Python图像处理库:PIL中Image,ImageDraw等基本模块介绍
常用操作
合成 Image.blend(i1,i2,a)/Image.composite(i1,i2,mask)
缩略图 thumbnail(size,filter=None)
Modifies in-place,Preserves aspect ratio
>>> myImage.thumbnail ((128, 128), Image.ANTIALIAS)
剪切 crop(bbox)
>>> bounds = (100, 100, 400, 400)
>>> cutoutIm = myImage.crop (bounds)
粘贴 paste(i2,where,mask=None)/paste(color,box=None,mask=None)
旋转 rotate(theta)
rotated around its center
翻转旋转 transpose(method)
ROTATE_90/180/270(clockwise), FLIP_TOP_BOTTOM(horizontal), FLIP_RIGHT_LEFT(vertical)
>>> fixedIm = myImage.transpose (ROTATE_90)
The Image Module
The Image module provides
- a class with the same name which is used to represent a PIL image.
- The module also provides a number of factory functions(including functions to load images from files, and to create new images)
图像对象 Image – from file or newly created
所有的图片操作必须有一个操作对象,例如Pil提供open(filename)进行这个过程,此后,一切关于图片的操作均基于这个对象。有以下几种创建image对象的方式:
1 Image.open(f)
>>> import Image
>>>
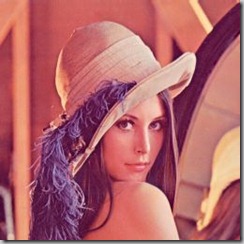
>>> Im = Image.open("lena.jpg")
>>> print Im.mode,Im.size,Im.format
RGB (256, 256) JPEG
>>> Im.show()
如果文件不能打开,会抛出IOError异常。
可以查看image对象的format,mode,size,palette,info几个属性。
调用im.show()会在图片查看工具中显示当前操作的image对象。
标准版本的show方法的实现不太高效,因为它先把image保存到一个临时文件,然后调用xy工具来显示图像。如果你没有安装xy,那么它就无法工作了。不过如果它可以工作,倒还是非常方便用来debug和测试。
2 Image.new(mode,size,color=None)
color的默认值是黑色,这里我们新建一个红色的图像。
>>> newIm = Image.new (“RGBA”, (640, 480), (255, 0, 0)) #新建一个image对象creating images from scratch
3 Image.blend(i1,i2,a) -- (p1 x (1 - a) + p2 x a)
选一张灰度图(L)做背景,和雷娜图(RGB)做blend操作

>>> Im2 = Image.open("background.jpg").convert(Im.mode)
>>> Im2 = Im2.resize(Im.size)
>>> Im2.show()
>>>
>>> img = Image.blend(Im,Im2,0.2)
>>> img.show()

操作完毕后save(filename)用以保存这个临时的image对象img到硬盘。
4 Image.composite(i1,i2,mask) --equal-sized images i1 ,i2 and mask("1", "L", or "RGBA") (p1 x (1 - m) + p2 x m)
5 Image.eval(f,i) -- applying a function f to each pixel of image i
6 Image.merge(mode,bandList) --Creates a multi-band image from a sequence of single-band images of equal size
以下是Image对象的全部方法:
| save(f,format=None) | 保存 | 如果f是一个file对象,必须指定format(format codes) |
| convert(mode) | 转换mode | |
| copy() | ||
| crop(bbox) | 剪切 | 原图中bbox区域 |
| filter(name) | 滤镜 | the name of predefined image enhancement filters 滤镜名字需要import ImageFilter |
| getbands() | 通道的字符串序列 | 如RGB图返回('R', 'G', 'B') |
| getbbox() | 包含非零区域的最小bbox | |
| getextrema() | 最大最小像素点值 | min&max pixel value 单通道图:返回元组(min,max) 多通道图:返回各个通道的元组组成的元组 |
| getpixel(xy) | 取像素点值 | 坐标xy处的pixel value or a sequence of pixel values |
| histogram(mask=None) |
统计直方图 |
单通道图:返回列表[c0, c1, ...],ci是值为i的像素数 多通道图:a single sequence that is the concatenation of the sequences for all bands mask参数:a same-sized mask image of mode "1" or "L"(include only those pixels correspond to nonzero pixels in the mask argument) |
| offset(dx,dy=None) |
平移 |
Returns a new image the same size as the original, but with all pixels rotated dx in the +x direction,and dy in the +y direction. If dy is omitted, it defaults to the same value as dx. |
| paste(i2,where,mask=None) | 粘贴图片 | where参数可以是 1 (x,y)坐标对:i2的像素点(0,0)对齐原图中的(x,y)粘贴,i2超过原图边界的部分被抛弃 2 bbox:i2必须和该bounding box大小一致 3 None:i2必须和原图大小一致 如果i2的mode和原图不一致,粘贴前会被转换。 mask参数:a same-sized mask image of mode "1","L" or “RGBA ”(control which pixels get replaced) |
| paste(color,box=None,mask=None) | 填充颜色 | 如果box省略,整个图被填充为color色;mask参数同上 |
| point(function) | 改变像素点(函数) | Returns a new image with each pixel modified. |
| point(table) | 改变像素点(查表) | To translate pixels using a table(a sequence of 256n values, where n is the number of bands in the image) lookup |
| putalpha(band) |
改变alpha通道 |
The pixels of the band image(same-sized,"L" or "1") replace the alpha band(A) of the original image(RGBA) in place. |
| putpixel(xy, color) | 改变单个像素点颜色 | Note that this method is relatively slow. For more extensive changes, use paste or theImageDraw module instead. |
| resize(size,filter=None) | 调整大小 | |
| rotate(theta) |
旋转(围绕图片中心) |
Any pixels that are not covered by rotation of the original image are set to black. |
| show() |
显示图片 |
On Unix systems, this method runs the xv image viewer to display the image. |
| split() |
分离通道 |
返回各个通道的灰度图组成的元组 |
| thumbnail(size,filter=None) | 缩略图 | Modifies in-place,Preserves aspect ratio |
| transform(xs, ys, Image.EXTENT, (x0,y0,x1,y1)) |
Returns a transformed copy of the image. In the transformed image, the point originally at (x0,y0) will appear at (0,0), and point (x1,y1) will appear at (xs, ys). |
|
| transform(xs, ys, Image.AFFINE, (a,b,c,d,e,f)) | affine变换 |
The values a through f are the first two rows of an affine transform matrix. |
| transpose(method) | 翻转旋转 | ROTATE_90/180/270(clockwise), FLIP_TOP_BOTTOM(horizontal), FLIP_RIGHT_LEFT(vertical) |
The ImageDraw Module
支持2D图像 The ImageDraw module provide basic 2D graphics support for Image objects.
It can for example be used to
- create new images,
- annotate or retouch existing images, and to generate graphics on the fly for web use.
For a more advanced drawing library for PIL, see The aggdraw Module.
创建绘画对象 ImageDraw module creates drawing surface for image
import Image, ImageDraw
im = Image.open(“vacation.jpeg")
drawSurface = ImageDraw.Draw(im)
基本绘画操作 Basic methods of drawing surface
- 弧/弦/扇形 chord arc pieslice (bbox, strtAng, endAng)
- 椭圆 ellipse (bbox)
- 线段/多段线 line (L) draw.line(((60,60),(90,60), (90,90), (60,90), (60,60))) #draw a square
- 点 point (xy) #单像素点很小看不清,实际中可用实心小圆代替
- 多边形 polygon (L) draw.polygon([(60,60), (90,60), (90,90), (60,90)]) #draw a square
- 矩形 rectangle (bbox) # first coord属于矩形, second coord不属于
- 文字 text(xy,message,font=None) 绘制文字message,文本区域左上角坐标为xy
drawable.text((10, 10), "Hello", fill=(255,0,0), font=None) - 文字大小 textsize(message,font=None) 给定文字message,返回所占像素(width,height)
可选参数 Common optional args for these methods
- fill=fillColor
- outline=outlineColor
矢量字体支持 TrueType Font support
import ImageFont
ttFont = ImageFont.truetype (“arial.ttf”, 16)
drawable.text ((10, 10), “Hello”, fill=(255,0,0), font=ttFont)
例子:Draw a Grey Cross Over an Image

import Image, ImageDraw im = Image.open("lena.pgm") # Creates an object that can be used to draw in the given image.

draw = ImageDraw.Draw(im) # draw.line(xy, options) => Draws a line between the coordinates in the xy list.

# The coordinate list can be any sequence object containing either 2-tuples [ (x, y), ... ] # or numeric values [ x, y, ... ]. # The fill option gives the color to use for the line.

draw.line((0, 0) + im.size, fill=128) draw.line((0, im.size[1], im.size[0], 0), fill=128) del draw # write to stdout

im.save(sys.stdout, "PNG")
The ImageChops module
a number of arithmetical image operations, called channel operations ("chops" 通道操作).
These can be used for various purposes, including special effects 特殊效果, image compositions 图像合成, algorithmic painting 算法绘画, and more.
At this time, channel operations are only implemented for 8-bit images (e.g. "L" and "RGB").
例子:比较两幅图像
Exact Comparison:
The quickest way to determine if two images have exactly the same contents is to get the difference between the two images, and then calculate the bounding box of the non-zero regions in this image. If the images are identical, all pixels in the difference image are zero, and the bounding box function returns None.
import ImageChops def equal(im1, im2): return ImageChops.difference(im1, im2).getbbox() is None
To get a measure of how similar two images are, you can calculate the root-mean-square (RMS) value of the difference between the images. If the images are exactly identical, this value is zero. The following function uses the difference function, and then calculates the RMS value from the histogram of the resulting image.
RMS Difference:
To get a measure of how similar two images are, you can calculate the root-mean-square (RMS) value of the difference between the images. If the images are exactly identical, this value is zero. The following function uses the difference function, and then calculates the RMS value from the histogram of the resulting image.
# Example: File: imagediff.py

import ImageChops import math, operator def rmsdiff(im1, im2): "Calculate the root-mean-square difference between two images" h = ImageChops.difference(im1, im2).histogram() # calculate rms

    return math.sqrt(reduce(operator.add, map(lambda h, i: h*(i**2), h, range(256)) ) / (float(im1.size[0]) * im1.size[1]))
Python图像处理库:PIL中Image,ImageDraw等基本模块介绍的更多相关文章
- Python图像处理库PIL中图像格式转换(一)
在数字图像处理中,针对不同的图像格式有其特定的处理算法. 所以,在做图像处理之前,我们须要考虑清楚自己要基于哪种格式的图像进行算法设计及事实上现.本文基于这个需求.使用python中的图像处理库PIL ...
- Python图像处理库PIL中图像格式转换
o 在数字图像处理中,针对不同的图像格式有其特定的处理算法.所以,在做图像处理之前,我们需要考虑清楚自己要基于哪种格式的图像进行算法设计及其实现.本文基于这个需求,使用python中的图像处理库PIL ...
- Python图像处理库(PIL)
官方:(详细)http://pillow.readthedocs.io/en/3.1.x/reference/ImageDraw.html http://pillow.readthedocs.io/e ...
- Python图像处理库——PIL
PIL全称Python Image Library,是python官方的图像处理库,包含各种图像处理模块.Pillow是PIL的一个派生分支,包含与PIL相同的功能,并且更灵活.python3.0之后 ...
- python图像处理库PIL的基本概念介绍
PIL中所涉及的基本概念有如下几个:通道(bands).模式(mode).尺寸(size).坐标系统(coordinate system).调色板(palette).信息(info)和滤波器(filt ...
- Python图像处理库PIL的ImageSequence模块介绍
ImageSequence模块包括了一个wrapper类,它能够让用户迭代訪问图形序列中每一帧图像. 一.ImageSequence模块的函数 1. Iterator 定义:ImageSequenc ...
- Python图像处理库PIL的ImageStat模块介绍
ImageStat模块用于计算整个图像或者图像的一个区域的统计数据. 一.ImageStat模块的函数 1. Stat 定义1:ImageStat.Stat(image)⇒ Stat instanc ...
- Python图像处理库PIL从入门到精通
https://blog.csdn.net/column/details/pythonpil.html 示例: from PIL import Image import pytesseract pyt ...
- Python图像处理库:Pillow 初级教程
Python图像处理库:Pillow 初级教程 2014-09-14 翻译 http://pillow.readthedocs.org/en/latest/handbook/tutorial.html ...
随机推荐
- Codeforces_768_D_(概率dp)
D. Jon and Orbs time limit per test 2 seconds memory limit per test 256 megabytes input standard inp ...
- C# 创建与读写配置文件
配置文件内容为 <?xml version="1.0" encoding="utf-8" ?> <configuration> < ...
- 禁止foreach循环使用remove/add----快速失败
阿里巴巴开发手册中有一条: 7[强制]不要在 foreach 循环里进行元素的 remove / add 操作. remove 元素请使用 Iterator 方式,如果并发操作,需要对 Iterato ...
- 服务器 获取用户 真实ip
在有代理的情况下,因为要代替客户端去访问服务器,所以,当请求包经过反向代理后,在代理服务器这里这个IP数据包的IP包头做了修改,最终后端WEB服务器得到的数据包的头部源IP地址是代理服务器的IP地址. ...
- 顶点的度 (20 分) Java解法
顶点的度 顶点的图.给定一个有向图,输出各顶点的出度和入度. 输入格式: 输入文件中包含多个测试数据,每个测试数据描述了一个无权有向图.每个测试数据的第一行为两个正整数n 和m,1 ≤ n ≤ 100 ...
- Spring Boot 与ElasticSearch
一.ElasticSearch 介绍 开源的 ElasticSearch 是目前全文搜索引擎的首选,它是一个分布式搜索服务,提供Restful API,它可以快速地存储.搜索和分析海量数据.底层基 ...
- Colletions工具类常用方法
Collections 工具类常用方法: 排序 查找,替换操作 同步控制(不推荐,需要线程安全的集合类型时请考虑使用 JUC 包下的并发集合 排序操作 void reverse(List list)/ ...
- 22万个木箱!TWaver 3D极限压榨
打开个门户网站都千呼万唤,我们还能期待网页上的3D技术会有“酣畅淋漓”.“一气呵成”的感受吗?也许现在还差点火候.但是HTML5.WebGL等技术一直在飞速的发展,可能很快你就会惊讶它的能力.现在,我 ...
- 搜索--P1101 单词方阵
题目描述 给一n×n的字母方阵,内可能蕴含多个"yizhong"单词.单词在方阵中是沿着同一方向连续摆放的.摆放可沿着 8 个方向的任一方向,同一单词摆放时不再改变方向,单词与单词 ...
- UVA - 1608 Non-boring sequences(分治法)
题目: 如果一个序列的任意连续的子序列中至少有一个只出现一次的元素,则称这个序列是不无聊的.输入一个n(n≤200000)个元素的序列A(各个元素均为109以内的非负整数),判断它是不是不无聊的. 思 ...