nginx使用lua waf防火墙来做防CC配置
nginx添加lua模块
启动和安装nginx
yum install -y nginx

systemctl daemon-reload

systemctl enable nginx

#为了实验方便这里就直接yum安装了,配置了开机启动

注意:出现报错

[root@wh02 ~]# useradd  nginx -M -s /sbin/nologin

useradd: cannot open /etc/shadow

表示 你曾经锁定了/etc/shadow 文件

#添加nginx系统启动:

vim /usr/lib/systemd/system/nginx.service

添加以下内容:

#----------------------------------------------------------

[Unit]

Description=nginx - high performance web server

Documentation=http://nginx.org/en/docs/

After=network.target remote-fs.target nss-lookup.target

[Service]

Type=forking

PIDFile=/run/nginx.pid

ExecStartPre=/usr/sbin/nginx -t -c /etc/nginx/nginx.conf

ExecStart=/usr/sbin/nginx -c /etc/nginx/nginx.conf

ExecReload=/bin/kill -s HUP $MAINPID

ExecStop=/bin/kill -s QUIT $MAINPID

PrivateTmp=true

[Install]

WantedBy=multi-user.target

#----------------------------------------------------------

#启动 nginx

[root@wh02 ~]# systemctl daemon-reload

[root@wh02 ~]# systemctl start nginx

#查看状态

[root@wh02 ~]# systemctl status nginx

#停止

[root@wh02 ~]# systemctl stop nginx

#获取默认编译参数,用于后面添加 lua模块

[root@wh02 ~]# nginx -V

nginx version: nginx/1.16.1

built by gcc 4.8.5 20150623 (Red Hat 4.8.5-39) (GCC)

built with OpenSSL 1.0.2k-fips  26 Jan 2017

TLS SNI support enabled

configure arguments: --prefix=/usr/share/nginx --sbin-path=/usr/sbin/nginx --modules-path=/usr/lib64/nginx/modules --conf-path=/etc/nginx/nginx.conf --error-log-path=/var/log/nginx/error.log --http-log-path=/var/log/nginx/access.log --http-client-body-temp-path=/var/lib/nginx/tmp/client_body --http-proxy-temp-path=/var/lib/nginx/tmp/proxy --http-fastcgi-temp-path=/var/lib/nginx/tmp/fastcgi --http-uwsgi-temp-path=/var/lib/nginx/tmp/uwsgi --http-scgi-temp-path=/var/lib/nginx/tmp/scgi --pid-path=/run/nginx.pid --lock-path=/run/lock/subsys/nginx --user=nginx --group=nginx --with-file-aio --with-ipv6 --with-http_ssl_module --with-http_v2_module --with-http_realip_module --with-stream_ssl_preread_module --with-http_addition_module --with-http_xslt_module=dynamic --with-http_image_filter_module=dynamic --with-http_sub_module --with-http_dav_module --with-http_flv_module --with-http_mp4_module --with-http_gunzip_module --with-http_gzip_static_module --with-http_random_index_module --with-http_secure_link_module --with-http_degradation_module --with-http_slice_module --with-http_stub_status_module --with-http_perl_module=dynamic --with-http_auth_request_module --with-mail=dynamic --with-mail_ssl_module --with-pcre --with-pcre-jit --with-stream=dynamic --with-stream_ssl_module --with-google_perftools_module --with-debug --with-cc-opt='-O2 -g -pipe -Wall -Wp,-D_FORTIFY_SOURCE=2 -fexceptions -fstack-protector-strong --param=ssp-buffer-size=4 -grecord-gcc-switches -specs=/usr/lib/rpm/redhat/redhat-hardened-cc1 -m64 -mtune=generic' --with-ld-opt='-Wl,-z,relro -specs=/usr/lib/rpm/redhat/redhat-hardened-ld -Wl,-E'
编译安装lua模块
echo "export LUAJIT_LIB=/usr/local/luajit/lib

export LUAJIT_INC=/usr/local/luajit/include/luajit-2.0 " >>/etc/profile

#ngx_devle_kit下载解压

mkdir  /leilei

cd /leilei

wget https://github.com/simpl/ngx_devel_kit/archive/v0.3.0.tar.gz

tar -xf v0.3.0.tar.gz

#lua-nginx-module模块下载解压

wget https://github.com/openresty/lua-nginx-module/archive/v0.10.8.tar.gz

tar xf v0.10.8.tar.gz

#安装luajit

wget http://luajit.org/download/LuaJIT-2.0.5.tar.gz

tar zxf LuaJIT-2.0.5.tar.gz

cd LuaJIT-2.0.5

make

make install

#增加环境变量

export LUAJIT_LIB=/usr/local/lib

export LUAJIT_INC=/usr/local/include/luajit-2.0

#----------------至此 模块都配置好了,需要在nginx中导入模块 ------------------------#

#编译模块可能出现的报错:

[root@wh02 LuaJIT-2.0.5]# make PREFIX=/usr/local/luajit

==== Building LuaJIT 2.0.5 ====

make -C src

make[1]: gcc: Command not found

make[1]: Entering directory `/usr/local/src/LuaJIT-2.0.4/src'

make[1]: gcc: Command not found

make[1]: gcc: Command not found

make[1]: gcc: Command not found

make[1]: gcc: Command not found

make[1]: gcc: Command not found

Makefile:233: *** Unsupported target architecture.  Stop.

make[1]: Leaving directory `/usr/local/src/LuaJIT-2.0.4/src'

make: *** [default] Error 2

解决办法:   yum install -y gcc

#编译安装lua模块:

tar xf LuaJIT-2.0.5.tar.gz

cd LuaJIT-2.0.5

make PREFIX=/usr/local/luajit

make install PREFIX=/usr/local/luajit
下载扩展模块:
cd /server/tools/leilei

wget https://github.com/simpl/ngx_devel_kit/archive/v0.3.0.tar.gz

tar -xf v0.3.0.tar.gz

wget https://github.com/openresty/lua-nginx-module/archive/v0.10.11.tar.gz

tar xf v0.10.11.tar.gz

[root@wh02 leilei]# ll

total 680

drwxrwxr-x 10 root root   4096 Nov  4  2017 lua-nginx-module-0.10.11

drwxrwxr-x  9 root root   4096 May 10  2016 ngx_devel_kit-0.3.0

-rw-r--r--  1 root root 616653 Jan  5 04:32 v0.10.11.tar.gz

-rw-r--r--  1 root root  66455 Jan  5 04:32 v0.3.0.tar.gz
nginx添加扩展模块
#获取原来的编译参数

[root@wh02 tools]# nginx -V

nginx version: nginx/1.16.1

built by gcc 4.8.5 20150623 (Red Hat 4.8.5-39) (GCC)

built with OpenSSL 1.0.2k-fips  26 Jan 2017

TLS SNI support enabled

configure arguments: --prefix=/usr/share/nginx --sbin-path=/usr/sbin/nginx --modules-path=/usr/lib64/nginx/modules --conf-path=/etc/nginx/nginx.conf --error-log-path=/var/log/nginx/error.log --http-log-path=/var/log/nginx/access.log --http-client-body-temp-path=/var/lib/nginx/tmp/client_body --http-proxy-temp-path=/var/lib/nginx/tmp/proxy --http-fastcgi-temp-path=/var/lib/nginx/tmp/fastcgi --http-uwsgi-temp-path=/var/lib/nginx/tmp/uwsgi --http-scgi-temp-path=/var/lib/nginx/tmp/scgi --pid-path=/run/nginx.pid --lock-path=/run/lock/subsys/nginx --user=nginx --group=nginx --with-file-aio --with-ipv6 --with-http_ssl_module --with-http_v2_module --with-http_realip_module --with-stream_ssl_preread_module --with-http_addition_module --with-http_xslt_module=dynamic --with-http_image_filter_module=dynamic --with-http_sub_module --with-http_dav_module --with-http_flv_module --with-http_mp4_module --with-http_gunzip_module --with-http_gzip_static_module --with-http_random_index_module --with-http_secure_link_module --with-http_degradation_module --with-http_slice_module --with-http_stub_status_module --with-http_perl_module=dynamic --with-http_auth_request_module --with-mail=dynamic --with-mail_ssl_module --with-pcre --with-pcre-jit --with-stream=dynamic --with-stream_ssl_module --with-google_perftools_module --with-debug --with-cc-opt='-O2 -g -pipe -Wall -Wp,-D_FORTIFY_SOURCE=2 -fexceptions -fstack-protector-strong --param=ssp-buffer-size=4 -grecord-gcc-switches -specs=/usr/lib/rpm/redhat/redhat-hardened-cc1 -m64 -mtune=generic' --with-ld-opt='-Wl,-z,relro -specs=/usr/lib/rpm/redhat/redhat-hardened-ld -Wl,-E'

# 下载nginx 1.16.1 安装包:

cd /server/tools/leilei

wget http://nginx.org/download/nginx-1.16.1.tar.gz

tar xf nginx-1.16.1.tar.gz

cd nginx-1.16.1/

#重新编译nginx

./configure  --prefix=/usr/share/nginx --sbin-path=/usr/sbin/nginx --modules-path=/usr/lib64/nginx/modules --conf-path=/etc/nginx/nginx.conf --error-log-path=/var/log/nginx/error.log --http-log-path=/var/log/nginx/access.log --http-client-body-temp-path=/var/lib/nginx/tmp/client_body --http-proxy-temp-path=/var/lib/nginx/tmp/proxy --http-fastcgi-temp-path=/var/lib/nginx/tmp/fastcgi --http-uwsgi-temp-path=/var/lib/nginx/tmp/uwsgi --http-scgi-temp-path=/var/lib/nginx/tmp/scgi --pid-path=/run/nginx.pid --lock-path=/run/lock/subsys/nginx --user=nginx --group=nginx --with-file-aio --with-http_ssl_module --with-http_v2_module --with-http_realip_module --with-stream_ssl_preread_module --with-http_addition_module --with-http_xslt_module=dynamic --with-http_image_filter_module=dynamic --with-http_sub_module --with-http_dav_module --with-http_flv_module --with-http_mp4_module --with-http_gunzip_module --with-http_gzip_static_module --with-http_random_index_module --with-http_secure_link_module --with-http_degradation_module --with-http_slice_module --with-http_stub_status_module --with-http_perl_module=dynamic --with-http_auth_request_module --with-mail=dynamic --with-mail_ssl_module --with-pcre --with-pcre-jit --with-stream=dynamic --with-stream_ssl_module --with-google_perftools_module --with-debug --with-cc-opt='-O2 -g -pipe -Wall -Wp,-D_FORTIFY_SOURCE=2 -fexceptions -fstack-protector-strong --param=ssp-buffer-size=4 -grecord-gcc-switches -specs=/usr/lib/rpm/redhat/redhat-hardened-cc1 -m64 -mtune=generic' --with-ld-opt='-Wl,-z,relro -specs=/usr/lib/rpm/redhat/redhat-hardened-ld -Wl,-E' --add-module=/server/tools/leilei/ngx_devel_kit-0.3.0 --add-module=/server/tools/leilei/lua-nginx-module-0.10.11

#这是添加了这两个模块后编译的:

 --add-module=/server/tools/leilei/ngx_devel_kit-0.3.0 --add-module=/server/tools/leilei/lua-nginx-module-0.10.11

 编译也有可能会报错: ./configure: error: the invalid value in --with-ld-opt="-Wl,-z,relro -specs=/usr/lib/rpm/redhat/redhat-hardened-ld -Wl,-E"

 解决方法:

 yum -y install redhat-rpm-config.noarch

编译出错: ./configure: error: ngx_http_lua_module requires the Lua library.

解决办法:

yum install lua-devel -y

编译出错:/configure: error: the HTTP XSLT module requires the libxml2/libxslt

解决办法:

yum install libxslt-devel -y

编译出错: ./configure: error: the HTTP image filter module requires the GD library.

解决办法:

yum install gd gd-devel -y

编译出错: ./configure: error: perl module ExtUtils::Embed is required

解决办法:

yum install perl-ExtUtils-Embed -y

编译出错: ./configure: error: the Google perftools module requires the Google perftools

解决办法:

yum install gperftools -y

安装完毕:

Configuration summary

  + using system PCRE library

  + using system OpenSSL library

  + using system zlib library

  nginx path prefix: "/usr/share/nginx"

  nginx binary file: "/usr/sbin/nginx"

  nginx modules path: "/usr/lib64/nginx/modules"

  nginx configuration prefix: "/etc/nginx"

  nginx configuration file: "/etc/nginx/nginx.conf"

  nginx pid file: "/run/nginx.pid"

  nginx error log file: "/var/log/nginx/error.log"

  nginx http access log file: "/var/log/nginx/access.log"

  nginx http client request body temporary files: "/var/lib/nginx/tmp/client_body"

  nginx http proxy temporary files: "/var/lib/nginx/tmp/proxy"

  nginx http fastcgi temporary files: "/var/lib/nginx/tmp/fastcgi"

  nginx http uwsgi temporary files: "/var/lib/nginx/tmp/uwsgi"

  nginx http scgi temporary files: "/var/lib/nginx/tmp/scgi"

## 编译安装nginx

  make

## 平滑升级:

\cp -af /usr/sbin/nginx ~

[root@wh02 nginx-1.16.1]# cp -af objs/nginx /usr/sbin/

cp: overwrite ‘/usr/sbin/nginx’? y

#发送协同工作信号

[root@wh02 nginx-1.16.1]# kill -USR2 `cat /run/nginx.pid`

[root@wh02 nginx-1.16.1]# ps -ef|grep nginx

root     21305 23677  0 01:31 ?        00:00:00 nginx: master process /usr/sbin/nginx

nginx    21306 21305  0 01:31 ?        00:00:00 nginx: worker process

root     21311  1443  0 01:31 pts/2    00:00:00 grep --color=auto nginx

root     23677     1  0 Jan04 ?        00:00:00 nginx: master process /usr/sbin/nginx

nginx    23678 23677  0 Jan04 ?        00:00:00 nginx: worker process

#发送退出信号

[root@wh02 nginx-1.16.1]#  kill -QUIT `cat /run/nginx.pid`

[root@wh02 nginx-1.16.1]# ps -ef|grep nginx

root     21368  1443  0 01:32 pts/2    00:00:00 grep --color=auto nginx

root     23677     1  0 Jan04 ?        00:00:00 nginx: master process /usr/sbin/nginx

nginx    23678 23677  0 Jan04 ?        00:00:00 nginx: worker process

升级完毕!
lua模块添加
步骤整理:

wget http://luajit.org/download/LuaJIT-2.0.2.tar.gz

tar xf LuaJIT-2.0.5.tar.gz

cd LuaJIT-2.0.5

make PREFIX=/usr/local/LuaJIT/include/luajit

make install PREFIX=/usr/local/nginx/lua/luajit

wget https://github.com/simplresty/ngx_devel_kit/archive/v0.3.0.tar.gz

tar xf v0.3.0.tar.gz

get https://github.com/openresty/lua-nginx-module/archive/v0.10.11.tar.gz

tar xf v0.10.11.tar.gz

export LUAJIT_LIB=/opt/programs/nginx_1.12.2/lua/luajit/lib

export LUAJIT_INC=/opt/programs/nginx_1.12.2/lua/luajit/include/luajit-2.0
配置:
#nginx.conf配置文件中的http区块加入如下:

#----------waf防火墙-----------------------------#

lua_package_path "/etc/nginx/conf.d/waf/?.lua";

lua_shared_dict limit 10m;

init_by_lua_file  /etc/nginx/conf.d/waf/init.lua;

access_by_lua_file /etc/nginx/conf.d/waf/waf.lua;

#----------waf防火墙-----------------------------#

#nginx目录下创建相关目录:

mkdir -p /etc/nginx/conf.d/waf/

#进入相关目录下载lua配置文件:

cd /etc/nginx/conf.d/waf/

git clone https://github.com/loveshell/ngx_lua_waf.git

mv ngx_lua_waf waf

cd waf/

[root@wh02 waf]# ll

total 32

-rw-r--r-- 1 root root 2377 Jan  5 04:50 config.lua

-rw-r--r-- 1 root root 6405 Jan  5 04:50 init.lua

-rw-r--r-- 1 root root 1587 Jan  5 04:50 install.sh

-rw-r--r-- 1 root root 4612 Jan  5 04:50 README.md

drwxr-xr-x 2 root root 4096 Jan  5 04:50 wafconf

-rw-r--r-- 1 root root 2295 Jan  5 04:50 waf.lua

# 添加到nginx配置文件中

vim /etc/nginx/nginx.conf

http  {

...

...

#----------waf防火墙-----------------------------#

lua_load_resty_core off;

lua_shared_dict limit 30m;

lua_package_path "/etc/nginx/conf.d/waf/?.lua";

init_by_lua_file  /etc/nginx/conf.d/waf/init.lua;

access_by_lua_file /etc/nginx/conf.d/waf/waf.lua;

#----------waf防火墙-----------------------------#

...

...

}

# 修改 vim /etc/nginx/conf.d/waf/config.lua 配置文件,将规则路径改为: /etc/nginx/conf.d/waf/

RulePath = "/etc/nginx/conf.d/waf/wafconf/"

attacklog = "on"

logdir = "/etc/nginx/logs/hack/"

#没有相关目录就创建相关目录

mkdir -p /etc/nginx/conf.d/waf/wafconf/

mkdir -p /etc/nginx/logs/hack/

通过以上配置并没有让他生效,如果需要生效还需要取config.lua中开启规则才可以.
nginx中添加配置:

开启waf 防火墙:
vim /etc/nginx/conf.d/waf/config.lua

config_waf_enable= "on"

由于版本更新,新版本的lua配置中已经没有了 waf 开关了,默认就是开启状态,如果需要关闭则需要去 nginx.conf中注释lua.
waf防火墙规则配置:
目录: /etc/nginx/conf.d/waf/config.lua

vim /etc/nginx/conf.d/waf/config.lua

#没修改之前都是默认规则.

	RulePath = "/usr/local/nginx/conf/waf/wafconf/"

    --规则存放目录

	attacklog = "on"

    --是否开启攻击信息记录,需要配置logdir

    logdir = "/usr/local/nginx/logs/hack/"

    --log存储目录,该目录需要用户自己新建,切需要nginx用户的可写权限

    UrlDeny="on"

    --是否拦截url访问

    Redirect="on"

    --是否拦截后重定向

    CookieMatch = "on"

    --是否拦截cookie攻击

    postMatch = "on"

    --是否拦截post攻击

    whiteModule = "on"

    --是否开启URL白名单

    black_fileExt={"php","jsp"}

    --填写不允许上传文件后缀类型

    ipWhitelist={"127.0.0.1"}

    --ip白名单,多个ip用逗号分隔

    ipBlocklist={"1.0.0.1"}

    --ip黑名单,多个ip用逗号分隔

    CCDeny="on"

    --是否开启拦截cc攻击(需要nginx.conf的http段增加lua_shared_dict limit 10m;)

    CCrate = "100/60"

    --设置cc攻击频率,单位为秒.

    --默认1分钟同一个IP只能请求同一个地址100次

    html=[[Please go away~~]]

    --警告内容,可在中括号内自定义

    备注:不要乱动双引号,区分大小写
访问测试:
http://115.159.79.190/index.php?id=../etc/passwd
访问一个敏感信息,检查是否会被阻止
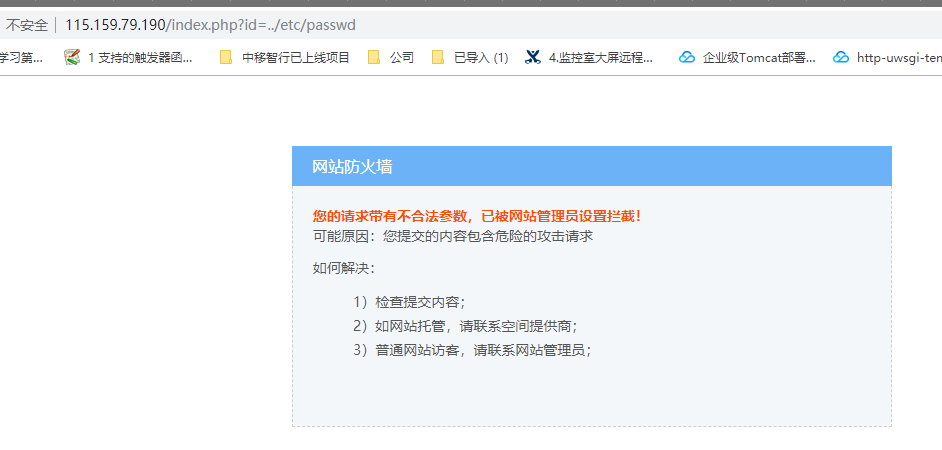
看到这个提示说明 waf防火墙配置成功!
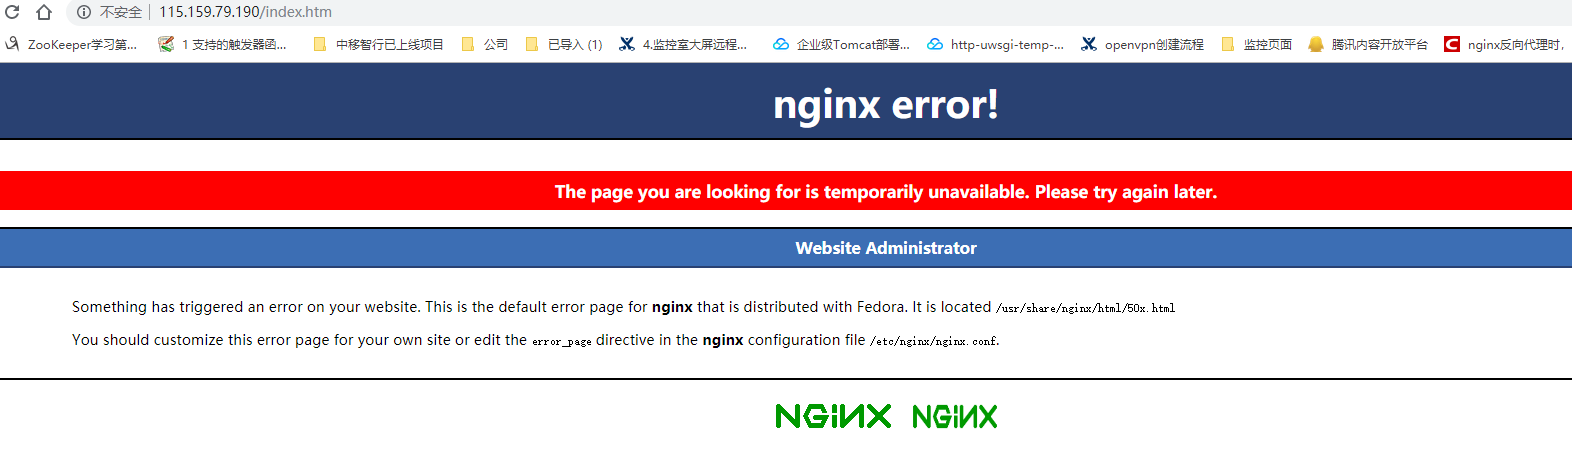
错误页面也有可能是这样:
测试禁止IP访问:
#黑名单

ipBlocklist={"1.0.0.1","117.186.242.158"}  #添加上我们自己的IP地址 117.186.242.158,分号分隔

#白名单

ipWhitelist={"127.0.0.1"}  #添加上我们自己的IP地址 117.186.242.158,分号分隔
实际黑名单效果: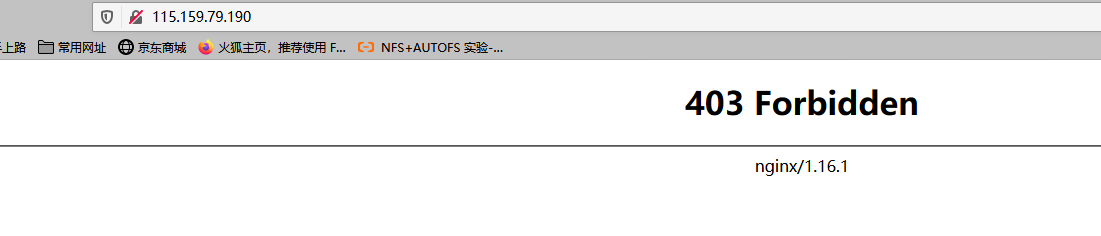
--lock-path=/run/lock/subsys/nginx --user=nginx --group=nginx --with-file-aio --with-ipv6 --with-http_ssl_mod
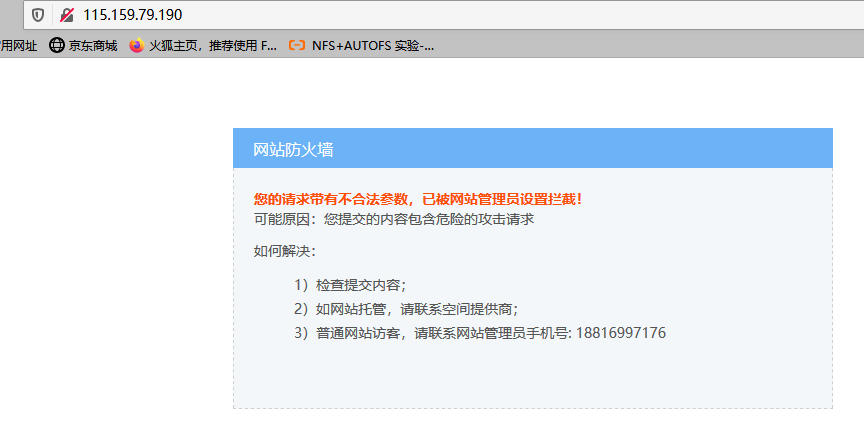
自定义的网站阻止页面:

网站根目录下创建 50x.html 写入以下内容

cat /usr/share/nginx/html

#-------------------------------------------------------

<html xmlns="http://www.w3.org/1999/xhtml"><head>

<meta http-equiv="Content-Type" content="text/html; charset=utf-8">

<title>网站防火墙</title>

<style>

p {

        line-height:20px;

}

ul{ list-style-type:none;}

li{ list-style-type:none;}

</style>

</head>

<body style=" padding:0; margin:0; font:14px/1.5 Microsoft Yahei, 宋体,sans-serif; color:#555;">

 <div style="margin: 0 auto; width:1000px; padding-top:70px; overflow:hidden;">

  <div style="width:600px; float:left;">

    <div style=" height:40px; line-height:40px; color:#fff; font-size:16px; overflow:hidden; background:#6bb3f6; padding-left:20px;">网站防火墙 </div>

    <div style="border:1px dashed #cdcece; border-top:none; font-size:14px; background:#fff; color:#555; line-height:24px; height:220px; padding:20px 20px 0 20px; overflow-y:auto;background:#f3f7f9;">

      <p style=" margin-top:0px; margin-bottom:0px; margin-left:0px; margin-right:0px; -qt-block-indent:0; text-indent:0px;"><span style=" font-weight:600; color:#fc4f03;">您的请求带有不合法参数,已被网站管理员设置拦截!</span></p>

<p style=" margin-top:0px; margin-bottom:0px; margin-left:0px; margin-right:0px; -qt-block-indent:0; text-indent:0px;">可能原因:您提交的内容包含危险的攻击请求</p>

<p style=" margin-top:12px; margin-bottom:12px; margin-left:0px; margin-right:0px; -qt-block-indent:1; text-indent:0px;">如何解决:</p>

<ul style="margin-top: 0px; margin-bottom: 0px; margin-left: 0px; margin-right: 0px; -qt-list-indent: 1;"><li style=" margin-top:12px; margin-bottom:0px; margin-left:0px; margin-right:0px; -qt-block-indent:0; text-indent:0px;">1)检查提

交内容;</li>

<li style=" margin-top:0px; margin-bottom:0px; margin-left:0px; margin-right:0px; -qt-block-indent:0; text-indent:0px;">2)如网站托管,请联系空间提供商;</li>

<li style=" margin-top:0px; margin-bottom:0px; margin-left:0px; margin-right:0px; -qt-block-indent:0; text-indent:0px;">3)普通网站访客,请联系网站管理员手机号: 18816997176 </li></ul>

    </div>

  </div>

</div>

</body></html>

#-------------------------------------------------------
效果图:
nginx使用lua waf防火墙来做防CC配置的更多相关文章
- NGINX的奇淫技巧 —— 5. NGINX实现金盾防火墙的功能(防CC)
NGINX的奇淫技巧 —— 5. NGINX实现金盾防火墙的功能(防CC) ARGUS 1月13日 发布 推荐 0 推荐 收藏 2 收藏,1.1k 浏览 文章整理中...... 实现思路 当服务器接收 ...
- nginx利用limit模块设置IP并发防CC攻击
nginx利用limit模块设置IP并发防CC攻击 分类: 系统2013-01-21 09:02 759人阅读 评论(0) 收藏 举报 来源:http://blog.xencdn.net/nginx- ...
- Azure WAF防火墙工作原理分析和配置向导
Azure WAF工作原理分析和配置向导 本文博客地址为:http://www.cnblogs.com/taosha/p/6716434.html ,转载请保留出处,多谢! 本地数据中心往云端迁移的的 ...
- nginx中使用waf防火墙
1.安装依赖 yum install -y readline-devel ncurses-devel 2.安装Lua # .tar.gz # cd lua- # make linux # make i ...
- 防cc攻击利器之Httpgrard
一.httpgrard介绍 HttpGuard是基于openresty,以lua脚本语言开发的防cc攻击软件.而openresty是集成了高性能web服务器Nginx,以及一系列的Nginx模块,这其 ...
- Nginx + Lua 搭建网站WAF防火墙
前言 对于项目里面只是使用代理等常用功能,在线安装即可,如需制定化模块,则推荐编译安装 PS:本文不仅仅包含Nginx相关的知识点,还包含了逆天学习方法(对待新事物的处理) 官方网站:https:// ...
- Nginx详解二十八:Nginx架构篇Nginx+Lua的安全waf防火墙
Nginx+Lua的安全waf防火墙 看一下别人写好的:https://github.com/loveshell/ngx_lua_waf 先安装git:yum -y install git 在/opt ...
- nginx+lua实现灰度发布/waf防火墙
nginx+lua 实现灰度发布 waf防火墙 课程链接:[课程]Nginx 与 Lua 实现灰度发布与 WAF 防火墙(完)_哔哩哔哩 (゜-゜)つロ 干杯~-bilibili 参考博客 Nginx ...
- Nginx使用Lua模块实现WAF
前言:最近一段时间在写加密数据功能,对安全相关知识还是缺少积累,无意间接触到了WAF相关知识,刚好Nginx可以实现WAF功能,也简单学习了Lua这门语言,分享下 一.WAF产生的背景 过去企业通常会 ...
- 安装nginx+ngx_lua支持WAF防护功能
安装nginx+ngx_lua支持WAF防护功能 nginx lua模块淘宝开发的nginx第三方模块,它能将lua语言嵌入到nginx配置中,从而使用lua就极大增强了nginx的能力.nginx以 ...
随机推荐
- Windows 系统上如何安装 Python 环境(详细教程)
Windows 系统上如何安装 Python 环境(详细教程) 目前,Python有两个版本,一个是2.x版,一个是3.x版,这两个版本是不兼容的.由于2.x版官方只维护到2020年,所以以3.x版作 ...
- .NET Emit 入门教程:第六部分:IL 指令:9:详解 ILGenerator 指令方法:运算操作指令(指令篇结束)
前言: 经过前面几篇的学习,我们了解到指令的大概分类,如: 参数加载指令,该加载指令以 Ld 开头,将参数加载到栈中,以便于后续执行操作命令. 参数存储指令,其指令以 St 开头,将栈中的数据,存储到 ...
- TiDB Vector 抢先体验之用 TiDB 实现以图搜图
本文首发自 TiDB 社区专栏:https://tidb.net/blog/0c5672b9 前言 最早知道 TiDB 要支持向量化的消息应该是在23年10月份左右,到第一次见到 TiDB Vecto ...
- 疫情带火了这款APP:2600个学生一天点赞70万次
这几天,全国中小学生经历了"过山车"一样的心情. 因为疫情的不断蔓延,1月27日,教育部下发通知,2020年春季学期延期开学. 随后,教育部又提出"利用网络平台,停课 ...
- 成本节省 50%,9人团队使用函数计算开发 wolai 在线文档应用
简介: 通过使用函数计算,wolai 的前端工程师们就可以把从前到后的一整套开发流程负责起来,我们的研发迭代速度非常快. 作者| 马锐拉(wolai.com 创始人) 我们的日常工作场景几乎离 ...
- 揭秘 cache 访问延迟背后的计算机原理
简介:本文介绍如何测试多级 cache 的访存延迟,以及背后蕴含的计算机原理. CPU 的 cache 往往是分多级的金字塔模型,L1 最靠近 CPU,访问延迟最小,但 cache 的容量也最小.本 ...
- 探秘RocketMQ源码——Series1:Producer视角看事务消息
简介: 探秘RocketMQ源码--Series1:Producer视角看事务消息 1. 前言 Apache RocketMQ作为广为人知的开源消息中间件,诞生于阿里巴巴,于2016年捐赠给了Apac ...
- Win32 使用 CreateProcess 方法让任务管理器里的命令行不显示应用文件路径
本文记录一个 Win32 的有趣行为,调用 CreateProcess 方法传入特别的参数,可以让任务管理器里的命令行不显示应用文件路径 开始之前,先看看下面这张有趣的图片 可以看到我编写的 Svca ...
- dotnet 解析 TTF 字体文件格式
在 Windows 下,可以使用 DX 提供的强大能力,调用 DX 读取 TTF 字体文件,获取字体文件的信息以及额外的渲染信息.特别是基于 DX 的 WPF 更是加了一层封装,使用 FontFami ...
- 快速部署 微软开源的 Garnet 键值数据库
快速部署 微软开源的 Garnet 键值数据库 Garnet 是 Microsoft Research 推出的一种新型远程缓存存储,其设计速度极快.可扩展且延迟低. Garnet 在单个节点内是线程可 ...