CentOS7 yum install elasticsearch
首先安装 JDK 环境
# 本机是否已经安装,ElasticSearch 最低支持 jdk 1.7

yum list installed | grep java

# 查看 yum 库中的 java 安装包

yum list java*

# 安装 java-1.8.

yum install -y java-1.8.-openjdk

# 安装完成后查看 java 版本

java -version

openjdk version "1.8.0_212"

OpenJDK Runtime Environment (build 1.8.0_212-b04)

OpenJDK -Bit Server VM (build 25.212-b04, mixed mode)
安装 elasticsearch(当前为 7.2)
# 下载并安装公共签名密钥

rpm --import https://artifacts.elastic.co/GPG-KEY-elasticsearch

# 创建 yum 源文件

vim /etc/yum.repos.d/elasticsearch.repo

[elasticsearch-.x]

name=Elasticsearch repository for .x packages

baseurl=https://artifacts.elastic.co/packages/7.x/yum

gpgcheck=

gpgkey=https://artifacts.elastic.co/GPG-KEY-elasticsearch

enabled=

autorefresh=

type=rpm-md

# 安装

yum install -y elasticsearch
配置 elasticsearch
# 配置文件都在 /etc/elasticsearch/ 目录下

vim /etc/elasticsearch/elasticsearch.yml

# 集群名称

cluster.name: jhxxb

# 节点名称

node.name: node-

# 数据文件与日志文件存放目录

path.data: /home/esData/es

path.logs: /home/esData/log

# 网络设置

network.host: 0.0.0.0

http.port:

# 集群设置

cluster.initial_master_nodes: ["node-1"]

# 修改配置中目录的用户与用户组,不然无法启动

chown -R elasticsearch:elasticsearch /home/esData/log/

chown -R elasticsearch:elasticsearch /home/esData/es/
启动 elasticsearch
# 启动
systemctl start elasticsearch.service # 开机自启
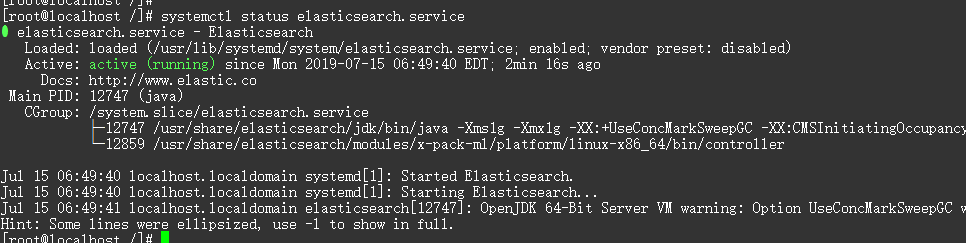
systemctl enable elasticsearch.service # 查看状态
systemctl status elasticsearch.service
浏览器访问 ip + 9200/?pretty 查看状态

安装 kibana(当前为 7.2),elasticsearch 的可视化界面(类似的还有 es-head 插件)
# 下载并安装公共签名密钥

rpm --import https://artifacts.elastic.co/GPG-KEY-elasticsearch

# 添加源

vim /etc/yum.repos.d/kibana.repo

[kibana-.x]

name=Kibana repository for .x packages

baseurl=https://artifacts.elastic.co/packages/7.x/yum

gpgcheck=

gpgkey=https://artifacts.elastic.co/GPG-KEY-elasticsearch

enabled=

autorefresh=

type=rpm-md

# 安装

yum install -y kibana

# 配置

vim /etc/kibana/kibana.yml

server.host: "0.0.0.0"

# 不要用 127.0.0.1,可能会提示 Kibana server is not ready yet

elasticsearch.hosts: ["http://192.168.8.41:9200"]

i18n.locale: "zh-CN"

# 刷新服务配置

systemctl daemon-reload

# 开机自启

systemctl enable kibana.service

# 启动

systemctl start kibana.service

# 查看状态

systemctl status kibana.service
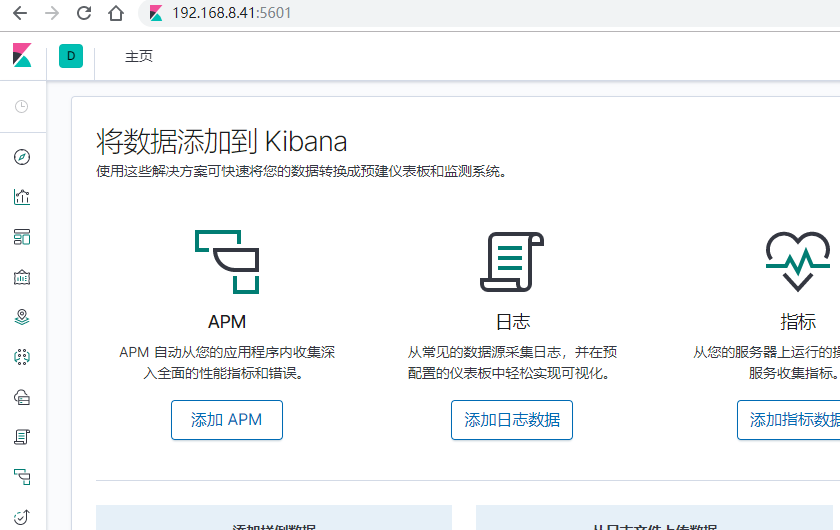
默认端口为 5601
https://www.elastic.co/guide/en/elasticsearch/reference/current/rpm.html
https://www.elastic.co/guide/en/kibana/current/rpm.html
http://www.eryajf.net/2351.html
CentOS7 yum install elasticsearch的更多相关文章
- centos7 yum install redis
直接yum 安装的redis 不是最新版本 yum install redis 如果要安装最新的redis,需要安装Remi的软件源,官网地址:http://rpms.famillecollet.co ...
- centos7#yum install ffmpeg
yum install ffmpeg rpm --import http://li.nux.ro/download/nux/RPM-GPG-KEY-nux.ro rpm -Uvh http://li. ...
- Centos7 yum install chrome
一.配置 yun 源 vim /etc/yum.repos.d/google-chrome.repo [google-chrome] name=google-chrome baseurl=http:/ ...
- centos7 yum install timeout
https://yum.dockerproject.org/repo/main/centos/7/repodata/repomd.xml: [Errno 12] Timeout on https:// ...
- Centos7 yum install vim 出现“could not retrieve mirrorlist”
ps:来源 https://www.cnblogs.com/justphp/p/5959655.html 办法一:改dns解析 vim /etc/resolv.conf 添加: nameserver ...
- 【elasticsearch】(1)centos7 使用yum安装elasticsearch 2.X
前言 elasticsearch(下面称为ES)是一个基于Lucene的搜索服务器(By 百度百科:查看).所以他需要java的环境即jdk,这里提供懒人一键安装方式 # yum install ja ...
- CentOS7.3 yum install MySQL5.7
安装环境:阿里云服务器 + CentOS7.3 测试工具:Navicat for MySQL 参考博客:https://blog.csdn.net/qq_38417808/article/detail ...
- wireshark使用心得 centos7安装wireshark: yum install wireshark wireshark-gnome
centos7 安装wireshark 安装 yum install wireshark yum install wireshark-gnome 关于pcap文件的文件解析网上资料有很多,我在这就不说 ...
- [CentOS7 mini]Linux命令补全 yum install bash-completion
CentOS7 mini默认不带命令补全需要自行安装 使用国内yum清华源 安装完后退出当前窗口再登录生效 # yum install -y bash-completion 已加载插件:fastest ...
随机推荐
- Struts简单的实例
一.创建Aciton类 package com.my.frame; public class HelloWordAction { private String name; public String ...
- Linux中 tr 命令详解
tr - translate or delete characters 主要用于转换和删除字符 带有最常用选项的t r命令格式为:tr -c -d -s [ "string1_to_tran ...
- TCP超时与重传
TCP提供可靠的传输层.它使用的方法之一就是确认从另一端收到的数据.但数据和确认都有可能丢失.TCP通过在发送时设置一个定时器来解决这种问题.如果当定时器溢出时还没收到确认,他就重传数该数据.对任何实 ...
- java_day09_GUI事件
第九章:GUI事件 1.AWT事件模型概述 使用AWT或者Swing中的容器.组件和布局管理器就可以构建出图形界面,但是这时候该界面还并不能和用户进行交换,因为图形界面中的组件还没有添加事件监听器,所 ...
- 《python解释器源码剖析》第4章--python中的list对象
4.0 序 python中的list对象,底层对应的则是PyListObject.如果你熟悉C++,那么会很容易和C++中的list联系起来.但实际上,这个C++中的list大相径庭,反而和STL中的 ...
- Oracle【增删改&数据的备份】
增删改的SQL语句执行完毕后,不会立马进行数据的写入数据库(这时数据在内存中),需要手动对数据进行提交(commit),如果数据出问题,可以使用回滚.主键:非空唯一的 --在一张表中,某字段值是非空唯 ...
- 解决Zabbix某台主机突然频繁告警"Zabbix agent on xxxxxx is unreachable for x minutes"
一.某台主机突然某一天频繁告警zabbix agent不可达 查看zabbix agent日志没有发现异常 二.查看zabbix server日志发现这台主机的日志有大量报错信息"first ...
- java开发技巧
1,IDEA辅助功能Shift +F2去到有错误的地方Alt+Enter,会给出解决错误的建议: 2,调试,没问题的步骤,直接跳过,不要跳入细节: 调试时,要明确要跟踪的变量,不要陷入混乱: 3,调试 ...
- 数据驱动——ddt
1: pip3 install ddt 2: @ddt 装饰 @data((2,3),(4,5)) 支持列表,元祖,字典 @unpack 解压数据 1 import unittest 2 from ...
- 2019.8.30 记录一个Swiper的使用
导入 flutter_swiper: ^1.1.6 引入 import 'package:flutter_screenutil/flutter_screenutil.dart'; 已下 ...