Linux CentOS 7 防火墙与端口设置操作
CentOS升级到7之后用firewall代替了iptables来设置Linux端口,
下面是具体的设置方法:
[]:选填
<>:必填
[<zone>]:作用域(block、dmz、drop、external、home、internal、public、trusted、work)
<port>:端口号
[-<port>]:或者端口范围
<protocol>:端口协议(tcp、udp)协议目前支持这四种类型
[<seconds>]:过期时间,使用N秒后自动关闭(秒)
[--permanent]:永久设置,在重启后依然保证设置可用,如果不加此项,重启后端口会恢复关闭状态
注:设置端口后要重启防火墙使其生效 firewall-cmd --complete-reload
1、检查端口状态
yes:已开通
no:未开通
firewall-cmd --query-port=<port>[-<port>]/<protocol>
firewall-cmd [--zone=<zone>] --query-port=<port>[-<port>]/<protocol>
firewall-cmd [--permanent] [--zone=<zone>] --query-port=<port>[-<port>]/<protocol>


查看已开放的端口
firewall-cmd --zone=public --list-ports

2、启用端口
success:执行成功
warning:警告xxx
firewall-cmd --add-port=<port>[-<port>]/<protocol>
firewall-cmd [--zone=<zone>] --add-port=<port>[-<port>]/<protocol> [--timeout=<seconds>]
firewall-cmd [--permanent] [--zone=<zone>] --add-port=<port>[-<port>]/<protocol>


3、禁用端口
success:执行成功
warning:警告xxx
firewall-cmd --remove-port=<port>[-<port>]/<protocol>
firewall-cmd [--zone=<zone>] --remove-port=<port>[-<port>]/<protocol>
firewall-cmd [--permanent] [--zone=<zone>] --remove-port=<port>[-<port>]/<protocol>


4、防火墙重启
--reload:不改变状态的条件下重启防火墙
--complete-reload:状态信息将会丢失,当防火墙有问题时可以使用,如,状态信息和防火墙规则都正常却无法建立任何链接的情况等
firewall-cmd --reload

firewall-cmd --complete-reload
例子


6、查看防火墙状态
命令1:firewall-cmd --state

命令2:systemctl status firewalld

7、查看、打开、关闭应急模式
(应急模式阻断所有网络连接,防止出现紧急状况)
firewall-cmd --query-panic

firewall-cmd --panic-on

firewall-cmd --panic-off
8、打开、关闭、重启防火墙
systemctl stop firewalld

systemctl start firewalld

systemctl restart firewalld

9、开启/关闭 开机自启动防火墙
systemctl enable firewalld

systemctl disable firewalld

查询防火墙服务是否开机启动:
systemctl is-enabled firewalld

10、其他操作

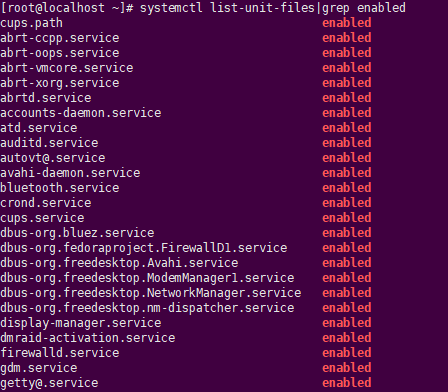
查询启动失败的服务列表:systemctl --failed

Linux CentOS 7 防火墙与端口设置操作的更多相关文章
- 物理机连接虚拟机中的数据库及Windows添加防火墙允许端口详细操作步骤
公司项目中因为会使用到SQL server数据库,但是自己电脑无论安装2008R2或者2014版本都不成功,我想可能是和之前安装的一些Windows的软件存在冲突. 于是便单独创建了一台虚拟机,在虚拟 ...
- CentOS 7 防火墙和端口配置
centos 7 防火墙和端口配置--解决 RHEL 7/ CentOS 7/Fedora 出现Unit iptables.service failed to load # 第一步,关闭firewal ...
- Linux CentOS中防火墙的关闭及开启端口
注:CentOS7之前用来管理防火墙的工具是iptable,7之后使用的是Firewall 样例:在CentOS7上安装tomcat后,在linux本机上可以访问tomcat主页,http://ip: ...
- centos7 防火墙与端口设置、linux端口范围
防火墙 启动防火墙: systemctl start firewalld 查看防火墙状态: systemctl status firewalld 关闭防火墙: systemctl stop firew ...
- CentOS 7防火墙开放端口快速方法
这篇文章主要为大家详细介绍了Centos7.1防火墙开放端口的快速方法,具有一定的参考价值,感兴趣的小伙伴们可以参考一下 例如安装Nagios后,要开放5666端口与服务器连接,命令如下: [ro ...
- linux CentOS中文输入法安装及设置
摘自百度空间,不错,一次搞定! centos 6.3用yum安装中文输入法 1.需要root权限,所以要用root登录 ,或su root 2.yum install "@Chinese S ...
- Linux CentOS 7 防火墙/端口设置
CentOS升级到7之后用firewall代替了iptables来设置Linux端口, 下面是具体的设置方法: []:选填 <>:必填 [<zone>]:作用域(block.d ...
- Linux CentOS 7 防火墙/端口设置【转发】
CentOS升级到7之后用firewall代替了iptables来设置Linux端口, 下面是具体的设置方法: []:选填 <>:必填 [<zone>]:作用域(block.d ...
- linux防火墙与端口设置
1.编辑iptables文件 # sudo vi /etc/sysconfig/iptables 添加如下一行 -A INPUT -p tcp -m state --state NEW -m tcp ...
随机推荐
- 随机森林之oob的计算过程
随机森林有一个重要的优点就是,没有必要对它进行交叉验证或者用一个独立的测试集来获得误差的一个无偏估计.它可以在内部进行评估,也就是说在生成的过程中就可以对误差建立一个无偏估计. 随机森林在生成每颗决策 ...
- 【Python】【基础知识】【内置常量】
Python的内置常量有: False.True.None.NotImplemented.Ellipsis.__debug__ 由 site 模块添加的常量:quit.exit.copyright.c ...
- 小菜鸟之HTML第三课
jquery的引入 <!DOCTYPE html> <html lang="en"> <head> <meta charset=" ...
- 对pdf 表单域 或文本框的操作---动态填充PDF 文件内容
前提:需要pdf模板:并且模板内容以pdf 文本框的形式填写 package com.test;import java.io.File;import java.io.FileOutputStream; ...
- PAT B1037 在霍格沃兹找零钱
AC代码 #include <cstdio> #include <algorithm> using namespace std; char flag = 0; //判断付钱数是 ...
- 剑指offer5:用两个栈来实现一个队列,完成队列的Push和Pop操作。 队列中的元素为int类型。
1. 题目描述 用两个栈来实现一个队列,完成队列的Push和Pop操作. 队列中的元素为int类型. 2. 思想 (1)栈的特点是先进后出,而队列的特点是先进先出: (2)因此,入队列的情况和入栈的情 ...
- Resistors in Parallel(找规律+大数)
题意:https://codeforces.com/group/ikIh7rsWAl/contest/254825/problem/E 给你一个n,计算n / Sigma(1~n)的d(是n的只出现一 ...
- django channels
django channels django channels 是django支持websocket的一个模块. 1. 安装 `pip3 install channels` 2. 快速上手 2.1 在 ...
- asp.net练习②——Paginaton无刷新分页
aspx代码: <html xmlns="http://www.w3.org/1999/xhtml"> <head runat="server" ...
- vue axios拦截跳转
第一步:添加需要拦截的页面 { path: '/control', name: 'Control', meta: { requireAuth: true }, 第二步:页面拦截 router.befo ...