【部分原创】python实现视频内的face swap(换脸)
1.准备工作,按博主的环境为准
Python 3.5
Opencv 3
Tensorflow 1.3.1
Keras 2
cudnn和CUDA,如果你的GPU足够厉害并且支持的话,可以选择安装
那就先安装起来,有兴趣的朋友给我个暗示,好让我有动力写下去,想实现整套的功能还是有点复杂的
第一部分,数据采集,及视频内人物脸
import cv2

save_path = 'your save path'

cascade = cv2.CascadeClassifier('haarcascade_frontalface_alt.xml path')

cap = cv2.VideoCapture('your video path')

i = 0

while True:

    ret,frame = cap.read()

    gray = cv2.cvtColor(frame,cv2.COLOR_BGR2GRAY)

    rect = cascade.detectMultiScale(gray,scaleFactor=1.3,minNeighbors=9,minSize=(50,50),flags = cv2.CASCADE_SCALE_IMAGE)

    print ("rect",rect)

    if not rect is ():

        for x,y,z,w in rect:

            roiImg = frame[y:y+w,x:x+z]

            cv2.imwrite(save_path+str(i)+'.jpg',roiImg)

            cv2.rectangle(frame,(x,y),(x+z,y+w),(0,0,255),2)

            i +=1

    cv2.imshow('frame',frame)

    if cv2.waitKey(1) &0xFF == ord('q'):

        break

cap.release()

cv2.destroyAllWindows()
第二部分,国外大神开源代码,用于模型训练
import cv2

import numpy

from utils import get_image_paths, load_images, stack_images

from training_data import get_training_data

from model import autoencoder_A

from model import autoencoder_B

from model import encoder, decoder_A, decoder_B

try:

    encoder  .load_weights( "models/encoder.h5"   )

    decoder_A.load_weights( "models/decoder_A.h5" )

    decoder_B.load_weights( "models/decoder_B.h5" )

except:

    pass

def save_model_weights():

    encoder  .save_weights( "models/encoder.h5"   )

    decoder_A.save_weights( "models/decoder_A.h5" )

    decoder_B.save_weights( "models/decoder_B.h5" )

    print( "save model weights" )

images_A = get_image_paths( "data/trump" )

images_B = get_image_paths( "data/cage"  )

images_A = load_images( images_A ) / 255.0

images_B = load_images( images_B ) / 255.0

images_A += images_B.mean( axis=(0,1,2) ) - images_A.mean( axis=(0,1,2) )

print( "press 'q' to stop training and save model" )

for epoch in range(1000000):

    batch_size = 64

    warped_A, target_A = get_training_data( images_A, batch_size )

    warped_B, target_B = get_training_data( images_B, batch_size )

    loss_A = autoencoder_A.train_on_batch( warped_A, target_A )

    loss_B = autoencoder_B.train_on_batch( warped_B, target_B )

    print( loss_A, loss_B )

    if epoch % 100 == 0:

        save_model_weights()

        test_A = target_A[0:14]

        test_B = target_B[0:14]

    figure_A = numpy.stack([

        test_A,

        autoencoder_A.predict( test_A ),

        autoencoder_B.predict( test_A ),

        ], axis=1 )

    figure_B = numpy.stack([

        test_B,

        autoencoder_B.predict( test_B ),

        autoencoder_A.predict( test_B ),

        ], axis=1 )

    figure = numpy.concatenate( [ figure_A, figure_B ], axis=0 )

    figure = figure.reshape( (4,7) + figure.shape[1:] )

    figure = stack_images( figure )

    figure = numpy.clip( figure * 255, 0, 255 ).astype('uint8')

    cv2.imshow( "", figure )

    key = cv2.waitKey(1)

    if key == ord('q'):

        save_model_weights()

        exit()
第三部分,国外大神开源代码,人脸输出
import cv2

import numpy

from pathlib import Path

from utils import get_image_paths

from model import autoencoder_A

from model import autoencoder_B

from model import encoder, decoder_A, decoder_B

encoder  .load_weights( "models/encoder.h5"   )

decoder_A.load_weights( "models/decoder_A.h5" )

decoder_B.load_weights( "models/decoder_B.h5" )

images_A = get_image_paths( "data/trump" )

images_B = get_image_paths( "data/cage" )

def convert_one_image( autoencoder, image ):

    assert image.shape == (256,256,3)

    crop = slice(48,208)

    face = image[crop,crop]

    face = cv2.resize( face, (64,64) )

    face = numpy.expand_dims( face, 0 )

    new_face = autoencoder.predict( face / 255.0 )[0]

    new_face = numpy.clip( new_face * 255, 0, 255 ).astype( image.dtype )

    new_face = cv2.resize( new_face, (160,160) )

    new_image = image.copy()

    new_image[crop,crop] = new_face

    return new_image

output_dir = Path( 'output' )

output_dir.mkdir( parents=True, exist_ok=True )

for fn in images_A:

    image = cv2.imread(fn)

    new_image = convert_one_image( autoencoder_B, image )

    output_file = output_dir / Path(fn).name

    cv2.imwrite( str(output_file), new_image )
第四部分,人脸替换
#import necessary libraries

import cv2

import glob as gb

# import numpy

#capture video from the webcam

cap = cv2.VideoCapture('your video path')

fourcc = cv2.VideoWriter_fourcc(*'XVID')

out = cv2.VideoWriter('your output video path', fourcc, 20.0, (1920, 1080))

#load the face finder

face_cascade = cv2.CascadeClassifier('haarcascade_frontalface_alt.xml path')

#load the face that will be swapped in

img_path = gb.glob("your image path")

#start loop

for path in img_path:

    face_img = cv2.imread(path)

    while True:

        ret, img = cap.read()  # read image

        gray = cv2.cvtColor(img, cv2.COLOR_BGR2GRAY)

        faces = face_cascade.detectMultiScale(gray, 1.3, 3)  # find faces

        # for all the faces found in the frame

        for (x, y, w, h) in faces:

            # resize and blend the face to be swapped in

            face = cv2.resize(face_img, (h, w), interpolation=cv2.INTER_CUBIC)

            face = cv2.addWeighted(img[y:y + h, x:x + w], .5, face, .5, 1)

            # swap faces

            img[y:y + h, x:x + w] = face

            out.write(img)

            # show the image

        cv2.imshow('img', img)

        key = cv2.waitKey(1)

        if key == ord('q'):

            exit()

cap.release()

cv2.destroyAllWindows()
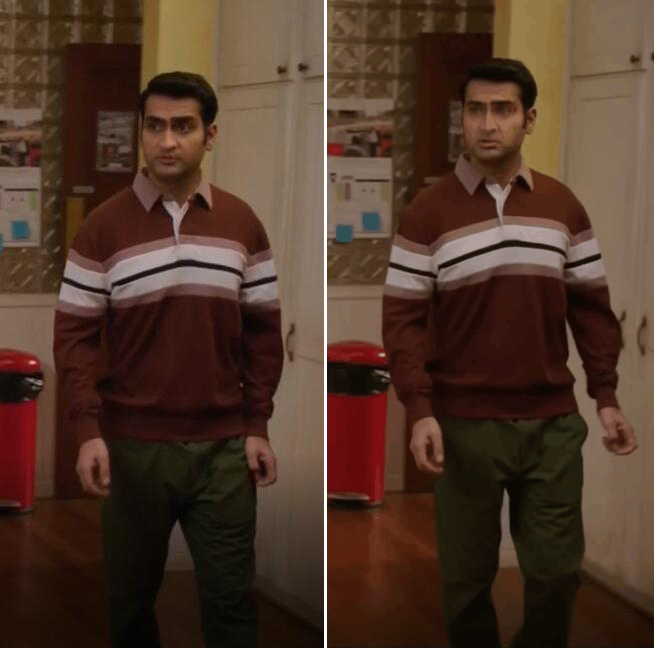
最后放一张训练一小时后的视频截图,用的是尼古拉斯凯奇的脸
【部分原创】python实现视频内的face swap(换脸)的更多相关文章
- 【原创】python实现视频内的face swap(换脸)
1.准备工作,按博主的环境为准 Python 3.5 Opencv 3 Tensorflow 1.3.1 Keras 2 cudnn和CUDA,如果你的GPU足够厉害并且支持的话,可以选择安装 那就先 ...
- [原创]使用python对视频/音频文件进行详细信息采集,并进行去重操作
[原创]使用python对视频/音频文件进行详细信息采集,并进行去重操作 转载请注明出处 一.关于为什么用pymediainfo以及pymediainfo的安装 使用python对视频/音频文件进行详 ...
- Python的常用内置函数介绍
Python的常用内置函数介绍 作者:尹正杰 版权声明:原创作品,谢绝转载!否则将追究法律责任. 一.取绝对值(abs) #!/usr/bin/env python #_*_coding:utf-8_ ...
- 零基础快速掌握Python系统管理视频课程【猎豹网校】
点击了解更多Python课程>>> 零基础快速掌握Python系统管理视频课程[猎豹网校] 课程目录 01.第01章 Python简介.mp4 02.第02章 IPython基础.m ...
- Python学习教程(Python学习视频_Python学些路线):Day06 函数和模块的使用
Python学习教程(Python学习视频_Python学些路线):函数和模块的使用 在讲解本章节的内容之前,我们先来研究一道数学题,请说出下面的方程有多少组正整数解. $$x_1 + x_2 + x ...
- [Python] 将视频转成ASCII符号形式、生成GIF图片
一.简要说明 简述:本文主要展示将视频转成ASCII符号形式展示出来,带音频. 运行环境:Win10/Python3.5. 主要模块: PIL.numpy.shutil. [PIL]: 图像处理 [n ...
- Python音视频开发:消除抖音短视频Logo和去电视台标
☞ ░ 前往老猿Python博文目录 ░ 一.引言 对于带Logo(如抖音Logo.电视台标)的视频,有三种方案进行Logo消除: 直接将对应区域用对应图像替换: 直接将对应区域模糊化: 通过变换将要 ...
- python常用数据类型内置方法介绍
熟练掌握python常用数据类型内置方法是每个初学者必须具备的内功. 下面介绍了python常用的集中数据类型及其方法,点开源代码,其中对主要方法都进行了中文注释. 一.整型 a = 100 a.xx ...
- python计算非内置数据类型占用内存
getsizeof的局限 python非内置数据类型的对象无法用sys.getsizeof()获得真实的大小,例: import networkx as nx import sys G = nx.Gr ...
随机推荐
- vim7.4官方源码在vs2013的编译方法及问题总结
vim7.4发布也有一段时候了,也该是把之前编译的7.3重新编译一下了,于是考虑着到最新的visual studio 2013编译一下,也顺便看看有没有其它问题. 1.安装vs2013,这个应该不用说 ...
- python爬虫批量抓取ip代理
使用爬虫抓取数据时,经常要用到多个ip代理,防止单个ip访问太过频繁被封禁.ip代理可以从这个网站获取:http://www.xicidaili.com/nn/.因此写一个python程序来获取ip代 ...
- C# 对Excel操作时,单元格值的读取
一.Range中Value与Value2的区别 当range("A1:B10")设置为 Currency (货币)和 Date (日期.日期时间)数据类型时,range2将返回对应 ...
- android 4.4最新官方源代码下载
国内网络,日夜不休花了一个多月才下载成功android标准源代码,有些开发同人须要.已上传到网盘,分享给大家 微云地址: http://url.cn/PkkSzC 百度云盘地址(更新) http:// ...
- 为什么我们须要复杂的password
前两天我打开邮箱一看.收到公司1331一封要求改动邮箱password的邮件. 为什么我们须要一个复杂的password呢?尽管我一直以来设置的password都非常复杂.可是公司这次要求改动pass ...
- 关于jquery的事件命名空间
在多人协作的前端开发中,或许会遇到一个问题:几个开发人员都给一个元素添加了同样的事件,但是又有开发人员想要解除掉元素身上的某个事件效果,这时候操作起来就有些麻烦,需要用到jquery给我们提供的事件命 ...
- npm更新方法
今天npm的版本更新发现小于3.0 尝试了npm install npm -g 安装么有成功换成了 cnpm install npm -g安装之后就可以
- 原生js中获取this与鼠标对象以及vue中默认的鼠标对象参数
1.通过原生js获取this对象 <!DOCTYPE html> <html> <head> <meta charset="utf-8" ...
- CSU 8月月赛 Decimal 小数化分数
http://acm.csu.edu.cn/OnlineJudge/problem.php?id=1303 这个OJ很容易跪所以我贴一下题目 Description 任意一个分数都是有理数,对于任意一 ...
- windows查看硬件信息系统信息
rem 查看cpu wmic cpu list briefrem 查看物理内存wmic memphysical list briefrem 查看逻辑内存wmic memlogical list bri ...