Jersey 2 + Maven + Tomcat + IntelliJ IDEA 搭建RESTful服务
本文参考以下内容:
[1] Starting out with Jersey & Apache Tomcat using IntelliJ
[2] 【Jersey】IntelliJ IDEA + Maven + Jetty + Jersey搭建RESTful服务
感谢两位作者。
网上很多文章都是用Jersey 1 搭建的,不能用Jersey 2的新特性,在此我分享一种Jersey 2的搭建方法。
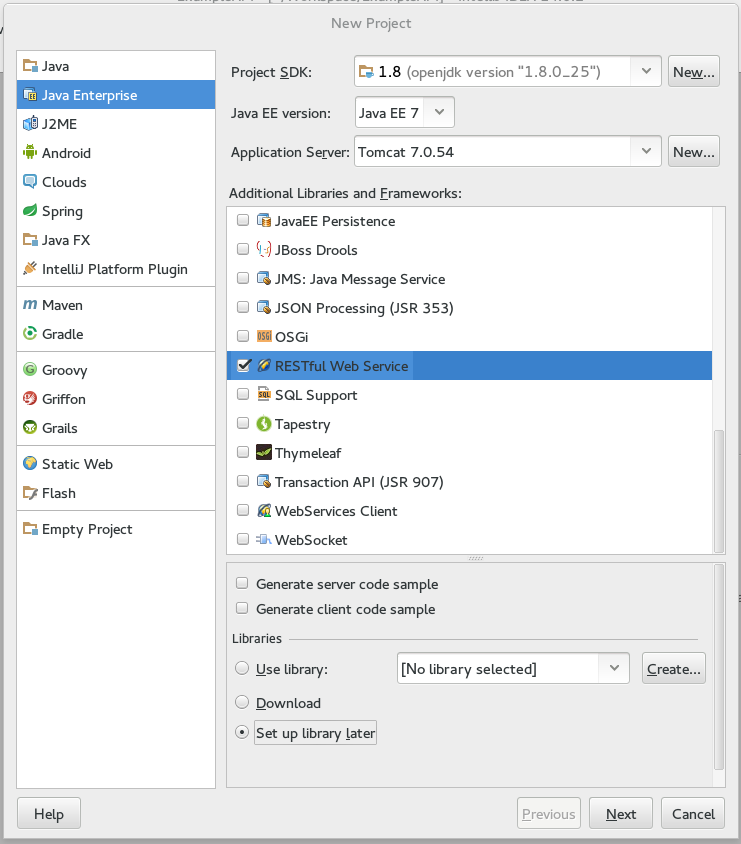
0. 创建新项目
在IntelliJ中创建新项目,选择Java Enterprise -> RESTful Web Service -> Setup libery later.
1. 加入web框架和maven框架
右键单击项目名-> Add Frameworks Support,分别勾选Web Application和Maven。

3. 在maven中加入jersey依赖
在pom.xml中加入:
 <dependency>

     <groupId>org.glassfish.jersey.containers</groupId>

     <artifactId>jersey-container-servlet</artifactId>

     <version>2.9</version>

 </dependency>

 <dependency>

     <groupId>org.glassfish.jersey.core</groupId>

     <artifactId>jersey-client</artifactId>

     <version>2.9</version>

 </dependency>

 <dependency>

     <groupId>org.glassfish.jersey.media</groupId>

     <artifactId>jersey-media-json-jackson</artifactId>

     <version>2.9</version>

 </dependency>
此时,整个pom.xml文档如下。另外使用maven默认的库下载源文件很慢,可以使用国内镜像,方法可见maven国内镜像(maven下载慢的解决方法)。
顺便一提,maven默认的java源值、目标值版本是1.5,可以自行修改成1.8,方法见下面代码。
 <?xml version="1.0" encoding="UTF-8"?>

 <project xmlns="http://maven.apache.org/POM/4.0.0"

          xmlns:xsi="http://www.w3.org/2001/XMLSchema-instance"

          xsi:schemaLocation="http://maven.apache.org/POM/4.0.0 http://maven.apache.org/xsd/maven-4.0.0.xsd">

     <modelVersion>4.0.0</modelVersion>

     <groupId>cn.test</groupId>

     <artifactId>test</artifactId>

     <version>1.0-SNAPSHOT</version>

     <name>test</name>

     <properties>

         <maven.compiler.source>1.8</maven.compiler.source>

         <maven.compiler.target>1.8</maven.compiler.target>

     </properties>

     <dependencies>

         <dependency>

             <groupId>org.glassfish.jersey.containers</groupId>

             <artifactId>jersey-container-servlet</artifactId>

             <version>2.9</version>

         </dependency>

         <dependency>

             <groupId>org.glassfish.jersey.core</groupId>

             <artifactId>jersey-client</artifactId>

             <version>2.9</version>

         </dependency>

         <dependency>

             <groupId>org.glassfish.jersey.media</groupId>

             <artifactId>jersey-media-json-jackson</artifactId>

             <version>2.9</version>

         </dependency>

     </dependencies>

 </project>
4. 创建源文件
在src/java目录下新建包,如com.test.jersey,在包下新建类HelloWorld.java,写上代码:
package com.test.jersey;

import javax.ws.rs.GET;

import javax.ws.rs.Path;

import javax.ws.rs.Produces;

@Path("/hello")

public class HelloWorld {

    //GET注解设置接受请求类型为GET

    @GET

    //Produces表明发送出去的数据类型为text/plain

    // 与Produces对应的是@Consumes,表示接受的数据类型为text/plain

    @Produces("text/plain")

    public String getMessage() {

        return "Hello world!";

    }

}
5. 配置servlet
编辑web/WEB-INF/web.xml,加入代码:
<servlet>

    <servlet-name>test</servlet-name>

    <servlet-class>org.glassfish.jersey.servlet.ServletContainer</servlet-class>

    <init-param>

        <param-name>jersey.config.server.provider.packages</param-name>

        <param-value>com.test.jersey</param-value>

    </init-param>

    <load-on-startup>1</load-on-startup>

</servlet>

<servlet-mapping>

    <servlet-name>test</servlet-name>

    <url-pattern>/*</url-pattern>

</servlet-mapping>
6. 配置Tomcat
点击Run >Edit Configurations… > “+” > Tomcat Server > Local,加入Tomcat,选择Deployment tab, 点击 “+”, 选择唯一的Artifact,点击"OK"即可。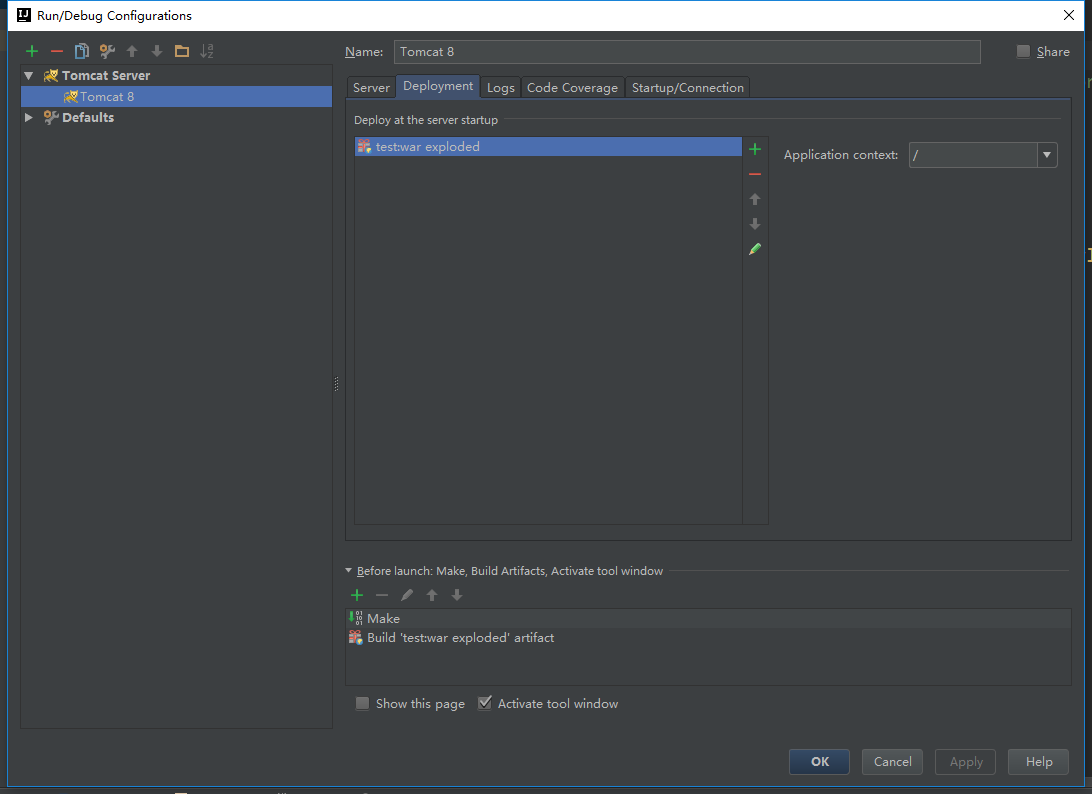
7. 在输出中加入库文件
选择Project Structure,点击Artifacts,可以右侧Available Elements下面有很多库文件没有包含在输出中。依次双击各个文件即可。


8. 运行Tomcat
运行Tomcat,在浏览器中输入http://localhost:8080/hello,即可看到以下输出:
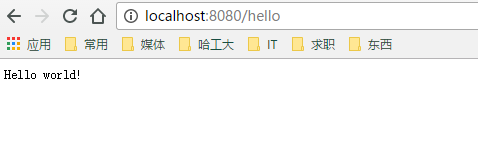
Jersey 2 + Maven + Tomcat + IntelliJ IDEA 搭建RESTful服务的更多相关文章
- Maven + Jetty + Jersey搭建RESTful服务
IntelliJ IDEA + Maven + Jetty + Jersey搭建RESTful服务 本文参考以下内容: 使用Jersey实现RESTful风格的webservice(一) Starti ...
- jersey2.26+spring5+jpa一步步搭建restful服务
前言 首先,为什么想选择Jersey做restful服务呢?我个人比较喜欢它的插件化设计,可以方便的注入自己的全局处理逻辑.再一个就是可以生成wadl描述文件,供查询服务方法.所以在学习spring的 ...
- 【Jersey】IntelliJ IDEA + Maven + Jetty + Jersey搭建RESTful服务
本文参考以下内容: 使用Jersey实现RESTful风格的webservice(一) Starting out with Jersey & Apache Tomcat using Intel ...
- IntelliJ IDEA + Maven + Jetty + Jersey搭建RESTful服务
这次参考的是这个博客,完全按照这个我这里会出一些问题,一会再说就是了. https://www.cnblogs.com/puyangsky/p/5368132.html 一.首先新建一个项目,选择Ja ...
- elipse + maven + tomcat + springMVC环境搭建
1. java JDK安装 http://jingyan.baidu.com/article/b24f6c82c989da86bfe5dab2.html 2.eclipse安装 http://jing ...
- Maven+Spirng+Mybatis+CXF搭建WebService服务
https://jingyan.baidu.com/article/39810a23b1de2fb637fda66c.html
- [转]php,使用Slim和Medoo搭建简单restful服务
本文转自:https://www.jianshu.com/p/32b6d0284d97 关于rest和orm框架的组合使用,几年前我就写过使用Slim+Notorm来搭建restful服务,不过看到N ...
- 基于jersey和Apache Tomcat构建Restful Web服务(一)
基于jersey和Apache Tomcat构建Restful Web服务(一) 现如今,RESTful架构已然成为了最流行的一种互联网软件架构,它结构清晰.符合标准.易于理解.扩展方便,所以得到越来 ...
- Jersey+Spring+Maven环境搭建
第一步:创建一个Maven工程.加入Jersey.Spring.Jersey+Spring的依赖包,以及内嵌的Tomcat7插件: pom.xml文件如图所示: <project xmlns=& ...
随机推荐
- java内置工具
jps jps -l :列出java进程 jstat jstat -gcutil pid:列出各个内存区的使用情况,百分比 jinfo jinfo -flags pid : 列出虚拟机设置,包括默认值 ...
- DataStructure 排序 源码实现
本篇博客实现了 1.冒泡排序 2.冒泡排序的一种优化(当某次冒泡没有进行交换时,退出循环) 3.选择排序 4.归并排序 5.快速排序. 主要是源码的实现,并将自己在敲的过程中所遇到的一些问题记录下来. ...
- jackson注解使用心得
maven依赖: <dependency> <groupId>com.fasterxml.jackson.core</groupId> <artifactId ...
- mysql大表myisam的导入
在my.cnf中增大以下参数 myisam_sort_buffer_size = 1024Mtmp_table_size = 256M tmpdir = /home/tmpmyisam_max_sor ...
- [Maven]初次实践
都说Maven好,以前一直用ant,这次体验一下. 开始之前,maven给我的印象有2个,一是库依赖管理做得比较好,二是规范了构建编译过程,说白了就是什么目录都规定好了. 好开始安装,解压缩,设置m2 ...
- Codevs 2370 小机房的树 LCA 树上倍增
题目描述 Description 小机房有棵焕狗种的树,树上有N个节点,节点标号为0到N-1,有两只虫子名叫飘狗和大吉狗,分居在两个不同的节点上.有一天,他们想爬到一个节点上去搞基,但是作为两只虫子, ...
- angular 数据绑定
1.ng-band 使用在index.html页面使用,该页面不要直接使用双花括号,否则网络延迟的时候页面会显示双花括号,由于通常只在index.html里导入angular.js,所以在其他模板页面 ...
- 用CSS3实现瀑布流布局
以前使用瀑布流都要用js,现在有了css3,可以轻松实现了. 掌握点: 1.column-count 把div中的文本分为多少列 2.column-width 规定列宽 3.column-gap 规定 ...
- JAVAWEB项目如何实现验证码
验证码基础 一.什么是验证码及它的作用 :验证码为全自动区分计算机和人类的图灵测试的缩写,是一种区分用户是计算机的公共全自动程序,这个问题可以由计算机生成并评判,但是必须只有人类才能解答.可以防止恶意 ...
- 使用git版本控制器C#工程,git托管到GitHub和visual studio on line
类比TFS, 托管到了VS online,为私有.GitHub上托管的代码为开源. 新建工程选择版本控制器"Git" VS online: 本地: GitHub,下载github ...