centos7安装nginx-1.13.6 新手入门,图文解析
系统环境
操作系统:64位CentOS Linux release 7.2.1511 (Core)
安装nginx依赖包
[root@localhost ~]# yum install gcc-c++ pcre pcre-devel zlib zlib-devel openssl openssl—devel
必须要安装,时间可能有点久。
下载nginx
下载地址:http://nginx.org/en/download.html

下载最新的nginx-1.13.6(写笔记时,这个版本是最新的),下载好之后,在centos系统中创建/soft目录
[root@localhost ~]# mkdir /soft
利用工具WinSCP,将下载好的nginx包拷贝到centos下的/soft目录
解压nginx
[root@localhost ~]# cd /soft
[root@localhost soft]# tar -zxvf nginx-1.13.6.tar.gz
编译和安装nginx
[root@localhost soft]# cd nginx-1.13.6/
[root@localhost nginx-1.13.6]# ./configure --prefix=/usr/local/nginx
指定安装在/usr/local/nginx目录下,不指定也没关系,默认就是这个目录。
[root@localhost nginx-1.13.6]# make && make install
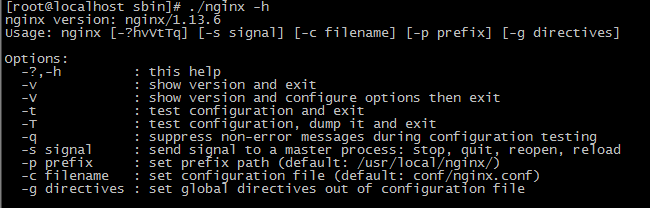
查看nginx版本号:
[root@localhost ~]# cd /usr/local/nginx/sbin/
[root@localhost sbin]# ./nginx -h
开启80端口
[root@localhost conf]# firewall-cmd --zone=public --add-port=80/tcp --permanent
[root@localhost conf]# firewall-cmd --reload
启动和停止nginx
启动
[root@localhost sbin]# ./nginx
停止
[root@localhost sbin]# ./nginx -s stop
重启
[root@localhost sbin]# ./nginx -s reload
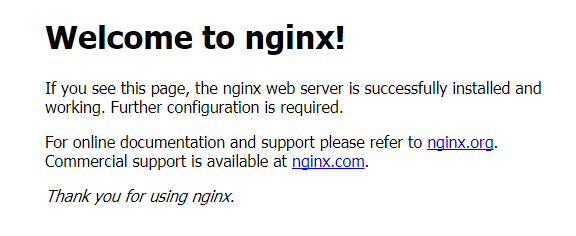
浏览
在浏览器地址栏输入http://192.168.1.100/
参考网址
https://www.cnblogs.com/lxg0/p/6979274.html
简单配置
下面这段配置是最最最简单的负载均衡配置,文件名nginx_fzjh.conf,只要在我们启动nginx的时候,指定这个配置文件就行了([root@localhost sbin]# /usr/local/nginx/sbin/nginx -c /usr/local/nginx/conf/nginx_fzjh.conf)
worker_processes 4;

events{

    worker_connections 1024;

}

http{

    server {

        listen 80;

            server_name myserver;

        location / {

            proxy_pass http://mysite;

        }

    }

    upstream mysite {

        #ip_hash;

        server 10.101.56.52:80;# weight=5;

        server 10.101.56.52:8089;# weight=3;

        #server x.x.x.x:80 weight=1;

    }

}
只看不回复,诅咒你钉钉0.0000000001厘米。
centos7安装nginx-1.13.6 新手入门,图文解析的更多相关文章
- centos7安装kafka_2.11-1.0.0 新手入门
系统环境 1.操作系统:64位CentOS Linux release 7.2.1511 (Core) 2.jdk版本:1.8.0_121 3.zookeeper版本:zookeeper-3.4.9. ...
- linux(centos7) 安装nginx
linux(centos7) 安装nginx 1.14(stable) 版本 Nginx配置文件常见结构的从外到内依次是「http」「server」「location」等等,缺省的继承关系是从外到内, ...
- 【Nginx安装】CentOS7安装Nginx及配置
[Nginx安装]CentOS7安装Nginx及配置 2018年03月05日 11:07:21 阅读数:7073 Nginx是一款轻量级的网页服务器.反向代理服务器.相较于Apache.lighttp ...
- VMware虚拟机中的CentOS7安装Nginx后本机无法访问的解决办法
VMware虚拟机中的CentOS7安装Nginx后本机无法访问的解决办法 在linux上安装nginx 请参考:Linux Centos7 安装 nginx 在虚拟机centos7上安装nginx之 ...
- Centos7 下nginx nginx-1.13.4 安装
环境:CentOS Linux release 7.3.1611 (Core) Linux localhost.localdomain 3.10.0-514.26.2.el7.x86_64 #1 S ...
- centos7安装nginx的两种方法
第一种方式:通过yum安装 直接通过 yum install nginx 肯定是不行的,因为yum没有nginx,所以首先把 nginx 的源加入 yum 中 运行下面的命令: 1.将nginx放到y ...
- CentOS7 安装Nginx+MySQL
首先我们需要安装nginx的yum源 [root@AD ~]# rpm -Uvh http://nginx.org/packages/centos/7/noarch/RPMS/nginx-releas ...
- (转)AIX7.1安装Nginx 1.13的方法
原文:https://blog.csdn.net/lvshaorong/article/details/79401860 https://blog.csdn.net/lvshaorong/articl ...
- Centos7安装Nginx实战
一.背景 最近在写一些自己的项目,用到了nginx,所以自己动手来在Centos7上安装nginx,以下是安装步骤. 二.基本概念以及应用场景 1.什么是nginx Nginx是一款使用C语言开发的高 ...
随机推荐
- Ubuntu16下Hadoop安装
1. 安装Ubuntu 2. 新装Ubuntu常用软件安装和系统设置 (1) 安装vim yum install vim (2) 更改hostname为hadoop_master sudo vim / ...
- 第三节: Quartz.Net五大构件之Scheduler(创建、封装、基本方法等)和Job(创建、关联等)
一. 五大构件 引言: Quartz.Net的五大构件 1. 调度器:Scheduler 2. 作业任务:Job 3. 触发器: Trigger 4. 线程池: SimpleThreadPoo ...
- logging模块简单使用
日志配置 #!/usr/bin/python2.7 import os import logging def get_logger(path='./', filename='access.log', ...
- [物理学与PDEs]第1章习题2 均匀带电球面的电场强度与电势
设有一均匀分布着电荷的半径为 $R$ 的球面, 其电荷密度 (即单位面积上的电荷量) 为 $\sigma$. 试求该球面所形成电场的电场强度及电势. 解答: 设 $P$ 距圆心的距离为 $r$, 不妨 ...
- LOJ #556. 「Antileaf's Round」咱们去烧菜吧
好久没更博了 咕咕咕 现在多项式板子的常数巨大...周末好好卡波常吧.... LOJ #556 题意 给定$ m$种物品的出现次数$ B_i$以及大小$ A_i$ 求装满大小为$[1..n]$的背包的 ...
- laravel 跨库执行原生 sql 语句
执行原生 sql 返回结果集
- IDEAL字体颜色修改
IDEA 炫酷的主题字体颜色设置(基于IDEA 2018)前言: IDEA中主题可以更换,大家可以直接到 http://www.riaway.com/ 网站或 http://color-themes ...
- Django模型层-单表操作
ORM介绍 MVC或者MVC框架中包括一个重要的部分,就是ORM,它实现了数据模型与数据库的解耦,即数据模型的设计不需要依赖于特定的数据库,通过简单的配置就可以轻松更换数据库,这极大的减轻了开发人员的 ...
- Android Camera MSM HAL
高通新的camera驱动架构设计发生了一些变化,借用互联网上常用的一种结构,大致的原理如此:将camera的所有功能划分为不同的模块,让模块自己来决定自己的事情(高内聚,低耦合),模块需要有统一的接口 ...
- noj算法 8皇后打印 回溯法
描述: 输出8皇后问题所有结果. 输入: 没有输入. 输出: 每个结果第一行是No n:的形式,n表示输出的是第几个结果:下面8行,每行8个字符,‘A’表示皇后,‘.’表示空格.不同的结果中,先输出第 ...