python操作Excel-写/改/读
python操作excel主要用到xlrd和xlwt这两个库,即xlrd是读excel,xlwt是写excel的库。
xlrd和xlwt这两个库用之前需要安装:cmd -> pip install xlrd / cmd -> pip install xlwt
一、写Excel
1. 手动一条条的添加数据
import xlwt
book = xlwt.Workbook() #新建一个excel
sheet = book.add_sheet('sheet1') #添加一个sheet页 sheet.write(0,0,'编号') #(行,列,'输入的内容') 第一行/列是0
sheet.write(0,1,'名字')
sheet.write(0,2,'性别') sheet.write(1,0,'')
sheet.write(1,1,'马春波')
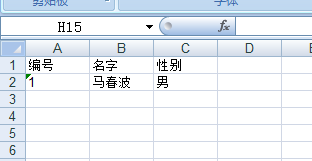
sheet.write(1,2,'男') book.save('stu.xls') #wps xls xlsx ,微软的office 需以 .xls结尾
运行结果,生成一个Excel,显示内容如下:
2. 循环添加行、列
import xlwt
book = xlwt.Workbook() #新建一个excel
sheet = book.add_sheet('sheet1') #添加一个sheet页 stu_info = [
['编号','姓名','密码','性别','地址'],
[1,'machunbo','sdfsd23sdfsdf2','男','北京'],
[2,'machunbo2','sdfsd23sdfsdf2','男','北京'],
[3,'machunb3','sdfsd23sdfsdf2','男','北京'],
[4,'machunbo4','sdfsd23sdfsdf2','男','北京'],
[5,'machunbo5','sdfsd23sdfsdf2','男','北京'],
[6,'machunbo6','sdfsd23sdfsdf2','男','北京'],
[7,'machunbo6','sdfsd23sdfsdf2','男','北京'],
[8,'machunbo6','sdfsd23sdfsdf2','男','北京'],
[9,'machunbo6','sdfsd23sdfsdf2','男','北京'],
[10,'machunbo6','sdfsd23sdfsdf2','男','北京'],
[11,'machunbo6','sdfsd23sdfsdf2','男','北京'],
]#6行5列 #方法1:
row = 0 #行
for stu in stu_info:
sheet.write(row,0,stu[0])
sheet.write(row,1,stu[1])
sheet.write(row,2,stu[2])
sheet.write(row,3,stu[3])
sheet.write(row,4,stu[4])
row+=1 #方法2:
row = 0 #行
for stu in stu_info:
#stu
col = 0 # 列
# [1, 'machunbo', 'sdfsd23sdfsdf2', '男', '北京'],
for s in stu: #控制列
sheet.write(row,col,s) #0 3 男
col+=1
row+=1 #方法3:
for index,value in enumerate(stu_info):
# index 0
# value ['编号','姓名','密码','性别','地址'] #index 1
#value [1,'machunbo','sdfsd23sdfsdf2','男','北京']
for index2,v2 in enumerate(value): #enumerate同时取下标和对应的元素
print(index,index2,v2)
#0 1
#1 machunbo
#2 sdfsd23sdfsdf2
#4 北京
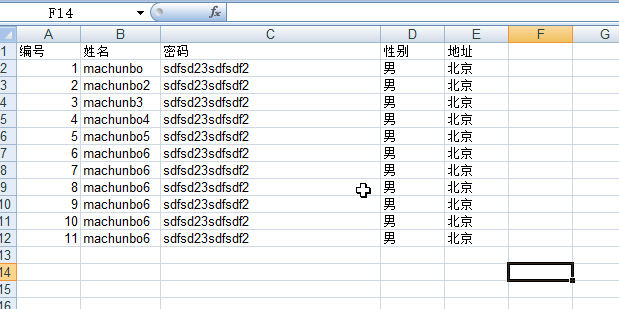
sheet.write(index,index2,v2) book.save('stu001.xls') #wps xls xlsx ,微软的office xls
运行结果,生成一个Excel,显示内容如下:
二、 修改Excel
使用前,安装xlutils模块
import xlrd

from xlutils import copy

#编写思路如下:

#1、先打开原来的excel

#2、复制一份

#3、在复制的excel上修改

#4、保存

book = xlrd.open_workbook('stu.xls')

new_book = copy.copy(book) #复制一份原excel

sheet = new_book.get_sheet(0) #修改excel的时候,得用get_sheet()

sheet.write(0,0,'id') #把第一行第一列中的数据变为id

sheet.write(0,3,'password') #第一行第四列的数据变为password

new_book.save('stu.xls') #保存
运行结果,修改了原Excel,显示内容如下:

三、读取Excel
import xlrd

book = xlrd.open_workbook('stu3.xls')

sheet = book.sheet_by_index(0) #查看哪个sheet的数据,根据索引指定,第一个sheet,无返回值

sheet = book.sheet_by_name('sheet1')#查看哪个sheet的数据,根据sheet名称指定,无返回值

print(sheet.cell(0,0).value) #获取指定单元格的内容,单元格位置cell(行、列):id

print(sheet.cell(1,0).value) #输出1.0而不是整数1

print(sheet.row_values(0)) #获取整行的数据,返回list:['id', '姓名', '密码', 'password', '地址']

print(sheet.row_values(1)) #[1.0, 'machunbo', 'sdfsd23sdfsdf2', '男', '北京']

print(sheet.col_values(0))#获取整列的数据:['id', 1.0, 2.0, 3.0, 4.0, 5.0, 6.0, 7.0, 8.0, 9.0, 10.0, 11.0]

print(sheet.col_values(1))

print(sheet.nrows) #输出总行数:12

print(sheet.ncols) #输出总列数:5

for row in range(1,sheet.nrows): #从第一行开始取值,取到最后一行

    print(sheet.row_values(row)) #输出每行的数据,每行数据都是一个list
输出结果如下:
id

1.0

['id', '姓名', '密码', 'password', '地址']

[1.0, 'machunbo', 'sdfsd23sdfsdf2', '男', '北京']

['id', 1.0, 2.0, 3.0, 4.0, 5.0, 6.0, 7.0, 8.0, 9.0, 10.0, 11.0]

['姓名', 'machunbo', 'machunbo2', 'machunb3', 'machunbo4', 'machunbo5', 'machunbo6', 'machunbo6', 'machunbo6', 'machunbo6', 'machunbo6', 'machunbo6']

12

5

[1.0, 'machunbo', 'sdfsd23sdfsdf2', '男', '北京']

[2.0, 'machunbo2', 'sdfsd23sdfsdf2', '男', '北京']

[3.0, 'machunb3', 'sdfsd23sdfsdf2', '男', '北京']

[4.0, 'machunbo4', 'sdfsd23sdfsdf2', '男', '北京']

[5.0, 'machunbo5', 'sdfsd23sdfsdf2', '男', '北京']

[6.0, 'machunbo6', 'sdfsd23sdfsdf2', '男', '北京']

[7.0, 'machunbo6', 'sdfsd23sdfsdf2', '男', '北京']

[8.0, 'machunbo6', 'sdfsd23sdfsdf2', '男', '北京']

[9.0, 'machunbo6', 'sdfsd23sdfsdf2', '男', '北京']

[10.0, 'machunbo6', 'sdfsd23sdfsdf2', '男', '北京']

[11.0, 'machunbo6', 'sdfsd23sdfsdf2', '男', '北京']
内容补充:https://www.cnblogs.com/zhoujie/p/python18.html
python操作Excel-写/改/读的更多相关文章
- python操作excel表格(xlrd/xlwt)
最近遇到一个情景,就是定期生成并发送服务器使用情况报表,按照不同维度统计,涉及python对excel的操作,上网搜罗了一番,大多大同小异,而且不太能满足需求,不过经过一番对源码的"研究&q ...
- Python操作excel表格
用Python操作Excel在工作中还是挺常用的,因为毕竟不懂Excel是一个用户庞大的数据管理软件 注:本篇代码在Python3环境下运行 首先导入两个模块xlrd和xlwt,xlrd用来读取Exc ...
- 【转】python操作excel表格(xlrd/xlwt)
[转]python操作excel表格(xlrd/xlwt) 最近遇到一个情景,就是定期生成并发送服务器使用情况报表,按照不同维度统计,涉及python对excel的操作,上网搜罗了一番,大多大同小异, ...
- 使用python操作excel表格
首先 pip install xlrd 安装相关模块 其次:使用方法: 1 导入模块 import xlrd 2 打开excel文件读取数据 worksheet=xlrd.open_workbook ...
- python基础(六)python操作excel
一.python操作excel,python操作excel使用xlrd.xlwt和xlutils模块,xlrd模块是读取excel的,xlwt模块是写excel的,xlutils是用来修改excel的 ...
- python操作excel xlrd和xlwt的使用
最近遇到一个情景,就是定期生成并发送服务器使用情况报表,按照不同维度统计,涉及python对excel的操作,上网搜罗了一番,大多大同小异,而且不太能满足需求,不过经过一番对源码的"研究&q ...
- python 操作excel 的包 函数
###########sample 1 https://blog.csdn.net/chengxuyuanyonghu/article/details/54951399 python操作excel主要 ...
- Python 操作excel day5
一.Python操作excel python操作excel使用xlrd.xlwt和xlutils模块 1.xlrd模块是读取excel的: 2.xlwt模块是写excel的: 3.xlutils是用来 ...
- python - 操作excel表格
说明:由于公司oa暂缺,人事妹子在做考勤的时候,需要通过几个excel表格去交叉比对员工是否有旷工或迟到,工作量大而且容易出错. 这时候it屌丝的机会来啦,花了一天时间给妹子撸了一个自动化脚本. 1. ...
- 自动化办公:python操作Excel
1.安装 -- upgrade pippython -m pip install --- install pypipip install pypi 执行python setup.py install进 ...
随机推荐
- P1972 HHのnecklace 离线+树状数组
此题莫队可过 然而太难了...... 我在胡雨菲那看的解法,然后自己打了一波,调了一个错,上交,自信AC. 做法:离线,对于L排序. 每种颜色可能出现很多次,那么我们如何不算重复呢? 只需把[L,n] ...
- 1145. Hashing - Average Search Time
The task of this problem is simple: insert a sequence of distinct positive integers into a hash ta ...
- 利用twilio进行手机短信验证
首先要注册 twilio 账号但是由于twilio人机验证用的是Goole所有注册需要FQ 完成后去免费获取15元使用 然后 pip install twilio 注册完成后会在个人首页显示你的免费金 ...
- Could not install the app on the device, read the error above for details. Make sure you have an Android emulator running or a device connected and have set up your Android development environment:
Administrator@DESKTOP-EHCTIOR MINGW64 /d/react-native-eyepetizer (master) $ react-native run-android ...
- R语言绘图(FZ)
P-Value Central Lmit Theorem(CLT) mean(null>diff) hist(null) qqnorm(null) qqline(null) pops<-r ...
- Unity 物体移动的理解
Unity通过内置的Input类获取外部输入,具体查看: Editor---Project Setting---Input,常见的输入比如:Vertical.Horizontal.Fire1.Jump ...
- CodeChef - BLACKCOM 可行性dp转最优化树dp
https://www.codechef.com/problems/BLACKCOM 题意:一颗5000个黑白结点的树,10W个查询寻找是否存在大小s并且有t和黑节点的子图 一开始就觉得应当是一个树d ...
- Normal Equation
一.Normal Equation 我们知道梯度下降在求解最优参数\(\theta\)过程中需要合适的\(\alpha\),并且需要进行多次迭代,那么有没有经过简单的数学计算就得到参数\(\theta ...
- Map_占位符(嗨没想好怎么起名字)
Map 是很好的集合,为我们带来了在其他语言(比如 Perl)中经常可见的好用的键/值对集合.JDK 以 HashMap 的形式为我们提供了方便的 Map 实现,它在内部使用哈希表实现了对键的对应值的 ...
- Windows Dll Injection、Process Injection、API Hook、DLL后门/恶意程序入侵技术
catalogue 1. 引言2. 使用注册表注入DLL3. 使用Windows挂钩来注入DLL4. 使用远程线程来注入DLL5. 使用木马DLL来注入DLL6. 把DLL作为调试器来注入7. 使用c ...