
在React中随机生成图形验证码
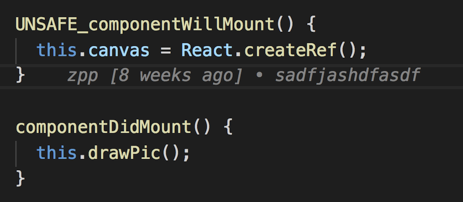
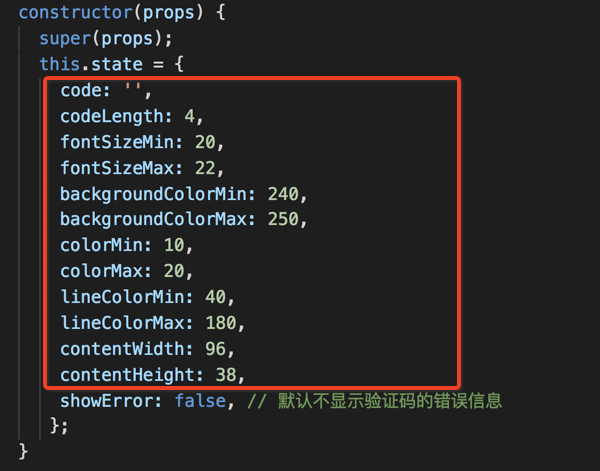
各个方法
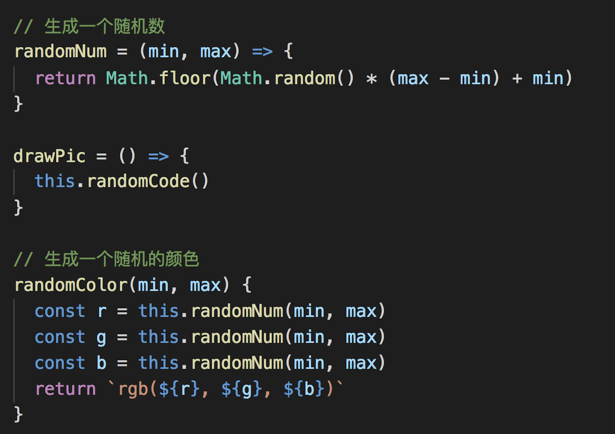
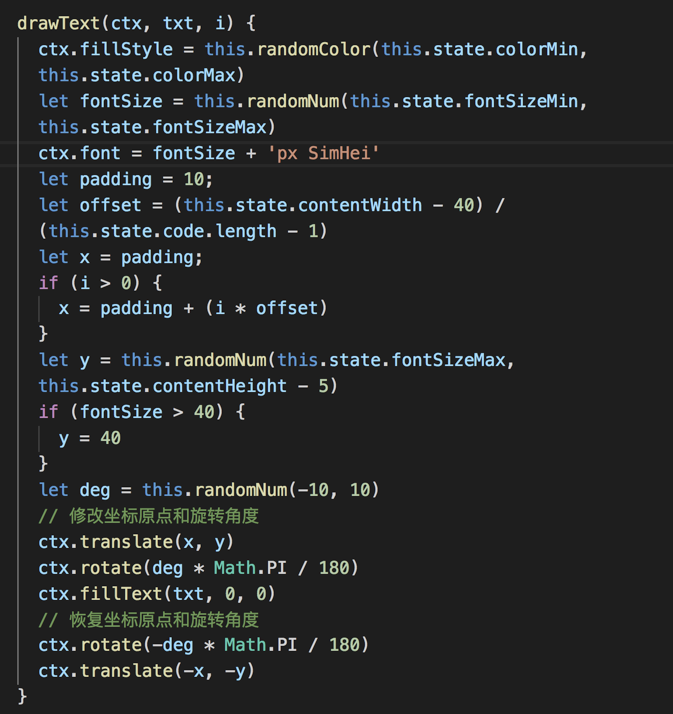
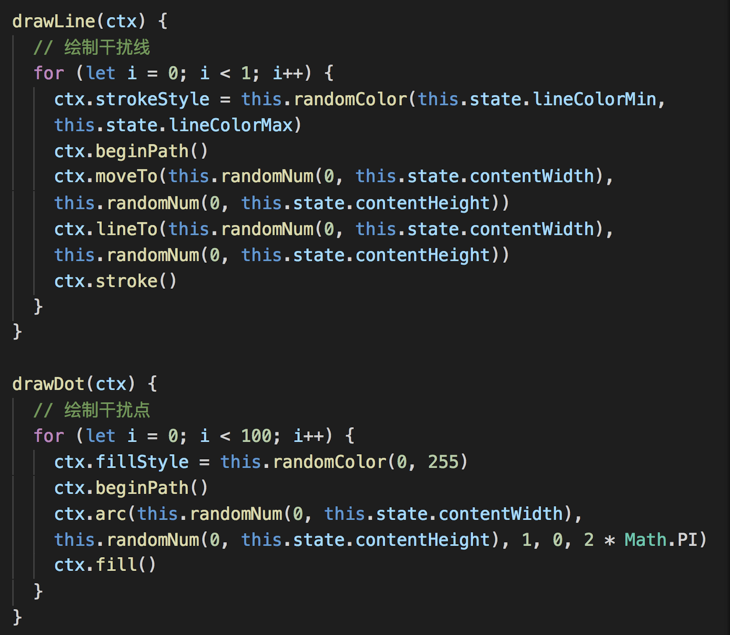
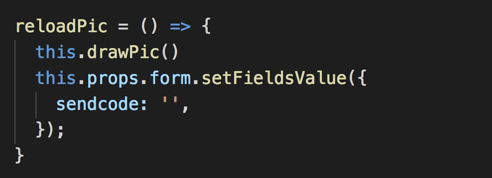
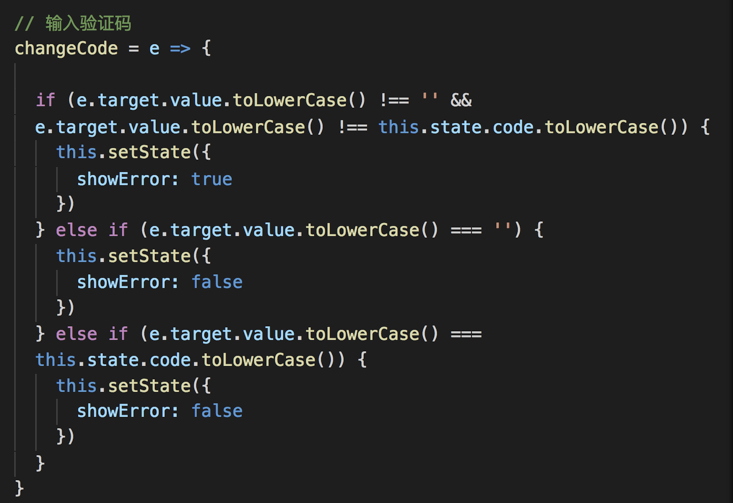
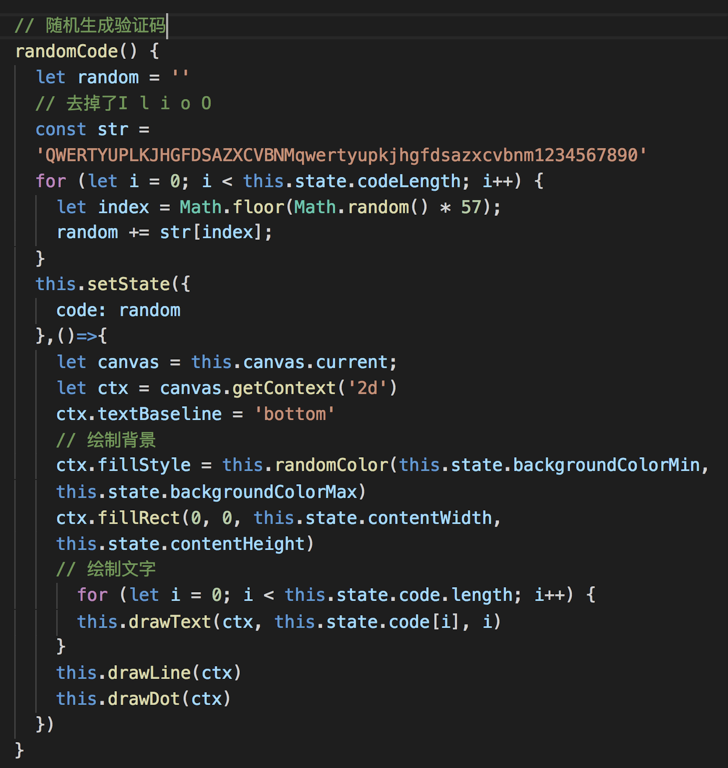
在输入框中定义一个位置存放图形
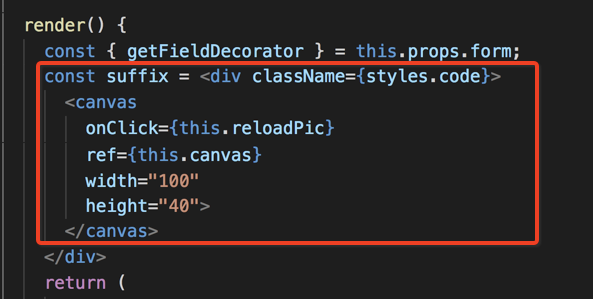
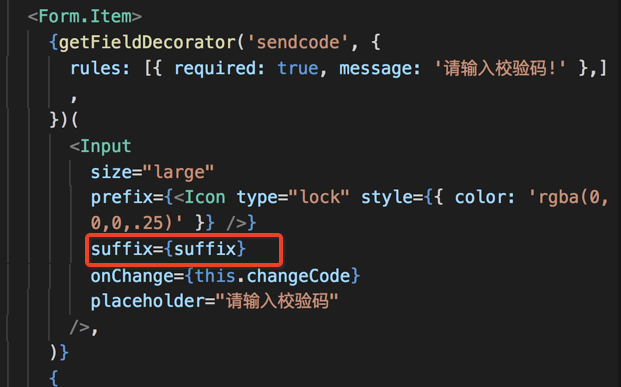
完整代码 方便复制粘贴
import React, { Component } from 'react';
import styles from './leftLogin.scss';
import { withRouter } from 'dva/router';
import { connect } from 'dva';
import { Form, Icon, Input, Button, Checkbox } from 'antd';
@connect(({ login }) => ({
login,
}))
class leftLogin extends Component {
constructor(props) {
super(props);
this.state = {
code: '',
codeLength: 4,
fontSizeMin: 20,
fontSizeMax: 22,
backgroundColorMin: 240,
backgroundColorMax: 250,
colorMin: 10,
colorMax: 20,
lineColorMin: 40,
lineColorMax: 180,
contentWidth: 96,
contentHeight: 38,
showError: false, // 默认不显示验证码的错误信息
};
}
UNSAFE_componentWillMount() {
this.canvas = React.createRef();
}
componentDidMount() {
this.drawPic();
}
// 点击登录按钮
handleSubmit = e => {
e.preventDefault();
this.drawPic();
this.props.form.validateFields((err, values) => {
if (!err && this.state.showError !== true) {
// 调登录接口
const { dispatch } = this.props;
dispatch({
type: 'login/login',
payload: {
account: values.username,
pwd: values.password
}
})
this.props.form.setFieldsValue({
sendcode: '',
});
this.setState({
showError: false
})
}
});
}
// 跳转到忘记密码页
forget = () => {
this.props.history.push('/forget')
}
// 跳转到注册页
regist = () => {
this.props.history.push('/regist')
}
// 生成一个随机数
randomNum = (min, max) => {
return Math.floor(Math.random() * (max - min) + min)
}
drawPic = () => {
this.randomCode()
}
// 生成一个随机的颜色
randomColor(min, max) {
const r = this.randomNum(min, max)
const g = this.randomNum(min, max)
const b = this.randomNum(min, max)
return rgb(${r}, ${g}, ${b})
}
drawText(ctx, txt, i) {
ctx.fillStyle = this.randomColor(this.state.colorMin, this.state.colorMax)
let fontSize = this.randomNum(this.state.fontSizeMin, this.state.fontSizeMax)
ctx.font = fontSize + 'px SimHei'
let padding = 10;
let offset = (this.state.contentWidth - 40) / (this.state.code.length - 1)
let x = padding;
if (i > 0) {
x = padding + (i * offset)
}
let y = this.randomNum(this.state.fontSizeMax, this.state.contentHeight - 5)
if (fontSize > 40) {
y = 40
}
let deg = this.randomNum(-10, 10)
// 修改坐标原点和旋转角度
ctx.translate(x, y)
ctx.rotate(deg * Math.PI / 180)
ctx.fillText(txt, 0, 0)
// 恢复坐标原点和旋转角度
ctx.rotate(-deg * Math.PI / 180)
ctx.translate(-x, -y)
}
drawLine(ctx) {
// 绘制干扰线
for (let i = 0; i < 1; i++) {
ctx.strokeStyle = this.randomColor(this.state.lineColorMin, this.state.lineColorMax)
ctx.beginPath()
ctx.moveTo(this.randomNum(0, this.state.contentWidth), this.randomNum(0, this.state.contentHeight))
ctx.lineTo(this.randomNum(0, this.state.contentWidth), this.randomNum(0, this.state.contentHeight))
ctx.stroke()
}
}
drawDot(ctx) {
// 绘制干扰点
for (let i = 0; i < 100; i++) {
ctx.fillStyle = this.randomColor(0, 255)
ctx.beginPath()
ctx.arc(this.randomNum(0, this.state.contentWidth), this.randomNum(0, this.state.contentHeight), 1, 0, 2 * Math.PI)
ctx.fill()
}
}
reloadPic = () => {
this.drawPic()
this.props.form.setFieldsValue({
sendcode: '',
});
}
// 输入验证码
changeCode = e => {
if (e.target.value.toLowerCase() !== '' && e.target.value.toLowerCase() !== this.state.code.toLowerCase()) {

  this.setState({

    showError: true

  })

} else if (e.target.value.toLowerCase() === '') {

  this.setState({

    showError: false

  })

} else if (e.target.value.toLowerCase() === this.state.code.toLowerCase()) {

  this.setState({

    showError: false

  })

}
}
// 随机生成验证码
randomCode() {
let random = ''
// 去掉了I l i o O
const str = 'QWERTYUPLKJHGFDSAZXCVBNMqwertyupkjhgfdsazxcvbnm1234567890'
for (let i = 0; i < this.state.codeLength; i++) {
let index = Math.floor(Math.random() * 57);
random += str[index];
}
this.setState({
code: random
},()=>{
let canvas = this.canvas.current;
let ctx = canvas.getContext('2d')
ctx.textBaseline = 'bottom'
// 绘制背景
ctx.fillStyle = this.randomColor(this.state.backgroundColorMin, this.state.backgroundColorMax)
ctx.fillRect(0, 0, this.state.contentWidth, this.state.contentHeight)
// 绘制文字
for (let i = 0; i < this.state.code.length; i++) {
this.drawText(ctx, this.state.code[i], i)
}
this.drawLine(ctx)
this.drawDot(ctx)
})
}
render() {
const { getFieldDecorator } = this.props.form;
const suffix =
return (
<Form onSubmit={this.handleSubmit} style={{ width: '398px', margin: '0 auto', fontSize: '12px' }}>
<Form.Item>
{getFieldDecorator('username', {
rules: [{ required: true, message: '请输入用户名!' }, {
pattern: /^1[3456789]\d{9}$/,
message: '手机号格式不正确'
}],
})(
<Input
size="large"
prefix={<Icon type="user" style={{ color: 'rgba(0,0,0,.25)' }} />}
placeholder="请输入手机号"
/>,
)}
</Form.Item>
<Form.Item>
{getFieldDecorator('password', {
rules: [{ required: true, message: '请输入密码!' }, {
pattern: /^.{6,}$/,
message: '密码格式不正确(不得低于6位)'
}],
})(
<Input
size="large"
prefix={<Icon type="lock" style={{ color: 'rgba(0,0,0,.25)' }} />}
type="password"
placeholder="请输入密码"
/>,
)}
</Form.Item>
<Form.Item>
{getFieldDecorator('sendcode', {
rules: [{ required: true, message: '请输入校验码!' },],
})(
<Input
size="large"
prefix={<Icon type="lock" style={{ color: 'rgba(0,0,0,.25)' }} />}
suffix={suffix}
onChange={this.changeCode}
placeholder="请输入校验码"
/>,
)}
{
this.state.showError ?
请输入正确的验证码
: null
}
</Form.Item>
          <Form.Item className={this.state.showError ? styles.inputBottom : ''}>

            {getFieldDecorator('remember', {

              valuePropName: 'checked',

              initialValue: true,

            })(<Checkbox>7天内免登录</Checkbox>)}

            <a className={styles.forget} onClick={this.forget}>

              忘记密码

            </a>

            <Button

              size="large"

              type="primary"

              htmlType="submit"

              className={styles.button}

            >

              登录

            </Button>

            <a onClick={this.regist}>新用户注册</a>

          </Form.Item>

        </Form>

  </div>

);
}
}
const WrappedNormalLoginForm = Form.create({ name: 'normal_login' })(leftLogin);
export default withRouter(WrappedNormalLoginForm);
在React中随机生成图形验证码的更多相关文章
- ASP.NET中如何生成图形验证码
通常生成一个图形验证码主要 有3个步骤: (1)随机产生一个长度为N的随机字符串,N的值可由开发可由开发人员自行设置.该字符串可以包含数字.字母等. (2)将随机生成的字符串创建成图片,并显示. (3 ...
- java生成图形验证码
效果图 import java.awt.Color; import java.awt.Font; import java.awt.Graphics; import java.awt.image.Buf ...
- C#生成图形验证码
先看效果: 再上代码 public class CaptchaHelper { private static Random rand = new Random(); private static in ...
- PHP5 GD库生成图形验证码(汉字)
PHP5 GD库生成图形验证码且带有汉字的实例分享. 1,利用GD库函数生成图片,并在图片上写指定字符imagecreatetruecolor 新建一个真彩色图像imagecolorallocate ...
- PHP5生成图形验证码(有汉字)
利用PHP5中GD库生成图形验证码 类似于下面这样 1.利用GD库函数生成图片,并在图片上写指定字符 imagecreatetruecolor 新建一个真彩色图像 imagecolora ...
- python 生成图形验证码
文章链接:https://mp.weixin.qq.com/s/LYUBRNallHcjnhJb1R3ZBg 日常在网站使用过程中经常遇到图形验证,今天准备自己做个图形验证码,这算是个简单的功能,也适 ...
- asp.net 生成图形验证码(字母和数字混合)
验证码技术是网站开发过程中比较重要的技术,可以防止非法人员利用注册机或者登陆工具来攻击我们的网站.下面是效果图: 具体实现方法如下: 1.主要思路是:引用Using System.Drawing命名空 ...
- (转)Android 之生成图形验证码
import android.graphics.Bitmap; import android.graphics.Canvas; import android.graphics.Color; impor ...
- 【Java】生成图形验证码
本章介绍一个能生成比较好看的图形验证码类 生成验证码工具类 package com.util; import java.awt.Color; import java.awt.Font; import ...
随机推荐
- 思科室外AP无法注册到WLC
思科的一些新的室外AP,在购买回来时,有时候会出现无法加入WLC的情况,现象基本是无法加入,或感觉加入了,立马又掉了. 例如: AIR-AP1562E-H-K9 AIR-AP1572EAC-H-K9 ...
- iOS 根据域名查询 IP 地址
在 iOS 开发中,如果需要知道网站的 IP 地址: #include <netdb.h> #include <arpa/inet.h> NSString *webSiteSt ...
- Nginx正则及 Location匹配!
1:Nginx location 规则匹配 ^~ 标识符匹配后面跟一个字符串.匹配字符串后将停止对后续的正则表达式进行匹配. 如:location ^~ /images/, 在匹配 ...
- 安装scikit-learn
首先到官网下载安装 python ,之后下载setuptools 进行安装. 'python' 不是内部或外部命令 可运行 set PATH=%PATH%;C:\Python34 安装完成之后,运行 ...
- Django 学习之Rest Framework 视图相关
drf除了在数据序列化部分简写代码以外,还在视图中提供了简写操作.所以在django原有的django.views.View类基础上,drf封装了多个子类出来提供给我们使用. Django REST ...
- 2019年ipa发布苹果应用商店审核指南
https://baijiahao.baidu.com/s?id=1623886553597961077&wfr=spider&for=pc ipa 发布审核指南 说明: 本指南为初版 ...
- nginx的addition模块在响应的前后报文添加内容与变量的运行原理
nginx默认未编译此模块:让nginx编译启用此模块 ./configure --prefix=/data/web --sbin-path=/usr/bin --user=nginx --group ...
- 12 JavaScript String对象 & Date对象
<script> var a = "string"; var b = new String("string"); var c = new Strin ...
- 11 JavaScript Number原始值&对象&科学记数法&范围&进制转换&溢出Infinity&NaN
JavaScript Number对象 是经过封装的能处理数字值的对象 由Number()构造器创建 只有一种数字类型 可以使用也可以不使用小数点书写数字 JavaScript原始值与对象: 在Jav ...
- spring boot 中 2.X 的跨域请求
解决跨域: @Configuration @EnableAutoConfiguration public class ZooConfiguration { @Bean public FilterReg ...