使用connected-react-router使router与store同步
connected-react-router是一个绑定react-router到redux的组件,来实现双向绑定router的数据到redux store中,这么做的好处就是让应用更Redux化,可以在action中实现对路由的操作。
这个组件的关键就在于使用了react-router中的一个关键组件,也就是ReactTraining/history,这个组件看了下文档,作者是这么解释的
The history library is a lightweight layer over browsers' built-in History and Location APIs. The goal is not to provide a full implementation of these APIs, but rather to make it easy for users to opt-in to different methods of navigation.
按照我的理解应该是对浏览器原本的history对象做了一定的增强,同时应该对ReactNative等环境做了一定的polyfill。
使用connected-react-router这个库的关键点就在于创建合适的history对象
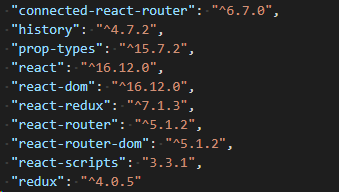
我当前connected-react-router的版本为v6,需要react router大于v4,并且react-redux大于v6,react大于v16.4.0
先看index.js
import React from 'react';

import ReactDOM from 'react-dom';

import { Provider } from 'react-redux'

import configureStore, { history } from './configureStore'

import { ConnectedRouter } from 'connected-react-router'

import routes from './routes'

const store = configureStore()

ReactDOM.render(

    <Provider store={store}>// Provider使用context将store传给子组件

        <ConnectedRouter history={history}>//ConnectedRouter传递history对象作为props

            { routes }

        </ConnectedRouter>

    </Provider>

  , document.getElementById('root'));
configureStore.js提供history与store
使用createBrowserHistory()创建history。
const history = createBrowserHistory()
使用redux-devtools-extension
window.__REDUX_DEVTOOLS_EXTENSION_COMPOSE__
reducers/index.js
import { combineReducers } from 'redux'

import { connectRouter } from 'connected-react-router'

import counterReducer from './counter'

const rootReducer = (history) => combineReducers({

  count: counterReducer,

  router: connectRouter(history)

})

export default rootReducer
combineReducers方法,用于 Reducer 的拆分。你只要定义各个子 Reducer 函数,然后用这个方法,将它们合成一个大的 Reducer
reducers/counter.js
const counterReducer = (state = 0, action) => {

    switch (action.type) {

      case 'INCREMENT':

        return state + 1

      case 'DECREMENT':

        return state - 1

      default:

        return state

    }

  }

  export default counterReducer
routes/index.js
components/Counter.js
import React from 'react'

import PropTypes from 'prop-types'

import { connect } from 'react-redux'

import { increment, decrement } from '../actions/counter'

const Counter = (props) => (

  <div>

    Counter: {props.count}

    <button onClick={props.increment}>+</button>

    <button onClick={props.decrement}>-</button>

  </div>

)

Counter.propTypes = {

  count: PropTypes.number,

  increment: PropTypes.func.isRequired,

  decrement: PropTypes.func.isRequired,

}

const mapStateToProps = state => ({

  count: state.count,

})

const mapDispatchToProps = dispatch => ({

  increment: () => dispatch(increment()),

  decrement: () => dispatch(decrement()),

})

export default connect(mapStateToProps, mapDispatchToProps)(Counter)
actions/counter.js
export const increment = () => ({

  type: 'INCREMENT',

})

export const decrement = () => ({

  type: 'DECREMENT',

})
使用connected-react-router使router与store同步的更多相关文章
- [React] 10 - Tutorial: router
Ref: REACT JS TUTORIAL #6 - React Router & Intro to Single Page Apps with React JS Ref: REACT JS ...
- vue & vue router & dynamic router
vue & vue router & dynamic router https://router.vuejs.org/guide/essentials/dynamic-matching ...
- router.go,router.push,router.replace的区别
除了使用 <router-link> 创建 a 标签来定义导航链接,我们还可以借助 router 的实例方法,通过编写代码来实现.当你点击 <router-link> 时,这个 ...
- [Angular2 Router] Programmatic Router Navigation via the Router API - Relative And Absolute Router Navigation
In this tutorial we are going to learn how to navigate programmatically (or imperatively) by using t ...
- vue router.push(),router.replace(),router.go()和router.replace后需要返回两次的问题
转载:https://www.cnblogs.com/lwwen/p/7245083.html https://blog.csdn.net/qq_15385627/article/details/83 ...
- vue router.push(),router.replace(),router.go()
1.router.push(location)=====window.history.pushState 想要导航到不同的 URL,则使用 router.push 方法.这个方法会向 history ...
- [Angular2 Router] Index router
Index router as default router. import {RouterModule} from "@angular/router"; import {NotF ...
- $router和router区别
this.$router.push({path:'/'})//这个是js编程式的一种动态跳转路由方式,是全局的路由对象. 而写在router声明文件中的router是自己定义实例化的一个对象.可以使用 ...
- React中setState 什么时候是同步的,什么时候是异步的?
class Example extends React.Component { constructor() { super(); this.state = { val: 0 }; } componen ...
随机推荐
- Unable to execute dex:Multuple dex files define 解决方法
困扰我两天的问题终于解决了,在网上查的方法无非有三种 一. Eclipse->Project->去掉Build Automatically->Clear ->Build Pro ...
- upper_bound()和low_bound函数的基本使用和理解(转载,已获博主授权)
版权声明:本文为博主原创文章,未经博主允许不得转载. https://blog.csdn.net/sdz20172133/article/details/80101838 前提:一个非降序列!!!!! ...
- git 提取某次提交所修改的代码
git 提取某次提交所修改的代码 应用场景 把分支A的某个功能抽到分支B中. 首先切换到分支B, 然后进行遴选(git cherry-pick). 如果没有冲突, 会自动合并然后使用原信息提交. 如果 ...
- mysq 事务管理入门
设置隔离级别:
- delphi base64编码
需要uses IdCoderMIME: function TForm1.Base64E(Path: string): string;var filepath: string; filestream: ...
- 吴裕雄--天生自然java开发常用类库学习笔记:定时调度
// 完成具体的任务操作 import java.util.TimerTask ; import java.util.Date ; import java.text.SimpleDateFormat ...
- 吴裕雄--天生自然java开发常用类库学习笔记:IdentityHashMap类
import java.util.IdentityHashMap ; import java.util.HashMap ; import java.util.Set ; import java.uti ...
- POJ 3468 区间更新(求任意区间和)A Simple Problem with Integers
A Simple Problem with Integers Time Limit: 5000MS Memory Limit: 131072K Total Submissions: 163977 ...
- python基础(三)闭包与装饰器
闭包(closure): 内嵌函数通过调用外部嵌套函数作用域内的变量,则这个内嵌函数就是闭包. 闭包必须满足三个条件: 必须有一个内嵌函数 内嵌函数必须引用外部嵌套函数中的变量 外部函数的返回值必须是 ...
- NO11 SSH故障排查思路和netstat命令
本章知识相关考试:1.企业场景面试题:Linux系统如何优化?2.企业场景面试题:SSH服务连不上,如何排查?记住回答技巧: 1 ping 2 telnet 客户端ssh工具:SecureCRT,x ...