JUnit4 笔记
1. JUnit4基础
JUnit4 与 JUnit3不同的是,不需要继承测试类,而是通过JDK5提供的注解去标识测试方法。
常用的注解如下:
@Before:初始化方法 对于每一个测试方法都要执行一次(注意与BeforeClass区别,后者是对于所有方法执行一次)
@After:释放资源 对于每一个测试方法都要执行一次(注意与AfterClass区别,后者是对于所有方法执行一次)
@Test:测试方法,在这里可以测试期望异常和超时时间
--@Test(expected=ArithmeticException.class)检查被测方法是否抛出ArithmeticException异常
--@Test(timeout=100)检查测试方法运行耗费的时间,如果超时,则抛出异常:test timed out after xxx milliseconds

@Ignore:忽略的测试方法
@BeforeClass:针对所有测试,只执行一次,且必须为static void
@AfterClass:针对所有测试,只执行一次,且必须为static void
一个JUnit4的单元测试用例执行顺序为:
@BeforeClass -> @Before -> @Test -> @After -> @AfterClass;
一个Junit4的单元测试方法执行顺序为:
@Before -> @Test -> @After
示例代码:
package com.khlin.test.junit.jmockit.demo;

import org.junit.After;

import org.junit.AfterClass;

import org.junit.Assert;

import org.junit.Before;

import org.junit.BeforeClass;

import org.junit.Test;

public class CameraTest {

    private static Camera camera;

    //针对所有测试,只运行一次。且只能是static方法

    @BeforeClass

    public static void init() {

        camera = new Camera();

        System.out.println("annotation BeforeClass:");

    }

    //每个测试方法调用前都会调用此方法

    @Before

    public void initClass() {

        System.out.println("annotation Before:");

    }

    @Test(timeout=1)

    public void testTakePhoto() {

        Assert.assertEquals(48, camera.takePhoto("abc"));

        System.out.println("test method");

    }

    @After

    public void teardownClass() {

        System.out.println("annotation After:");

    }

    @AfterClass

    public static void teardown() {

        System.out.println("annotation AfterClass:");

    }

}
2.JUnit4高级特性
此外,JUnit4为单元测试提供了默认的测试运行器,它的测试方法都是由它负责执行的。
开发者也可以通过继承org.junit.runner.Runner来定制自己的运行器,然后通过RunWith注解指定对应的测试运行器。
作为非专业测试人员,一般的默认运行器就可以满足需要了。当要使用一些高级特性时,就必须显式指定测试运行器。
高级特性常用的有参数化和套件测试。
1)参数化测试
构建无限组数据,对一个方法进行测试,优点是多次测试时测试方法只需要写一个,缺点是这样只能对一个方法进行测试,除非有必要大量测试,否则意义不是很大。
步骤如下:
1.在测试类上添加注解@RunWith(Parameterized.class),指定测试运行器
2.创建用于存储期望值和参数的变量
3.声明构造方法,为上述变量赋值
4.声明数据供给方法,static,返回值为Collection类型(二维数组),用@Parameters注解
示例代码:
 package com.khlin.test.junit.jmockit.demo;

 import java.util.Arrays;

 import java.util.Collection;

 import org.junit.After;

 import org.junit.Assert;

 import org.junit.Before;

 import org.junit.Test;

 import org.junit.runner.RunWith;

 import org.junit.runners.Parameterized;

 import org.junit.runners.Parameterized.Parameters;

 //0.注解,表示是参数化测试

 @RunWith(Parameterized.class)

 public class CalculatorTest {

     private Calculator calculator;

     //1.创建用于存储期望值和参数

     private int expected;

     private int i;

     private int j;

     //2. 构造方法赋值

     public CalculatorTest(int expected, int i, int j) {

         // TODO Auto-generated constructor stub

         this.expected = expected;

         this.i = i;

         this.j = j;

     }

     //3. 数据供给方法,static,返回值为Collection类型,用@Parameters注解

     @Parameters

     public static Collection initParameter() {

         return Arrays.asList(new Object[][] { { 2, 1, 1 }, { 3, 2, 1 },

                 { 88, 22, 66 }});

     }

     // 每次方法前都会调用

     @Before

     public void init() {

         calculator = new Calculator();

     }

     @Test

     public void testAdd() {

         Assert.assertEquals(expected, calculator.add(i, j));

     }

     @After

     public void teardown() {

         this.calculator = null;

     }

 }
2)套件测试
实际上就是将所有的测试类,集合到一个总的测试类当中,运行时将会依次去调用所有测试类的测试方法,意义。。。。好像也不是很大的样子。
步骤如下:
1.创建一个空的测试类
2.在该测试类上使用注解,@RunWith(Suite.class)指定运行器,@SuiteClasses({xxx.class, xxx.class})指定集合进来的测试类
3.保证这个空类使用public 修饰,而且存在公开的不带有任何参数的构造函数
以上面两段代码为例,套件测试类的代码如下:
 package com.khlin.test.junit.jmockit.demo;

 import org.junit.runner.RunWith;

 import org.junit.runners.Suite;

 import org.junit.runners.Suite.SuiteClasses;

 @RunWith(Suite.class)

 @SuiteClasses({CalculatorTest.class, CameraTest.class})

 public class SuitTest {

 }
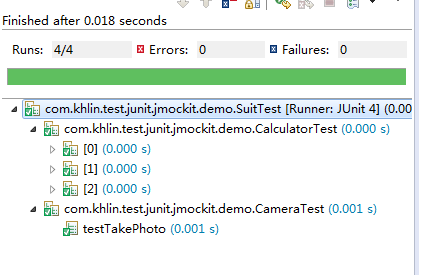
运行结果,依次调用了测试方法:
JUnit4 笔记的更多相关文章
- junit4笔记
这两天在复习hibernate,看的小峰的视频,觉得很不错. 现在把里面的junit4的一些使用方法记下来.方便以后的差用.代码如下. package com.java1234.service; im ...
- Junit4学习笔记
一.初始化标注 在老Junit4提供了setUp()和tearDown(),在每个测试函数调用之前/后都会调用. @Before: Method annotated with @Before exec ...
- Java 学习笔记 Junit4单元测试使用
Junit使用 1.导入Junit包 到官网下载个Junit4.12.jar文件,放在lib目录 或者在类的空白处打@Test,之后按下alt+enter,选择添加Junit4依赖 之后就会弹出一个窗 ...
- JUnit4 学习笔记
一.环境搭建: 1.需要用的包: JUnit4.7:http://files.cnblogs.com/files/ShawnYang/junit4.7.zip hamcrest-1.2:http:// ...
- Junit4学习笔记--方法的执行顺序
package com.lt.Demo.TestDemo; import java.util.Arrays; import java.util.Collection; import org.junit ...
- JUnit4源码学习笔记
先上一个在Spring-test下运行的调用栈 自底向上: JUnitStarter IDEA对JUnit的支持,调用JUnitCore.run(Runner),将注解@RunWith指定的Runne ...
- JUnit4 入门笔记
Test注解的两个可选参数 expected timeout The Test annotation supports two optional parameters. The first, expe ...
- ActiveMQ学习笔记(5)——使用Spring JMS收发消息
摘要 ActiveMQ学习笔记(四)http://my.oschina.net/xiaoxishan/blog/380446 中记录了如何使用原生的方式从ActiveMQ中收发消息.可以看出,每次 ...
- Robotium编写测试用例如何模拟Junit4的BeforeClass和AfterClass方法2 - SingleLaunchActivityTestCase
本文来源于:http://blog.csdn.net/zhubaitian/article/details/39296753 在上一遍笔记博客中本以为只能在Setup和TearDown中做条件判断来实 ...
随机推荐
- App性能优化
http://www.cocoachina.com/ios/20150429/11712.html http://blog.csdn.net/jasonblog/article/details/765 ...
- Google Chrome中的高性能网络(二)
Chrome Predictor的预测功能优化 Chrome会随着使用变得更快. 它这个特性是通过一个单例对象Predictor来实现的.这个对象在浏览器内核进程(Browser Kernel Pro ...
- 从头开始编写一个Orchard网上商店模块(5) - 创建和渲染ProductCatalog的内容类型
原文地址: http://skywalkersoftwaredevelopment.net/blog/writing-an-orchard-webshop-module-from-scratch-pa ...
- SQL Server 堆表与栈表的对比(大表)
环境准备 使用1个表,生成1000万行来进行性能对比(勉强也算比较大了),对比性能差别. 为了简化过程,不提供生成随机数据的过程.该表初始为非聚集索引(堆表),测试过程中会改为聚集索引(栈表). CR ...
- cloudstack安装篇3-SELinux配置、NTP时间同步、配置ClouStack软件库
一.SELinux配置 为了让CloudStack正常工作,我们必须将SELinux设置为permissive.需要在当前系统运行状态下和启动后都能够生效,进行以下配置. 在系统运行状态下的将SELi ...
- ios中的容器类 ViewController
https://developer.apple.com/library/ios/featuredarticles/ViewControllerPGforiPhoneOS/AboutViewContro ...
- 程序员需要掌握哪些IT技能
据Foote Partners的最新调查:如今,你掌握的 IT 技能的多少决定了你薪资的多少,但你不一定非要比开源架构师或Certified Secure Software Life Cycle Pr ...
- ios 好去处
1.王巍的博客(我们都叫它喵神,他很萌哒) 链接:http://onevcat.com/ (难度指数:※※※※※)理由:他的swift的新书讲解的非常好,但不适合入门,进阶的话这是很适合的一本书.其他 ...
- js学习之原型prototype(一)
1.javascript中的每个引用类型(原生的.和自定义的)都有prototype属性,Javascript中对象的prototype属性的解释是:返回对象类型原型的引用. A.prototype ...
- weapon制作武器
weapon制作武器 (weapon.pas/c/cpp) 解题报告 制作武器weapon.pas/c/cpp) 背景 WZland的紧急避难所很快就建好了,WZland的居民们陆续地来到这个紧急避难 ...