Hbase Shell命令详解+API操作
HBase Shell 操作
3.1 基本操作
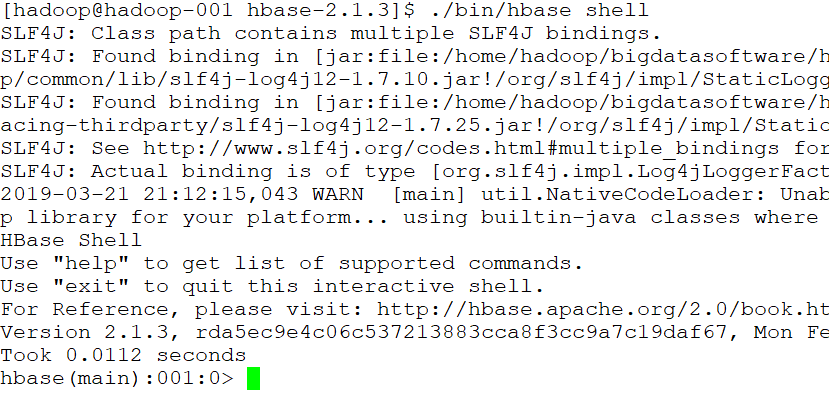
1.进入 HBase 客户端命令行,在hbase-2.1.3目录下
bin/hbase shell
2.查看帮助命令
hbase(main):001:0> help

3.查看当前数据库中有哪些表
hbase(main):002:0> list
3.2 表的操作
1.创建表
hbase(main):002:0> create 'student','info'
注意:删除字符的按键BackSpace的删除顺序是反过来的,即从左往右删。
2.插入数据到表
hbase(main):003:0> put 'student','1001','info:sex','male'
hbase(main):004:0> put 'student','1001','info:age','18'
hbase(main):005:0> put 'student','1002','info:name','Janna'
hbase(main):006:0> put 'student','1002','info:sex','female'
hbase(main):007:0> put 'student','1002','info:age','20'
3.扫描查看表数据
hbase(main):008:0> scan 'student'
hbase(main):009:0> scan 'student',{STARTROW => '1001', STOPROW => '1001'} 前闭后开
hbase(main):010:0> scan 'student',{STARTROW => '1001'}
4.查看表结构
hbase(main):0011:0> describe 'student'
5.更新指定字段的数据
hbase(main):012:0> put 'student','1001','info:name','Nick'
hbase(main):013:0> put 'student','1001','info:age','100'
6.查看【指定行】或【指定列族:列】的数据
hbase(main):014:0> get 'student','1001'
hbase(main):015:0> get 'student','1002','info:name'
7.统计表数据行数
hbase(main):021:0> count 'student'
8.删除数据
删除某 rowkey 的全部数据:
hbase(main):016:0> deleteall 'student','1001'
注意:删除操作默认的时间戳是当前时间。在 HBase 中,增删改数据都是打时间戳!!!
删除某rowkey的某一列数据:
hbase(main):017:0> delete 'student','1002','info:sex'
注意:shell删除操作会将数据的所有版本都删除掉。但是在 HBase 的 API 操作中可以细粒度的控制删除哪一个版本。
9.清空表数据
hbase(main):018:0> truncate 'student'
提示:清空表的操作顺序为先 disable,然后再 truncate。
10.删除表
首先需要先让该表为 disable 状态:
hbase(main):019:0> disable 'student'
然后才能 drop 这个表:
hbase(main):020:0> drop 'student'
提示:如果直接 drop 表,会报错:ERROR: Table student is enabled. Disable it first.
11.变更表信息
设置将info列族中的数据存放3个版本:
hbase(main):022:0> alter 'student',{NAME => 'info', VERSIONS => 3}
hbase(main):022:0> get 'student','1001',{COLUMN => 'info:name', VERSIONS => 3}
Hbase API操作
1.环境准备:
创建maven项目,更改pom.xml文件配置
<dependencies>

        <dependency>

            <groupId>org.apache.hbase</groupId>

            <artifactId>hbase-client</artifactId>

            <version>1.1.3</version>

        </dependency>

        <dependency>

            <groupId>junit</groupId>

            <artifactId>junit</artifactId>

            <version>4.11</version>

            <scope>test</scope>

        </dependency>

        <dependency>

            <groupId>org.apache.logging.log4j</groupId>

            <artifactId>log4j-core</artifactId>

            <version>2.8.2</version>

        </dependency>

        <dependency>

            <groupId>org.apache.hadoop</groupId>

            <artifactId>hadoop-common</artifactId>

            <version>2.7.2</version>

        </dependency>

        <dependency>

            <groupId>org.apache.hadoop</groupId>

            <artifactId>hadoop-hdfs</artifactId>

            <version>${hadoop.version}</version>

        </dependency>

        <dependency>

            <groupId>org.apache.hadoop</groupId>

            <artifactId>hadoop-client</artifactId>

            <version>${hadoop.version}</version>

        </dependency>

    </dependencies>
2.API
一系列API操作集合如下:
package com.gec.demo;

import org.apache.hadoop.conf.Configuration;

import org.apache.hadoop.hbase.*;

import org.apache.hadoop.hbase.client.*;

import org.apache.hadoop.hbase.protobuf.generated.ClientProtos;

import org.apache.hadoop.hbase.util.Bytes;

import sun.java2d.pipe.OutlineTextRenderer;

import java.io.IOException;

import static com.gec.demo.utli.getTable.getHTable;

public class HbaseOperation {

    static Admin admin = null;

    static Connection conn = null;

    static Configuration conf = null;

    static {

        // HBase配置文件

        conf = HBaseConfiguration.create();

        // 设置zookeeper地址

        conf.set("hbase.zookeeper.quorum", "hadoop-001");

        conf.set("hbase.zookeeper.property.clientPort", "2181");

        try {

            // 获取连接对象,执行

            conn = ConnectionFactory.createConnection(conf);

            admin = conn.getAdmin();

        } catch (IOException e) {

            e.printStackTrace();

        }

    }

    private static void close(Connection conn, Admin admin) {

        if (conn != null) {

            try {

                conn.close();

            } catch (IOException e) {

                e.printStackTrace();

            }

        }

        if (admin != null) {

            try {

                admin.close();

            } catch (IOException e) {

                e.printStackTrace();

            }

        }

    }

    public static boolean isTableExistNewAPI(String tableName) throws MasterNotRunningException, ZooKeeperConnectionException, IOException {

        // HBase配置文件

        Configuration conf = HBaseConfiguration.create();

        // 设置zookeeper地址

        conf.set("hbase.zookeeper.quorum", "hadoop-001");

        conf.set("hbase.zookeeper.property.clientPort", "2181");

        // 获取连接对象,执行

        Connection connection = ConnectionFactory.createConnection(conf);

        Admin admin = connection.getAdmin();

        boolean tableExists = admin.tableExists(TableName.valueOf(tableName));

        // 关闭资源

        admin.close();

        return tableExists;

    }

    // 创建表

    public static void createTable(String tableName, String... columnFamily) throws IOException {

        if (isTableExistNewAPI(tableName)) {

            System.out.println("表" + tableName + "已存在!");

            return;

        }

        // 创建表描述器

        HTableDescriptor hTableDescriptor = new HTableDescriptor(TableName.valueOf(tableName));

        // 添加列族

        for (String cf : columnFamily) {

            // 创建列描述器

            HColumnDescriptor HColumnDescriptor = new HColumnDescriptor(cf);

            // 指定列族的版本个数,默认个数是一个

            // HColumnDescriptor.setMaxVersions(5);

            hTableDescriptor.addFamily(HColumnDescriptor);

        }

        // 创建表操作

        admin.createTable(hTableDescriptor);

        System.out.println("表" + tableName + "创建成功!");

    }

    // 删除表

    public static void deleteTable(String tableName) throws IOException {

        if (isTableExistNewAPI(tableName)) {

            // 删除表之前先使表不可用(下线)

            admin.disableTable(TableName.valueOf(tableName));

            // 执行删除操作

            admin.deleteTable(TableName.valueOf(tableName));

            System.out.println("表" + tableName + "删除成功!");

        } else {

            System.out.println("表" + tableName + "不存在!");

        }

    }

    // 向表中插入数据(或修改)

    public static void putRowData(String tableName, String rowKey, String columnFamily, String column, String value) throws IOException {

        // 创建HTable对象

        // 旧API

        // HTable hTable = new HTable(conf, TableName.valueOf(tableName));

        // 获取Table对象

        // 新API

        Table table = conn.getTable(TableName.valueOf(tableName));

        Put put = new Put(Bytes.toBytes(rowKey));

        // 向Put对象中组装数据

        put.addColumn(Bytes.toBytes(columnFamily), Bytes.toBytes(column), Bytes.toBytes(value));

        // 执行向表中插入数据的操作

        table.put(put);

        System.out.println("插入数据成功");

        table.close();

        // 批量插入数据提示:1、同一个RowKey下添加不同的列;2、不同的RowKey,可以将RowKey(Put)放到List集合。

    }

    // 删除多行数据

    public static void deleteData(String tableName, String rowKey, String columnFamily, String column) throws IOException {

        // 获取Table对象

        // 新API

        Table table = conn.getTable(TableName.valueOf(tableName));

        // 创建Delete对象

        Delete delete = new Delete(Bytes.toBytes(rowKey));

        // 向Delete对象中组装数据,如果不组装,则删除的是行键的数据(多行数据)

        // delete.addColumn(Bytes.toBytes(columnFamily), Bytes.toBytes(column)); // 慎用这个方法,删除某个版本(默认最新版本),保留旧的版本

        // delete.addColumns(Bytes.toBytes(columnFamily), Bytes.toBytes(column)); // 公司推荐使用这个方法,删除所有版本

        // 执行删除操作

        table.delete(delete);

        System.out.println("删除多行数据成功");

        table.close();

    }

    // 获取所有数据(全表扫描)

    public static void scanTable(String tableName) throws IOException {

        // 获取Table对象

        // 新API

        Table table = conn.getTable(TableName.valueOf(tableName));

        // 构建扫描器,指定扫描的起始行和结束行,不指定的话,表示扫描全表,还可以指定其他限定

        Scan scan = new Scan();

        // scan.setStartRow(startRow);

        // scan.setStopRow(stopRow);

        // 执行扫描全表操作

        ResultScanner resultScanner = table.getScanner(scan);

        for (Result result : resultScanner) {

            Cell[] cells = result.rawCells();

            for (Cell cell : cells) {

                System.out.println("行键:" + Bytes.toString(result.getRow())

                        + " 列族:" + Bytes.toString(CellUtil.cloneFamily(cell))

                        + " 列:" + Bytes.toString(CellUtil.cloneQualifier(cell))

                        + " 值:" + Bytes.toString(CellUtil.cloneValue(cell)));

            }

        }

        table.close();

    }

    // 获取某一行数据

    public static void getRowData(String tableName, String rowKey) throws IOException {

        // 获取Table对象

        // 新API

        Table table = conn.getTable(TableName.valueOf(tableName));

        // 新建一个Get对象

        Get get = new Get(Bytes.toBytes(rowKey));

        // 显示所有版本

        // get.setMaxVersions();

        // 显示指定版本

        // get.setMaxVersions(maxVersions);

        // 显示指定时间戳的版本

        // get.setTimeStamp();

        // 执行获取某一行数据的操作

        Result result = table.get(get);

        Cell[] cells = result.rawCells();

        for (Cell cell : cells) {

            System.out.println("行键:" + Bytes.toString(result.getRow())

                    + " 列族:" + Bytes.toString(CellUtil.cloneFamily(cell))

                    + " 列:" + Bytes.toString(CellUtil.cloneQualifier(cell))

                    + " 值:" + Bytes.toString(CellUtil.cloneValue(cell))

                    + " 时间戳:" + cell.getTimestamp());

        }

        table.close();

    }

    // 获取某一行指定“列族:列”的数据

    public static void getRowQualifierData(String tableName, String rowKey, String columnFamily, String column) throws IOException {

        // 获取Table对象

        // 新API

        Table table = conn.getTable(TableName.valueOf(tableName));

        // 新建一个Get对象

        Get get = new Get(Bytes.toBytes(rowKey));

        // 指定要获取某一行的“列族:列”

        get.addColumn(Bytes.toBytes(columnFamily), Bytes.toBytes(column));

        // 执行获取某一行指定“列族:列”数据的操作

        Result result = table.get(get);

        Cell[] cells = result.rawCells();

        for (Cell cell : cells) {

            System.out.println("行键:" + Bytes.toString(result.getRow())

                    + " 列族:" + Bytes.toString(CellUtil.cloneFamily(cell))

                    + " 列:" + Bytes.toString(CellUtil.cloneQualifier(cell))

                    + " 值:" + Bytes.toString(CellUtil.cloneValue(cell))

                    + " 时间戳:" + cell.getTimestamp());

        }

        table.close();

    }

}
Hbase Shell命令详解+API操作的更多相关文章
- 【Devops】【docker】【CI/CD】关于jenkins构建成功后一步,执行的shell命令详解+jenkins容器运行宿主机shell命令的实现方法
1.展示这段shell命令 +详解 #================================================================================= ...
- Linux主要shell命令详解(上)
[摘自网络] kill -9 -1即实现用kill命令退出系统 Linux主要shell命令详解 [上篇] shell是用户和Linux操作系统之间的接口.Linux中有多种shell,其中缺省使用的 ...
- adb shell 命令详解,android
http://www.miui.com/article-275-1.html http://noobjava.iteye.com/blog/1914348 adb shell 命令详解,android ...
- adb shell 命令详解,android, adb logcat
http://www.miui.com/article-275-1.html http://noobjava.iteye.com/blog/1914348 adb shell 命令详解,android ...
- linux iostat命令详解 磁盘操作监控工具
Linux系统中的 iostat是I/O statistics(输入/输出统计)的缩写,iostat工具将对系统的磁盘操作活动进行监视. 它的特点是汇报磁盘活动统计情况,同时也会汇报出CPU使用情况. ...
- hadoop Shell命令详解
调用文件系统(FS)Shell命令应使用bin/hadoop fs <args>的形式.所有的的FS shell命令使用URI路径作为参数.URI路径详解点击这里. 1.cat说明:将路径 ...
- Hive Shell 命令详解
Hive服务介绍 Hive默认提供的cli(shell)服务,如果需要启动其他服务,那么需要service参数来启动其他服务,比如thrift服务.metastore服务等.可以通过命令hive -- ...
- adb shell 命令详解(转)
adb介绍 SDK的Tools文件夹下包含着Android模拟器操作的重要命令adb,adb的全称为(Android Debug Bridge就是调试桥的作用.通过adb我们可以在Eclipse中方面 ...
- adb shell 命令详解
adb介绍 SDK的Tools文件夹下包含着Android模拟器操作的重要命令adb,adb的全称为(Android Debug Bridge就是调试桥的作用.通过adb我们可以在Eclipse中方面 ...
随机推荐
- 基于centos的freeradius高可用lvs(UDP)
最近在做freeradius的高可用配置,使用lvs的vip做轮询: freeradius的配置见前面的文章: 下面是lvs的keepalived的配置: global_defs { router_i ...
- Eclipse的配置
1 Eclipse的工作空间和新建工程 1.1: 工作空间 其实就是我们写的源代码所在的目录 1.2: 创建工程(项目) 右键/Package Explore 空白区/new /Java Projec ...
- c++下基于windows socket的多线程服务器(基于TCP协议)
之前用c++实现过基于windows socket的单线程TCP服务器(http://www.cnblogs.com/jzincnblogs/p/5170230.html),今天实现了一个多线程的版本 ...
- Spring架构-01-微服务架构
一.单体架构 所有功能,所有模块都耦合在一个系统里面,如传统的一MVC. 需要重新编译测试,重新部署. 伸缩性差 可靠性差 系统迭代困难 跨开发语言程序低 团队协作麻烦 二.微服务架构 常见架构风格: ...
- [转]PLA算法总结及其证明
PLA算法总结及其证明 http://m.blog.csdn.net/article/details?id=45232891 分类: 机器学习 PLA(Perception Learning Algo ...
- 获取图像的ROI模板区域
前言 项目需要得到视频帧图像的某一区域作为模板,首先需要确定ROI区域的坐标范围,很简单,直接上代码. % /********************************************* ...
- xdoj-1319 求树上任意一点的最大距离----利用树的直径
1 #include <bits/stdc++.h> using namespace std; ; vector < vector <int> > g(N); in ...
- Linux定时任务计划
Linux定时任务计划 在使用Linux系统时,我们有时会需要让系统在某个时间去执行特定的任务,这时就需要去了解Linux提供的定时任务功能 种类 Linux的定时任务分为两种:单一型和循环型 单一型 ...
- C++学习(一)之Visual Studio安装以及首次使用
一.安装Visual Studio 首先下载Visual Studio 链接: http://pan.baidu.com/s/1pLhJt0Z 密码:uqyc 将.ios文件解压得到以下文件: 点击v ...
- [洛谷P1417 烹调方案]贪心+dp
http://acm.zju.edu.cn/onlinejudge/showProblem.do?problemCode=3211Dream City Time Limit: 1 Second ...