disruptor笔记之一:快速入门
欢迎访问我的GitHub
https://github.com/zq2599/blog_demos
内容:所有原创文章分类汇总及配套源码,涉及Java、Docker、Kubernetes、DevOPS等;
关于disruptor
disruptor是LMAX公司开发的一个高性能队列,其作用和阻塞队列(BlockingQueue)类似,都是在相同进程内、不同线程间传递数据(例如消息、事件),另外disruptor也有自己的一些特色:
- 以广播的形式发布事件,并且消费者之间存在依赖关系;
- 为事件提前分配内存;
- 无锁算法;
关于Ring Buffer(环形队列)
- 提到disruptor一般都会提到Ring Buffer(环形队列)是它的特点,实际上从3.0版本之后,环形队列只是用来存储和更新事件数据,在其他更复杂的场景下,用户可以通过自定义操作将其替换掉;

- 简单的说,disruptor官方认为Ring Buffe是核心概念(Core Concepts),但不是特色( key features)
本篇概览
作为《disruptor笔记》系列的开篇,本篇有两个任务:
创建名为disruptor-tutorials的gradle工程,作为整个系列的父工程,该系列所有代码都是这个父工程下的module;
在disruptor-tutorials下面新建名为basic-event的module,这是个springboot应用,作用是使用disruptor的基本功能:一个线程发布事件,另一个线程消费事件,也就是对环形队列最基本的操作,如下图:

用disruptor实现消息的发布和消费的套路
- 咱们提前小结用disruptor实现消息的发布和消费的套路,后面的开发按部就班即可,括号中是本篇对应的java类:
- 事件的定义:一个普通的bean(StringEvent.java)
- 事件工厂:定义如何生产事件的内存实例,这个实例刚从内存中创建,还没有任何业务数据(StringEventFactory.java)
- 事件处理:封装了消费单个事件的具体逻辑(StringEventHandler.java)
- 事件生产者:定义了如何将业务数据设置到还没有业务数据的事件中,就是工厂创建出来的那种(StringEventProducer.java)
- 初始化逻辑:创建和启动disruptor对象,将事件工厂传给disruptor,创建事件生产者和事件处理对象,并分别与disruptor对象关联;
- 业务逻辑:也就是调用事件生产者的onData方法发布事件,本文的做法是在单元测试类中发布事件,然后检查消费的事件数和生产的事件数是否一致;
7
环境信息
《Disruptor笔记》系列涉及的环境信息如下:
- 操作系统:64位win10
- JDK:1.8.0_281
- IDE:IntelliJ IDEA 2021.1.1 (Ultimate Edition)
- gradle:6.7.1
- springboot:2.3.8.RELEASE
- disruptor:3.4.4
源码下载
- 本篇实战中的完整源码可在GitHub下载到,地址和链接信息如下表所示(https://github.com/zq2599/blog_demos):
| 名称 | 链接 | 备注 |
|---|---|---|
| 项目主页 | https://github.com/zq2599/blog_demos | 该项目在GitHub上的主页 |
| git仓库地址(https) | https://github.com/zq2599/blog_demos.git | 该项目源码的仓库地址,https协议 |
| git仓库地址(ssh) | git@github.com:zq2599/blog_demos.git | 该项目源码的仓库地址,ssh协议 |
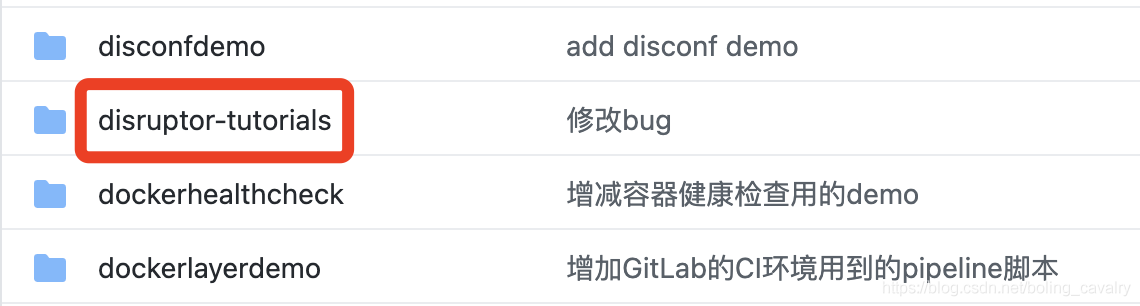
- 这个git项目中有多个文件夹,本次实战的源码在disruptor-tutorials文件夹下,如下图红框所示:
创建父工程
- 因为是系列文章,所以这里做个父工程来管理所有依赖库和插件,新建名为disruptor-tutorials的gradle工程,build.gradle如下:
import java.time.OffsetDateTime

import java.time.format.DateTimeFormatter

buildscript {

    repositories {

        maven {

            url 'https://plugins.gradle.org/m2/'

        }

        // 如果有私服就在此配置,如果没有请注释掉

        maven {

            url 'http://192.168.50.43:8081/repository/aliyun-proxy/'

        }

        // 阿里云

        maven {

            url 'http://maven.aliyun.com/nexus/content/groups/public/'

        }

        mavenCentral()

    }

    ext {

        // 项目版本

        projectVersion = '1.0-SNAPSHOT'

        // sprignboot版本 https://github.com/spring-projects/spring-boot/releases

        springBootVersion = '2.3.8.RELEASE'

    }

}

plugins {

    id 'java'

    id 'java-library'

    id 'org.springframework.boot' version "${springBootVersion}" apply false

    id 'io.spring.dependency-management' version '1.0.11.RELEASE'

    id 'net.nemerosa.versioning' version '2.14.0'

    id 'io.franzbecker.gradle-lombok' version '4.0.0' apply false

    id 'com.github.ben-manes.versions' version '0.36.0' // gradle dependencyUpdates

}

// If you attempt to build without the `--scan` parameter in `gradle 6.0+` it will cause a build error that it can't find

// a buildScan property to change. This avoids that problem.

if (hasProperty('buildScan')) {

    buildScan {

        termsOfServiceUrl = 'https://gradle.com/terms-of-service'

        termsOfServiceAgree = 'yes'

    }

}

wrapper {

    gradleVersion = '6.7.1'

}

def buildTimeAndDate = OffsetDateTime.now()

ext {

    // 构建时取得当前日期和时间

    buildDate = DateTimeFormatter.ISO_LOCAL_DATE.format(buildTimeAndDate)

    buildTime = DateTimeFormatter.ofPattern('HH:mm:ss.SSSZ').format(buildTimeAndDate)

    buildRevision = versioning.info.commit

}

allprojects {

    apply plugin: 'java'

    apply plugin: 'idea'

    apply plugin: 'eclipse'

    apply plugin: 'io.spring.dependency-management'

    apply plugin: 'io.franzbecker.gradle-lombok'

    compileJava {

        sourceCompatibility = JavaVersion.VERSION_1_8

        targetCompatibility = JavaVersion.VERSION_1_8

        options.encoding = 'UTF-8'

    }

    compileJava.options*.compilerArgs = [

            '-Xlint:all', '-Xlint:-processing'

    ]

    // Copy LICENSE

    tasks.withType(Jar) {

        from(project.rootDir) {

            include 'LICENSE'

            into 'META-INF'

        }

    }

    // 写入到MANIFEST.MF中的内容

    jar {

        manifest {

            attributes(

                    'Created-By': "${System.properties['java.version']} (${System.properties['java.vendor']} ${System.properties['java.vm.version']})".toString(),

                    'Built-By': 'travis',

                    'Build-Date': buildDate,

                    'Build-Time': buildTime,

                    'Built-OS': "${System.properties['os.name']}",

                    'Build-Revision': buildRevision,

                    'Specification-Title': project.name,

                    'Specification-Version': projectVersion,

                    'Specification-Vendor': 'Will Zhao',

                    'Implementation-Title': project.name,

                    'Implementation-Version': projectVersion,

                    'Implementation-Vendor': 'Will Zhao'

            )

        }

    }

    repositories {

        mavenCentral()

        // 如果有私服就在此配置,如果没有请注释掉

        maven {

            url 'http://192.168.50.43:8081/repository/aliyun-proxy/'

        }

        // 阿里云

        maven {

            url 'http://maven.aliyun.com/nexus/content/groups/public/'

        }

        jcenter()

    }

    buildscript {

        repositories {

            maven { url 'https://plugins.gradle.org/m2/' }

        }

    }

}

allprojects { project ->

    buildscript {

        dependencyManagement {

            imports {

                mavenBom "org.springframework.boot:spring-boot-starter-parent:${springBootVersion}"

                mavenBom "org.junit:junit-bom:5.7.0"

            }

            dependencies {

                dependency 'org.projectlombok:lombok:1.16.16'

                dependency 'org.apache.commons:commons-lang3:3.11'

                dependency 'commons-collections:commons-collections:3.2.2'

                dependency 'com.lmax:disruptor:3.4.4'

            }

        }

        ext {

            springFrameworkVersion = dependencyManagement.importedProperties['spring-framework.version']

        }

    }

}

group = 'bolingcavalry'

version = projectVersion
- 接下来编写消息发布和消费的代码;
新建module
- 前面新建了整个《Disruptor笔记》系列的父工程,现在新建名为basic-event的module,其build.gradle内容如下:
plugins {

    id 'org.springframework.boot'

}

dependencies {

    implementation 'org.projectlombok:lombok'

    implementation 'org.springframework.boot:spring-boot-starter'

    implementation 'org.springframework.boot:spring-boot-starter-web'

    implementation 'com.lmax:disruptor'

    testImplementation('org.springframework.boot:spring-boot-starter-test')

}
- 这个module是个springboot应用,启动类如下:
package com.bolingcavalry;

import org.springframework.boot.SpringApplication;

import org.springframework.boot.autoconfigure.SpringBootApplication;

@SpringBootApplication

public class BasicEventApplication {

	public static void main(String[] args) {

		SpringApplication.run(BasicEventApplication.class, args);

	}

}
- 接下来按照前面总结的套路行事;
事件的定义
- 事件定义类StringEvent.java,可见就是个普普通通的java bean:
package com.bolingcavalry.service;

import lombok.Data;

import lombok.NoArgsConstructor;

import lombok.ToString;

@Data

@ToString

@NoArgsConstructor

public class StringEvent {

    private String value;

}
事件工厂
- 事件工厂的作用,是让disruptor知道如何在内存中创建一个事件实例,不过,该实例和业务还没有任何关系,本篇的事件工厂如下,可见就是创建StringEvent实例,并没有特别的操作:
package com.bolingcavalry.service;

import com.lmax.disruptor.EventFactory;

public class StringEventFactory implements EventFactory<StringEvent> {

    @Override

    public StringEvent newInstance() {

        return new StringEvent();

    }

}
事件处理
- 时间处理类的作用是定义一个事件如何被消费,里面是具体的业务代码,每个事件都会执行此类的onEvent方法;
- 本篇的事件处理类做的事情是打印事件内容,再用sleep消耗100毫秒,然后再调用外部传入的Consumer实现类的accept方法:
package com.bolingcavalry.service;

import com.lmax.disruptor.EventHandler;

import lombok.Setter;

import lombok.extern.slf4j.Slf4j;

import java.util.function.Consumer;

@Slf4j

public class StringEventHandler implements EventHandler<StringEvent> {

    public StringEventHandler(Consumer<?> consumer) {

        this.consumer = consumer;

    }

    // 外部可以传入Consumer实现类,每处理一条消息的时候,consumer的accept方法就会被执行一次

    private Consumer<?> consumer;

    @Override

    public void onEvent(StringEvent event, long sequence, boolean endOfBatch) throws Exception {

        log.info("sequence [{}], endOfBatch [{}], event : {}", sequence, endOfBatch, event);

        // 这里延时100ms,模拟消费事件的逻辑的耗时

        Thread.sleep(100);

        // 如果外部传入了consumer,就要执行一次accept方法

        if (null!=consumer) {

            consumer.accept(null);

        }

    }

}
事件生产者
- 每当业务要生产一个事件时,就会调用事件生产者的onData方法,将业务数据作为入参传进来,此时生产者会从环形队列中取出一个事件实例(就是前面的事件工厂创建的),把业务数据传给这个实例,再把实例正式发布出去:
package com.bolingcavalry.service;

import com.lmax.disruptor.RingBuffer;

public class StringEventProducer {

    // 存储数据的环形队列

    private final RingBuffer<StringEvent> ringBuffer;

    public StringEventProducer(RingBuffer<StringEvent> ringBuffer) {

        this.ringBuffer = ringBuffer;

    }

    public void onData(String content) {

        // ringBuffer是个队列,其next方法返回的是下最后一条记录之后的位置,这是个可用位置

        long sequence = ringBuffer.next();

        try {

            // sequence位置取出的事件是空事件

            StringEvent stringEvent = ringBuffer.get(sequence);

            // 空事件添加业务信息

            stringEvent.setValue(content);

        } finally {

            // 发布

            ringBuffer.publish(sequence);

        }

    }

}
初始化逻辑
- 开发一个spring bean,这里面有disruptor的初始化逻辑,有几处需要关注的地方稍后会说到:
package com.bolingcavalry.service.impl;

import com.bolingcavalry.service.*;

import com.lmax.disruptor.RingBuffer;

import com.lmax.disruptor.dsl.Disruptor;

import com.lmax.disruptor.util.DaemonThreadFactory;

import lombok.extern.slf4j.Slf4j;

import org.springframework.scheduling.concurrent.CustomizableThreadFactory;

import org.springframework.stereotype.Service;

import javax.annotation.PostConstruct;

import java.time.LocalDateTime;

import java.util.concurrent.Executor;

import java.util.concurrent.Executors;

import java.util.concurrent.ThreadFactory;

import java.util.concurrent.atomic.AtomicInteger;

import java.util.concurrent.atomic.AtomicLong;

import java.util.function.Consumer;

@Service

@Slf4j

public class BasicEventServiceImpl implements BasicEventService {

    private static final int BUFFER_SIZE = 16;

    private Disruptor<StringEvent> disruptor;

    private StringEventProducer producer;

    /**

     * 统计消息总数

     */

    private final AtomicLong eventCount = new AtomicLong();

    @PostConstruct

    private void init() {

        Executor executor = Executors.newCachedThreadPool();

        // 实例化

        disruptor = new Disruptor<>(new StringEventFactory(),

                BUFFER_SIZE,

                new CustomizableThreadFactory("event-handler-"));

        // 准备一个匿名类,传给disruptor的事件处理类,

        // 这样每次处理事件时,都会将已经处理事件的总数打印出来

        Consumer<?> eventCountPrinter = new Consumer<Object>() {

            @Override

            public void accept(Object o) {

                long count = eventCount.incrementAndGet();

                log.info("receive [{}] event", count);

            }

        };

        // 指定处理类

        disruptor.handleEventsWith(new StringEventHandler(eventCountPrinter));

        // 启动

        disruptor.start();

        // 生产者

        producer = new StringEventProducer(disruptor.getRingBuffer());

    }

    @Override

    public void publish(String value) {

        producer.onData(value);

    }

    @Override

    public long eventCount() {

        return eventCount.get();

    }

}
- 上述代码有以下几点需要注意:
- publish方法给外部调用,用于发布一个事件;
- eventCountPrinter是Consumer的实现类,被传给了StringEventHandler,这样StringEventHandler消费消息的时候,eventCount就会增加,也就记下了已经处理的事件总数;
- Disruptor的构造方法中,BUFFER_SIZE表示环形队列的大小,这里故意设置为16,这样可以轻易的将环形队列填满,此时再发布事件会不会导致环形队列上的数据被覆盖呢?稍后咱们可以测一下;
- 记得调用start方法;
web接口
再写一个web接口类,这样就可以通过浏览器验证前面的代码了:
package com.bolingcavalry.controller;

import com.bolingcavalry.service.BasicEventService;

import org.springframework.beans.factory.annotation.Autowired;

import org.springframework.boot.SpringApplication;

import org.springframework.boot.autoconfigure.SpringBootApplication;

import org.springframework.http.HttpStatus;

import org.springframework.web.bind.annotation.*;

import java.time.LocalDateTime;

@RestController

public class BasicEventController {

    @Autowired

    BasicEventService basicEventService;

    @RequestMapping(value = "/{value}", method = RequestMethod.GET)

    public String publish(@PathVariable("value") String value) {

        basicEventService.publish(value);

        return "success, " + LocalDateTime.now().toString();

    }

}
业务逻辑
现在生产事件的接口已准备好,消费事件的代码也完成了,接下来就是如何调用生产事件的接口来验证生产和消费是否正常,这里我选择使用单元测试来验证;
在disruptor-tutorials\basic-event\src\test\java目录下新增测试类BasicEventServiceImplTest.java,测试逻辑是发布了一百个事件,再验证消费事件的数量是否也等于一百:
package com.bolingcavalry.service.impl;

import com.bolingcavalry.service.BasicEventService;

import lombok.extern.slf4j.Slf4j;

import org.junit.Test;

import org.junit.runner.RunWith;

import org.springframework.beans.factory.annotation.Autowired;

import org.springframework.boot.test.context.SpringBootTest;

import org.springframework.test.context.junit4.SpringRunner;

import static org.junit.Assert.assertEquals;

@RunWith(SpringRunner.class)

@SpringBootTest

@Slf4j

public class BasicEventServiceImplTest {

    @Autowired

    BasicEventService basicEventService;

    @Test

    public void publish() throws InterruptedException {

        log.info("start publich test");

        int count = 100;

        for(int i=0;i<count;i++) {

            log.info("publich {}", i);

            basicEventService.publish(String.valueOf(i));

        }

        // 异步消费,因此需要延时等待

        Thread.sleep(1000);

        // 消费的事件总数应该等于发布的事件数

        assertEquals(count, basicEventService.eventCount());

    }

}
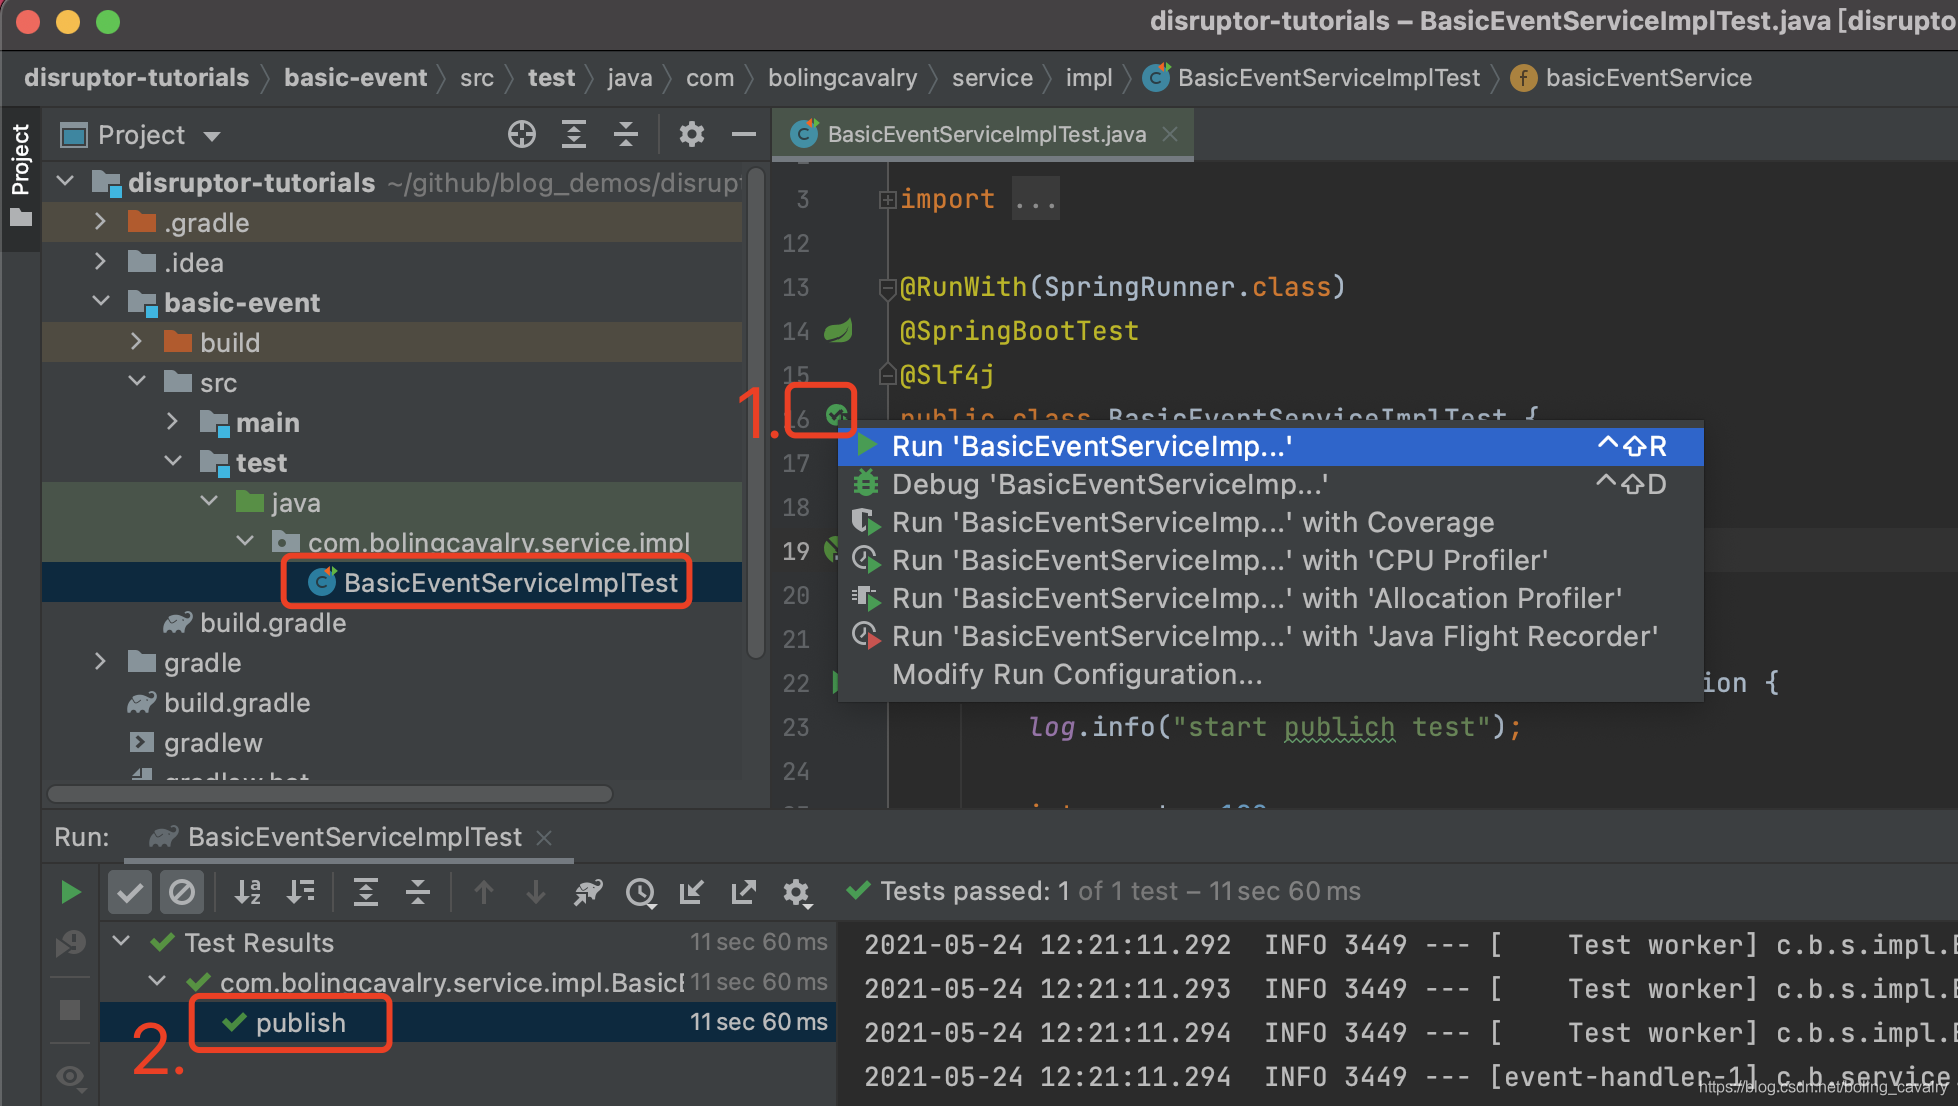
- 编码完成后,点击下图红框1中的按钮运行单元测试,结果如红框2所示,测试通过:
- 聪明的您可能会产生疑惑:环形数组大小只有16,消费一个事件耗时很长(100毫秒),那么环形数组中的事件还未消费完时如果还在发布事件会发生什么呢?新事件会覆盖未消费的事件吗?显然不会,因为测试结果是通过的,那么disruptor是怎么做到的呢?其实从日志上可以看出一些端倪,下图是测试过程中日志的末尾部分,红框显示,一直到测试快结束,发布事件的线程还在执行发布操作,这就意味着:如果消费速度过慢导致环形队列里放不进新的事件时,发布事件的线程就会阻塞,知道环形队列中可以放入事件为止:

- 至此,disrupor的入门操作就完成了,咱们已经体验过基本的发布和消费功能,接下来的文章咱们会继续深入学习其他更强大的功能;
你不孤单,欣宸原创一路相伴
欢迎关注公众号:程序员欣宸
微信搜索「程序员欣宸」,我是欣宸,期待与您一同畅游Java世界...
https://github.com/zq2599/blog_demos
disruptor笔记之一:快速入门的更多相关文章
- C++ Primer学习笔记_1_快速入门
C++快速入门 一 编写简单程序 // main是操作系统唯一显示调用的函数int main() {/**return返回的值是一个状态指示器 0:成功 非0:返回错误给OS*以echo $?命令可以 ...
- springboot笔记02——快速入门quickstart
前言 学习一个新的框架,往往会用一个quickstart快速入门,这次就写一下springboot的quickstart程序. 开发环境 JDK 1.8 Springboot 2.1.6 Maven ...
- SQLite:自学笔记(1)——快速入门
SQLite的安装和入门 了解 啥是SQLite? SQLite是一种轻巧迷你的关系型数据库管理系统.它的特点如下: 不需要一个单独的服务器进程或操作的系统(无服务器的). SQLite 不需要配置, ...
- (笔记)快速入门PADS logic 到 layout
以前从未接触过画板,先是硬着头皮边学边操作<Layout2007中文教程之PADS_Logic>,刚好在中秋节前把这个教程从头到尾通学了一遍,随后感觉这个教程有了方方面面但没有工程的系统性 ...
- R语言笔记:快速入门
1.简单会话 > x<-c(1,2,4) > x [1] 1 2 4 R语言的标准赋值运算符是<-.也可以用=,不过不建议用它,有些情况会失灵.其中c表示连接(concaten ...
- Kafka学习笔记2: 快速入门
在开始Kafka环境搭建之前,首先要安装Linux系统,并在Linux系统上安装JDK1.8版本,关于linux虚拟机的安装和linux系统下jdk的安装可以参考我的博文: http://blog.c ...
- React官方文档笔记之快速入门
快速开始 JSFiddle 我们建议在 React 中使用 CommonJS 模块系统,比如 browserify 或 webpack. 要用 webpack 安装 React DOM 和构建你的包: ...
- 学习笔记-CCS-MSP430F5529[快速入门篇二]
由于2021的全国电赛延期了,从今天开始打算好好整理一下使用CCS编程的经验,本篇笔记会好好整理一下我备赛期间用CCS写的程序,包括外部中断,定时器部分的定时中断,定时器输入捕获,PWM波输出,UAR ...
- webpack 学习笔记 02 快速入门
webpack 的目标 将依赖项分块,按需加载. 减少web app的初始加载时间. 使每一个静态集合都能够作为组件使用. 有能力集成第三方库,作为组件使用. 高度可配置化. 适用于大型项目. INS ...
- Vue 学习笔记之快速入门篇
Vue (读音 /vjuː/,类似于 view) 是一套用于构建用户界面的渐进式框架.与其它大型框架不同的是,Vue 被设计为可以自底向上逐层应用.Vue 的核心库只关注视图层,不仅易于上手,还便于与 ...
随机推荐
- Redis如何实现分布式锁
今天我们来聊一聊分布式锁的那些事. 相信大家对锁已经不陌生了,我们在多线程环境中,如果需要对同一个资源进行操作,为了避免数据不一致,我们需要在操作共享资源之前进行加锁操作.在计算机科学中,锁(lock ...
- 使用JDBC(Dbutils工具包)来从数据库拿取map类型数据来动态生成insert语句
前言: 大家在使用JDBC来连接数据库时,我们通过Dbutils工具来拿取数据库中的数据,可以使用new BeanListHandler<>(所映射的实体类.class),这样得到的数据, ...
- 尝试通过 JDBC 将 UTF-8 插入 MySQL 时出现“乱码”
这是我的连接设置方式: Connection conn = DriverManager.getConnection(url + dbName + "?useUnicode=true& ...
- GC垃圾收集器
垃圾收集器是垃圾收集算法的具体实现,是执行垃圾收集算法的,是守护线程. HotSport虚拟机采用分代收集(JVM规范并未对堆区进行划分),将堆分为年轻代和老年代,垃圾收集器也是这样组合使用的,不过已 ...
- 数据结构解析-HashTable
概要 HashTable也是散列表的一种实现,我们在上一篇解析了HashMap,在这里我们与HashMap做个对比,让你能清晰的了解两者的区别: 散列表 实现方式 数据安全 数据安全实现方式 key\ ...
- TCP三次握手中SYN,ACK,Seq含义
TCP(Transmission Control Protocol)传输控制协议 TCP是主机对主机层的传输控制协议,提供可靠的连接服务,采用三次握手确认建立一个连接: 位码即tcp标志位,有6种标示 ...
- C# volatile 的使用
class Program { private static volatile bool bChanged; static void Main(string[] args) { Thread t1 = ...
- nginx 实现反向代理、负载均衡、高可用
转自:https://blog.csdn.net/zy1471162851/article/details/91795712 tip: nginx是一款高性能的http 服务器/反向代理服务器及电 ...
- mzy git学习,撤销修改(二)
git checkout – file: 撤销我们对工作区的修改(没有提交到暂存区) 当我们在工作区修改了之后,并没有提交到暂存区,如果要撤销对 某个文件的修改的话,就使用 git checkout ...
- 有关Java动态数组的一个小问题
前言 问题描述 今天遇到一个关于集合的问题,觉得比较有趣,记录一下,这个问题是:定义一个用户类,至少包含姓名,年龄,生日,qq邮箱,初始化10个用户,利用String操作,提取qq到List集合中,姓 ...