配置Apache虚拟主机
[title]: # 配置Apache虚拟主机
实验环境
- 一台最小化安装的CentOS 7.3虚拟机
配置基础环境
1. 安装apache
yum install -y httpd
2. 建立虚拟主机的根目录
mkdir /var/wwwroot

mkdir /var/wwwroot/site1

mkdir /var/wwwroot/site2

echo -e "site1" >> /var/wwwroot/site1/index.html

echo -e "site2" >> /var/wwwroot/site2/index.html

3. 关闭CentOS的防火墙
setenforce 0

systemctl stop firewalld

systemctl disable firewalld

配置基于端口的虚拟主机
1. 编辑apache配置文件
vim /etc/httpd/conf.d/vhost.conf
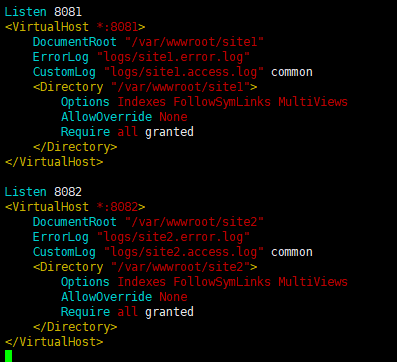
2. 添加以下内容
Listen 8081

<VirtualHost *:8081>

    DocumentRoot "/var/wwwroot/site1"

    ErrorLog "logs/site1.error.log"

    CustomLog "logs/site1.access.log" common

    <Directory "/var/wwwroot/site1">

        Options Indexes FollowSymLinks MultiViews

        AllowOverride None

        Require all granted

    </Directory>

</VirtualHost>

Listen 8082

<VirtualHost *:8082>

    DocumentRoot "/var/wwwroot/site2"

    ErrorLog "logs/site2.error.log"

    CustomLog "logs/site2.access.log" common

    <Directory "/var/wwwroot/site2">

        Options Indexes FollowSymLinks MultiViews

        AllowOverride None

        Require all granted

    </Directory>

</VirtualHost>
3. 启动apache服务
systemctl start httpd
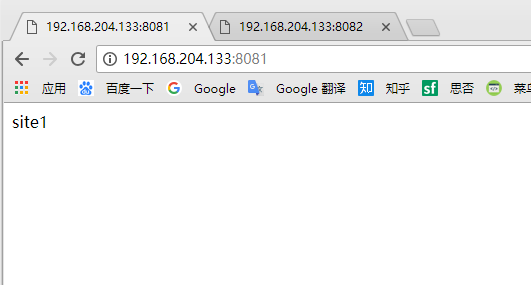
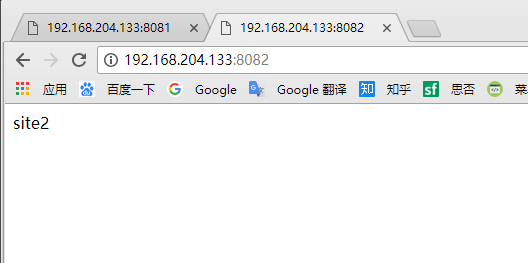
4. 在宿主机访问两个站点
http://192.168.204.133:8081
http://192.168.204.133:8082
配置基于域名的虚拟主机
1. 编辑apache配置文件
vim /etc/httpd/conf.d/vhost.conf
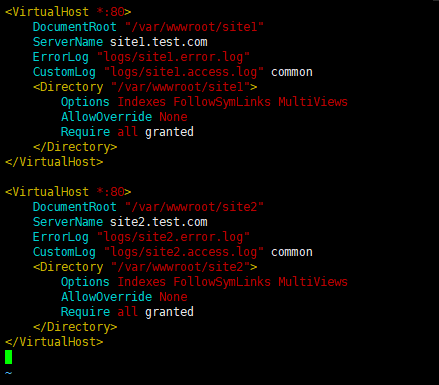
2. 修改为以下内容
<VirtualHost *:80>

    DocumentRoot "/var/wwwroot/site1"

    ServerName site1.test.com

    ErrorLog "logs/site1.error.log"

    CustomLog "logs/site1.access.log" common

    <Directory "/var/wwwroot/site1">

        Options Indexes FollowSymLinks MultiViews

        AllowOverride None

        Require all granted

    </Directory>

</VirtualHost>

<VirtualHost *:80>

    DocumentRoot "/var/wwwroot/site2"

    ServerName site2.test.com

    ErrorLog "logs/site2.error.log"

    CustomLog "logs/site2.access.log" common

    <Directory "/var/wwwroot/site2">

        Options Indexes FollowSymLinks MultiViews

        AllowOverride None

        Require all granted

    </Directory>

</VirtualHost>
3. 重启apache服务
systemctl restart httpd
4. 在Windows上修改hosts文件
编辑C:\Windows\System32\drivers\etc\hosts文件,
添加以下内容(根据实际情况自己修改)
192.168.204.135   site1.test.com

192.168.204.135   site2.test.com
5. 在宿主机访问两个站点
http://site1.test.com/
http://site2.test.com/


配置基于IP的虚拟主机
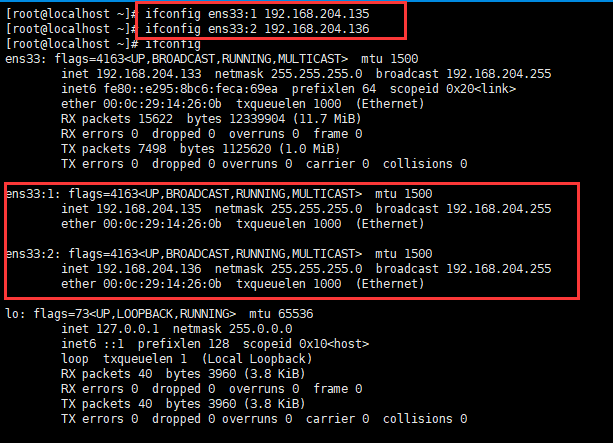
1. 在虚拟机上增加两个IP地址
ifconfig ens33:1 192.168.204.135

ifconfig ens33:2 192.168.204.136
2. 重新编辑apache配置文件
vim /etc/httpd/conf.d/vhost.conf
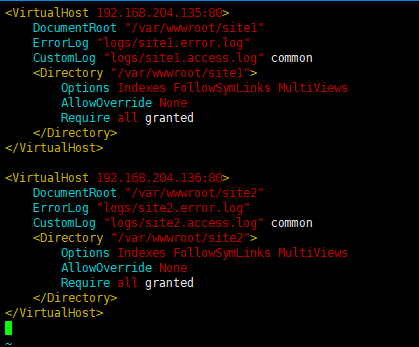
3. 修改配置文件为以下内容
<VirtualHost 192.168.204.135:80>

    DocumentRoot "/var/wwwroot/site1"

    ErrorLog "logs/site1.error.log"

    CustomLog "logs/site1.access.log" common

    <Directory "/var/wwwroot/site1">

        Options Indexes FollowSymLinks MultiViews

        AllowOverride None

        Require all granted

    </Directory>

</VirtualHost>

<VirtualHost 192.168.204.136:80>

    DocumentRoot "/var/wwwroot/site2"

    ErrorLog "logs/site2.error.log"

    CustomLog "logs/site2.access.log" common

    <Directory "/var/wwwroot/site2">

        Options Indexes FollowSymLinks MultiViews

        AllowOverride None

        Require all granted

    </Directory>

</VirtualHost>
4. 重启apache服务
systemctl restart httpd
5. 在宿主机访问两个站点
http://192.168.204.135/
http://192.168.204.136/


本文链接:https://www.cnblogs.com/connect/p/apache-vhost.html
配置Apache虚拟主机的更多相关文章
- wamp开发环境配置之配置Apache虚拟主机
网站建设人员在本地测试时,常常不是一个网站,那怎么能像输入域名一样在地址栏上面输入“域名”就能本地访问该网站呢?这里就要配置Apache虚拟主机了! 1.找到apache\conf\httpd.con ...
- 配置LANMP环境(7)-- 配置nginx反向代理,与配置apache虚拟主机
一.配置nginx反向代理 1.修改配置文件 vim /etc/nginx/nginx.conf 在35行http下添加一下内容: include /data/nginx/vhosts/*.conf; ...
- 配置apache虚拟主机的实例总结
如何实现apache虚拟主机配置. 1.基于ip地址的虚拟主机Listen 80<VirtualHost 172.20.30.40> DocumentRoot /home/httpd/ht ...
- Wamp环境下配置--Apache虚拟主机
1.首先打开apache的配置文件httpd.conf,并去掉#Include conf/extra/httpd-vhosts.conf前面的#,启用虚拟主机功能 # Virtual hosts In ...
- Windows下如何配置apache虚拟主机
其实apache配置虚拟主机说简单也简单,但是就是就有几个坑,要是稍不注意就掉坑里了. --小树前言 坑三连 没遇到这三个坑,就配置得很顺畅了 用自己指定的域名进入不了任何页面. 只能进apache的 ...
- wamp配置apache虚拟主机支持多域名访问localhost
1.背景: 在进行网站开发的时候,通常需要以http://localhost或者127.0.0.1等地址来访问本地环境的网站.不过随着开发项目的增多,需要每次先访问localhost然后再选项目,显得 ...
- windows环境下,apache虚拟主机配置
在windows环境下,apache从配置文件的相关配置: Windows 是市场占有率最高的 PC 操作系统, 也是很多人的开发环境. 其 VirtualHost 配置方法与 Linux 上有些差异 ...
- apache 虚拟主机详细配置:http.conf配置详解
apache 虚拟主机详细配置:http.conf配置详解 Apache的配置文件http.conf参数含义详解 Apache的配置由httpd.conf文件配置,因此下面的配置指令都是在httpd. ...
- Apache虚拟主机配置
在一个Apache服务器上可以配置多个虚拟主机,实现一个服务器提供多站点服务,其实就是访问同一个服务器上的不同目录.Apache虚拟主机配置有3中方法:基于IP配置.基于域名配置和基于端口配置,这里介 ...
随机推荐
- MySQL 授予普通用户PROCESS权限
在MySQL中如何给普通用户授予查看所有用户线程/连接的权限,当然,默认情况下show processlist是可以查看当前用户的线程/连接的. mysql> grant process on ...
- django安装与使用
django安装与使用 --更新中 安装 我这里采用pip安装 pip install django 创建django工程 创建好的工程,会在当前目录.下 django-admin startproj ...
- c/c++ 标准库 bind 函数 详解
标准库 bind 函数 详解 bind函数:接收一个函数名作为参数,生成一个新的函数. auto newCallable = bind(callbale, arg_list); arg_list中的参 ...
- Windows Server 2016-Active Directory复制概念(二)
本章继续补充有关Active Directory复制概念,具体内容如下: 连接对象: 连接对象是一个Active Directory对象,表示从源域控制器到目标域控制器的复制连接.域控制器是单个站点的 ...
- jenkins 备份配置信息
本文介绍几种备份jenkin配置信息的方法,大家可根据实际情况做出选择. 我的测试环境如下: windows 7 jenkins 2.32.3 ____升级到___2.46.3 (长期支持版本) 多种 ...
- Lingo求解线性规划案例1——生产计划问题
凯鲁嘎吉 - 博客园 http://www.cnblogs.com/kailugaji/ 说明: Lingo版本: 某工厂明年根据合同,每个季度末 ...
- VS2013 创建ASP.NET MVC 4.0 未指定的错误(异常来自HRESULT: 0x80004005(e_fail))
这个错误是真的头疼,尝试各种办法都没用,最后解决用的方法是: 找到 vs_ultimate.exe 修复文件,我的文件位置在 C:\ProgramData\Package Cache\{4d78654 ...
- node express 上传文件
npm install --save multer var fs = require('fs'); var multer = require('multer'); var upload = multe ...
- 阿里云CentOS下nodejs安装
1. 下载node包(包含npm) cd /usr/local/src/ wget https://nodejs.org/dist/v10.11.0/node-v10.11.0-linux-x64.t ...
- mumu安卓模拟器使用教程
安装教程: 1http://mumu.163.com/ 在这网址里面下载 2.安装 我的是mac 安装时需要输入你的你电脑密码 但是也报错,你点击旁边的提示就会告诉去安全与隐私里点击允许就好了 很 ...