webapi+swagger ui 文档描述
代码:GitHub
swagger ui在我们的.NET CORE和.NET Framework中的展现形式是不一样的,如果有了解的,在.NET CORE中的是比.NET Framework好的。两张图对比下
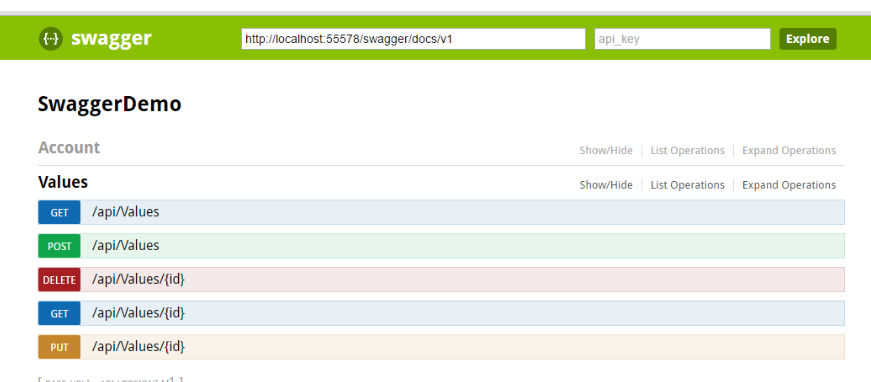
.NET Framework中自带的就是这个,样式一般
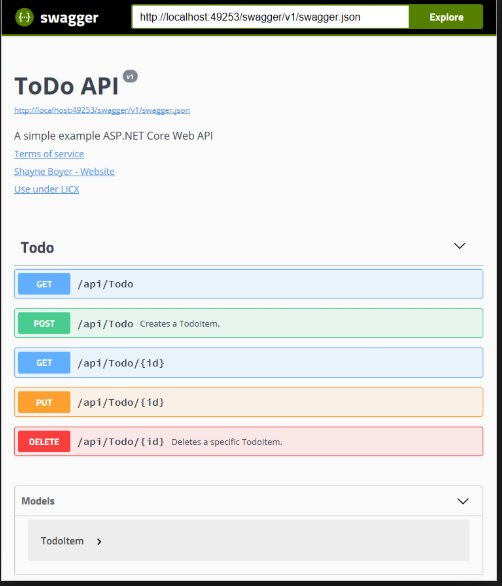
.NET CORE中:
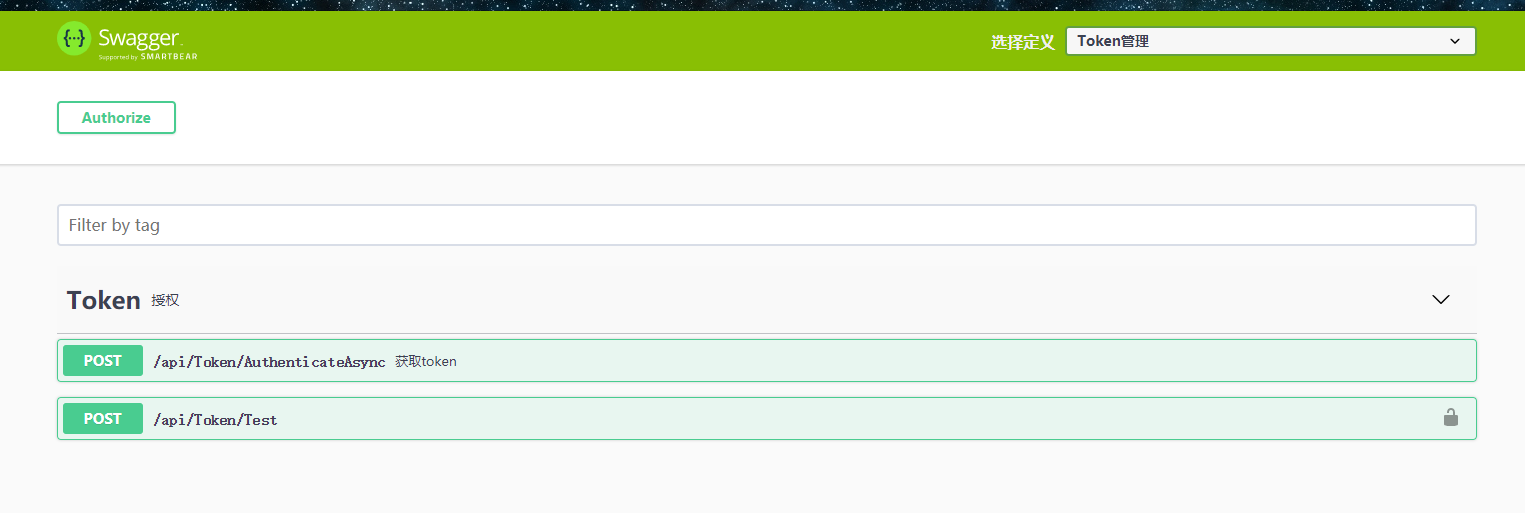
一对比core中的明显好看,本篇教你怎么在Framework 环境中搭建下面的样式,先看看效果,下面就是在Framework 环境搭建的效果:

环境:Owin
owin了解:https://www.cnblogs.com/neverc/p/4864414.html
注:怎么搭建的可以百度一下Owin,这边主要是介绍要注意的几点,源码在github上。
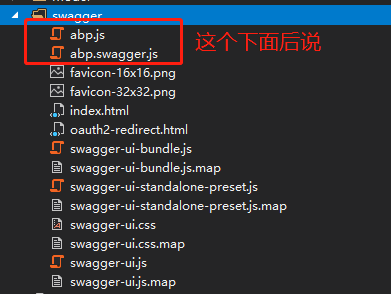
①下载我们的Swagger ui
地址:https://github.com/swagger-api/swagger-ui
下载dist文件夹的东西
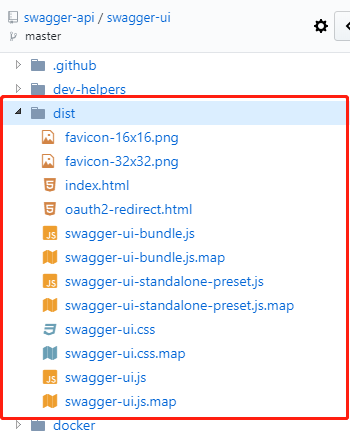
添加到我们的项目中,文件夹为swagger
② nuget Swashbuckle.Core
在App_Start中创建一个DocConfig 类,进行文档配置
using Sealee.Util;
using Swashbuckle.Application;
using Swashbuckle.Swagger;
using System;
using System.Collections.Concurrent;
using System.Collections.Generic;
using System.IO;
using System.Linq;
using System.Reflection;
using System.Web;
using System.Web.Http;
using System.Web.Http.Description;
using System.Xml;
using WebApiOwin.App_Start; namespace WebApiOwin
{
public class DocConfig
{
public static void Register(HttpConfiguration config)
{
Assembly _thisAssembly = typeof(DocConfig).Assembly;
string _project = MethodBase.GetCurrentMethod().DeclaringType.Namespace;//项目命名空间 //注释 我们的post提交都会创建Dto来申明,这边添加了注释,前台页面就会显示
string path = System.AppDomain.CurrentDomain.BaseDirectory;
string _xmlPath = string.Format("{0}/bin/{1}.XML", path, _project);
string path2 = path.GetSlnPath();
string _xmlPath2 = Path.Combine(path2, "My.Entity\\bin\\My.Entity.xml"); config.EnableSwagger(c =>
{
c.MultipleApiVersions(
(apiDesc, targetApiVersion) =>
{
//控制器描述
IEnumerable<string> versions = apiDesc.ActionDescriptor.ControllerDescriptor.GetCustomAttributes<MyVersionAttribute>().Select(x => x.Version);
return versions.Any(v => $"{v.ToString()}" == targetApiVersion);
},
(vc) =>
{
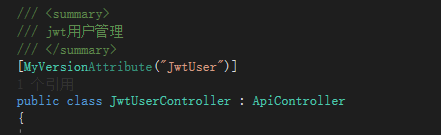
//MyVersionAttribute 标识了这个属性的都需要在这里加上 这边会配合index.html页面完成
vc.Version("Token", "");
vc.Version("JwtUser", "");
}); //c.SingleApiVersion("Token", "Super duper API");
//忽略标记为已删除的属性
c.IgnoreObsoleteProperties(); //多文档描述
//文档描述
c.IncludeXmlComments(_xmlPath);
//文档描述
c.IncludeXmlComments(_xmlPath2); c.ResolveConflictingActions(apiDescriptions => apiDescriptions.First()); c.CustomProvider((defaultProvider) =>
{
//获取描述
return new MySwaggerProvider(defaultProvider, _xmlPath);
}); //操作过滤
c.OperationFilter<HttpHeadFilter>();
}); //.EnableSwaggerUi() 重点:这边我们不需要他生成页面,使用我们刚刚下载dist中的页面 }
} /// <summary>
/// 设置SwaggerDocument 显示的数据
/// </summary>
public class MySwaggerProvider : ISwaggerProvider
{
private static ConcurrentDictionary<string, SwaggerDocument> _cache =
new ConcurrentDictionary<string, SwaggerDocument>(); private readonly ISwaggerProvider _swaggerProvider;
private readonly string _xmlPath; public MySwaggerProvider(ISwaggerProvider swaggerProvider, string xmlPath)
{
_swaggerProvider = swaggerProvider;
_xmlPath = xmlPath;
} public SwaggerDocument GetSwagger(string rootUrl, string apiVersion)
{
string cacheKey = string.Format("{0}_{1}", rootUrl, apiVersion);
//只读取一次
if (!_cache.TryGetValue(cacheKey, out SwaggerDocument srcDoc))
{
srcDoc = _swaggerProvider.GetSwagger(rootUrl, apiVersion);
ConcurrentDictionary<string, string> pairs = GetControllerDesc(apiVersion);
//控制器描述
IList<Tag> tagList = new List<Tag>();
foreach (KeyValuePair<string, string> item in pairs)
{
Tag tag = new Tag();
tag.name = item.Key;
tag.description = item.Value;
tagList.Add(tag);
}
srcDoc.tags = tagList; srcDoc.vendorExtensions = new Dictionary<string, object> {
{ "ControllerDesc", pairs }
};
_cache.TryAdd(cacheKey, srcDoc);
}
return srcDoc;
} /// <summary>
/// 从API文档中读取控制器描述
/// </summary>
private ConcurrentDictionary<string, string> GetControllerDesc(string apiVersion)
{
ConcurrentDictionary<string, string> controllerDescDict = new ConcurrentDictionary<string, string>();
if (File.Exists(_xmlPath))
{
XmlDocument xmldoc = new XmlDocument();
xmldoc.Load(_xmlPath);
string type = string.Empty, path = string.Empty, controllerName = string.Empty; string[] arrPath;
int length = -, cCount = "Controller".Length;
XmlNode summaryNode = null;
foreach (XmlNode node in xmldoc.SelectNodes("//member"))
{
type = node.Attributes["name"].Value;
if (type.StartsWith("T:"))
{
string[] typeName = type.Split(':');
Type t = Type.GetType(typeName[]); //控制器
arrPath = type.Split('.');
length = arrPath.Length;
controllerName = arrPath[length - ];
if (controllerName.EndsWith("Controller"))
{
//如果分组了
if (t.GetCustomAttributes<MyVersionAttribute>().Count() != )
{
string version = t.GetCustomAttribute<MyVersionAttribute>().Version;
//上面tag和下面的需要同步过滤
if (version == apiVersion)
{
//获取控制器注释
summaryNode = node.SelectSingleNode("summary");
string key = controllerName.Remove(controllerName.Length - cCount, cCount);
if (summaryNode != null && !string.IsNullOrEmpty(summaryNode.InnerText) && !controllerDescDict.ContainsKey(key))
{
controllerDescDict.TryAdd(key, summaryNode.InnerText.Trim());
}
}
}
}
}
}
}
return controllerDescDict;
}
} public class HttpHeadFilter : IOperationFilter
{
public void Apply(Operation operation, SchemaRegistry schemaRegistry, ApiDescription apiDescription)
{
// if (operation.parameters == null)
// operation.parameters = new List<Parameter>();
////判断是否添加授权过滤器
// var filterPipeline = apiDescription.ActionDescriptor.GetFilterPipeline();
// var isAuthorized = filterPipeline.Select(fileInfo => fileInfo.Instance).Any(filter => filter is IAuthorizationFilter);
// var allowAnonymous = apiDescription.ActionDescriptor.GetCustomAttributes<AllowAnonymousAttribute>().Any();
// if (isAuthorized&&!allowAnonymous)
// {
// operation.parameters.Add(new Parameter { name = "Authorization", @in = "head", description = "token", required = false, type = "string" }); // } if (operation == null)
{
return;
} if (operation.parameters == null)
{
operation.parameters = new List<Parameter>();
}
if (operation.security == null)
{
operation.security = new List<IDictionary<string, IEnumerable<string>>>();
} Parameter parameter = new Parameter
{
description = "The authorization token",
@in = "header",
name = "Authorization",
required = true,
type = "string"
}; //var parameter = new Parameter
//{
// description = "The authorization token",
// @in = "header",
// name = "Authorization",
// required = true,
// type = "string"
//};
//显示锁标识
if (apiDescription.ActionDescriptor.GetCustomAttributes<AllowAnonymousAttribute>().Any())
{
//parameter.required = false;
}
else
{
Dictionary<string, IEnumerable<string>> oAuthRequirements = new Dictionary<string, IEnumerable<string>> { { "Authorization", new List<string>() } };
operation.security.Add(oAuthRequirements);
}
// operation.parameters.Add(parameter);
}
}
}
MyVersionAttribute 类用来显示我们的版本
    [AttributeUsage(AttributeTargets.Class | AttributeTargets.Method, Inherited = true)]

    public class MyVersionAttribute : Attribute

    {

        public MyVersionAttribute(string _version)

        {

            this.Version = _version;

        }

        /// <summary>

        /// 版本

        /// </summary>

        public string Version { get; set; }

    }
最后在我们的owin中添加DocConfig

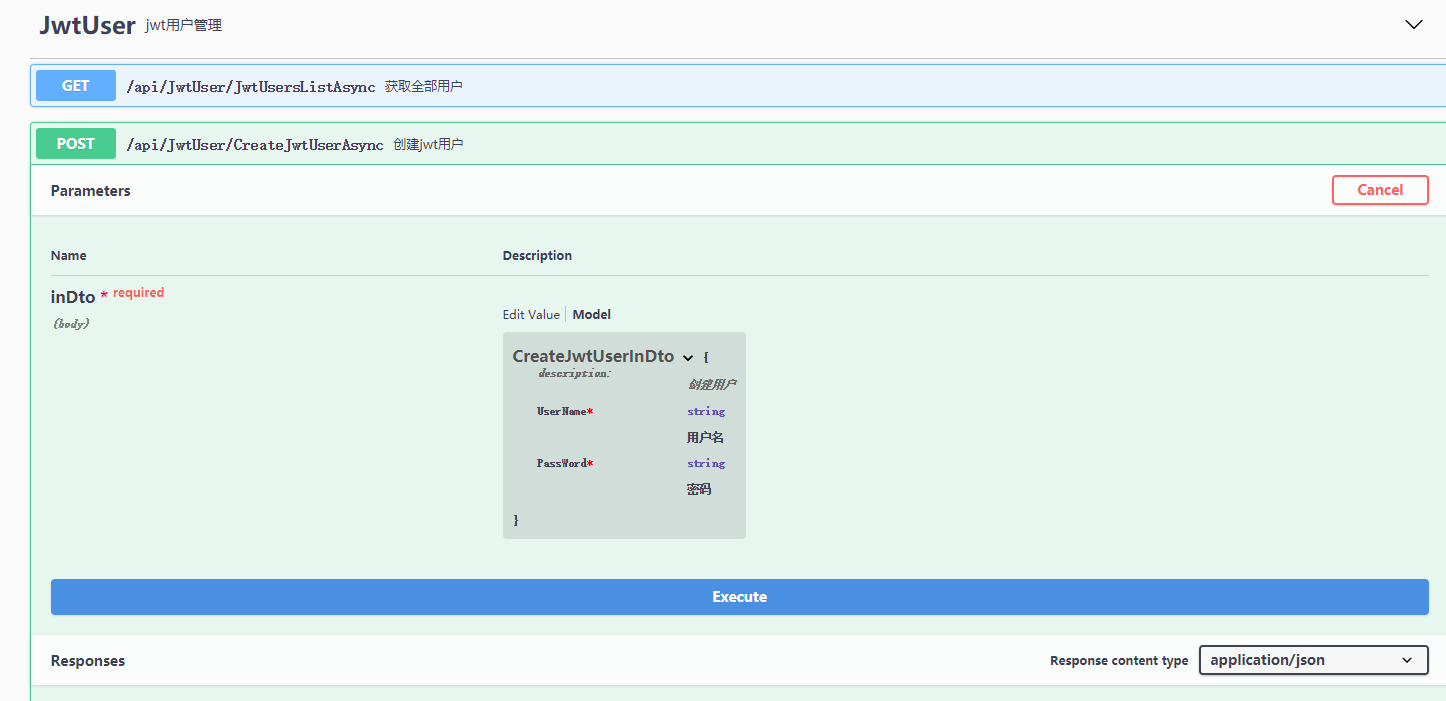
接口列子:


③修改我们的Index.html页面
文档配置:https://github.com/swagger-api/swagger-ui/blob/master/docs/usage/configuration.md
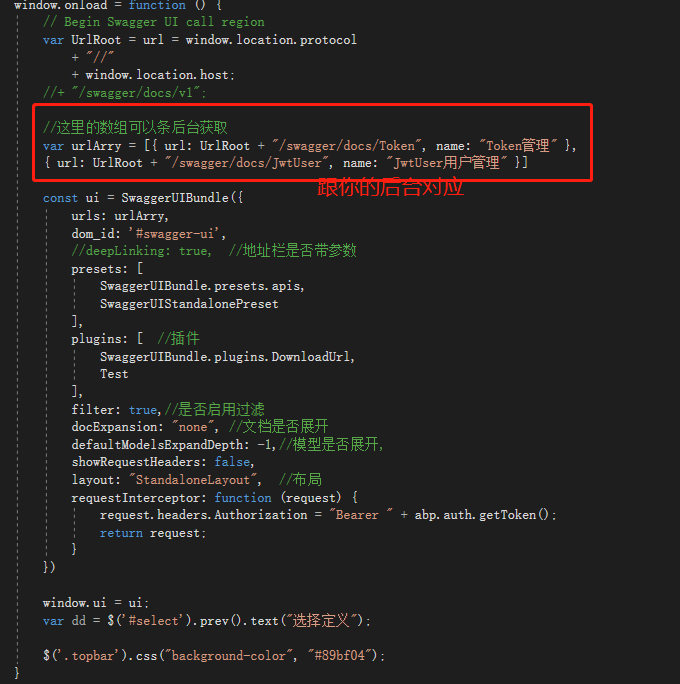
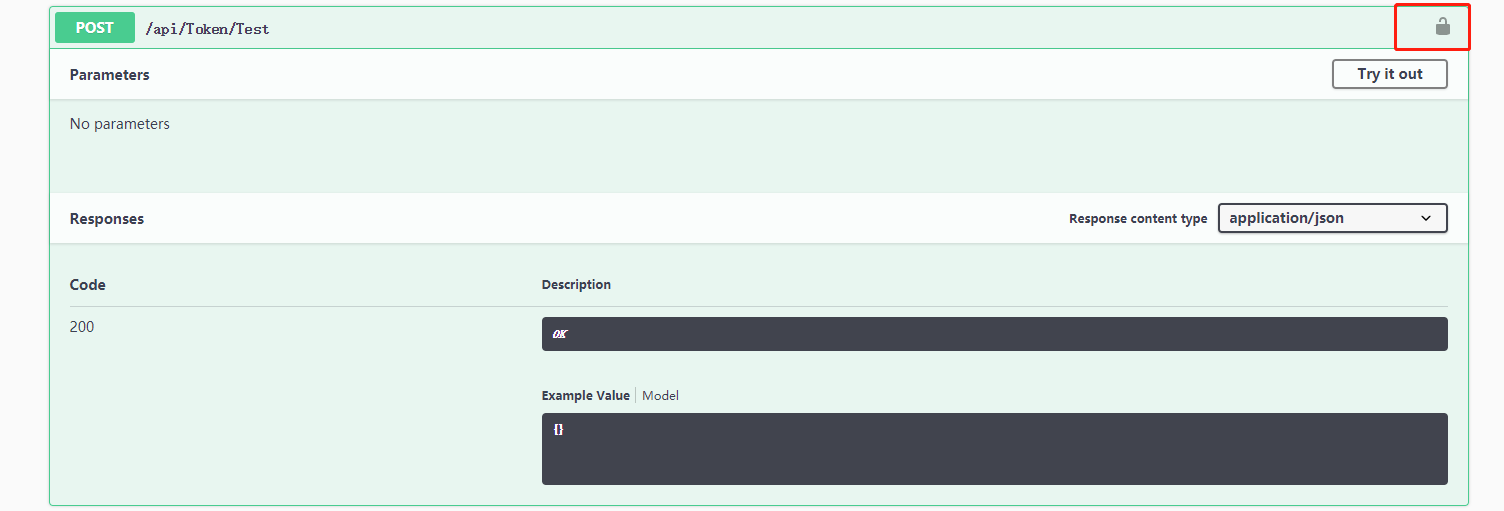
附授权,页面上左边的按钮:
得到这两个js,应用到你的项目

这边就是这两个js生成了授权按钮,以及样式,文本,然后把你授权需要的信息传到后台进行获取token。看下这个js你就知道了,这边不详细介绍了.应为项目中的授权不一样这边的代码你也进行相应的修改才行,别直接Copy用。
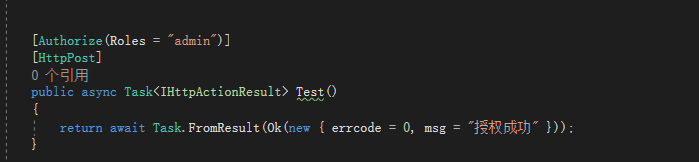
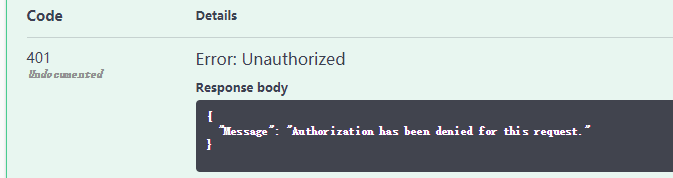
授权:一般我们的在接口中授权了的需要你携带token信息才能访问。
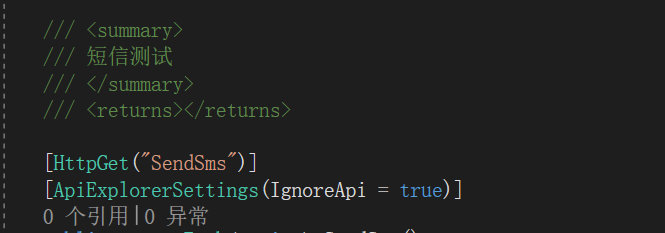
隐藏接口:
[ApiExplorerSettings(IgnoreApi = true)]
总结:最主要的还是不要使用代码生成的页面,需要我们的自己添加的页面,然后进行配置就好了。
webapi+swagger ui 文档描述的更多相关文章
- MVC WebApi Swagger帮助文档 接口用法
1.WebApi在解决方案Apps.WebApi中 2.将Apps.WebApi设置为启动项目之后,可以直接浏览到Api的帮助文档,并直接进行调试 3.登录接口 4.登录获取的token来访问其他接口 ...
- 使用Swagger实现webapi接口自动化文档生成
这里是实现自动化api稳当的生成,在网上看了很多swagger的文档,可能都是在为实现接口时直接使用的swagger,其实步骤差不多,但是更加详细的我还没看到,又或者说,我看着文档来的时候还是出错啦, ...
- springboot+swagger接口文档企业实践(上)
目录 1.引言 2.swagger简介 2.1 swagger 介绍 2.2 springfox.swagger与springboot 3. 使用springboot+swagger构建接口文档 3. ...
- Swagger API文档
Swagger API文档集中化注册管理 接口文档是前后端开发对接时很重要的一个组件.手动编写接口文档既费时,又存在文档不能随代码及时更新的问题,因此产生了像swagger这样的自动生成接口文档的 ...
- Swagger在线文档使用教程
springboot整合Swagger2 1.首先创建一个springboot工程,在pom文件内导入依赖 <!--swagger依赖--> <!--Swagger2- ...
- .net core的Swagger接口文档使用教程(二):NSwag
上一篇介绍了Swashbuckle ,地址:.net core的Swagger接口文档使用教程(一):Swashbuckle 讲的东西还挺多,怎奈微软还推荐了一个NSwag,那就继续写吧! 但是和Sw ...
- .net core的Swagger接口文档使用教程(一):Swashbuckle
现在的开发大部分都是前后端分离的模式了,后端提供接口,前端调用接口.后端提供了接口,需要对接口进行测试,之前都是使用浏览器开发者工具,或者写单元测试,再或者直接使用Postman,但是现在这些都已经o ...
- Swagger 接口文档
目录 Swagger 介绍 Swagger 依赖 SpringBoot 集成 Swagger 配置类 常用注解 效果示例 Swagger 介绍 Swagger UI 允许任何人(无论是开发团队还是最终 ...
- 使用Swashbuckle.AspNetCore生成.NetCore WEBAPI的接口文档
一.问题 使用Swashbuckle.AspNetCore生成.NetCore WEBAPI的接口文档的方法 二.解决方案 参考文章:https://docs.microsoft.com/zh-cn/ ...
随机推荐
- Activity间通过Intent交互及系统服务调用
I. 实验目的通过本实验理解Android开发框架中最核心程序部件Activity间通过Intent交互的原理,掌握通过Intent传递参数和系统服务调用的方法,并通过实验中的3个具体的实验内容加深理 ...
- 理解JPA注解@GeneratedValue的使用方法
https://blog.csdn.net/u012838207/article/details/80406716 一.JPA通用策略生成器 通过annotation来映射hibernate实体的,基 ...
- [POJ3468]关于整数的简单题 (你想要的)树状数组区间修改区间查询
#include <cstdio> #include <algorithm> #include <cstring> #include <cctype> ...
- Docker中Maven私服的搭建
为何用到Maven私服? 在实际开发中,项目中可能会用到第三方的jar.内部通讯的服务接口都会打入到公司的私服中. 我们从项目实际开发来看: 一些无法从外部仓库下载的构件,例如内部的项目还能部署到私服 ...
- 总结TCP与UDP的区别
TCP的优点: 可靠,稳定 TCP的可靠体现在TCP在传递数据之前,会有三次握手来建立连接,而且在数据传递时,有确认.窗口.重传.拥塞控制机制,在数据传完后,还会断开连接用来节约系统资源. TCP的缺 ...
- 59: loj #10215
$des$ https://loj.ac/problem/10215 $sol$ exgcd检查 $code$ #include <iostream> #include <cstdl ...
- (持续更新) C# 面试技术点、常见SQL技术点 和 解决高并发的相关技术
这篇博客 持续更新. 方便小伙伴们学习与面试前的复习
- Git和Github详细教程
一 概述 说到Git和Github,前几天我们知道微软以75亿美元收购全球最大的代码托管和写作平台GitHub,而GitHub是全球最大的代码仓库,很多开发人员都将代码存放在Github,许多开发者因 ...
- ubuntu17.10 源
1.保险做法先备份源文件: cp -i /etc/apt/sources.list /etc/apt/sources.list_backup 2.打开sources.list: sudo ged ...
- Gradle插件和Gradle对应表
Gradle插件build.gradle文件的buildscript Gradlegradle/wrapper/gradle-wrapper.properties文件 AndroidStudio版本 ...