
SpringBoot应用部署到Docker上(docker-ce版本)
配置TCP远程连接(docker-maven-plugin插件连接的地址)
# 加上红色标识的部分
[root@localhost admin]# vim /lib/systemd/system/docker.service

[Unit]

Description=Docker Application Container Engine

Documentation=https://docs.docker.com

BindsTo=containerd.service

After=network-online.target firewalld.service containerd.service

Wants=network-online.target

Requires=docker.socket

[Service]

Type=notify

# the default is not to use systemd for cgroups because the delegate issues still

# exists and systemd currently does not support the cgroup feature set required

# for containers run by docker

ExecStart=/usr/bin/dockerd -H fd:// --containerd=/run/containerd/containerd.sock -H unix:///var/run/docker.sock -H tcp://0.0.0.0:2375

ExecReload=/bin/kill -s HUP $MAINPID

TimeoutSec=

RestartSec=

Restart=always

# Note that StartLimit* options were moved from "Service" to "Unit" in systemd .

# Both the old, and new location are accepted by systemd  and up, so using the old location

# to make them work for either version of systemd.

StartLimitBurst=

# Note that StartLimitInterval was renamed to StartLimitIntervalSec in systemd .

# Both the old, and new name are accepted by systemd  and up, so using the old name to make

# this option work for either version of systemd.

StartLimitInterval=60s

# Having non-zero Limit*s causes performance problems due to accounting overhead

# in the kernel. We recommend using cgroups to do container-local accounting.

LimitNOFILE=infinity

LimitNPROC=infinity

LimitCORE=infinity

# Comment TasksMax if your systemd version does not support it.

# Only systemd  and above support this option.

TasksMax=infinity

# set delegate yes so that systemd does not reset the cgroups of docker containers

Delegate=yes

# kill only the docker process, not all processes in the cgroup

KillMode=process

[Install]

WantedBy=multi-user.target
开放2375端口
# 开启防火墙端口

firewall-cmd --zone=public --add-port=/tcp --permanent

systemctl restart firewalld
配置私有仓库
配置daemon.json文件
[root@localhost admin]# vim /etc/docker/daemon.json

{

  "insecure-registries":["192.168.192.128:443"]

}

# 重启服务

systemctl daemon-reload

systemctl restart docker
然后下载registry镜像
[root@localhost admin]# docker pull registry

[root@localhost admin]# mkdir /usr/docker_registry_data

[root@localhost admin]# docker run -d -p : -v /usr/docker_registry_data:/var/lib/registry registry

# 开启防火墙端口

firewall-cmd --zone=public --add-port=/tcp --permanent

systemctl restart firewalld

新建SpringBoot工程
<build>

        <plugins>

            <plugin>

                <groupId>org.springframework.boot</groupId>

                <artifactId>spring-boot-maven-plugin</artifactId>

            </plugin>

            <plugin>

                <groupId>com.spotify</groupId>

                <artifactId>docker-maven-plugin</artifactId>

                <version>1.2.0</version>

                <configuration>

                    <!--Docker要求推送的映像名称以仓库的主机名和端口为前缀。例如,要推送my-image到registry.example.com,镜像需要标记为registry.example.com/my-image-->

                    <imageName>192.168.192.128:443/hello</imageName>

                    <!--基础镜像-->

                    <baseImage>java</baseImage>

                    <entryPoint>["java", "-jar", "/${project.build.finalName}.jar"]</entryPoint>

                    <!-- copy the service's jar file from target into the root directory of the image -->

                    <resources>

                        <resource>

                            <targetPath>/</targetPath>

                            <directory>${project.build.directory}</directory>

                            <include>${project.build.finalName}.jar</include>

                        </resource>

                    </resources>

                    <forceTags>true</forceTags>

                    <imageTags>

                        <imageTag>latest</imageTag>

                    </imageTags>

                </configuration>

            </plugin>

        </plugins>

    </build>
打包(注意,要保证服务器的Registry容器开启)
SET DOCKER_HOST=tcp://192.168.192.128:2375

mvn clean package -Dmaven.test.skip=true docker:build -DpushImageTag
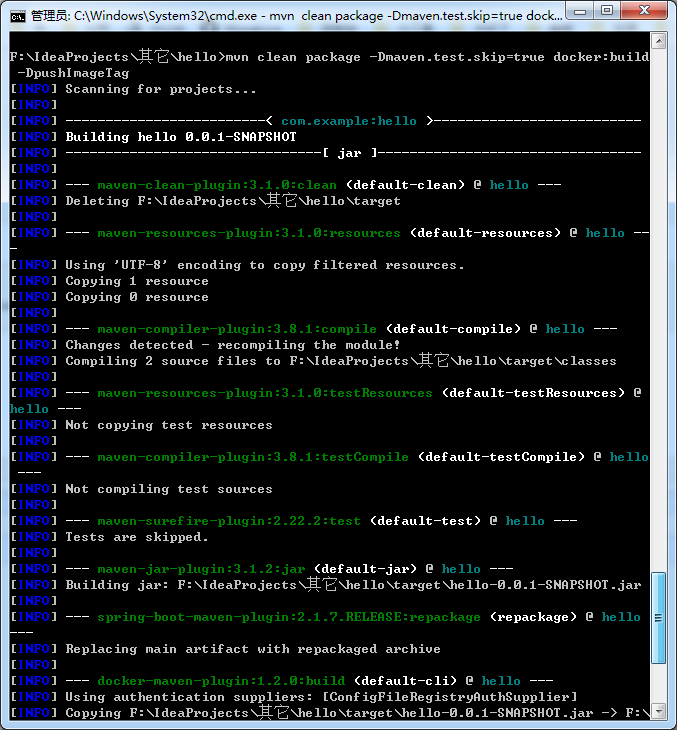
成功
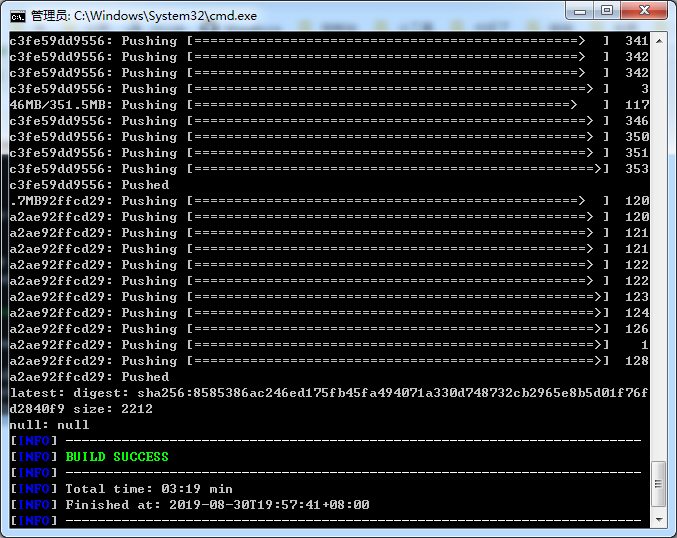
现在回来看镜像

启动(后台启动加上-d)
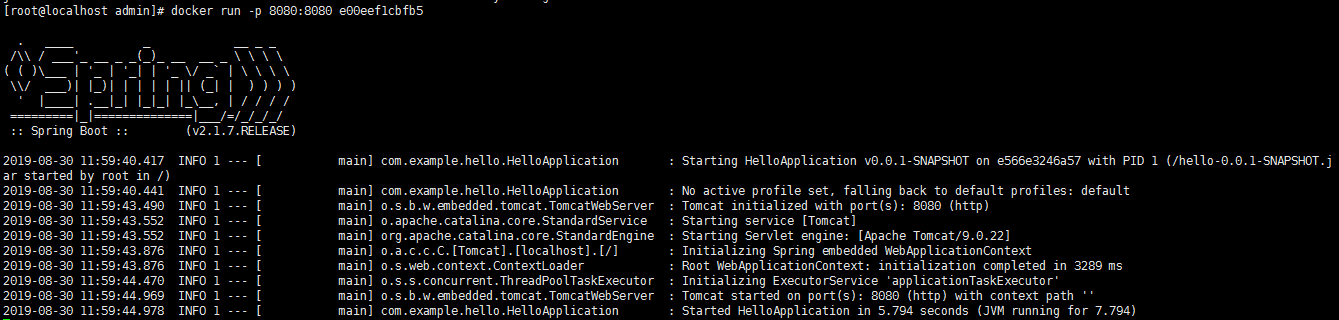
访问

另一种方式:Dockerfile
在src/main下新建一个docker目录
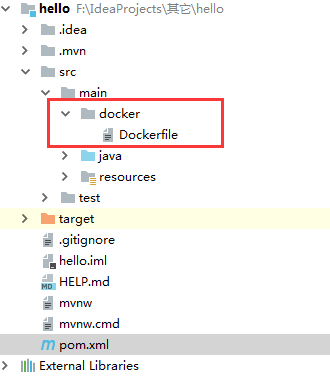
Dockerfile内容
# 基础镜像

FROM java:

# 打包jar去向

ADD /hello-0.0.-SNAPSHOT.jar /app.jar

# 暴露端口

EXPOSE

# 启动命令

ENTRYPOINT ["java", "-jar", "/app.jar"]
pom文件修改如下:
    <build>

        <plugins>

            <plugin>

                <groupId>org.springframework.boot</groupId>

                <artifactId>spring-boot-maven-plugin</artifactId>

            </plugin>

            <plugin>

                <groupId>com.spotify</groupId>

                <artifactId>docker-maven-plugin</artifactId>

                <version>1.2.0</version>

                <configuration>

                    <!--Docker要求推送的映像名称以注册表的主机名和端口为前缀。例如,要推送my-image到registry.example.com,镜像需要标记为registry.example.com/my-image-->

                    <imageName>192.168.192.128:443/hello-2</imageName>

                    <dockerDirectory>src/main/docker</dockerDirectory>

                    <resources>

                        <resource>

                            <targetPath>/</targetPath>

                            <directory>${project.build.directory}</directory>

                            <include>${project.build.finalName}.jar</include>

                        </resource>

                    </resources>

                    <forceTags>true</forceTags>

                    <imageTags>

                        <imageTag>latest</imageTag>

                    </imageTags>

                </configuration>

            </plugin>

        </plugins>

    </build>
打包推送
SET DOCKER_HOST=tcp://192.168.192.128:2375

mvn clean package -Dmaven.test.skip=true docker:build -DpushImageTag
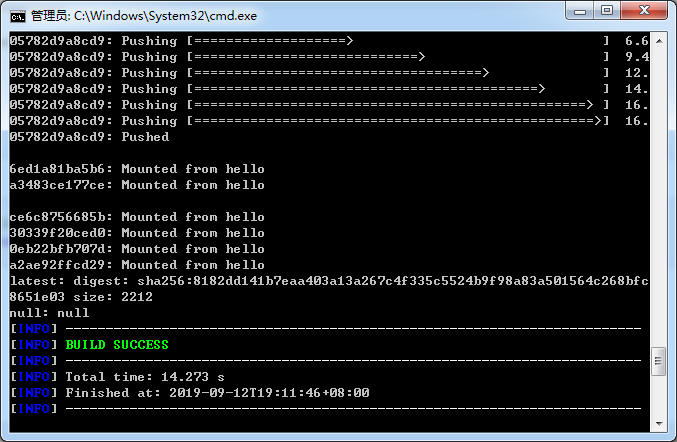
运行结果
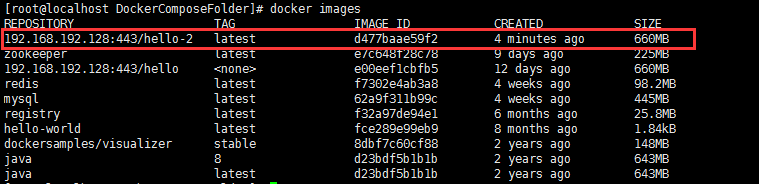
查看镜像
SpringBoot应用部署到Docker上(docker-ce版本)的更多相关文章
- SpringBoot项目部署初体验【Docker】
前言 一个微服务项目,小到几个模块,大到十几二十几个模块,每个模块都是单独的SpringBoot工程,这么多模块的部署,部署成本真的很高,而且每个服务的部署,都是手动部署,打成war或者jar ?,一 ...
- springboot项目部署到服务器上
链接:https://blog.csdn.net/qq_22638399/article/details/81506448#commentsedit 链接2:https://blog.csdn.net ...
- Springboot 项目部署到服务器上
项目部署到服务器上,有两种方式,一种 jar 包,一种 war 包 jar包 部署时,后续的域名配置,SSL证书等在nginx中配置 war包 部署时,后续的域名配置可以在tomcat中配置就好,修改 ...
- SpringBoot应用部署到Docker上(docker-io版本)
配置TCP远程连接 为什么要配置这个呢,因为用到的docker-maven-plugin插件默认连接到localhost:2375上的docker.然而:1. 我们的Docker不在本地,执行打包命令 ...
- SpringBoot项目部署到服务器上,tomcat不启动该项目
今天lz把项目重新传到服务器上后,重启tomcat遇到个问题,就是这个tomcat怎么都不启动这个项目,别的项目都没事,一番查找后发现问题所在. 我们先建个SpringBoot工程,重现一下问题: 写 ...
- 如何把springboot项目部署到tomcat上
前言: 开始以为打包springboot项目为war包丢到tomcat上的webapps下面就可以访问controller层的路径了,可是调用接口却报404的错误,而打开8080的主页,不加路径却可以 ...
- React+SpringBoot项目部署
静态资源访问配置 https://www.jianshu.com/p/b6e0a0df32ec https://segmentfault.com/q/1010000012240531/a-102000 ...
- windows上docker部署springboot多实例
前提条件: 1.可以运行jar包的环境2.机器上已经安装了docker3.准备部署的springboot的jar包4.Dockerfile文件 准备Dockerfile FROM java:8 VOL ...
- ASP.NET CORE做的网站运行在docker上(不用dockerfile文件部署)
按网上的做法用dockerfile文件是可以弄得出来的,http://www.docker.org.cn/article/119.html, 不过我想把网站文件放在外面硬盘目录,再映射进去,这样只要在 ...
随机推荐
- mui 等待动画loading mui.showLoading
显示加载框:mui.showLoading("正在加载..","div"); //加载文字和类型,plus环境中类型为div时强制以div方式显示隐藏加载框:m ...
- FitNesseRoot/ErrorLogs目录下可查看fitnesse输出日志
调试fitnesse用例时,通过测试页面的输出信息不是很好定位问题出在哪里 这时可以在写代码过程中,增加一些输出信息,比如说java的话,可以用log4j.注意要把日志输出弄成utf-8编码,不然会中 ...
- 关于读取Com口数据时,Com口的名字的两种读法。
1,直接调用SerialPort类中的GetPortNames()方法. string[] portList = System.IO.Ports.SerialPort.GetPortNames(); ...
- Java 使用 Jackson库 对 JavaMap 进行序列化反序列化
最近在用 java 处理一一些东西,发现 java 对对象进行序列化反序列化比起 python 来还是有些麻烦记录一下. 找了好几个库最后选择了 Jackson 感觉大家对它评价还不错. 将目标从 J ...
- IIS部署Silverlight
题设: 网站如果应用了Silverlight技术,直接部署到IIS中是无法正常运行的, 分析: 因为Silverlight应用所对应的三种MIME类型没有在IIS中注册,所以Silverlight相关 ...
- window.showModelessDialog传值
参数传递:1. 要想对话框传递参数,是通过vArguments来进行传递的.类型不限制,对于字符串类型,最大为4096个字符.也可以传递对象,例如:------------------------ ...
- 如何完美更换WordPress网站的域名
前几天,一位WordPress王牌主机的用户问我,他的WordPress网站已经建立一年多了,现在想要修改网站使用的域名,该如何操作?这是WordPress用户经常遇到的问题.今天我们来给大家介绍一下 ...
- Cesium原理篇:6 Render模块(3: Shader)【转】
https://www.cnblogs.com/fuckgiser/p/5975274.html 在介绍Renderer的第一篇,我就提到WebGL1.0对应的是OpenGL ES2.0,也就是可编程 ...
- Windows系统中CreateFileMapping实现的共享内存及用法
在32位的Windows系统中,每一个进程都有权访问他自己的4GB(232=4294967296)平面地址空间,没有段,没有选择符,没有near和far指针,没有near和far函数调用,也没有内存模 ...
- SpringBoot 为API添加统一的异常处理(一)
首先我把异常分为两种,一种是可控制的,或者是由我们发现条件不正确主动抛出的异常,就像前城市编号不存在那个粟子:另一种是不可控制的,或者说是程序存在bug引起的异常,但这种异常也不想变态的就直接给前端抛 ...