基于Python的网页文档处理脚本实现
嵌入式web服务器不同于传统服务器,web需要转换成数组格式保存在flash中,才方便lwip网络接口的调用,最近因为业务需求,需要频繁修改网页,每次的压缩和转换就是个很繁琐的过程,因此我就有了利用所掌握的知识,利用python编写个能够批量处理网页文件,压缩并转换成数组的脚本。
脚本运行背景(后续版本兼容):
Python 3.5.1(下载、安装、配置请参考网上教程)
node.js v4.4.7, 安装uglifyjs管理包,支持js文件非文本压缩
uglifyjs 用来压缩JS文件的引擎,具体安装可参考http://www.zhangxinxu.com/wordpress/2013/01/uglifyjs-compress-js/
具体实现代码如下:
#/usr/bin/python

import os

import binascii

import shutil

from functools import partial

import re

import gzip

#创建一个新文件夹

def mkdir(path):

    path=path.strip()

    isExists=os.path.exists(path)

    #判断文件夹是否存在,不存在则创建

    if not isExists:

        os.makedirs(path)

        print(path+' 创建成功')

    else:

        pass

    return path

#删除一个文件夹(包含内部所有文件)

def deldir(path):

    path = path.strip()

    isExists=os.path.exists(path)

    #判断文件夹是否存在,存在则删除

    if isExists:

        shutil.rmtree(path)

        print(path + "删除成功")

    else:

        pass

#网页一次压缩文件

def FileReduce(inpath, outpath):

        infp = open(inpath, "r", encoding="utf-8")

        outfp = open(outpath, "w", encoding="utf-8")

        for li in infp.readlines():

            if li.split():

                #去除多余的\r \n

                li = li.replace('\n', '').replace('\t', '');

                #空格只保留一个

                li = ' '.join(li.split())

                outfp.writelines(li)

        infp.close()

        outfp.close()

        print(outpath+" 压缩成功")

#shell命令行调用(用ugllifyjs来压缩js文件)

def ShellReduce(inpath, outpath):

    Command = "uglifyjs "+inpath+" -m -o "+outpath

    print(Command)

    os.system(Command)

#gzip压缩模块

def FileGzip(inpath, outpath):

    with open(inpath, 'rb') as plain_file:

        with gzip.open(outpath, 'wb') as zip_file:

            zip_file.writelines(plain_file)

    print(outpath+" gzip-压缩成功")

#将文件以二进制读取, 并转化成数组保存

def FileHex(inpath, outpath):

    i = 0

    count = 0

    a = ''

    inf = open(inpath, 'rb');

    outf = open(outpath, 'w')

    records = iter(partial(inf.read, 1), b'')

    for r in records:

        r_int = int.from_bytes(r, byteorder='big')

        a +=  strzfill(hex(r_int), 2, 2) + ', '

        i += 1

        count += 1

        if i == 16:

            a += '\n'

            i = 0

    a = "const static char " + outpath.split('.')[-2].split('/')[-1] + "["+ str(count) +"]={\n" + a + "\n}\n\n"

    outf.write(a)

    inf.close()

    outf.close()

    print(outpath + " 转换成数组成功")

#在指定位置填充0

def strzfill(istr, index, n):

    return istr[:index] + istr[index:].zfill(n)

#去css注释 /*.....*/

def unCommentReduce(inpath, outpath):

    infp = open(inpath, "r", encoding="utf-8")

    outfp = open(outpath, "w", encoding="utf-8")

    fileByte = infp.read();

    replace_reg = re.compile('/\*[\s\S]*?\*/')

    fileByte = replace_reg.sub('', fileByte)

    fileByte = fileByte.replace('\n', '').replace('\t', '');

    fileByte = ' '.join(fileByte.split())

    outfp.write(fileByte)

    infp.close()

    outfp.close()

    print(outpath+"去注释 压缩成功!")

#程序处理主函数

def WebProcess(path):

        #原网页 ..\basic\

        #压缩网页 ..\reduce\

        #gzip二次压缩 ..\gzip

        #编译完成.c网页 ..\programe

        BasicPath = path + "\\basic"

        ReducePath = path + "\\reduce"

        GzipPath = path + "\\gzip"

        ProgramPath = path + "\\program"

        #删除原文件夹,再创建新文件夹

        deldir(ProgramPath)

        deldir(ReducePath)

        deldir(GzipPath)

        mkdir(ProgramPath)

        for root, dirs, files in os.walk(BasicPath):

                for item in files:

                        ext = item.split('.')

                        InFilePath = root + "/" + item

                        OutReducePath = mkdir(root.replace("basic", "reduce")) + "/" + item

                        OutGzipPath = mkdir(root.replace("basic", "gzip"))  + "/" + item + '.gz'

                        OutProgramPath = ProgramPath + "/" + item.replace('.', '_') + '.c'

                        #根据后缀不同进行相应处理

                        #html 去除'\n','\t', 空格字符保留1个

                        #css  去除\*......*\注释数据、'\n'和'\t', 同时空格字符保留1个

                        #js 调用uglifyjs2进行压缩

                        #gif jpg ico 直接拷贝

                        #其它 直接拷贝

                        #上述执行完毕后压缩成.gz文件

                        #除其它外,剩余文件同时转化成16进制数组, 保存为.c文件

                        if ext[-1] == 'html':

                            FileReduce(InFilePath, OutReducePath)

                            FileGzip(OutReducePath, OutGzipPath)

                            FileHex(OutGzipPath, OutProgramPath)

                        elif ext[-1] == 'css':

                            unCommentReduce(InFilePath, OutReducePath)

                            FileGzip(OutReducePath, OutGzipPath)

                            FileHex(OutGzipPath, OutProgramPath)

                        elif ext[-1] == 'js':

                            ShellReduce(InFilePath, OutReducePath)

                            FileGzip(OutReducePath, OutGzipPath)

                            FileHex(OutGzipPath, OutProgramPath)

                        elif ext[-1] in ["gif", "jpg", "ico"]:

                            shutil.copy(InFilePath, OutReducePath)

                            FileGzip(OutReducePath, OutGzipPath)

                            FileHex(OutGzipPath, OutProgramPath)

                        else:

                            shutil.copy(InFilePath, OutReducePath)

#获得当前路径

path = os.path.split(os.path.realpath(__file__))[0];

WebProcess(path)
上述实现的原理主要包含:
1.遍历待处理文件夹(路径为..\basic,需要用户创建,并将处理文件复制到其中,并将脚本放置到该文件夹上一层)--WebProcess
2.创建压缩页面文件夹(..\reduce, 用于存储压缩后文件), 由脚本完成,处理动作:
htm: 删除文本中的多余空格,换行符
css: 删除文本中的多余空格,换行符及注释文件/*......*/
js:调用uglifyjs进行压缩处理
gif, jpg, ico和其它: 直接进行复制处理
3.创建gzip文件处理文件夹(..\gzip, 用于保存二次压缩后文件), 由脚本调用gzip模块完成。
4.创建处理页面文件夹(..\program, 用于存储压缩后文件), 由脚本完成,处理动作:
以二进制模式读取文件,并转换成16进制字符串写入到文件中。
在文件夹下(shift+鼠标右键)启用windows命令行,并输入python web.py, 就可以通过循环重复这三个过程就可以完成所有文件的处理。
特别注意:所有处理的文件需要以utf-8格式存储,否则读取时会报"gbk"读取错误。
实现效果如下图
html文件:

转换数组:
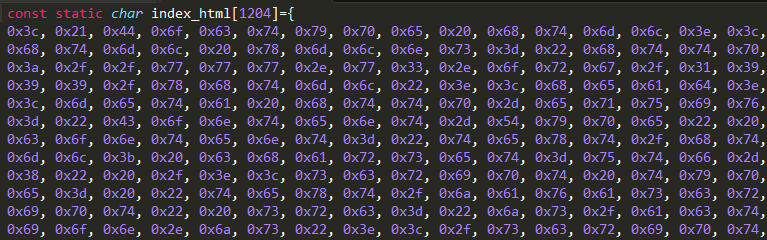
示例可参考:
http://files.cnblogs.com/files/zc110747/webreduce.7z
另外附送一个小的脚本,查询当前目录及子文件夹下选定代码行数和空行数(算是写这个脚本测试时衍生出来的):
#/usr/bin/python

import os

total_count = 0;

empty_count = 0;

def CountLine(path):

        global total_count

        global empty_count

        tempfile = open(path)

        for lines in tempfile:

                total_count += 1

                if len(lines.strip()) == 0:

                       empty_count += 1

def TotalLine(path):

        for root, dirs, files in os.walk(path):

                for item in files:

                        ext = item.split('.')

                        ext = ext[-1]

                        if(ext in ["cpp", "c", "h", "java", "php"]):

                                subpath = root + "/" + item

                                CountLine(subpath)

path = os.path.split(os.path.realpath(__file__))[0];

TotalLine(path)

print("Input Path:", path)

print("total lines: ",total_count)

print("empty lines: ",empty_count)

print("code lines: ", (total_count-empty_count))
基于Python的网页文档处理脚本实现的更多相关文章
- HTML5网页文档结构
2.1 Web标准 Web标准,使得Web开发更加容易.Web标准由万维网联盟(W3C)制定. 2.1.1 Web标准概述 Web标准的最终目的就是保证每个人都有权力访问相同 ...
- 使用Python从Markdown文档中自动生成标题导航
概述 知识与思路 代码实现 概述 Markdown 很适合于技术写作,因为技术写作并不需要花哨的排版和内容, 只要内容生动而严谨,文笔朴实而优美. 为了编写对读者更友好的文章,有必要生成文章的标题导航 ...
- 【转】Python之xml文档及配置文件处理(ElementTree模块、ConfigParser模块)
[转]Python之xml文档及配置文件处理(ElementTree模块.ConfigParser模块) 本节内容 前言 XML处理模块 ConfigParser/configparser模块 总结 ...
- Atitit 基于图片图像 与文档混合文件夹的分类
Atitit 基于图片图像 与文档混合文件夹的分类 太小的文档(txt doc csv exl ppt pptx)单独分类 Mov10KminiDoc 但是可能会有一些书法图片迁移,因为他们很微小,需 ...
- Openstack python api 学习文档 api创建虚拟机
Openstack python api 学习文档 转载请注明http://www.cnblogs.com/juandx/p/4953191.html 因为需要学习使用api接口调用openstack ...
- 获取网页文档的URL和连接来源
<script type="text/javascript">document.write("链接来源:"+document.referrer+&q ...
- Python处理Excel文档(xlrd, xlwt, xlutils)
简介 xlrd,xlwt和xlutils是用Python处理Excel文档(*.xls)的高效率工具.其中,xlrd只能读取xls,xlwt只能新建xls(不可以修改),xlutils能将xlrd.B ...
- python+selenium自动化软件测试(第12章):Python读写XML文档
XML 即可扩展标记语言,它可以用来标记数据.定义数据类型,是一种允许用户对自己的标记语言进 行定义的源语言.xml 有如下特征: 首先,它是有标签对组成:<aa></aa> ...
- 《网页文档/文字复制方法大全》 - imsoft.cnblogs
<网页文档/文字复制方法大全> 一: 1.首先,找到自己要的文档. 2.文章题目复制,在搜索引擎的框框里输入:site:wenku.baidu.com "题目"/sit ...
随机推荐
- ElasticSearch
ElaticSearch简介: ES是一个搜索引擎,基于当前最先进,最高效的全功能开源搜索引擎框架lucene ES还有许多功能: 分布式实时文件存储,并将每一个字段都编入索引,使其可以被搜索 近实时 ...
- 多线程迭代之——LINQ to TaskQuery
平时经常会迭代集合,如果数据多的话会很耗时. 例子: , , }; list.ForEach(a => DoSomething(a)); void DoSomething(int a) { // ...
- VS2013打开项目Web加载失败
今天打开一个好久没打开过的老项目,发现web加载失败,如图: 然后重新加载项目,提示: 一开始直接在网上找答案,结果看的答案都不靠谱,只好自己动手了, 先看了 这里面是基础配置:大概看过后,又去看了提 ...
- Linux_用户级_常用命令(5):rm
Linux常用命令第5集包含命令:rm 开篇语:懒是人类进步的源动力 本文原创,专为光荣之路公众号所有,欢迎转发,但转发请务必写出处! 一.命令简介 删除一个目录中的一个或多个文件或目录,如果没有使用 ...
- Linux_用户级_常用命令(4):cp
Linux_用户级_常用命令之cp 开篇语:懒是人类进步的源动力 本文原创,专为光荣之路公众号所有,欢迎转发,但转发请务必写出处! Linux常用命令第二集包含命令:cp 格式 cp [-optio ...
- jsp九大内置对象、四种作用域、跳转方式
jsp有四种属性范围: page -> 页面级别,显然只有在一个页面内可用. request -> 请求级别 服务器跳转,一次请求之后消失. session -> 会话级别 客户端跳 ...
- Mybatis select返回值为map时,选取表字段的两列作为key,value
项目需要从ibatis升级到MyBatis,dao中有一个方法返回Map类型,具体是查询语句查询两个字段,将结果列表字段A的值作为key字段B的值作为value存入Map中作为结果返回: ibatis ...
- redis.conf配置详细翻译解析
# redis 配置文件示例 # 当你需要为某个配置项指定内存大小的时候,必须要带上单位, # 通常的格式就是 1k 5gb 4m 等酱紫: # # 1k => 1000 bytes # 1kb ...
- mySQL函数根据经纬度计算两点距离
DROP FUNCTION IF EXISTS func_calcDistance ; CREATE FUNCTION func_calcDistance( origLng ,), -- 目的地经度 ...
- asp之缓存 cachestate
using System; using System.Collections.Generic; using System.Linq; using System.Web; using System.We ...