【Android开发日记】之入门篇(七)——Android数据存储(上)
一、Android的文件系统
- Android系统文件目录
目录 内容 system 系统目录,放置在Android运行所需的核心库 data 应用目录,放置着运行在Android上的应用及其数据 sdcard 扩展存储卡目录,用来存放共享的数据 mnt 记录Android挂载的外部存储信息 - Android的应用数据存储机制
在Android中,第三方应用及其数据,都存放在data目录下。其中,应用安装包会被存放到/data/app/目录下,每个安装包的文件名都形如:应用包名.apk,以避免重复。
比如包名为com.test.sample的应用,其应用数据的目录为/data/data/com.test.sample/。对应的数据库文件存储在/data/data/com.test.sample/database/目录下,设置文件存储在/data/data/com.test.sample/shared_prefs/,自定义的应用数据文件存储在目录/data/data/com.test.sample/files/下,等等。
不仅如此,Android还会为每个应用创建一个账号,只有通过本应用的账号才有权限去运行该应用的安装包文件,读写应用数据目录下的文件(当然root权限除外啊~),从而保证了该应用数据不会再被其他应用获取或破坏。 - Android的文件操作
从应用数据目录下可以看出,数据文件可以分成两类,一类是放置在扩展存储器中的文件,即/sdcard/目录下的文件,它们可以被各个应用共享;而另一类则是放在该应用数据目录下文件,它们仅能被各个应用独享,不能被其他应用读写。
(1)扩展存储器中的文件读写方式跟标准的java文件处理无异。
我们可以新建一个FileUtil的工具类来帮助我们处理文件的I/O操作,首先我们先判断SD卡的状态,看看SD卡是否可用,还有多少可用容量等。新建一个FileUtil的Class,加入方法// =================get SDCard information===================
public static boolean isSdcardAvailable() {
String status = Environment.getExternalStorageState();
//Environment.MEDIA_MOUNTED表示SD卡正常挂载
if (status.equals(Environment.MEDIA_MOUNTED)) {
return true;
}
return false;
} public static long getSDAllSizeKB() {
//sd卡的位置
File path = Environment.getExternalStorageDirectory();
//StatFs获取的都是以block为单位的
StatFs sf = new StatFs(path.getPath());
// 得到单个block的大小
long blockSize = sf.getBlockSize();
// 获取所有数据块数
long allBlocks = sf.getBlockCount();
// 返回SD卡大小
return (allBlocks * blockSize) / 1024; // KB
} /**
* free size for normal application
* @return
*/
public static long getSDAvalibleSizeKB() {
File path = Environment.getExternalStorageDirectory();
StatFs sf = new StatFs(path.getPath());
long blockSize = sf.getBlockSize();
long avaliableSize = sf.getAvailableBlocks();
return (avaliableSize * blockSize) / 1024;// KB
}Environment.getExternalStorageDirectory()表示获取扩展存储器的目录。(建议使用此方法动态获取,因为sdcard这个目录路径是可配置的)
StatFs.getBlockSize在API18后变为StatFs.getBlockSizeLong,其他类似的getBlock方法也一样,关于StatFs,详情可以看这篇博文
然后在activity中的button1加入事件case R.id.button1: {
Log.d("TEST", "sdcard?"+FileUtil.isSdcardAvailable());
Log.d("TEST", "全部容量"+(float)FileUtil.getSDAllSizeKB()/1024/1024);
Log.d("TEST", "可用容量"+(float)FileUtil.getSDAvalibleSizeKB()/1024/1024);
Toast.makeText(this, "status", Toast.LENGTH_SHORT).show();
break;
}运行结果如下

接下来我们来判断某个文件夹是否存在在SD卡中以及创建一个文件夹
/**
* @param director 文件夹名称
* @return
*/
public static boolean isFileExist(String director) {
File file = new File(Environment.getExternalStorageDirectory()
+ File.separator + director);
return file.exists();
} /**
* create multiple director
* @param path
* @return
*/
public static boolean createFile(String director) {
if (isFileExist(director)) {
return true;
} else {
File file = new File(Environment.getExternalStorageDirectory()
+ File.separator + director);
if (!file.mkdirs()) {
return false;
}
return true;
}
}其中File.separator是表示分隔符,在不同操作系统下是不同的,如windows就是代表"/",而在Linux下却是代表"\"。所以介意使用File.separator来代替分隔符。File.mkdirs()表示创建一个文件夹,且可附带创建父目录,而mkdir()不行,详情的File大家可以查看官方文档,或者看看这篇博文
然后在activity中的button2加入响应事件case R.id.button2: {
Log.d("TEST", "example文件夹存在?"+FileUtil.isFileExist("example"));
Log.d("TEST", "创建forexample文件夹"+FileUtil.createFile("forexample"));
Toast.makeText(this, "IsFile", Toast.LENGTH_SHORT).show();
break;
}运行后可以看到

我们会发现在手机的sdcard目录下新建了一个forexample的文件夹。
最后我们来实现文件的读和写
写:/**
*
* @param director
* (you don't need to begin with
* Environment.getExternalStorageDirectory()+File.separator)
* @param fileName
* @param content
* @param encoding
* (UTF-8...)
* @param isAppend
* : Context.MODE_APPEND
* @return
*/
public static File writeToSDCardFile(String directory, String fileName,
String content, String encoding, boolean isAppend) {
// mobile SD card path +path
File file = null;
OutputStream os = null;
try {
if (!createFile(directory)) {
return file;
}
file = new File(Environment.getExternalStorageDirectory()
+ File.separator + directory + File.separator + fileName);
os = new FileOutputStream(file, isAppend);
if (encoding.equals("")) {
os.write(content.getBytes());
} else {
os.write(content.getBytes(encoding));
}
os.flush();
} catch (IOException e) {
Log.e("FileUtil", "writeToSDCardFile:" + e.getMessage());
} finally {
try {
if (os != null) {
os.close();
}
} catch (IOException e) {
e.printStackTrace();
}
}
return file;
} /**
* write data from inputstream to SDCard
*/
public File writeToSDCardFromInput(String directory, String fileName,
InputStream input) {
File file = null;
OutputStream os = null;
try {
if (createFile(directory)) {
return file;
}
file = new File(Environment.getExternalStorageDirectory()
+ File.separator + directory + File.separator + fileName);
os = new FileOutputStream(file);
byte[] data = new byte[bufferd];
int length = -1;
while ((length = input.read(data)) != -1) {
os.write(data, 0, length);
}
// clear cache
os.flush();
} catch (Exception e) {
Log.e("FileUtil", "" + e.getMessage());
e.printStackTrace();
} finally {
try {
os.close();
} catch (Exception e) {
e.printStackTrace();
}
}
return file;
}从上面可以看到有两种写入的方法,一种是将字符串直接写入,另一种是将数据流写到文件中。还有一点要提的是file的默认目录就是sdcard的目录,所以开头不必每次都要加sdcard的目录路径。
FileOutputStream(file, isAppend) 两个参数,左边是File文件,而右边是一个boolean值,为true时,数据将会接在原来文件的后面写入,而false是则会覆盖。
读:public static String ReadFromSDCardFile(String directory,String fileName){
String res="";
File file = null;
file = new File(Environment.getExternalStorageDirectory()
+ File.separator + directory + File.separator + fileName);
try {
FileInputStream fis = new FileInputStream(file);
int length = fis.available();
byte [] buffer = new byte[length];
fis.read(buffer);
//将字节按照编码格式转成字符串
res = EncodingUtils.getString(buffer, "UTF-8");
fis.close();
return res;
}catch (FileNotFoundException e) {
// TODO Auto-generated catch block
Log.d("TEST", "FileNotFound");
e.printStackTrace();
}catch (Exception e) {
Log.d("TEST", "Can Not Open File");
e.printStackTrace();
}
return null;
}编码默认是UTF-8,若是想要改变的话,将其作为参数传入就行。
Activity中在按钮中加入响应case R.id.button3: {
FileUtil.writeToSDCardFile("forexample", "test.txt",
editText.getText().toString(), "UTF-8", true);
Toast.makeText(this, "WriteFile", Toast.LENGTH_SHORT).show();
break;
}
case R.id.button4: {
textView.setText(FileUtil.ReadFromSDCardFile("forexample", "test.txt"));
Toast.makeText(this, "ReadFile", Toast.LENGTH_SHORT).show();
break;
}在文字编辑框上写入“我是cpacm”,先点击writefile按钮,再点击ReadFile,得到运行结果

同时在根目录下的forexample文件夹里会找到test.txt,里面有着“我是cpacm”的一行字。到此,文件的读写成功。
(2)放在该应用数据目录下的文件读写
存储在应用目录下的私有数据目录,通常不会通过File类的方式直接读写,而是利用一些封装过的类或函数来操作。一般可以通过Context.openFileOutput来执行。
在Activity加入两个方法,分别为文件的读和写public void writeFile(String fileName,String writestr){
try{
FileOutputStream fout =openFileOutput(fileName,MODE_PRIVATE);
byte [] bytes = writestr.getBytes();
fout.write(bytes);
fout.close();
}
catch(Exception e){
e.printStackTrace();
}
} //读数据
public String readFile(String fileName){
String res="";
try{
FileInputStream fin = openFileInput(fileName);
int length = fin.available();
byte [] buffer = new byte[length];
fin.read(buffer);
res = EncodingUtils.getString(buffer, "UTF-8");
fin.close();
}
catch(Exception e){
e.printStackTrace();
}
return res;
}同时在按钮的响应中加入
case R.id.button5: {
writeFile("test2.txt",editText.getText().toString());
Toast.makeText(this, "WritePrivateFile", Toast.LENGTH_SHORT).show();
break;
}
case R.id.button6: {
textView.setText(readFile("test2.txt"));
Toast.makeText(this, "ReadPrivateFile", Toast.LENGTH_SHORT).show();
break;
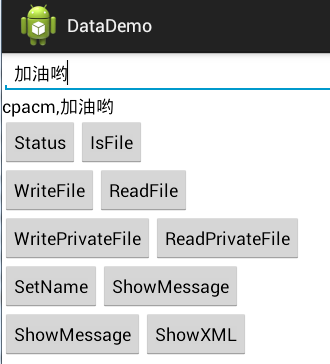
}效果图跟上张一样。
最后不要忘记在配置文件中声明权限
<uses-permission android:name="android.permission.WRITE_EXTERNAL_STORAGE" />
<uses-permission android:name="android.permission.MOUNT_UNMOUNT_FILESYSTEMS" />
二、Android设置文件的使用
用户在使用应用时,常常会有一些个人偏好。为了满足不同用户的需求,应用通常会提供对应的设置项(Preference),让用户根据自己的喜好选择。这些设置信息会存储在本地并进行结构化地展示,使用户可以编辑。
- 设置文件的存储和使用
Android应用的设置数据,可以通过android.content.SharedPreferences类来表示。它提供了一组数据读取的接口,可以从设置文件中读取给定键值的整形数,布尔型数等数据。
首先是获取SharedPreferencesprivate SharedPreferences userInfo;
//在界面组件或服务组件中调用,构造应用默认的设置文件,默认文件名字为_preferences.xml
//userInfo = PreferenceManager.getDefaultSharedPreferences(this);
//或获取指定名字的SharedPreferences对象 参数分别为存储的文件名和存储模式。
userInfo = getSharedPreferences("preferences", Activity.MODE_PRIVATE); //读取数据,如果无法找到则会使用默认值
String username = userInfo.getString("name", "未定义姓名");
String msg = userInfo.getString("msg", "未定义信息");
//显示文本
textView.setText(username+","+msg);两种获取方式,默认或者指定一个文件
接下来加入响应按钮case R.id.button7: {
//获得SharedPreferences的编辑器
SharedPreferences.Editor editor = userInfo.edit();
//将信息存入相应的键值中
editor.putString("name", editText.getText().toString()).commit();
Toast.makeText(this, "SetName", Toast.LENGTH_SHORT).show();
break;
}
case R.id.button8: {
//获得SharedPreferences的编辑器
SharedPreferences.Editor editor = userInfo.edit();
//将信息存入相应的键值中ss
editor.putString("msg", editText.getText().toString()).commit();
Toast.makeText(this, "SetMessage", Toast.LENGTH_SHORT).show();
break;
}
case R.id.button9: {
//获得SharedPreferences文件
userInfo = getSharedPreferences("preferences", Activity.MODE_PRIVATE);
String username = userInfo.getString("name", "未定义姓名");
String msg = userInfo.getString("msg", "未定义信息");
textView.setText(username+","+msg);
Toast.makeText(this, "ShowMsg", Toast.LENGTH_SHORT).show();
break;
}
case R.id.button10: {
//输出XML文件
textView.setText(print());
Toast.makeText(this, "ShowXML", Toast.LENGTH_SHORT).show();
break;
}按钮7,8可以设置信息,按钮9则从SharedPreferences文件中读取信息并显示在文字框中。按钮10会显示这个XML文件中的所有信息。
访问其他应用中的Preference(在SecondApp中访问FirstApp的数据),前提条件是:FirstApp的preference创建时指定了Context.MODE_WORLD_READABLE或者Context.MODE_WORLD_WRITEABLE权限。
如:在<package name>为com.first.app的应用使用下面语句创建了preference("first_app_perferences")。
Java代码getSharedPreferences("first_app_perferences", Context.MODE_WORLD_READABLE);
在SecondApp中要访问FirstApp应用中的preference,首先需要创建FirstApp应用的Context,然后通过Context 访问preference ,访问preference时会在应用所在包下的shared_prefs目录找到preference
Context firstAppContext = createPackageContext("com.first.app", Context.CONTEXT_IGNORE_SECURITY);
SharedPreferences sharedPreferences = firstAppContext.getSharedPreferences("first_app_perferences", Context.MODE_WORLD_READABLE);
String name = sharedPreferences.getString("name", "");
int age = sharedPreferences.getInt("age", 0);如果不通过创建Context访问FirstApp应用的preference,可以以读取xml文件方式直接访问FirstApp应用的preference对应的xml文件,
如:
File xmlFile = new File(“/data/data/<package
name>/shared_prefs/first_app_perferences.xml”);//<package
name>应替换成应用的包名: com.first.app - 设置界面组件
有一类特殊的Preference对象:android.preference.PreferenceGroup。它是容器型的Preference对象,负责管理一组相关联的Preference对象。设置项编辑的界面组件,通常派生自android.preference.PreferenceActivity类。它可以将一个定制好的设置树转换成对应的控件呈现出来。public class PreferencesDemo extends PreferenceActivity{
@Override
public void onCreate(Bundle savadInstanceState){
super.onCreate(savadInstanceState);
this.addPreferencesFromResource(R.xml.preference);
}
}其中,R.xml.preference表示描述设置信息的资源文件。放在XML资源目录下。
详细可以参考Android的配置界面PreferenceActivity
public class MainActivity extends Activity implements OnClickListener {
/** 存储后的文件路径:/data/data/<package name>/shares_prefs + 文件名.xml */
public static final String PATH = "/data/data/com.example.datademo/shared_prefs/preferences.xml";
private SharedPreferences userInfo;
private Button button1;
private Button button2;
private Button button3;
private Button button4;
private Button button5;
private Button button6;
private Button button7;
private Button button8;
private Button button9;
private Button button10;
private TextView textView;
private EditText editText;
@Override
protected void onCreate(Bundle savedInstanceState) {
super.onCreate(savedInstanceState);
setContentView(R.layout.activity_main);
// 获得界面的控件
textView = (TextView) findViewById(R.id.textView1);
editText = (EditText) findViewById(R.id.editText1);
button1 = (Button) findViewById(R.id.button1);
button1.setOnClickListener(this);
button2 = (Button) findViewById(R.id.button2);
button2.setOnClickListener(this);
button3 = (Button) findViewById(R.id.button3);
button3.setOnClickListener(this);
button4 = (Button) findViewById(R.id.button4);
button4.setOnClickListener(this);
button5 = (Button) findViewById(R.id.button5);
button5.setOnClickListener(this);
button6 = (Button) findViewById(R.id.button6);
button6.setOnClickListener(this);
button7 = (Button) findViewById(R.id.button7);
button7.setOnClickListener(this);
button8 = (Button) findViewById(R.id.button8);
button8.setOnClickListener(this);
button9 = (Button) findViewById(R.id.button9);
button9.setOnClickListener(this);
button10 = (Button) findViewById(R.id.button10);
button10.setOnClickListener(this);
//在界面组件或服务组件中调用,构造应用默认的设置文件,默认文件名字为_preferences.xml
//userInfo = PreferenceManager.getDefaultSharedPreferences(this);
//或获取指定名字的SharedPreferences对象 参数分别为存储的文件名和存储模式。
userInfo = getSharedPreferences("preferences.xml", Activity.MODE_PRIVATE);
//读取数据,如果无法找到则会使用默认值
String username = userInfo.getString("name", "未定义姓名");
String msg = userInfo.getString("msg", "未定义信息");
//显示文本
textView.setText(username+","+msg);
}
@Override
public void onClick(View v) {
// TODO Auto-generated method stub
switch (v.getId()) {
case R.id.button1: {

            Log.d("TEST", "sdcard?"+FileUtil.isSdcardAvailable());

            Log.d("TEST", "全部容量"+(float)FileUtil.getSDAllSizeKB()/1024/1024);

            Log.d("TEST", "可用容量"+(float)FileUtil.getSDAvalibleSizeKB()/1024/1024);

            Toast.makeText(this, "status", Toast.LENGTH_SHORT).show();

            break;

        }
case R.id.button2: {

            Log.d("TEST", "example文件夹存在?"+FileUtil.isFileExist("example"));

            Log.d("TEST", "创建forexample文件夹"+FileUtil.createFile("forexample"));

            Toast.makeText(this, "IsFile", Toast.LENGTH_SHORT).show();

            break;

        }
case R.id.button3: {

            FileUtil.writeToSDCardFile("forexample", "test.txt",

                    editText.getText().toString(), "UTF-8", true);

            Toast.makeText(this, "WriteFile", Toast.LENGTH_SHORT).show();

            break;

        }

        case R.id.button4: {

            textView.setText(FileUtil.ReadFromSDCardFile("forexample", "test.txt"));

            Toast.makeText(this, "ReadFile", Toast.LENGTH_SHORT).show();

            break;

        }
case R.id.button5: {
writeFile("test2.txt",editText.getText().toString());
Toast.makeText(this, "WritePrivateFile", Toast.LENGTH_SHORT).show();
break;
}
case R.id.button6: {
textView.setText(readFile("test2.txt"));
Toast.makeText(this, "ReadPrivateFile", Toast.LENGTH_SHORT).show();
break;
}
case R.id.button7: {
//获得SharedPreferences的编辑器
SharedPreferences.Editor editor = userInfo.edit();
//将信息存入相应的键值中
editor.putString("name", editText.getText().toString()).commit();
Toast.makeText(this, "SetName", Toast.LENGTH_SHORT).show();
break;
}
case R.id.button8: {
//获得SharedPreferences的编辑器
SharedPreferences.Editor editor = userInfo.edit();
//将信息存入相应的键值中ss
editor.putString("msg", editText.getText().toString()).commit();
Toast.makeText(this, "SetMessage", Toast.LENGTH_SHORT).show();
break;
}
case R.id.button9: {
userInfo = getSharedPreferences("preferences.xml", Activity.MODE_PRIVATE);
String username = userInfo.getString("name", "未定义姓名");
String msg = userInfo.getString("msg", "未定义信息");
textView.setText(username+","+msg);
Toast.makeText(this, "ShowMsg", Toast.LENGTH_SHORT).show();
break;
}
case R.id.button10: {
textView.setText(print());
Toast.makeText(this, "ShowXML", Toast.LENGTH_SHORT).show();
break;
}
}
}
    public void writeFile(String fileName,String writestr){

        try{

                FileOutputStream fout =openFileOutput(fileName,MODE_PRIVATE);

                byte [] bytes = writestr.getBytes();

                fout.write(bytes);

                fout.close();

              }

                catch(Exception e){

                e.printStackTrace();

               }

        }

        //读数据

    public String readFile(String fileName){

      String res="";

      try{

             FileInputStream fin = openFileInput(fileName);

             int length = fin.available();

             byte [] buffer = new byte[length];

             fin.read(buffer);

             res = EncodingUtils.getString(buffer, "UTF-8");

             fin.close();

         }

         catch(Exception e){

             e.printStackTrace();

         }

         return res;

    }
private String print() {
StringBuffer buff = new StringBuffer();
try {
BufferedReader reader = new BufferedReader(new InputStreamReader(
new FileInputStream(PATH)));
String str;
while ((str = reader.readLine()) != null) {
buff.append(str + "/n");
}
} catch (Exception e) {
e.printStackTrace();
}
return buff.toString();
}
}
 package com.example.datademo;

 import java.io.File;

 import java.io.FileInputStream;

 import java.io.FileNotFoundException;

 import java.io.FileOutputStream;

 import java.io.IOException;

 import java.io.InputStream;

 import java.io.OutputStream;

 import org.apache.http.util.EncodingUtils;

 import android.os.Environment;

 import android.os.StatFs;

 import android.util.Log;

 public class FileUtil {

     private static int bufferd = 1024;

     private FileUtil() {

     }

     /*

      * <!-- 在SDCard中创建与删除文件权限 --> <uses-permission

      * android:name="android.permission.MOUNT_UNMOUNT_FILESYSTEMS"/> <!--

      * 往SDCard写入数据权限 --> <uses-permission

      * android:name="android.permission.WRITE_EXTERNAL_STORAGE"/>

      */

     // =================get SDCard information===================

     public static boolean isSdcardAvailable() {

         String status = Environment.getExternalStorageState();

         //Environment.MEDIA_MOUNTED表示SD卡正常挂载

         //sd卡   http://blog.csdn.net/yuzhiboyi/article/details/8645730

         if (status.equals(Environment.MEDIA_MOUNTED)) {

             return true;

         }

         return false;

     }

     public static long getSDAllSizeKB() {

         // get path of sdcard

         File path = Environment.getExternalStorageDirectory();

         //StatFs获取的都是以block为单位的   http://blog.csdn.net/pang3510726681/article/details/6969557

         StatFs sf = new StatFs(path.getPath());

         // get single block size(Byte)

         long blockSize = sf.getBlockSize();

         // 获取所有数据块数

         long allBlocks = sf.getBlockCount();

         // 返回SD卡大小

         return (allBlocks * blockSize) / 1024; // KB

     }

     /**

      * free size for normal application

      *

      * @return

      */

     public static long getSDAvalibleSizeKB() {

         File path = Environment.getExternalStorageDirectory();

         StatFs sf = new StatFs(path.getPath());

         long blockSize = sf.getBlockSize();

         long avaliableSize = sf.getAvailableBlocks();

         return (avaliableSize * blockSize) / 1024;// KB

     }

     // =====================File Operation==========================

     /**

      * @param director 文件夹名称

      * @return

      */

     public static boolean isFileExist(String director) {

         File file = new File(Environment.getExternalStorageDirectory()

                 + File.separator + director);

         return file.exists();

     }

     /**

      * create multiple director

      *

      * @param path

      * @return

      */

     public static boolean createFile(String director) {

         if (isFileExist(director)) {

             return true;

         } else {

             File file = new File(Environment.getExternalStorageDirectory()

                     + File.separator + director);

             if (!file.mkdirs()) {

                 return false;

             }

             return true;

         }

     }

     public static File writeToSDCardFile(String directory, String fileName,

             String content, boolean isAppend) {

         return writeToSDCardFile(directory, fileName, content, "", isAppend);

     }

     /**

      *

      * @param director

      *            (you don't need to begin with

      *            Environment.getExternalStorageDirectory()+File.separator)

      * @param fileName

      * @param content

      * @param encoding

      *            (UTF-8...)

      * @param isAppend

      *            : Context.MODE_APPEND

      * @return

      */

     public static File writeToSDCardFile(String directory, String fileName,

             String content, String encoding, boolean isAppend) {

         // mobile SD card path +path

         File file = null;

         OutputStream os = null;

         try {

             if (!createFile(directory)) {

                 return file;

             }

             file = new File(Environment.getExternalStorageDirectory()

                     + File.separator + directory + File.separator + fileName);

             os = new FileOutputStream(file, isAppend);

             if (encoding.equals("")) {

                 os.write(content.getBytes());

             } else {

                 os.write(content.getBytes(encoding));

             }

             os.flush();

         } catch (IOException e) {

             Log.e("FileUtil", "writeToSDCardFile:" + e.getMessage());

         } finally {

             try {

                 if (os != null) {

                     os.close();

                 }

             } catch (IOException e) {

                 e.printStackTrace();

             }

         }

         return file;

     }

     /**

      * write data from inputstream to SDCard

      */

     public static File writeToSDCardFromInput(String directory, String fileName,

             InputStream input) {

         File file = null;

         OutputStream os = null;

         try {

             if (createFile(directory)) {

                 return file;

             }

             file = new File(Environment.getExternalStorageDirectory()

                     + File.separator + directory + File.separator + fileName);

             os = new FileOutputStream(file);

             byte[] data = new byte[bufferd];

             int length = -1;

             while ((length = input.read(data)) != -1) {

                 os.write(data, 0, length);

             }

             // clear cache

             os.flush();

         } catch (Exception e) {

             Log.e("FileUtil", "" + e.getMessage());

             e.printStackTrace();

         } finally {

             try {

                 os.close();

             } catch (Exception e) {

                 e.printStackTrace();

             }

         }

         return file;

     }

     public static String ReadFromSDCardFile(String directory,String fileName){

         String res="";

         File file = null;

         file = new File(Environment.getExternalStorageDirectory()

                 + File.separator + directory + File.separator + fileName);

         try {

             FileInputStream fis = new FileInputStream(file);

             int length = fis.available();

             byte [] buffer = new byte[length];

             fis.read(buffer);

             res = EncodingUtils.getString(buffer, "UTF-8");

             fis.close();

             return res;

         }catch (FileNotFoundException  e) {

             // TODO Auto-generated catch block

             Log.d("TEST", "FileNotFound");

             e.printStackTrace();

         }catch (Exception  e) {

             Log.d("TEST", "Can Not Open File");

             e.printStackTrace();

         }

         return null;

     }

 }
资源下载:DataDemo
参考文章:(1)Android中的SharedPreferences存储数据方式 http://blog.csdn.net/zuolongsnail/article/details/6556703 (2)Android - 文件操作 小结 http://www.open-open.com/lib/view/open1330957864280.html 限于篇幅,这篇文章就到此结束,这篇主要讲了如何在Android中读写文件,包括SDCard中和应用内部的文件。以及如何使用设置文件。在下一篇我会讲解Android内部自带的数据库使用及操作。========================================
作者:cpacm
出处:(http://www.cpacm.net/2015/03/22/Android开发日记(五)——Android数据存储(上)/)
【Android开发日记】之入门篇(七)——Android数据存储(上)的更多相关文章
- 【Android开发日记】第一个任务Android Service!Service靴+重力感应器+弹出窗口+保持执行
前言: 近期在写一个小程序,需求是手机摇一摇就弹窗出来.第一次使用了Service,学习了两天,实现了Service弹窗,开机启动,Service启动和销毁,Service保持一直执行. 满足了自己的 ...
- 【Android开发日记】之入门篇(九)——Android四大组件之ContentProvider
数据源组件ContentProvider与其他组件不同,数据源组件并不包括特定的功能逻辑.它只是负责为应用提供数据访问的接口.Android内置的许多数据都是使用ContentProvider形式,供 ...
- 【Android开发日记】之入门篇(十二)——Android组件间的数据传输
组件我们有了,那么我们缺少一个组件之间传递信息的渠道.利用Intent做载体,这是一个王道的做法.还有呢,可以利用文件系统来做数据共享.也可以使用Application设置全局数据,利用组件来进行控制 ...
- 【Android开发日记】之入门篇(十四)——Button控件+自定义Button控件
好久不见,又是一个新的学期开始了,为什么我感觉好惆怅啊!这一周也发生了不少事情,节假日放了三天的假(好久没有这么悠闲过了),实习公司那边被组长半强制性的要求去解决一个后台登陆的问题,结果就是把 ...
- 【Android开发日记】之入门篇(十一)——Android的Intent机制
继续我们的Android之路吧.今天我要介绍的是Android的Intent. 对于基于组件的应用开发而言,不仅需要构造和寻找符合需求的组件,更重要的是要将组件有机的连接起来,互联互通交换信息,才能够 ...
- 【Android开发日记】之入门篇(一)——开发环境的搭建
写给自己的话:至此,大学的时光已经剩下一年的时光,下一年等毕业设计结束后就算是正式地踏入社会.自己学android也不过几个月的时间,为了更好管理文档,写点东西记录下自己曾经做过的点点滴滴是一个不错的 ...
- 【Android开发日记】之入门篇(八)——Android数据存储(下)
废话不多说了,紧接着来讲数据库的操作吧.Come On! 提到数据存储问题,数据库是不得不提的.数据库是用来存储关系型数据的不二利器.Android为开发者提供了强大的数据库支持,可以用来轻松地构造基 ...
- 【Android开发日记】之入门篇(五)——Android四大组件之Service
这几天忙着驾校考试,连电脑都碰不到了,今天总算告一段落了~~Service作为Android的服务组件,默默地在后台为整个程序服务,辅助应用与系统中的其他组件或系统服务进行沟通.它跟Activity的 ...
- 【Android开发日记】之入门篇(六)——Android四大组件之Broadcast Receiver
广播接受者是作为系统的监听者存在着的,它可以监听系统或系统中其他应用发生的事件来做出响应.如设备开机时,应用要检查数据的变化状况,此时就可以通过广播来把消息通知给用户.又如网络状态改变时,电量变化时都 ...
随机推荐
- 【BZOJ3884】上帝与集合的正确用法
Description 一句话题意,给定\(p\)作为模数: \(p\le 10^7\),数据组数\(T\le1000\). Solution 看到就弃疗了,再见...... 将模数\(p\)拆分成\ ...
- GridView中网络图片延迟加载导致高度计算失败的问题
在使用下拉刷新以及加载更多控件的时候,出现了列表上滚不完的现象,经过半天的分析,最后得出结论:由于图片采用了延迟加载,导致列表按照没有加载图片时候的大小进行布局,相关的加载更多控件也就傻逼了. 最终解 ...
- 2017 3 8 练习赛 t3 路径规划
题目大意是让你在一棵树上找到一条路径使得(路径边权和*路径最小值) 最大. 这道题有两种方法. 1.点分治,考虑过重心的每条路径是否可能成为答案,枚举从根出发的每一条路径中的最小值等于总路径的最小值, ...
- bzoj5210最大连通子块和
题解: 考虑朴素的dp:$$f_{u} = max(\sum_{v} f_{v} + w_{u} , 0) \ \ \ \ h_{u} = max( max_{v} \{ h_{v} \} , h ...
- bzoj2589【 Spoj 10707】 Count on a tree II
题目描述 给定一棵N个节点的树,每个点有一个权值,对于M个询问(u,v),你需要回答u xor lastans和v这两个节点间有多少种不同的点权.其中lastans是上一个询问的答案,初始为0,即第一 ...
- C++下实现同接口下多个类作为参数的调用和传参
/* 实现同接口下不同类的对象的转移 定义类的接口 定义多个继承该接口的类 定义管理类,把接口当作类型, 传入该接口下各种类的对象,进行操作 */ #include<iostream> # ...
- js基础之DOM中元素对象的属性方法
在 HTML DOM (文档对象模型)中,每个部分都是节点. 节点是DOM结构中最基本的组成单元,每一个HTML标签都是DOM结构的节点. 文档是一个 文档节点 . 所有的HTML元素都是 ...
- 2017年Java面试题整理
原文出处:CSDN邓帅 面试是我们每个人都要经历的事情,大部分人且不止一次,这里给大家总结最新的2016年面试题,让大家在找工作时候能够事半功倍. 1.Switch能否用string做参数? a.在 ...
- Linux Ubuntu下安装配置mysql
检查系统中是否已经安装了mysql: sudo netstat -tap | grep mysql 安装mysql: sudo apt-get install mysql-server sudo ap ...
- 对 jQuery 中 data 方法的误解
一直以来都认为新版本中 data 是调用 dataset 实现的,对于低版本IE则采用 getAttribute其实一直是我误解了,也不知道最初这个想法是怎么来的.难道我被盗梦了? 今天 谢亮 兄弟和 ...