React Native Android启动白屏的一种解决方案下
实现思路
思路大流程:
1.APP启动的时候控制ReactActivity从而显示启动屏。
2.编写原生模块,提供一个关闭启动屏的公共接口。
3.在js的适当位置(一般是程序初始化工作完成后)调用上述公共接口关闭启动屏。
目录结构

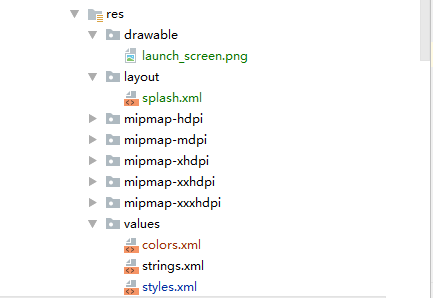
SplashScreen:创建Diaolg,当白屏的时候显示用。
SplashScreenModule、SplashScreenReactPackage:Dialog关闭的桥接,需要在MainApplication中注册。
lanuch_screen.png:Dialog布局文件显示的图片
splash.xml:Dialog加载的布局配置文件
开始动手
1.在android/app/src/main/java/com/splashScreen下创建一个文件SplashScreen.java
package com.splashScreen;

import android.app.Activity;

import android.app.Dialog;

import com.nativetest.R;

import java.lang.ref.WeakReference;

public class SplashScreen {

    private static int NULL_ID = 0;

    private static Dialog mSplashDialog;

    private static WeakReference<Activity> mActivity;

    /**

     * 打开启动屏

     */

    public static void show(final Activity activity, final boolean fullScreen, final int themeResId){

        if (activity==null) return;

        mActivity = new WeakReference<Activity>(activity);

        activity.runOnUiThread(new Runnable() {

            @Override

            public void run() {

                if (!activity.isFinishing()) {

                    mSplashDialog = new Dialog(

                            activity,

                            themeResId !=NULL_ID ? themeResId

                                    : fullScreen ? R.style.SplashScreen_Fullscreen

                                    : R.style.SplashScreen_SplashTheme

                    );

                    mSplashDialog.setContentView(R.layout.splash);

                    mSplashDialog.setCancelable(false);

                    if (!mSplashDialog.isShowing()) {

                        mSplashDialog.show();

                    }

                }

            }

        });

    }

    /**

     * 打开启动屏

     */

    public static void show(final Activity activity, final boolean fullScreen) {

        show(activity, fullScreen, 0);

    }

    /**

     * 打开启动屏

     */

    public static void show(final Activity activity) {

        show(activity, false);

    }

    /**

     * 关闭启动屏

     */

    public static void hide(Activity activity) {

        if (activity == null) {

            if (mActivity == null) {

                return;

            }

            activity = mActivity.get();

        }

        if (activity == null) return;

        activity.runOnUiThread(new Runnable() {

            @Override

            public void run() {

                if (mSplashDialog != null && mSplashDialog.isShowing()) {

                    mSplashDialog.dismiss();

                    mSplashDialog = null;

                }

            }

        });

    }

}
2.在android/app/src/main/java/com/splashScreen下创建一个文件SplashScreenModule.java
package com.splashScreen;

import com.facebook.react.bridge.ReactApplicationContext;

import com.facebook.react.bridge.ReactContextBaseJavaModule;

import com.facebook.react.bridge.ReactMethod;

import com.splashScreen.SplashScreen;

public class SplashScreenModule extends ReactContextBaseJavaModule {

    public SplashScreenModule(ReactApplicationContext reactContext) {

        super(reactContext);

    }

    @Override

    public String getName() {

        return "SplashScreen";

    }

    /**

     * 打开启动屏

     */

    @ReactMethod

    public void show() {

        SplashScreen.show(getCurrentActivity());

    }

    /**

     * 关闭启动屏

     */

    @ReactMethod

    public void hide() {

        SplashScreen.hide(getCurrentActivity());

    }

    /**

     * 退出程序

     */

    @ReactMethod

    public void exit() {

        if (getCurrentActivity() != null)

            getCurrentActivity().finish();

        System.exit(0);

    }

}
3.在android/app/src/main/java/com/splashScreen下创建一个文件SplashScreenReactPackage.java
package com.splashScreen;

import com.facebook.react.ReactPackage;

import com.facebook.react.bridge.JavaScriptModule;

import com.facebook.react.bridge.NativeModule;

import com.facebook.react.bridge.ReactApplicationContext;

import com.facebook.react.uimanager.ViewManager;

import com.splashScreen.SplashScreenModule;

import java.util.ArrayList;

import java.util.Collections;

import java.util.List;

public class SplashScreenReactPackage implements ReactPackage {

    // Deprecated RN 0.47

    public List<Class<? extends JavaScriptModule>> createJSModules() {

        return Collections.emptyList();

    }

    @Override

    public List<ViewManager> createViewManagers(ReactApplicationContext reactContext) {

        return Collections.emptyList();

    }

    @Override

    public List<NativeModule> createNativeModules(

            ReactApplicationContext reactContext) {

        List<NativeModule> modules = new ArrayList<>();

        modules.add(new SplashScreenModule(reactContext));

        return modules;

    }

}
4.在MainActivity.java中添加如下代码
package com.nativetest;

import android.content.Intent;

import android.os.Bundle;

import android.support.annotation.Nullable;

import com.facebook.react.ReactActivity;

import com.splashScreen.SplashScreen;

// import com.splashScreen.SplashScreen;

public class MainActivity extends ReactActivity {

    /**

     * Returns the name of the main component registered from JavaScript.

     * This is used to schedule rendering of the component.

     */

    @Override

    protected String getMainComponentName() {

        return "NativeTest";

    }

    @Override

    protected void onCreate(Bundle savedInstanceState) {

        SplashScreen.show(this,true);//显示Dialog

        super.onCreate(savedInstanceState);

        //解决应用程序多次重启问题

        if ((getIntent().getFlags() & Intent.FLAG_ACTIVITY_BROUGHT_TO_FRONT) != 0){

            finish();

            return;

        }

    }

}
5.在android/app/src/main/res下新建一个drawable文件夹,该文件夹下放置一个启动屏图片命名为launch_screen.png
6.在android/app/src/main/res下新建一个layout文件夹,该文件夹下新建一个layout.xml文件
<?xml version="1.0" encoding="utf-8"?>

<LinearLayout xmlns:android="http://schemas.android.com/apk/res/android"

    android:orientation="vertical" android:layout_width="match_parent"

    android:layout_height="match_parent"

    android:background="@drawable/launch_screen"

    >

</LinearLayout>
React Native Android启动白屏的一种解决方案下的更多相关文章
- React Native Android启动白屏的一种解决方案上
我们用RN去开发Android应用的时候,我们会发现一个很明显的问题,这个问题就是启动时每次都会有1~3秒的白屏时间,直到项目加载出来 为什么会出现这个问题? RN开发的应用在启动时,首先会将js b ...
- 解决android 启动白屏问题
Android 启动APP时黑屏白屏的三个解决方案 http://www.cnblogs.com/liqw/p/4263418.html android:windowSoftInputMode属性使用 ...
- 运行React Native项目出现白屏,无法运行
运行React Native出现白屏,无法运行,查看终端报错如下: 原因: 代码中有语法错误,导致运行失败. 其实到这里可以去Xcode查看控制台打印,会提示哪个文件出现错误的. 解决办法: 找到报错 ...
- Android 启动白屏或者黑屏闪现解决
1.设置Style //1.设置背景图Theme <style name="Theme.AppStartLoad" parent="android:Theme&qu ...
- react native 完美解决启动白屏
先讲下我的RN版本0.58.5 首先安装react-native-splash-screen(目前使用的版本是3.2.0) 项目地址https://github.com/crazycodeboy/re ...
- React native android 最常见的10个问题
这里逐条记录下最容易遇到的React native android 相关case: 1. app启动后,红色界面,unable load jsbundle : 解决办法:一般来说就是,你是用dev-s ...
- React Native Android 环境搭建
因为工作需要,最近正在学习React Native Android.温故而知新,把学习的内容记录下来巩固一下知识,也给有需要的人一些帮助. 需要说明的是,我刚接触React Native也不久,对它的 ...
- react-native —— 在Windows下搭建React Native Android开发环境
在Windows下搭建React Native Android开发环境 前段时间在开发者头条收藏了 @天地之灵_邓鋆 分享的<在Windows下搭建React Native Android开发环 ...
- react-native —— 在Mac上配置React Native Android开发环境排坑总结
配置React Native Android开发环境总结 1.卸载Android Studio,在终端(terminal)执行以下命令: rm -Rf /Applications/Android\ S ...
随机推荐
- ASP.NET MVC项目框架快速搭建实战
MVC项目搭建笔记---- 项目框架采用ASP.NET MVC+Entity Framwork+Spring.Net等技术搭建,采用”Domain Model as View Model“的MVC开发 ...
- 【codevs1245】最小的 N 个和
题目大意:给定两个有 N 个数字的序列,从这两个序列中任取一个数相加,共有 \(N^2\) 个和,求这些和中最小的 N 个. 题解:由于数据量是 10W,必须减少每次选取的决策集合中元素的个数.可以发 ...
- 浮动和margin-left负值的有趣现象
我将第二个浮动的元素的margin-left的值不断减小: 被设置元素左移,后面的元素跟着动 当被设置元素的右边界超过了前面元素的左边界,后面边的元素被前面的元素挡在外面了
- java基础-多线程应用案例展示
java基础-多线程应用案例展示 作者:尹正杰 版权声明:原创作品,谢绝转载!否则将追究法律责任. 一.两只熊,100只蜜蜂,蜜蜂每次生产的蜂蜜量是1,罐子的容量是30,熊在罐子的蜂蜜量达到20的时候 ...
- RAC手动中断订阅
__block RACDisposable* dispose = [[RACObserve(self, price) skip:1]subscribeNext:^(NSNumber* x) { [di ...
- 使用 git 托管代码
1. 下载安装好 git 客户端 2. 找一个家代码托管平台 我用 coding.net,注册个账号,建一个空项目 然后打开安装好的 git bash 客户端,使用 git clone 命令克隆下远程 ...
- dedecms织梦让channelartlist标签支持currentstyle属性
打开include\taglib\channelartlist.lib.php 大约93行 找到: $pv->Fields['typeurl'] = GetOneTypeUrlA($typei ...
- html5 canvas 水平渐变描边
<!DOCTYPE html PUBLIC "-//W3C//DTD XHTML 1.0 Transitional//EN" "http://www.w3.org/ ...
- HDU 1431 素数回文 离线打表
题目描述:给定一个区间,将这个区间里所有既是素数又是回文数的数输出来. 题目分析:这题的这个数据范围比较大,达到了10^8级别,而且输入的数据有多组,又因为判断一个数是否是回文数貌似只有暴力判断,时间 ...
- Dream------hive on spark
一.Hive on Spark是Hive跑在Spark上,用的是Spark执行引擎,而不是MapReduce,和Hive on Tez的道理一样. 并且用的是$HIVE_HOME/bin/hive,l ...