
Cordova Upload Images using File Transfer Plugin and .Net core WebAPI
In this article, I am going to explain ,"How to Upload Images to the server using Cordova File Transfer Plugin and Asp.Net core Web API".
Requirements
- Web API (you can use local IIS servers to host your API)
- Cordova Camera Plugin (cordova-plugin-camera)
- Cordova File Transfer Plugin (cordova-plugin-filetransfer)
Steps
1. Build Asp.net core Web API.
2. Camera Plugin to use mobile camera.
3. Upload Images using File transfer plugin.
SERVER SIDE:
Follow the link below to built Image Upload REST API Using ASP.NET Core.
Follow the link to Host ASP.NET Core Web API on IIS.
MOBILE APP:
Create New project on Visual Studio.
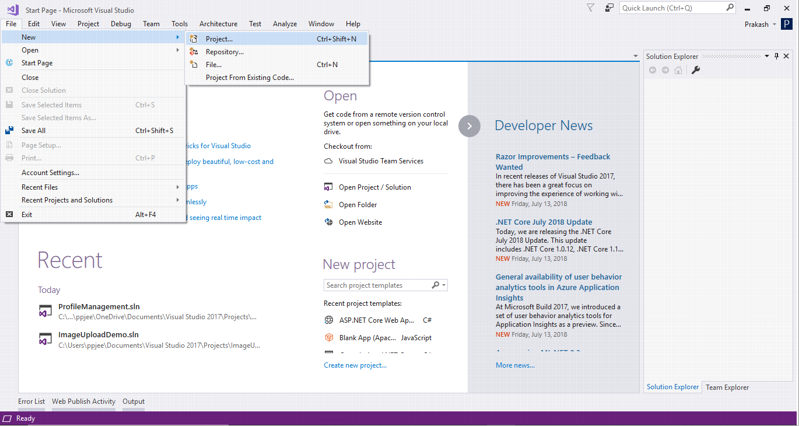
- Select JavaScript
- Select Mobile Apps
- Select Blank APP (Cordova APP)
- Provide Project Name
- Select Location that you want to store your project.
- Click on OK
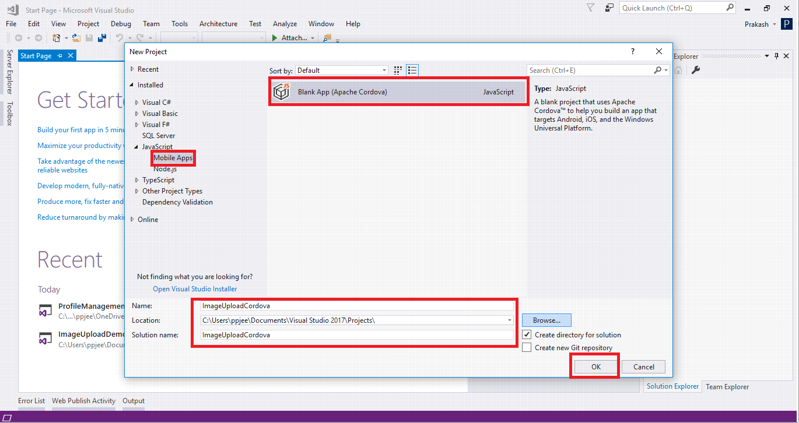
- Our Project looks like this.
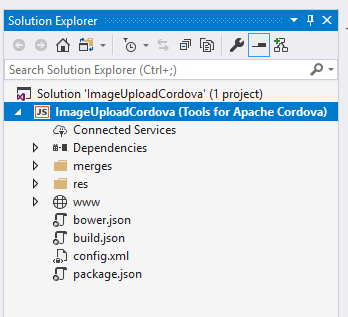
Adding Plugin:
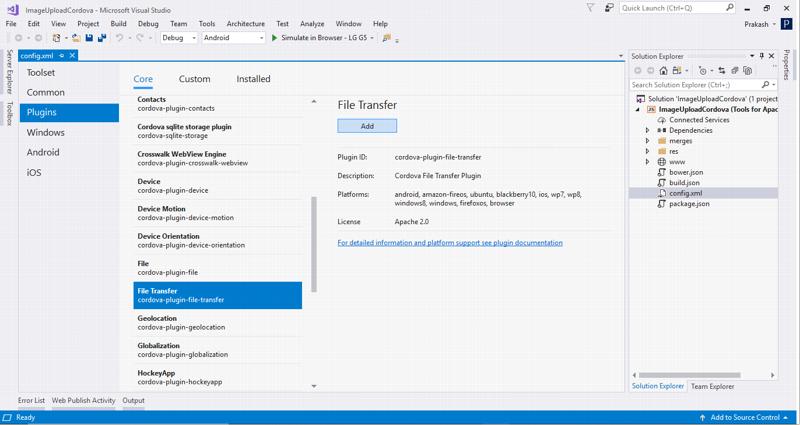
- Open config.xml
- Go to Plugin.
- Click on Camera. (cordova-plugin-camera)
- Click on Add.
- Similarly Add File Transfer Plugin(cordova-plugin-file-transfer)
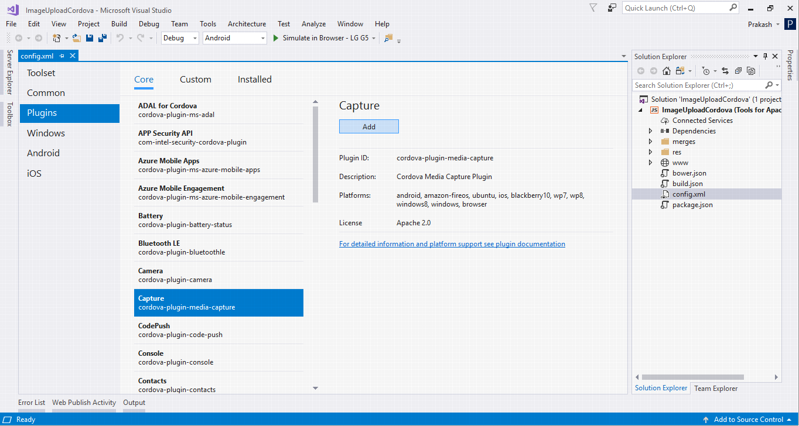
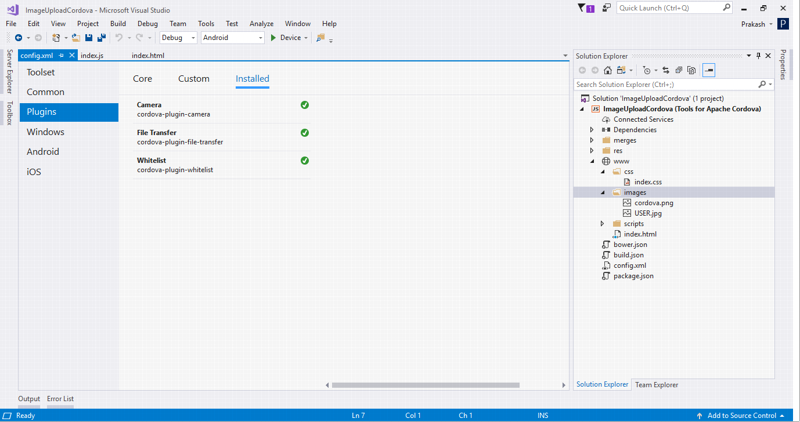
- You can see that our installed plugin is on the installed tab.
Now open your index.html and add following div.
<div class="row">

      <div class="profile-header-container">

         <div class="profile-header-img">

             <div id="image">

                 <img class='img-circle' width='120' height='120' src='images/USER.jpg' />

             </div>

             <div class="rank-label-container">

                 <input type="button" value="Update Profile Picture" id="GetImage">

             </div>

         </div>

      </div>

</div>- USER.jpg is a dummy image.

- Remove all the content of index.css and add following style
body, html {

    height: 100%;

    background-repeat: no-repeat;

    background-image: linear-gradient(rgb(104, 145, 162), rgb(12, 97, 33));

}

/**

 * Profile image component

 */

.profile-header-container {

    margin: 0 auto;

    text-align: center;

}

.profile-header-img {

    padding: 54px;

}

    .profile-header-img > img.img-circle {

        width: 120px;

        height: 120px;

        border: 2px solid #51D2B7;

    }

.profile-header {

    margin-top: 43px;

}

/**

 * Ranking component

 */

.rank-label-container {

    margin-top: -19px;

    /* z-index: 1000; */

    text-align: center;

}

.label.label-default.rank-label {

    background-color: rgb(81, 210, 183);

    padding: 5px 10px 5px 10px;

    border-radius: 27px;

}
- final Index.htm willl look like:
<!DOCTYPE html>

<html>

<head>

    <meta http-equiv="Content-Security-Policy" content="default-src 'self' data: gap: https://ssl.gstatic.com 'unsafe-eval'; style-src 'self' 'unsafe-inline'; media-src *">

    <meta http-equiv="content-type" content="text/html; charset=UTF-8" />

    <meta name="format-detection" content="telephone=no">

    <meta name="msapplication-tap-highlight" content="no">

    <meta name="viewport" content="user-scalable=no, initial-scale=1, maximum-scale=1, minimum-scale=1, width=device-width">

    <link rel="stylesheet" type="text/css" href="css/index.css">

    <title>ImageUploadCordova</title>

</head>

<body>

    <div class="row">

        <div class="profile-header-container">

            <div class="profile-header-img">

                <div id="image">

                    <img class='img-circle' width='120' height='120' src='images/USER.jpg' />

                </div>

                <div class="rank-label-container">

                    <input type="button" value="Update Profile Picture" id="GetImage">

                </div>

            </div>

        </div>

    </div>

    <script type="text/javascript" src="cordova.js"></script>

    <script type="text/javascript" src="scripts/platformOverrides.js"></script>

    <script type="text/javascript" src="scripts/index.js"></script>

</body>

</html>- final Index.js look like:
(function () {

    "use strict";

    document.addEventListener( 'deviceready', onDeviceReady.bind( this ), false );

    function onDeviceReady() {

        document.getElementById("GetImage").addEventListener("click", GetImage);

    };

})();

function GetImage() {

    navigator.camera.getPicture(function (imageUri) {

        var CapturePhoto = document.getElementById("image");

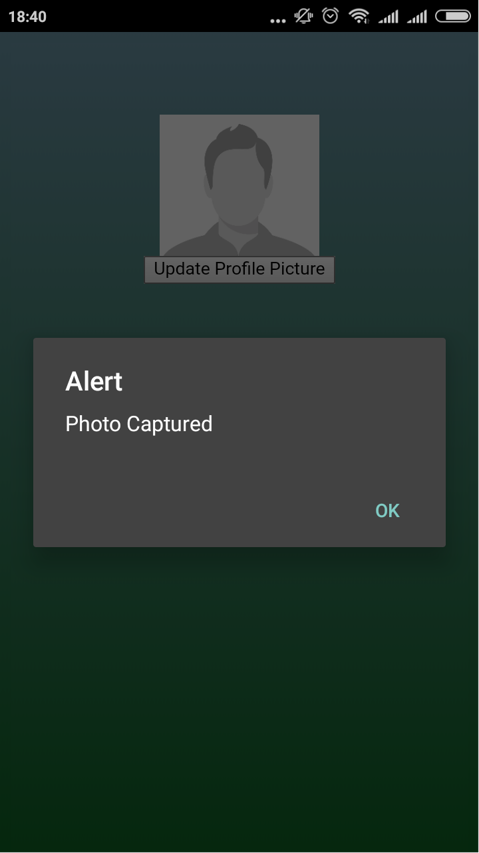
        alert("Photo Captured");

        CapturePhoto.innerHTML = "<img class='img-circle' width='120' height='120' src='" + imageUri + "' />'";

        uploadPhoto(imageUri);

    }, null, null);

}

function uploadPhoto(imageURI) {

    var options = new FileUploadOptions();

    options.fileKey = "files";

    options.fileName = imageURI.substr(imageURI.lastIndexOf('/') + 1);

    options.mimeType = "image/jpeg";

    console.log(options.fileName);

    var ft = new FileTransfer();

    ft.upload(imageURI, "http://192.168.1.66:8084/api/image", function (result) {

        console.log(JSON.stringify(result));

        alert(JSON.stringify(result));

    }, function (error) {

        console.log(JSON.stringify(error));

        alert(JSON.stringify(result));

    }, options);

}
In Index.js, you can see two methods firstly, GetImage for capturing image from Camera and secondly, UploadImage for uploading image to our web api. http://192.168.1.66:8084 is my local IIS server address.
Output:

- Tap on Upload Profile Picture.
- Choose camera
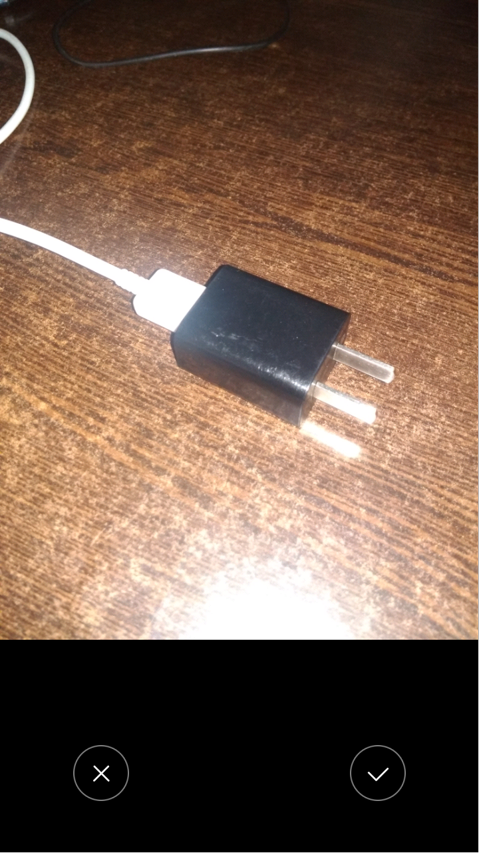
- Take a picture.
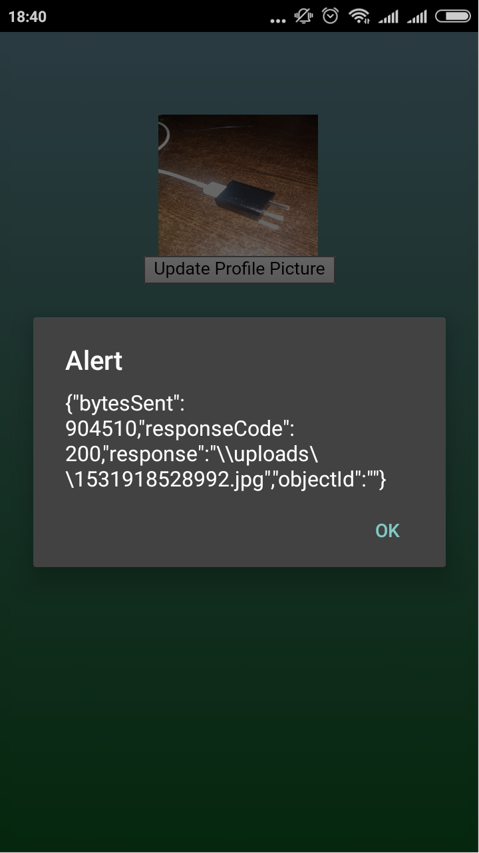
Server Side Output:
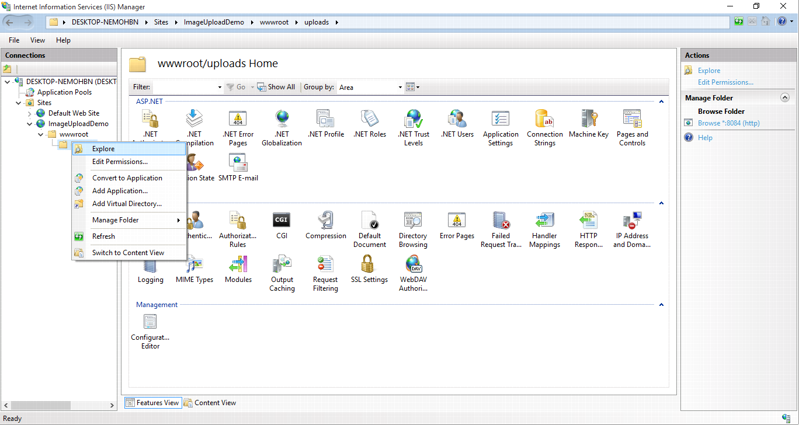
- Open your IIS.
- Right click on your webAPI and click on Explore.
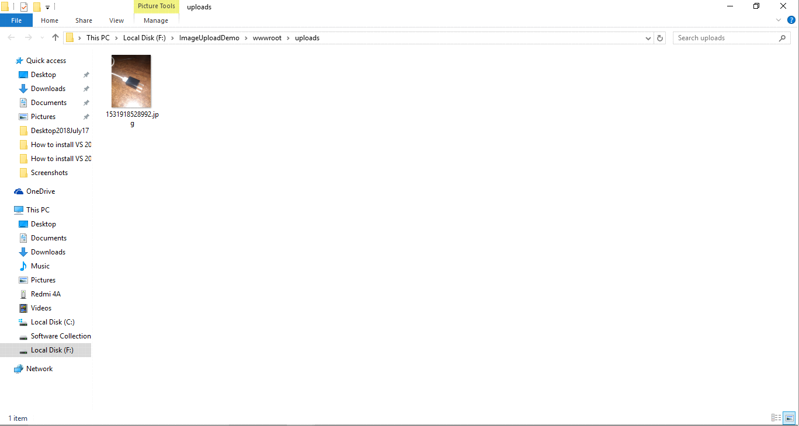
Finally, image is uploaded on Server Folder.
Summary:
In this article, we learned how to Upload Image using Cordova Camera plugin and File Transfer Plugin with ASP.Net core web API on Server Side.
Cordova Upload Images using File Transfer Plugin and .Net core WebAPI的更多相关文章
- cordova之File Transfer (Permission denied) 权限导致下载失败 - 简书
原文:cordova之File Transfer (Permission denied) 权限导致下载失败 - 简书 在文件上传时,由于权限问题,会报错(Permission denied),安卓6. ...
- FTP(File Transfer Protocol)是什么?
文件传输协议 FTP(File Transfer Protocol),是文件传输协议的简称.用于Internet上的控制文件的双向传输.同时,它也是一个应用程序(Application).用户可以通过 ...
- Android File Transfer Mac: 如何在 macOS 和 Android 系统之间移动数据
三大 Mac OS X 系统 Android 文件传输软件 谷歌出品的 Android File Transfer 如何在 Mac 系统上使用 Android File Transfer Androi ...
- PAT 5-8 File Transfer (25分)
We have a network of computers and a list of bi-directional connections. Each of these connections a ...
- 让 File Transfer Manager 在新版本WIndows上能用
最近研究.NET NATIVE,听说发布了第二个预览版,增加了X86支持,所以下,发现连接到的页面是:https://connect.microsoft.com/VisualStudio/Downlo ...
- PAT 05-树7 File Transfer
这次的题让我对选择不同数据结构所产生的结果惊呆了,一开始用的是结构来存储集合,课件上有现成的,而且我也是实在不太会,150ms的时间限制过不去,不得已,看到这题刚好可以用数组,结果7ms最多,有意思! ...
- 05-树8 File Transfer
并查集 简单并查集:输入N,代表有编号为1.2.3……N电脑.下标从1开始.初始化为-1.合并后根为负数,负数代表根,其绝对值代表个数. We have a network of computers ...
- Can't find file: './mysql/plugin.frm' (errno: 13)[mysql数据目录迁移错位]错误解决
大概需要4个步骤,其中第1步通过service mysql stop停止数据库,第4步通过service mysql start启动数据库. 第2步移动数据文件,不知道是否为Ubuntu智能的原因,移 ...
- File Transfer
本博客的代码的思想和图片参考:好大学慕课浙江大学陈越老师.何钦铭老师的<数据结构> 代码的测试工具PTA File Transfer 1 Question 2 Explain First, ...
随机推荐
- 机器学习之AdaBoost原理与代码实现
AdaBoost原理与代码实现 本文系作者原创,转载请注明出处: https://www.cnblogs.com/further-further-further/p/9642899.html 基本思路 ...
- 为什么要抛弃Pact?如何快速实现契约测试(CDC)
前言 在前几天的博客中,我转载了一篇文章,其中介绍了契约测试和pact是怎么实施的,的确很有帮助.但我经过研究,其实是pact本身也是有缺陷的,结合我近期在使用的服务型工具和我的实际情况,觉得实现契约 ...
- java爬虫系列第二讲-爬取最新动作电影《海王》迅雷下载地址
1. 目标 使用webmagic爬取动作电影列表信息 爬取电影<海王>详细信息[电影名称.电影迅雷下载地址列表] 2. 爬取最新动作片列表 获取电影列表页面数据来源地址 访问http:// ...
- Redis的值value(数据结构类型)
Redis的数据结构类型,指的是redis的值的value类型: Redis的常用数据结构类型:string,list,set,sortedSet,hash 一.sting的类型 string类型是r ...
- 前端入门20-JavaScript进阶之异步回调的执行时机
声明 本系列文章内容全部梳理自以下几个来源: <JavaScript权威指南> MDN web docs Github:smyhvae/web Github:goddyZhao/Trans ...
- SAP 没有激活HUM功能照常可以使用Handling Unit
SAP 没有激活HUM功能照常可以使用Handling Unit 笔者所在的项目上的公司间STO的流程里,发货公司在做PGI之后系统自动触发收货公司的inbound delivery单据,发货公司发出 ...
- 基于Html5 Plus + Vue + Mui 移动App 开发(二)
基于Html5 Plus + Vue + Mui 移动App 开发(二) 界面效果: 本页面采用Html5 Plus + Vue + Mui 开发移动界面,本页面实现: 1.下拉刷新.上拉获取更多功能 ...
- android 权限库EasyPermissions
文章链接:https://mp.weixin.qq.com/s/H63Sn03xV0JoINXB4SWWKA 众所周知,在android 6.0之后,如果应用程序需要危险权限,则用户必须明确向应用授予 ...
- sql 视图学习
视图语句 在 SQL 中,视图是基于 SQL 语句的结果集的可视化的表. 视图包含行和列,就像一个真实的表.视图中的字段就是来自一个或多个数据库中的真实的表中的字段. 您可以向视图添加 SQL 函数. ...
- C# -- 等待异步操作执行完成的方式
C# -- 等待异步操作执行完成的方式 1. 等待异步操作的完成,代码实现: class Program { static void Main(string[] args) { Func<int ...