iOS7 Sprite Kit 学习
iOS7 Sprite Kit 学习
iOS 7有一个新功能 Sprite Kit 这个有点类似cocos2d 感觉用法都差不多。下面简单来介绍下Sprite Kit
About Sprite Kit
Sprite Kit provides a graphics rendering and animation infrastructure that you can use to animate arbitrary textured images, or sprites. Sprite Kit uses a traditional rendering loop that allows processing on the contents of each frame before it is rendered. Your game determines the contents of the scene and how those contents change in each frame. Sprite Kit does the work to render frames of animation efficiently using the graphics hardware. Sprite Kit is optimized to allow essentially arbitrary changes to each frame of animation.
Sprite Kit also provides other functionality that is useful for games, including basic sound playback support and physics simulation. In addition, Xcode provides built-in support for Sprite Kit, allowing complex special effects and texture atlases to be easily created and then used in your app. This combination of framework and tools makes Sprite Kit a good choice for games and other apps that require similar kinds of animation. For other kinds of user-interface animation, use Core Animation instead.

Jumping into Sprite Kit
The best way to learn Sprite Kit is to see it in action. This example creates a pair of scenes and animates content in each. By working through this example, you will learn some of the fundamental techniques for working with Sprite Kit content, including:
Using scenes in a Sprite Kit–based game.
Organizing node trees to draw content.
Using actions to animate scene content.
Adding interactivity to a scene.
Transitioning between scenes.
Simulating physics inside a scene.
Getting Started
Xcode5.0以上。。
首先新建一个项目 SpriteWalkthrough 。
项目建好后在 ViewController.m 里添加如下代码
打开storyboard 然后找到右边 Sustom Slass 把Class 改成SKView!!!这个一定要改,不然会报错 -[UIView setShowsFPS:]: unrecognized selector sent to instance 0x9742e30
#import <SpriteKit/SpriteKit.h>

- (void)viewDidLoad
{
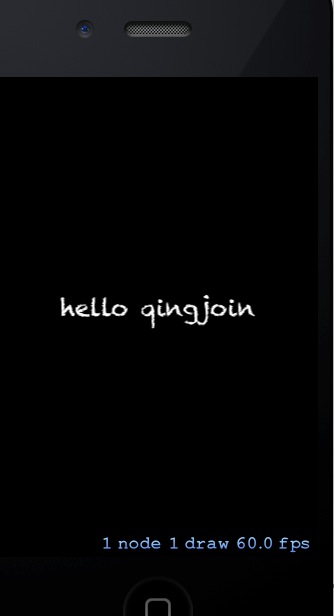
[super viewDidLoad]; SKView *spriteView = (SKView*)self.view; spriteView.showsFPS = YES;
spriteView.showsDrawCount = YES;
spriteView.showsNodeCount = YES;
// Do any additional setup after loading the view, typically from a nib.
}
新建一个class 命名为HelloScene.h文件不需要做修改
#import <SpriteKit/SpriteKit.h>

@interface HelloScene : SKScene

@end
然后再回到ViewController.m .修改如下
#import "HelloScene.h"
-(void)viewWillAppear:(BOOL)animated

{

    HelloScene* hello = [[HelloScene alloc] initWithSize:CGSizeMake(self.view.frame.size.width,self.view.frame.size.height)];

    SKView *spriteView = (SKView*)self.view;

    [spriteView presentScene:hello];

}
OK 。。run it ..
2.然后在HelloScene.m里添加如下
@interface HelloScene()

@property BOOL contentCreated;

@end
-(void)didMoveToView:(SKView *)view

{

    if(!self.contentCreated)

    {

        [self  createSceneContents];

        self.contentCreated = YES;

    }

}

-(void)createSceneContents

{

    NSLog(@"createSceneContents");

    self.backgroundColor = [SKColor blackColor];

    self.scaleMode = SKSceneScaleModeAspectFit;

    [self addChild:[self newHelloNode]];

}
-(SKLabelNode*)newHelloNode

{

    SKLabelNode *helloNode = [SKLabelNode labelNodeWithFontNamed:@"Chalkduster"];

    helloNode.name = @"helloNode";//@ 这个和下面的一样

    helloNode.text = @"hello game ";

    helloNode.fontSize = 24;

    helloNode.position = CGPointMake(CGRectGetMidX(self.frame), CGRectGetMidY(self.frame));

    return helloNode;

}
这个时候可以运行一次。
:
接下来继续,在HelloScene.m 里添加
-(void)touchesBegan:(NSSet *)touches withEvent:(UIEvent *)event

{

    SKNode *helloNode = [self childNodeWithName:@"helloNode"]; //@与上面的相同

    if(helloNode !=nil)

    {

        helloNode.name = nil;

        SKAction *moveUp = [SKAction moveByX:0 y:100.0 duration:0.5]; //向上移动

        SKAction *zoom = [SKAction scaleTo:2.0 duration:0.25];    //扩大两倍

        SKAction *pause = [SKAction waitForDuration:0.5];    //暂停

        SKAction *fadeAway = [SKAction fadeOutWithDuration:0.25];  //消失

        SKAction *remove = [SKAction removeFromParent];

        SKAction *moveSequence = [SKAction sequence:@[moveUp, zoom, pause, fadeAway, remove]];

        [helloNode runAction:moveSequence];

    }

}
再编译运行
新建一个class 命名为 SpaceshipScene 然后在SpaceshipScene.m里添加如下
@import "SpaceshipScene.h"

@interface SpaceshipScene ()

@property BOOL contentCreated;

@end

@implementation SpaceshipScene

- (void)didMoveToView:(SKView *)view

{

    if (!self.contentCreated)

    {

        [self createSceneContents];

        self.contentCreated = YES;

    }

}

- (void)createSceneContents

{

    self.backgroundColor = [SKColor blackColor];

    self.scaleMode = SKSceneScaleModeAspectFit;

}

@end
.h
#import <SpriteKit/SpriteKit.h>

@interface SpaceshipScene : SKScene

@end
然后回到
SpaceshipScene.m 修改如下代码。
-(void)touchesBegan:(NSSet *)touches withEvent:(UIEvent *)event

{

    SKNode *helloNode = [self childNodeWithName:@"helloNode"]; //@与上面的相同

    if(helloNode !=nil)

    {

        helloNode.name = nil;

        SKAction *moveUp = [SKAction moveByX:0 y:100.0 duration:0.5]; //向上移动

        SKAction *zoom = [SKAction scaleTo:2.0 duration:0.25];    //扩大两倍

        SKAction *pause = [SKAction waitForDuration:0.5];    //暂停

        SKAction *fadeAway = [SKAction fadeOutWithDuration:0.25];  //消失

        SKAction *remove = [SKAction removeFromParent];

        SKAction *moveSequence = [SKAction sequence:@[moveUp, zoom, pause, fadeAway, remove]];

        //[helloNode runAction:moveSequence];

        [helloNode runAction: moveSequence completion:^{

            SKScene *spaceshipScene  = [[SpaceshipScene alloc] initWithSize:self.size];

            SKTransition *doors = [SKTransition doorsOpenVerticalWithDuration:0.5];

            [self.view presentScene:spaceshipScene transition:doors];

        }];

    }

}
运行。。
最后把SpaceshipScene.m 文件修改如下
//

//  SpaceshipScene.m

//  SpriteWalkthrough

//

//  Created by qingyun on 8/13/13.

//  Copyright (c) 2013 qingyun. All rights reserved.

//

#import "SpaceshipScene.h"

@interface SpaceshipScene ()

@property BOOL contentCreated;

@end

@implementation SpaceshipScene

- (void)didMoveToView:(SKView *)view

{

    if (!self.contentCreated)

    {

        [self createSceneContents];

        self.contentCreated = YES;

    }

}

- (void)createSceneContents

{

    self.backgroundColor = [SKColor blackColor];

    self.scaleMode = SKSceneScaleModeAspectFit;

    SKSpriteNode *spaceship = [self newSpaceship];

    spaceship.position = CGPointMake(CGRectGetMidX(self.frame),CGRectGetMidY(self.frame)-150);

    [self addChild:spaceship];

    //@3

    SKAction *makeRocks = [SKAction sequence: @[

                                                [SKAction performSelector:@selector(addRock) onTarget:self],

                                                [SKAction waitForDuration:0.10 withRange:0.15]

                                                ]];

    [self runAction: [SKAction repeatActionForever:makeRocks]];

}

- (SKSpriteNode *)newSpaceship

{

    SKSpriteNode *hull = [[SKSpriteNode alloc] initWithColor:[SKColor grayColor] size:CGSizeMake(64,32)];

    SKAction *hover = [SKAction sequence:@[

                                           [SKAction waitForDuration:1.0],

                                           [SKAction moveByX:100 y:50.0 duration:1.0],

                                           [SKAction waitForDuration:1.0],

                                           [SKAction moveByX:-100.0 y:-50 duration:1.0]]];

    [hull runAction: [SKAction repeatActionForever:hover]]; //重复移动hover 里的action

    //@2

    SKSpriteNode *light1 = [self newLight];

    light1.position = CGPointMake(-28.0, 6.0);

    [hull addChild:light1];

    SKSpriteNode *light2 = [self newLight];

    light2.position = CGPointMake(28.0, 6.0);

    [hull addChild:light2];

    //@3

    hull.physicsBody = [SKPhysicsBody bodyWithRectangleOfSize:hull.size];

    hull.physicsBody.dynamic = NO;

    return hull;

}

//@2

- (SKSpriteNode *)newLight

{

    SKSpriteNode *light = [[SKSpriteNode alloc] initWithColor:[SKColor yellowColor] size:CGSizeMake(8,8)];

    SKAction *blink = [SKAction sequence:@[

                                           [SKAction fadeOutWithDuration:0.25],

                                           [SKAction fadeInWithDuration:0.25]]];

    SKAction *blinkForever = [SKAction repeatActionForever:blink];  //重复闪闪发光。

    [light runAction: blinkForever];

    return light;

}

//@3

static inline CGFloat skRandf() {

    return rand() / (CGFloat) RAND_MAX;

}

static inline CGFloat skRand(CGFloat low, CGFloat high) {

    return skRandf() * (high - low) + low;

}

- (void)addRock

{

    SKSpriteNode *rock = [[SKSpriteNode alloc] initWithColor:[SKColor brownColor] size:CGSizeMake(8,8)];

    rock.position = CGPointMake(skRand(0, self.size.width), self.size.height-50);

    rock.name = @"rock";

    rock.physicsBody = [SKPhysicsBody bodyWithRectangleOfSize:rock.size];

    rock.physicsBody.usesPreciseCollisionDetection = YES;

    [self addChild:rock];

}

-(void)didSimulatePhysics

{

    [self enumerateChildNodesWithName:@"rock" usingBlock:^(SKNode *node, BOOL *stop) {

        if (node.position.y < 0)

            [node removeFromParent];

    }];

}

@end
好了。一个简单的sprite 小游戏做成了。

demo 下载地址: https://github.com/qingjoin/SpriteKit
iOS7 Sprite Kit 学习的更多相关文章
- Sprite Kit编程指南(1)-深入Sprite Kit
深入Sprite Kit 学习Sprite Kit最好的方法是在实践中观察它.此示例创建一对场景和各自的动画内容.通过这个例子,你将学习使用Sprite Kit内容的一些基础技术,包括: · ...
- ios学习之路四(新建Sprite Kit 项目的时候出现apple LLVM 5.0 error)
在新建sprite kit 项目的时候出现"apple LLVM 5.0 error" 解决方法 在网上搜索,stackoverflow 上是这么说的点击打开链接.按照他的我也没解 ...
- Sprite Kit 入门教程
Sprite Kit 入门教程 Ray Wenderlich on September 30, 2013 Tweet 这篇文章还可以在这里找到 英语, 日语 If you're new here, ...
- ios游戏开发 Sprite Kit教程:初学者 1
注:本文译自Sprite Kit Tutorial for Beginners 目录 Sprite Kit的优点和缺点 Sprite Kit vs Cocos2D-iPhone vs Cocos2D- ...
- Sprite Kit教程:初学者
作者:Ray Wenderlich 原文出处:点击打开链接 http://www.raywenderlich.com/42699/spritekit-tutorial-for-beginners 转自 ...
- Sprite Kit编程指南中文版下载
下载地址:http://download.csdn.net/detail/xin814/6032573 关于Sprite Kit 重要提示: 这是API或开发技术的一个初版文档.虽然本文档的技术准确 ...
- Sprite Kit教程:制作一个通用程序 2
注1:本文译自Sprite Kit Tutorial: Making a Universal App: Part 2 目录 动画的定义:可行性 属性列表 添加游戏逻辑 添加音效 何去何从 上一篇文章中 ...
- swift语言注册非免费苹果账号iOS游戏框架Sprite Kit基础教程
swift语言注册非免费苹果账号iOS游戏框架Sprite Kit基础教程 1.2.3 注册非免费苹果账号swift语言注册非免费苹果账号iOS游戏框架Sprite Kit基础教程 免费的苹果账号在 ...
- Swift版iOS游戏框架Sprite Kit基础教程下册
Swift版iOS游戏框架Sprite Kit基础教程下册 试读下载地址:http://pan.baidu.com/s/1qWBdV0C 介绍:本教程是国内唯一的Swift版的Spritekit教程. ...
随机推荐
- 如何从 0 开始学 Ruby on Rails
如何从 0 开始学 Ruby on Rails (漫步版)Ruby 是一门编程语言,Ruby on Rails 是 Ruby 的一个 web 框架,简称 Rails. 有很多人对 Rails 感兴趣, ...
- DFGUI-- 标签交换 Tabstrip
DFGUI没有更新,事实上,有些遗憾. 它着重于一个小 Examples/Containers/TabContainer.unity 那是,Tab采用. 功能 非常easy.就是切换Tag 内容改变. ...
- 第4章2节《MonkeyRunner源码剖析》ADB协议及服务: ADB服务SERVICES.TXT翻译参考(原创)
天地会珠海分舵注:本来这一系列是准备出一本书的,详情请见早前博文“寻求合作伙伴编写<深入理解 MonkeyRunner>书籍“.但因为诸多原因,没有如愿.所以这里把草稿分享出来,所以错误在 ...
- 移植MonkeyRunner的图片对比和获取子图功能的实现-UiAutomator/Robotium篇
根据前一篇文章<移植MonkeyRunner的图片对比和获取子图功能的实现-Appium篇>所述,因为Appium和MonkeyRunner有一个共同点--代码控制流程都是在客户端实现的. ...
- Appium Android Bootstrap源码分析之控件AndroidElement
通过上一篇文章<Appium Android Bootstrap源码分析之简介>我们对bootstrap的定义以及其在appium和uiautomator处于一个什么样的位置有了一个初步的 ...
- Django查询的琐碎记录
我的需求是这样的,获取指定用户的获“赞”总数. 用户 models.py class UserProfile(models.Model): user = models.OneToOneField(Us ...
- AutoMapper 创建嵌套对象映射(原创)
之前在做DTO转换时,用到AutoMapper.但DTO的层次太深了,无奈官方没针对嵌套类型提供好的解决方案,于是自己实现了一下: 思路:采用递归和反射很好的避免手工创建嵌套对象的映射. 第一个版本, ...
- Java集合之ArrayList源码分析
1.简介 List在数据结构中表现为是线性表的方式,其元素以线性方式存储,集合中允许存放重复的对象,List接口主要的实现类有ArrayList和LinkedList.Java中分别提供了这两种结构的 ...
- AJAX入门——工作原理
同步和异步交互,了解互动 对于一个样本:一般B/S模式(同步) AJAX技术(异步) * 同步: 提交请求->等待server处理->处理完成返回 ...
- HTML5表单提示placeholder属性兼容IE
placeholder 属性提供可描述输入字段预期值的提示信息(hint). 该提示会在输入字段为空时显示,并会在字段获得焦点时消失. 注释:placeholder 属性适用于以下的 <inpu ...