SpringBoot2.x入门:快速创建一个SpringBoot应用
前提
这篇文章是《SpringBoot2.x入门》专辑的第2篇文章,使用的SpringBoot版本为2.3.1.RELEASE,JDK版本为1.8。
常规的套路会建议使用Spring官方提供的工具Spring Initializr通过指定配置创建一个SpringBoot项目,但是考虑到Spring Initializr必须联网使用,对于项目配置和依赖的控制粒度不够精细,本文会从更一般的情况考虑,详细分析怎么通过Maven和IntelliJ IDEA(下称IDEA)快速创建一个SpringBoot应用,包括单模块的Maven和多模块的Maven应用创建。
依赖分析
必要的插件:
Maven编译插件:maven-compiler-plugin。SpringBoot封装的Maven插件(一般必选,项目最终打包依赖到这个插件,它的版本建议跟随选用的SpringBoot的版本):spring-boot-maven-plugin。
Maven编译插件尽可能选用高版本,以适配更高版本的JDK。一般会选用的基本依赖如下:
lombok(可选,个人认为能提高开发效率,不过需要安装对应的插件)。junit(spring-boot-starter-test):单元测试。spring-boot-starter:Bean管理、配置读取等,简单理解就是IOC容器核心组件和一些扩展。spring-boot-starter-web:基于spring-boot-starter扩展,主要集成了SpringMVC的功能。
多数情况下,选用spring-boot-starter-web即可,版本选取REALEASE版本即可,注意尽可能整套项目使用同一个大版本的SpringBoot。
下面例子用到的各个组件的版本如下:
| 序号 | 组件 | 版本号 | 描述 |
|---|---|---|---|
| 1 | maven-compiler-plugin |
3.8.1 |
Maven编译插件 |
| 2 | spring-boot-starter |
2.3.1.RELEASE |
IOC容器核心组件 |
| 3 | spring-boot-maven-plugin |
2.3.1.RELEASE |
SpringBoot封装的Maven插件 |
| 4 | lombok |
1.18.12 |
- |
创建一个单模块的SpringBoot应用
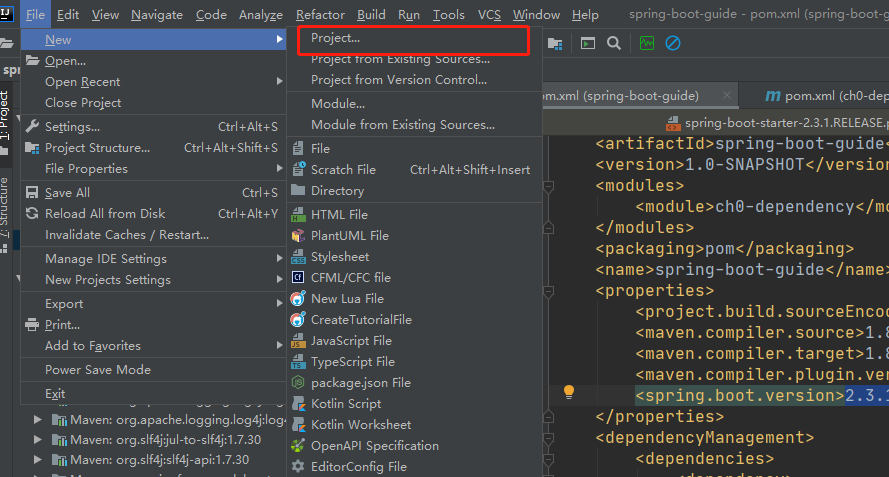
点击IDEA主菜单File -> Project进入创建新项目的界面:
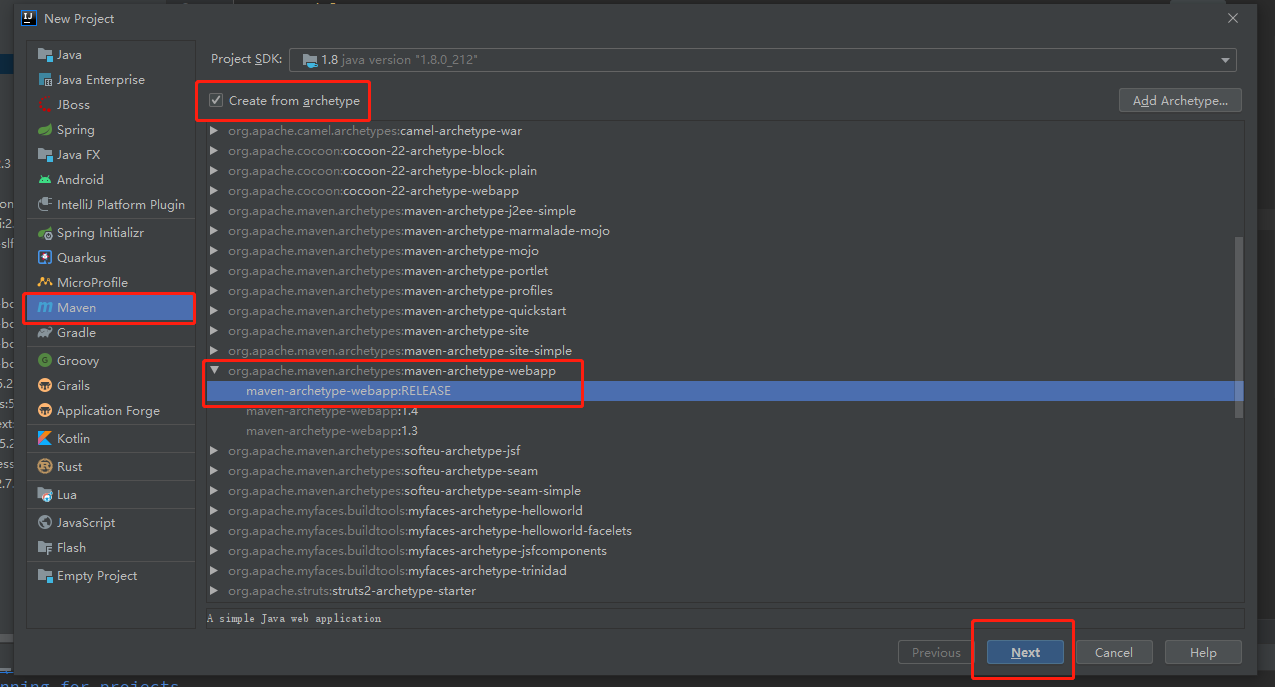
选择左侧的Maven选项,上方下拉选择好JDK版本,勾选Create from archetype,然后选中maven-archetype-webapp这个骨架的RELEASE版本,然后点击下一步按钮:
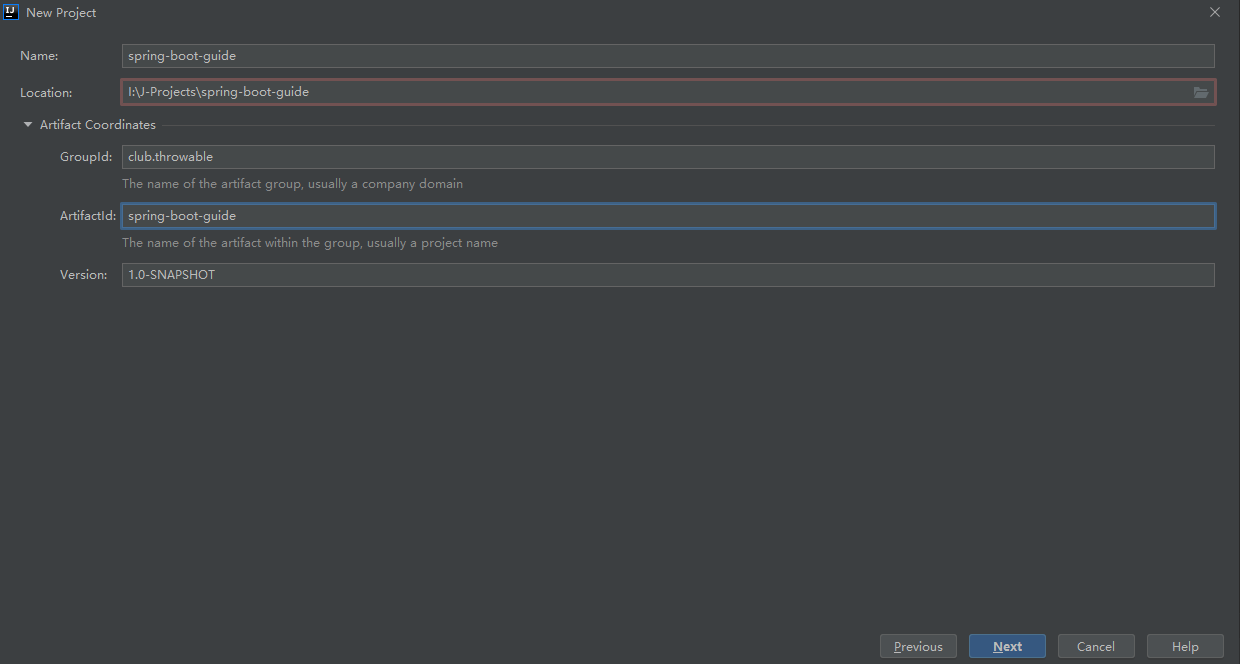
输入项目的GAV,选定项目的磁盘目录,然后点击下一步按钮:
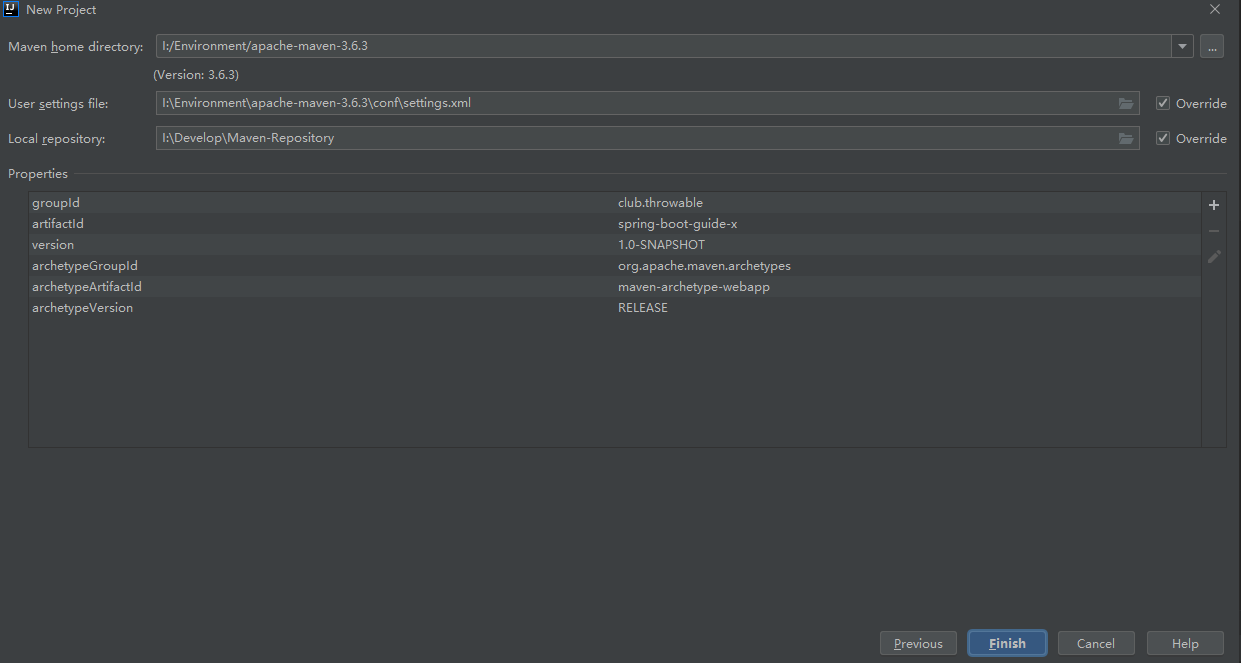
选定Maven的安装路径、配置文件和本地仓库,配置好相应的属性,最后点击完成即可:
创建出来的是一个标准的Maven项目,它的结构如下:
spring-boot-guide

   - src

     - main

       - webapp

         - web.xml

   - pom.xml
一般可以直接删除src/main/webapp目录,在pom.xml中增加对应的依赖,最终的pom.xml如下:
<?xml version="1.0" encoding="UTF-8"?>

<project xmlns="http://maven.apache.org/POM/4.0.0" xmlns:xsi="http://www.w3.org/2001/XMLSchema-instance"

         xsi:schemaLocation="http://maven.apache.org/POM/4.0.0 http://maven.apache.org/xsd/maven-4.0.0.xsd">

    <modelVersion>4.0.0</modelVersion>

    <groupId>club.throwable</groupId>

    <artifactId>spring-boot-guide</artifactId>

    <version>1.0-SNAPSHOT</version>

    <!-- 指定打包方式为Jar -->

    <packaging>jar</packaging>

    <name>spring-boot-guide</name>

    <properties>

        <project.build.sourceEncoding>UTF-8</project.build.sourceEncoding>

        <maven.compiler.source>1.8</maven.compiler.source>

        <maven.compiler.target>1.8</maven.compiler.target>

        <maven.compiler.plugin.version>3.8.1</maven.compiler.plugin.version>

        <lombok.version>1.18.12</lombok.version>

        <spring.boot.version>2.3.1.RELEASE</spring.boot.version>

    </properties>

    <!-- BOM全局管理starter版本 -->

    <dependencyManagement>

        <dependencies>

            <dependency>

                <groupId>org.springframework.boot</groupId>

                <artifactId>spring-boot-dependencies</artifactId>

                <version>${spring.boot.version}</version>

                <scope>import</scope>

                <type>pom</type>

            </dependency>

        </dependencies>

    </dependencyManagement>

    <dependencies>

        <dependency>

            <groupId>org.projectlombok</groupId>

            <artifactId>lombok</artifactId>

            <version>${lombok.version}</version>

            <scope>provided</scope>

        </dependency>

        <dependency>

            <groupId>org.springframework.boot</groupId>

            <artifactId>spring-boot-starter</artifactId>

        </dependency>

        <dependency>

            <groupId>org.springframework.boot</groupId>

            <artifactId>spring-boot-starter-test</artifactId>

            <scope>test</scope>

        </dependency>

    </dependencies>

    <build>

        <!-- 指定最终打出来的Jar包的名称 -->

        <finalName>spring-boot-guide</finalName>

        <plugins>

            <plugin>

                <groupId>org.apache.maven.plugins</groupId>

                <artifactId>maven-compiler-plugin</artifactId>

                <version>${maven.compiler.plugin.version}</version>

                <configuration>

                    <source>${maven.compiler.source}</source>

                    <target>${maven.compiler.target</target>

                    <encoding>${project.build.sourceEncoding}</encoding>

                </configuration>

            </plugin>

            <plugin>

                <groupId>org.springframework.boot</groupId>

                <artifactId>spring-boot-maven-plugin</artifactId>

                <version>${spring.boot.version}</version>

<!--                <configuration>-->

<!--                    <mainClass>可选配置,这里填写启动类的全类名</mainClass>-->

<!--                </configuration>-->

                <executions>

                    <execution>

                        <goals>

                            <goal>repackage</goal>

                        </goals>

                    </execution>

                </executions>

            </plugin>

        </plugins>

    </build>

</project>
有依赖版本变动,只需要直接修改properties元素中对应的版本号即可。在src/main下新建启动类java/club/throwable/App.java:
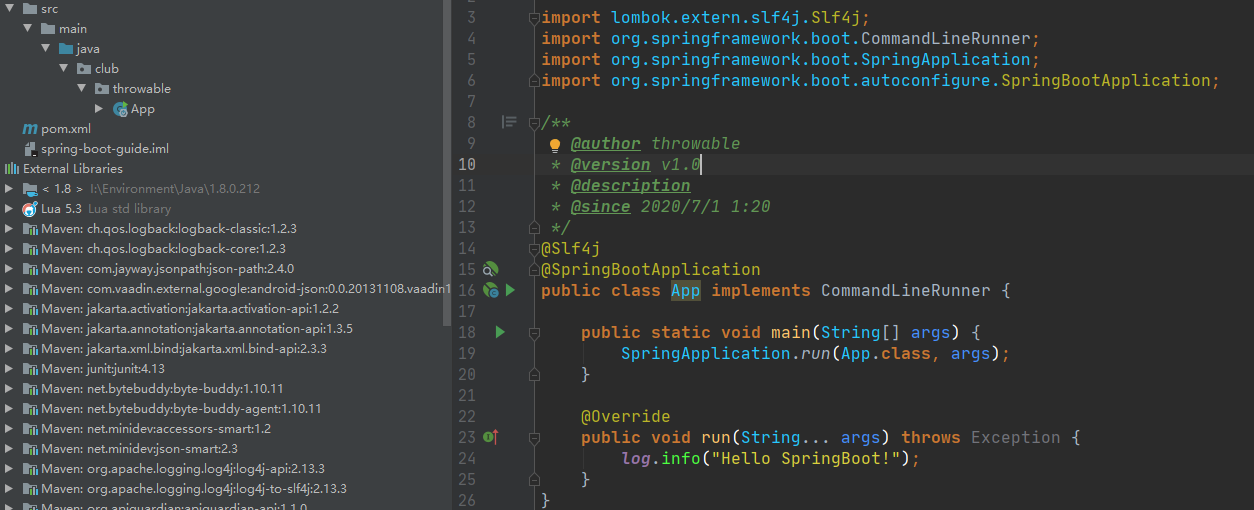
import lombok.extern.slf4j.Slf4j;

import org.springframework.boot.CommandLineRunner;

import org.springframework.boot.SpringApplication;

import org.springframework.boot.autoconfigure.SpringBootApplication;

@Slf4j

@SpringBootApplication

public class App implements CommandLineRunner {

    public static void main(String[] args) {

        SpringApplication.run(App.class, args);

    }

    @Override

    public void run(String... args) throws Exception {

        log.info("Hello SpringBoot!");

    }

}
启动App中的main函数后输出如下:
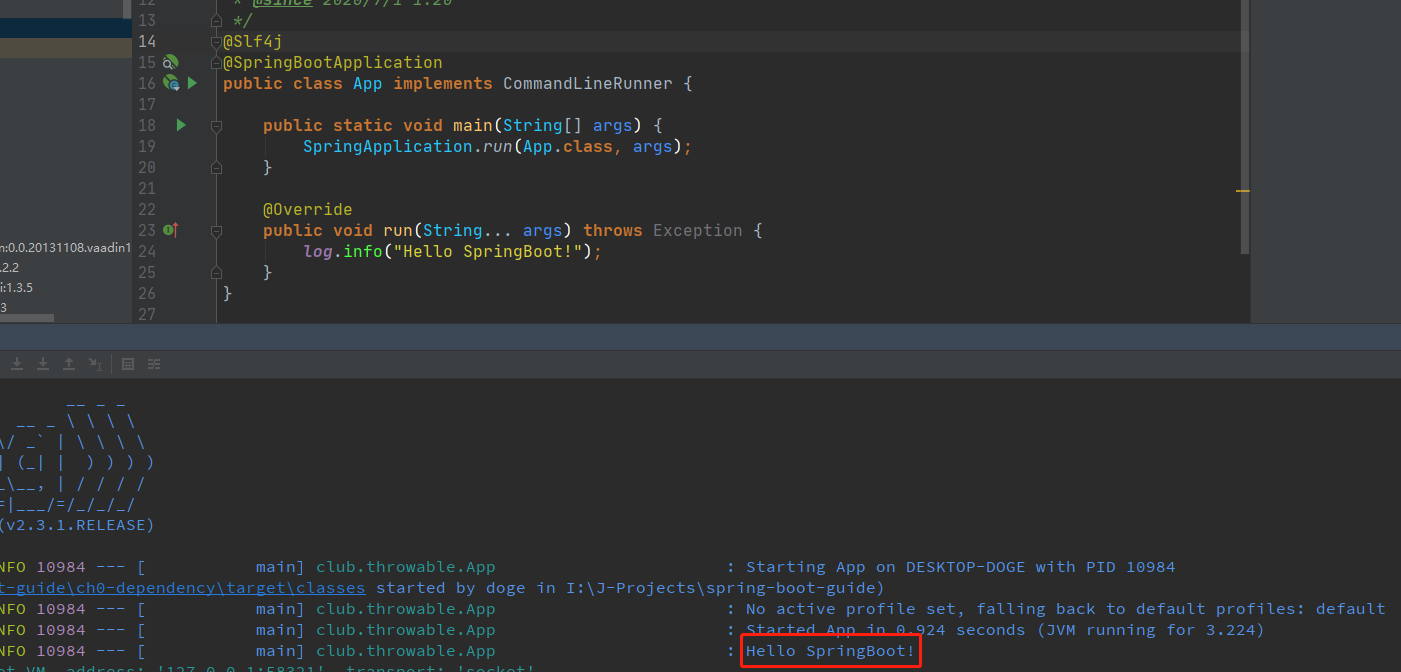
spring-boot-starter模块引入的只是核心容器组件,并没有集成像Tomcat这样的Servlet容器,启动后不会挂起主线程,所以执行完CommandLineRunner中的逻辑就会自行退出主线程。
创建一个多模块的SpringBoot应用
多模块应用的创建基于单模块应用,准确来说就是在一个创建完的单模块应用中添加新的模块(New Module)。在原来的根项目spring-boot-guide右键弹出菜单中选择新建模块:
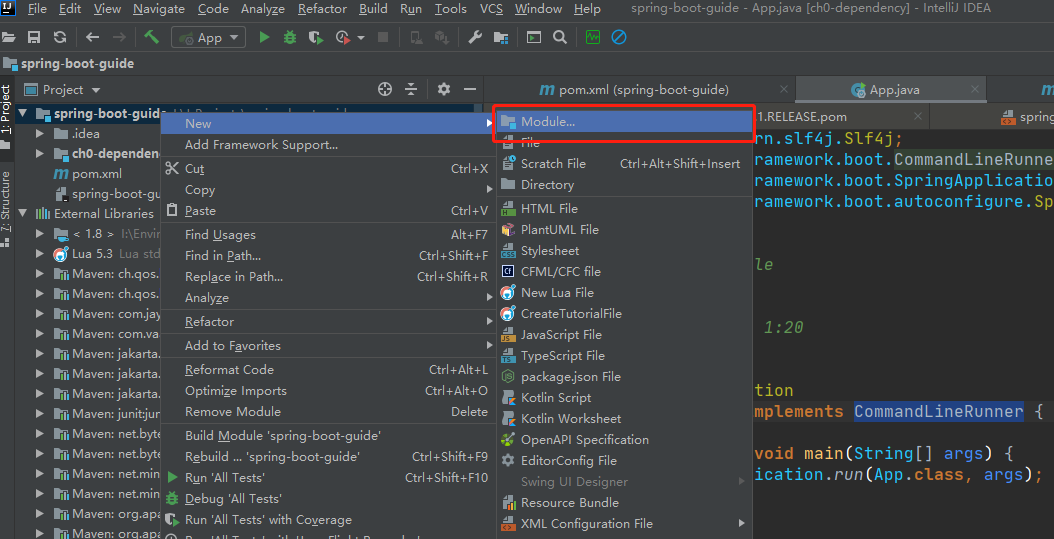
后续的步骤与上一小节的过程完全相同,不过定义的模块名称必须和根项目的名称不相同,这里定义为ch0-dependency,然后调整父pom.xml和子pom.xml:
spring-boot-guide -> pom.xml
<?xml version="1.0" encoding="UTF-8"?>

<project xmlns="http://maven.apache.org/POM/4.0.0" xmlns:xsi="http://www.w3.org/2001/XMLSchema-instance"

         xsi:schemaLocation="http://maven.apache.org/POM/4.0.0 http://maven.apache.org/xsd/maven-4.0.0.xsd">

    <modelVersion>4.0.0</modelVersion>

    <groupId>club.throwable</groupId>

    <artifactId>spring-boot-guide</artifactId>

    <version>1.0-SNAPSHOT</version>

    <modules>

        <module>ch0-dependency</module>

    </modules>

    <packaging>pom</packaging>

    <name>spring-boot-guide</name>

    <properties>

        <project.build.sourceEncoding>UTF-8</project.build.sourceEncoding>

        <maven.compiler.source>1.8</maven.compiler.source>

        <maven.compiler.target>1.8</maven.compiler.target>

        <maven.compiler.plugin.version>3.8.1</maven.compiler.plugin.version>

        <lombok.version>1.18.12</lombok.version>

        <spring.boot.version>2.3.1.RELEASE</spring.boot.version>

    </properties>

    <dependencyManagement>

        <dependencies>

            <dependency>

                <groupId>org.springframework.boot</groupId>

                <artifactId>spring-boot-dependencies</artifactId>

                <version>${spring.boot.version}</version>

                <scope>import</scope>

                <type>pom</type>

            </dependency>

        </dependencies>

    </dependencyManagement>

    <dependencies>

        <dependency>

            <groupId>org.projectlombok</groupId>

            <artifactId>lombok</artifactId>

            <version>${lombok.version}</version>

            <scope>provided</scope>

        </dependency>

        <dependency>

            <groupId>org.springframework.boot</groupId>

            <artifactId>spring-boot-starter-test</artifactId>

            <scope>test</scope>

        </dependency>

    </dependencies>

    <build>

        <finalName>spring-boot-guide</finalName>

        <plugins>

            <plugin>

                <groupId>org.apache.maven.plugins</groupId>

                <artifactId>maven-compiler-plugin</artifactId>

                <version>${maven.compiler.plugin.version}</version>

                <configuration>

                    <source>${maven.compiler.source}</source>

                    <target>${maven.compiler.target</target>

                    <encoding>${project.build.sourceEncoding}</encoding>

                </configuration>

            </plugin>

        </plugins>

    </build>

</project>
spring-boot-guide/ch0-dependency -> pom.xml
<?xml version="1.0" encoding="UTF-8"?>

<project xmlns="http://maven.apache.org/POM/4.0.0" xmlns:xsi="http://www.w3.org/2001/XMLSchema-instance"

         xsi:schemaLocation="http://maven.apache.org/POM/4.0.0 http://maven.apache.org/xsd/maven-4.0.0.xsd">

    <modelVersion>4.0.0</modelVersion>

    <parent>

        <groupId>club.throwable</groupId>

        <artifactId>spring-boot-guide</artifactId>

        <version>1.0-SNAPSHOT</version>

    </parent>

    <artifactId>ch0-dependency</artifactId>

    <version>1.0-SNAPSHOT</version>

    <packaging>jar</packaging>

    <name>ch0-dependency</name>

    <dependencies>

        <dependency>

            <groupId>org.springframework.boot</groupId>

            <artifactId>spring-boot-starter</artifactId>

        </dependency>

    </dependencies>

    <build>

        <finalName>ch0-dependency</finalName>

        <plugins>

            <plugin>

                <groupId>org.springframework.boot</groupId>

                <artifactId>spring-boot-maven-plugin</artifactId>

                <version>${spring.boot.version}</version>

<!--                <configuration>-->

<!--                    <mainClass>club.throwable.App</mainClass>-->

<!--                </configuration>-->

                <executions>

                    <execution>

                        <goals>

                            <goal>repackage</goal>

                        </goals>

                    </execution>

                </executions>

            </plugin>

        </plugins>

    </build>

</project>
注意:
spring-boot-maven-plugin一般情况下只需配置在需要打包的模块中,一般父模块是全局管理的模块,不需要全局定义此插件。maven-compiler-plugin可以配置在父模块中,让所有子模块都应用此插件。spring-boot-starter-test和lombok可以在父模块的dependencies元素中添加,相当于所有子模块都引入了这两个依赖。
父模块中的spring-boot-guide的src模块需要丢弃,可以直接剪切到ch0-dependency子模块中,如下:

后面再添加其他新的模块,直接重复上述的步骤即可。
代码仓库
这里给出本文搭建的一个多模块的SpringBoot应用的仓库地址(持续更新):
(本文完 c-2-d e-a-20200701 8:39 AM)
SpringBoot2.x入门:快速创建一个SpringBoot应用的更多相关文章
- 如何使用IDEA快速创建一个springboot项目
如何使用IDEA快速创建一个springboot项目 https://jingyan.baidu.com/article/0964eca24fdd938284f53640.html
- 快速创建一个springboot项目
创建一个maven项目(springboot.mybatis-plus) 目标:可以访问ftl页面.对象(json字符串),可以进行单元测试 1.新建一个maven项目,选择模板maven-arche ...
- 快速创建一个SpringBoot项目并整合Mybatis
2019-09-15 一.Maven环境搭建 1.导入jar坐标 <project xmlns="http://maven.apache.org/POM/4.0.0" xml ...
- 快速构建一个 Springboot
快速构建一个 Springboot 官网:http://projects.spring.io/spring-boot/ Spring Boot可以轻松创建可以“运行”的独立的,生产级的基于Spring ...
- ASP.NET Core模块化前后端分离快速开发框架介绍之2、快速创建一个业务模块
源码地址 GitHub:https://github.com/iamoldli/NetModular 演示地址 地址:https://nm.iamoldli.com 账户:admin 密码:admin ...
- 快速构建一个springboot项目(一)
前言: springcloud是新一代的微服务框架而springboot作为springcloud的基础,很有必要对springboot深入学习一下. springboot能做什么? (1)spri ...
- CXF 入门:创建一个基于WS-Security标准的安全验证(CXF回调函数使用,)
http://jyao.iteye.com/blog/1346547 注意:以下客户端调用代码中获取服务端ws实例,都是通过CXF 入门: 远程接口调用方式实现 直入正题! 以下是服务端配置 ==== ...
- 通过beego快速创建一个Restful风格API项目及API文档自动化
通过beego快速创建一个Restful风格API项目及API文档自动化 本文演示如何快速(一分钟内,不写一行代码)的根据数据库及表创建一个Restful风格的API项目,及提供便于在线测试API的界 ...
- Android开发的初学者快速创建一个项目
因为gwf的原因,大陆连不上google所以AndroidSDK是无法更新的 而且设置代理也不一定能解决问题 如果是初学者想快速的了解安卓开发,可以在国内的内网下载整合包 下载地址:http://rj ...
随机推荐
- Java实现 洛谷 导弹拦截
题目描述 某国为了防御敌国的导弹袭击,发展出一种导弹拦截系统.但是这种导弹拦截系统有一个缺陷:虽然它的第一发炮弹能够到达任意的高度,但是以后每一发炮弹都不能高于前一发的高度.某天,雷达捕捉到敌国的导弹 ...
- Java实现 蓝桥杯 算法训练 My Bad(暴力)
试题 算法训练 My Bad 问题描述 一个逻辑电路将其输入通过不同的门映射到输出,在电路中没有回路.输入和输出是一个逻辑值的有序集合,逻辑值被表示为1和0.我们所考虑的电路由与门(and gate, ...
- Java实现蓝桥杯历届试题高僧斗法
历届试题 高僧斗法 时间限制:1.0s 内存限制:256.0MB 提交此题 锦囊1 锦囊2 问题描述 古时丧葬活动中经常请高僧做法事.仪式结束后,有时会有"高僧斗法"的趣味节目,以 ...
- Java实现 蓝桥杯 猜算式
猜算式 看下面的算式: □□ x □□ = □□ x □□□ 它表示:两个两位数相乘等于一个两位数乘以一个三位数. 如果没有限定条件,这样的例子很多. 但目前的限定是:这9个方块,表示1~9的9个数字 ...
- java实现最大连续和问题
/* 10 5 -3 12 -31 15 22 -7 6 -8 -9 10 .... 暴力:O(n^3) 分治:[ mid ) 三种情况求最大 基线法: O(n) 2个数组: 从左到本位:出现的最大累 ...
- Java实现 蓝桥杯 历届试题 矩阵翻硬币
问题描述 小明先把硬币摆成了一个 n 行 m 列的矩阵. 随后,小明对每一个硬币分别进行一次 Q 操作. 对第x行第y列的硬币进行 Q 操作的定义:将所有第 ix 行,第 jy 列的硬币进行翻转. 其 ...
- Python UI自动化测试实操
本UI 自动化框架主要的实验的目的是:完成了登录页面的自动化登录与打开会员中心的页面这一自动化的过程. 废话不多说,直接上代码截图: 我们首先来看看整个工程的目录结构,这样以便于了解项目的调用关系: ...
- 优雅的敲JS代码的几个原则
一.条件语句 1,使用 Array.includes 来处理多重 || 条件 // ----- 一般 ------ if (fruit == 'apple' || fr ...
- el-upload配合vue-cropper实现上传图片前裁剪
需求背景 上传一个封面图,在上传之前需要对图片进行裁剪,上传裁剪之后的图片,类似微信的上传头像. 技术方案 上传肯定是用element的 el-upload 组件实现上传,非常方便,各种钩子函数. 裁 ...
- zabbix 邮箱告警
脚本内容 #!/bin/env python #coding:utf- import smtplib from email.mime.text import MIMEText from sys imp ...