《opencv学习》 之 特征检测与匹配
这几天学习SURF特征检测,直接看的视频和书本有点吃不消,现在是基本看懂了,如果写博客记录没有必要,因为网上都差不多,笔记都在书上了,以下是个人认为比较浅显易懂的文章,当然海有很多好文章我没看到。
看第一篇入门就可以,后面讲的不是很好: http://blog.csdn.net/jwh_bupt/article/details/7621681
harris: http://www.cnblogs.com/ronny/p/4009425.html
Harr: http://blog.csdn.net/zouxy09/article/details/7929570/
Box Filters: http://blog.csdn.net/lanbing510/article/details/28696833
SIFT: http://blog.csdn.net/abcjennifer/article/details/7639681/ http://blog.csdn.net/pi9nc/article/details/23302075
Harr小波特征: 场合不同这个表示也不同,比如在SURF中表示dx、dy,当然也可以表示成其它样子,得看Harr的内核
SURF: 看一下毛星云的那本书,其实网上说的差不多。
ORB: http://www.aiuxian.com/article/p-1728722.html,里面包括FAST特征点、BRIEF描述子
HOG: 这个算法相对比较上面容易理解。
LBP: http://blog.csdn.net/quincuntial/article/details/50541815这个算法可以手写实现,上面基本自己都实现不了(难度很大)
双线性插值: 百度百科有(先有三角函数计算坐标位置,然后用双线性插值计算像素值)
LBP算子
经典LBP算法:
1 int main(int argc, char**argv)
{
Mat input_image, Middle_image,threshold_image;
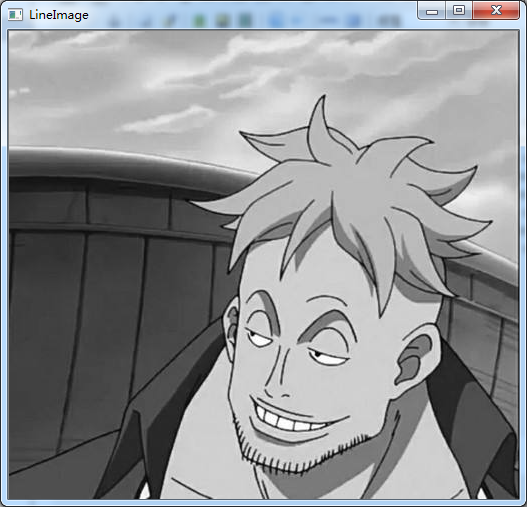
input_image = imread("1.jpg");
if (input_image.data == NULL) {
return -; cout << "can't open image.../";
}
cvtColor(input_image, input_image, CV_BGR2GRAY);
Mat output_image;
output_image.create(Size(input_image.rows - , input_image.cols - ), input_image.type());
output_image.setTo(, Mat());
int width = input_image.cols * input_image.channels();
int heigth = input_image.rows;
for (size_t i = ; i < heigth - ; i++)
{
//uchar *ptr = input_image.ptr<uchar>(i);
for (size_t j = ; j < width - ; j++)
{
uchar code = ;
uchar center = input_image.at<uchar>(i, j);
code |= (input_image.at<uchar>(i - , j - ) >= center) << ;
code |= (input_image.at<uchar>(i - , j ) >= center) << ;
code |= (input_image.at<uchar>(i - , j + ) >= center) << ;
code |= (input_image.at<uchar>(i , j - ) >= center) << ;
code |= (input_image.at<uchar>(i , j + ) >= center) << ;
code |= (input_image.at<uchar>(i + , j - ) >= center) << ;
code |= (input_image.at<uchar>(i + , j ) >= center) << ;
code |= (input_image.at<uchar>(i + , j + ) >= center) << ;
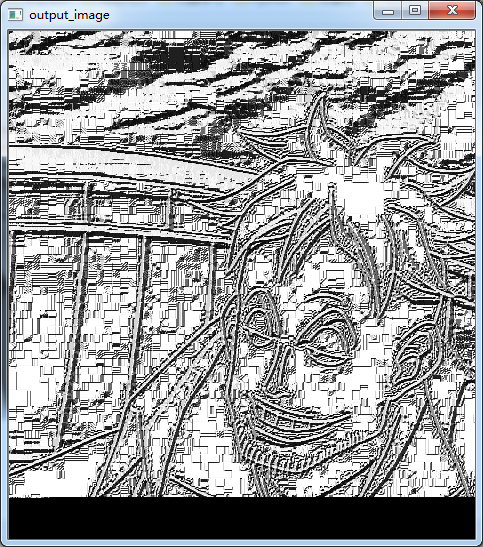
output_image.at<uchar>(i - , j - ) = code;
}
}
imshow("LineImage", input_image);
imshow("output_image", output_image); waitKey();
return ;
}
CLBP:
1 #include <opencv2/opencv.hpp>
#include <iostream> using namespace cv;
using namespace std; const int neighbor = ;//圆周上共几个像素
const int radius = ; int main(int argc, char**argv)
{
Mat input_image, output_image;
input_image = imread("1.jpg"); if (input_image.data == NULL) {
return -; cout << "can't open image.../";
}
cvtColor(input_image, input_image, CV_BGR2GRAY);
//Mat output_image = Mat::zeros(Size(input_image.cols - 2 * 30, input_image.rows - 2 * 30), CV_8UC1);
output_image.create(Size(input_image.cols - * radius, input_image.rows - *radius), CV_8UC1);
output_image.setTo();
int width = input_image.cols;
int height = input_image.rows; for (size_t n = ; n < neighbor; n++)
{
//-----计算圆边长点的坐标(这里x、y具体谁用cos和sin的结果一样,看后来计算双线性插值自己怎么理解了)
float x = static_cast<float>(radius) * cos(2.0 * CV_PI*n / static_cast<float>(neighbor));
float y = static_cast<float>(-radius) * sin(2.0 * CV_PI*n / static_cast<float>(neighbor));//这里加不加负号效果一样,因为是点的顺序而已。
//-----计算圆边上点的像素值,用双线性插值方法
int fx = static_cast<int>(floor(x));
int fy = static_cast<int>(floor(y));//上采样
int cx = static_cast<int>(ceil(x));
int cy = static_cast<int>(ceil(y));//下采样 float dx = x - fx;
float dy = y - fy; float w1 = ( - dx)*( - dy);
float w2 = dx*( - dy);
float w3 = ( - dx)*dy;
float w4 = dx*dy; for (size_t i = radius; i < height - radius; i++)
{
for (size_t j = radius; j < width - radius; j++)
{
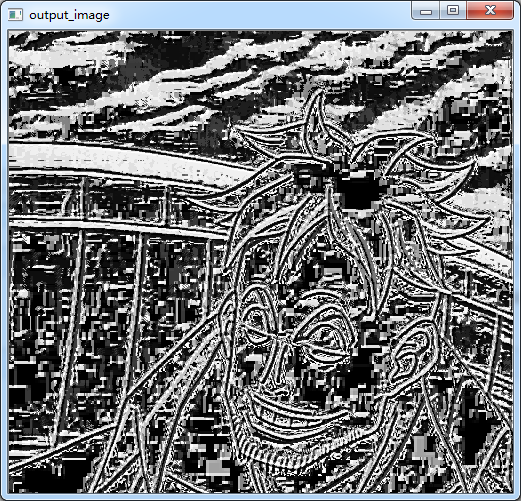
float p1 = input_image.at<uchar>(i + fy, j + fx);
float p2 = input_image.at<uchar>(i + fy, j + cx);
float p3 = input_image.at<uchar>(i + cy, j + fx);
float p4 = input_image.at<uchar>(i + cy, j + cx); float Angle_data = p1*w1 + p2*w2 + p3*w3 + p4*w4;
output_image.at<uchar>(i - radius, j - radius) |= (((input_image.at<uchar>(i, j) >= Angle_data) && (std::abs(Angle_data-input_image.at<uchar>(i,j)) > numeric_limits<float>::epsilon())) << n);
} }
} imshow("LineImage", input_image);
imshow("output_image", output_image); waitKey();
return ;
}

LBP后面还有很多知识,现在不学习那么深,只是了解一下,以后用到再继续深入。
SIFT算子
 #if 1

 #include <opencv2/opencv.hpp>

 #include <opencv2/xfeatures2d.hpp>

 #include <iostream>

 #include "math.h"

 using namespace cv::xfeatures2d;

 using namespace cv;

 using namespace std;

 void calSIFTFeatureAndCompare(Mat& src1, Mat& src2);

 int main(int argc, char**argv)

 {

     Mat input_image1, input_image2;

     input_image1 = imread("hand1.jpg");

     input_image2 = imread("hand2.jpg");

     if (!input_image1.data && !input_image2.data) {

         return -; cout << "can't open image.../";

     }

     calSIFTFeatureAndCompare(input_image1, input_image2);

     /*imshow("input_image1", input_image1);

     imshow("input_image2", input_image2);*/

     waitKey();

     return ;

 }

 //-------------特征点:如同harris等检测的点一样(当然加了更多的约束)--------------//

 //-------------描述子:点形成组织性,有方向和区域等,更能代表整副图像(也就是在特征点上加了更多的约束) --------------//

 void calSIFTFeatureAndCompare(Mat& src1,Mat& src2)

 {

     Mat grayMat1, grayMat2;

     cvtColor(src1, grayMat1, CV_BGR2GRAY);

     cvtColor(src2, grayMat2, CV_BGR2GRAY);

     normalize(grayMat1, grayMat1, , , CV_MINMAX);

     normalize(grayMat2, grayMat2, , , CV_MINMAX);

     /*//---定义SIFT描述子

     SiftFeatureDetector        detector; //计算特征点

     SiftDescriptorExtractor extractor;//计算描述子

     //---特征点检测

     vector<KeyPoint> keypoints1;

     vector<KeyPoint> keypoints2;

     detector.detect(grayMat1, keypoints1, Mat());

     detector.detect(grayMat2, keypoints2, Mat());

     //---计算特征点描述子

     Mat descriptors1, descriptors2;

     extractor.compute(grayMat1, keypoints1, descriptors1);

     extractor.compute(grayMat2, keypoints2, descriptors2);*/

     //SURF* detector = SURF::create(100);//那道理说是可以的,但是奔溃,不知道原因

     Ptr<SURF> detector = SURF::create();//这个参数hessianThreshold为海深矩阵的阈值T,看SIFT原理就可

     vector<KeyPoint> keypoints1;

     vector<KeyPoint> keypoints2;

     Mat descriptors1, descriptors2;

     //---特征点和描述子一起检测了

     detector->detectAndCompute(grayMat1, Mat(), keypoints1, descriptors1);

     detector->detectAndCompute(grayMat2, Mat(), keypoints2, descriptors2);

     //---特征点匹配

     vector<DMatch> matches;//存储匹配结果的类,和keypoint类似

     BFMatcher matcher(NORM_L1); //NORM_L1:代表SIFT,NORM_L2:代表SURF,默认SURF

     matcher.match(descriptors1, descriptors2, matches);

     Mat resultMatch;

     drawMatches(grayMat1, keypoints1, grayMat2, keypoints2, matches, resultMatch);

 }

 #endif

实际图片的匹配与寻找

在原图上截取的一个小图片进行测试---->>>>
本文利用SURF算子进行检测,利用FLANN进行匹配!

上代码:
 #if 1

 #include <opencv2/opencv.hpp>

 #include <opencv2/xfeatures2d.hpp>

 #include <iostream>

 #include "math.h"

 using namespace cv::xfeatures2d;

 using namespace cv;

 using namespace std;

 int main(int argc, char**argv)

 {

     Mat input_image1, input_image2;

     input_image1 = imread("2.jpg");

     input_image2 = imread("1.jpg");

     if (!input_image1.data && !input_image2.data) {

         return -; cout << "can't open image.../";

     }

     //-------------keypoints and descriptor detection

     const int minHessian = ;

     Ptr<SURF> detector = SURF::create(minHessian);

     vector<KeyPoint> srcKeyPoint, dstKeyPoint;

     Mat srcDescriptor, dstDescriptor;

     detector->detectAndCompute(input_image1, Mat(), srcKeyPoint, srcDescriptor);

     detector->detectAndCompute(input_image2, Mat(), dstKeyPoint, dstDescriptor);

     //------------FLANN algorithm match

     FlannBasedMatcher matcher;

     vector<DMatch> matches;

     matcher.match(srcDescriptor, dstDescriptor, matches);

     Mat matchImage;

     drawMatches(input_image1, srcKeyPoint, input_image2, dstKeyPoint, matches, matchImage);

     //------------calculate best keypoint

     double maxDistance = , minDistance = ;

     for (size_t i = ; i < matches.size(); i++)

     {

         maxDistance = maxDistance < matches[i].distance ? matches[i].distance : maxDistance;

         minDistance = minDistance < matches[i].distance ? minDistance : matches[i].distance;

     }

     vector<DMatch> bestMatches;

     for (size_t i = ; i < matches.size(); i++)

     {

         if (matches[i].distance <  * minDistance)

         {

             bestMatches.push_back(matches[i]);

         }

     }

     Mat bestMatchImage;

     drawMatches(input_image1, srcKeyPoint, input_image2, dstKeyPoint, bestMatches, bestMatchImage);

     //-----------Find four corner points from bestMatches

     vector<Point2f> srcPoint;

     vector<Point2f> dstPoint;

     for (size_t i = ; i < bestMatches.size(); i++)//save coordinate to srcPoint/dstPoint from bestMatches

     {

         srcPoint.push_back(srcKeyPoint[bestMatches[i].queryIdx].pt);

         dstPoint.push_back(dstKeyPoint[bestMatches[i].trainIdx].pt);

     }

     Mat H = findHomography(srcPoint, dstPoint,CV_RANSAC);//detection perspective Mapping(H映射)

     vector<Point2f> srcCorners();

     vector<Point2f> dstCorners();

     srcCorners[] = Point(, );

     srcCorners[] = Point(input_image1.cols, );

     srcCorners[] = Point(, input_image1.rows);

     srcCorners[] = Point(input_image1.cols, input_image1.rows);

     perspectiveTransform(srcCorners, dstCorners, H);//detection destination Corners

     line(input_image2, dstCorners[], dstCorners[], Scalar(, , ), );

     line(input_image2, dstCorners[], dstCorners[], Scalar(, , ), );

     line(input_image2, dstCorners[], dstCorners[], Scalar(, , ), );

     line(input_image2, dstCorners[], dstCorners[], Scalar(, , ), );

     waitKey();

     return ;

 }

 #endif
《opencv学习》 之 特征检测与匹配的更多相关文章
- OpenCV 学习笔记(模板匹配)
OpenCV 学习笔记(模板匹配) 模板匹配是在一幅图像中寻找一个特定目标的方法之一.这种方法的原理非常简单,遍历图像中的每一个可能的位置,比较各处与模板是否"相似",当相似度足够 ...
- OpenCV 学习笔记 07 目标检测与识别
目标检测与识别是计算机视觉中最常见的挑战之一.属于高级主题. 本章节将扩展目标检测的概念,首先探讨人脸识别技术,然后将该技术应用到显示生活中的各种目标检测. 1 目标检测与识别技术 为了与OpenCV ...
- OpenCV学习笔记(27)KAZE 算法原理与源码分析(一)非线性扩散滤波
http://blog.csdn.net/chenyusiyuan/article/details/8710462 OpenCV学习笔记(27)KAZE 算法原理与源码分析(一)非线性扩散滤波 201 ...
- OpenCV 学习笔记 05 人脸检测和识别 AttributeError: module 'cv2' has no attribute 'face'
1 环境设置: win10 python 3.6.8 opencv 4.0.1 2 尝试的方法 在学习人脸识别中,遇到了没有 cv2 中没有 face 属性.在网上找了几个方法,均没有成功解决掉该问题 ...
- opencv学习笔记(七)SVM+HOG
opencv学习笔记(七)SVM+HOG 一.简介 方向梯度直方图(Histogram of Oriented Gradient,HOG)特征是一种在计算机视觉和图像处理中用来进行物体检测的特征描述子 ...
- opencv学习笔记(六)直方图比较图片相似度
opencv学习笔记(六)直方图比较图片相似度 opencv提供了API来比较图片的相似程度,使我们很简单的就能对2个图片进行比较,这就是直方图的比较,直方图英文是histogram, 原理就是就是将 ...
- opencv学习笔记(五)镜像对称
opencv学习笔记(五)镜像对称 设图像的宽度为width,长度为height.(x,y)为变换后的坐标,(x0,y0)为原图像的坐标. 水平镜像变换: 代码实现: #include <ios ...
- opencv学习笔记(四)投影
opencv学习笔记(四)投影 任选了一张图片用于测试,图片如下所示: #include <cv.h> #include <highgui.h> using namespace ...
- opencv学习笔记(三)基本数据类型
opencv学习笔记(三)基本数据类型 类:DataType 将C++数据类型转换为对应的opencv数据类型 OpenCV原始数据类型的特征模版.OpenCV的原始数据类型包括unsigned ch ...
随机推荐
- 在VM上安装centOS后的网络配置
花了点时间,研究了下VM上的linux虚拟机的网络配置问题.1.环境主机:winXP SP2,家庭宽带,局域网连到路由器,ip地址为192.168.1.101. 虚拟机:centOS(redhat l ...
- 20155304 2016-2017-2 《Java程序设计》第九周学习总结
20155304 2016-2017-2 <Java程序设计>第九周学习总结 教材学习内容总结 JDBC简介 撰写应用程序是利用通信协议对数据库进行指令交换,以进行数据的增删查找 JDBC ...
- Windows下同一台机器上elasticsearch集群的配置以及elasticsearch-head插件的使用
ElasticSearch是一个基于Lucene的开源搜索服务器,现已经被越来越多的企业运用于项目当中,笔者为了学习es在自己机器上简单的搭建了一个es集群,此文权当记录. 1.我用到的压缩包 下载地 ...
- 虚拟机CentOS的NAT模式联网和SecureCRT远程登录管理工具
Cenos7 发生了很大的变化,不过也是直接配置网络,从启网卡,从启机器,crt链接 https://blog.csdn.net/gebitan505/article/details/54584213 ...
- nuclio dokcer 运行测试
nuclio serverless 平台,可以方便的进行实时事件以及数据处理应用的开发 dcoker 运行 启动 docker run -d -p 8070:8070 -v /var/run/dock ...
- Selenium(ThoughtWorks公司开发的web自动化测试工具)
Selenium也是一个用于Web应用程序测试的工具.Selenium测试直接运行在浏览器中,就像真正的用户在操作一样.支持的浏览器包括IE(7.8.9).Mozilla Firefox.Mozill ...
- IDEA永久激活
对于java开发者来说,idea无疑是使用最广泛最得力的开发工具(没有之一):网上的激活教程也是非常多,这里昌昌也再提供一份更加详细的激活教程,为那些刚入门的开发者们做出一点自己的贡献,对于使用有效期 ...
- slf4j-api、slf4j-log4j12、log4j 之间是什么关系?
slf4j:Simple Logging Facade for Java,为java提供的简单日志Facade.Facade:门面,更底层一点说就是接口.他允许用户以自己的喜好,在工程中通过slf4j ...
- SpringMVC Controller 介绍及常用注解
摘要: @Controller.@RequestMapping(属性:value.params .method.headers).@PathVariable.@RequestParam.@Cookie ...
- WPF Demo6
通知项熟悉.数据绑定 using System.ComponentModel; namespace Demo6 { /// <summary> /// 通知项属性 /// </sum ...