数据持久化之bind Mounting
一、默认情况
1.创建一个Nginx测试镜像
Dockerfile:
FROM nginx:latest

WORKDIR /usr/share/nginx/html

COPY index.html index.html   #使用当前目录下index.html文件
index.html
[root@localhost docker-nginx]# cat index.html
<!doctype html>
<html lang="en">
<head>
<meta charset="utf-8">
<title>hello</title>
</head>
<body>
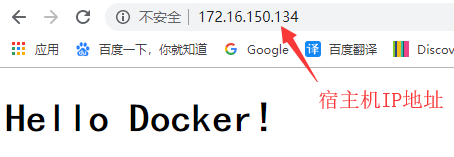
<h1>Hello Docker! </h1>
</body>
</html>
编译
[root@localhost docker-nginx]# docker build -t my_nginx:v1 .

[root@localhost docker-nginx]# docker image ls

REPOSITORY          TAG                 IMAGE ID            CREATED             SIZE

my_nginx            v1                  897d33067e21         seconds ago        MB
2.使用my_ingx镜像创建一个容器,并访问
[root@localhost docker-nginx]# docker run -d --name my_nginx -p : my_nginx:v1

2ff4ee3a55e500785b229527fc72a17b34b2ed96c7c9b419a23ab57644aada1d
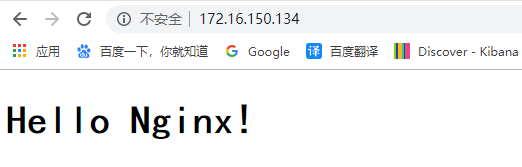
3.进入容器内部修改index.html,并访问查看结果
[root@localhost docker-nginx]# docker exec -it my_nginx /bin/bash

root@2ff4ee3a55e5:/usr/share/nginx/html# sed -i "s#Hello Docker#Hello Nginx#g" index.html
4.修改当前目录下index.html并访问查看结果
[root@localhost docker-nginx]# sed -i "s#Hello Docker#Hello Nginx on physics#g" index.html

二、使用bind Mounting
1.删除旧容器再新建一个容器,并访问,注意结果
[root@localhost docker-nginx]# docker run -d --name my_nginx -v $(pwd):/usr/share/nginx/html -p : my_nginx:v1

24e94344b29c333fceec7f6164ac5757d4747fd4e71e9a6d45e373dfaf130013

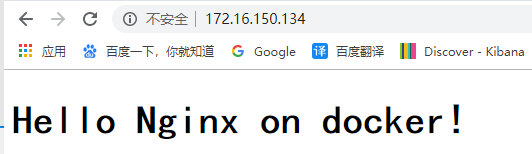
2.进入容器内部修改index.html,并访问查看结果
[root@localhost docker-nginx]# docker exec -it my_nginx /bin/bash

root@24e94344b29c:/usr/share/nginx/html# sed -i "s#Hello Nginx on physics#Hello Nginx on docker#g" index.html
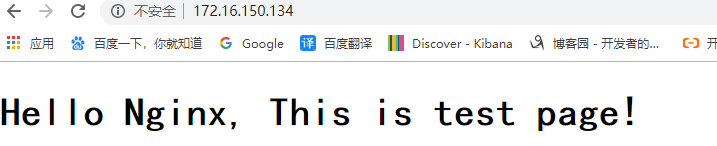
3.退出容器并修改当前目录下index.html,并访问
[root@localhost docker-nginx]# sed -i "s#Hello Nginx on docker#Hello Nginx, This is test page#g" index.html
4.查看本地index.html和容器index.html
[root@localhost docker-nginx]# md5sum index.html  #查看宿主机与容器中index.html hash值

60cbc4142a556d3e5a1e812edf288757  index.html

[root@localhost docker-nginx]# docker exec -it my_nginx md5sum index.html

60cbc4142a556d3e5a1e812edf288757  index.html

[root@localhost docker-nginx]# cat index.html     #查看宿主机与容器中index.html 内容

<!doctype html>

<html lang="en">

<head>

  <meta charset="utf-8">

  <title>hello</title>

</head>

<body>

  <h1>Hello Nginx, This is test page! </h1>

</body>

</html>

[root@localhost docker-nginx]# docker exec -it my_nginx cat  index.html

<!doctype html>

<html lang="en">

<head>

  <meta charset="utf-8">

  <title>hello</title>

</head>

<body>

  <h1>Hello Nginx, This is test page! </h1>

</body>

</html>
总结及与Data Volume的区别:
.Data Volume 需要在 Dockerfile 内声明需要创建的 volume 目录。

  Bind Mounting 则不需要在 Dockerfile 声明 volume,只需要在创建容器的时候,也就是 run 的时候声明即可。

.使用Data Volume持久化的方式,是因为我们容器是一个数据源的产生地方,本身会产生文件和数据,而我们不想让我们的文件和数据随着容器的消失而消失,因此用这种方式持久化

  使用Bind Mounting 持久化的方式,则本地的目录文件和容器中的文件是同步的,如果本地的文件做了修改,那么容器中的文件也会修改。

  即:Bind mount会覆盖容器中的文件,而volume mount则不会,即如果容器中已有文件,则会将文件同步到主机的目录上
数据持久化之bind Mounting的更多相关文章
- 23. docker 数据持久化 bind mounting
1. bind mounting 和 data volume 的区别 data volume 需要在 Dockerfile 定义 Volume bind mounting 只需要 -v 指明 容器外部 ...
- Docker Swarm bind 数据持久化
Docker Swarm bind 数据持久化 bind:主要将工作节点宿主级文件或目录,同步挂载到容器中. 环境: 系统:Centos 7.4 x64 应用版本:Docker 18.09.0 管理节 ...
- Docker数据持久化及实战(Nginx+Spring Boot项目+MySQL)
Docker数据持久化: Volume: (1)创建mysql数据库的container docker run -d --name mysql01 -e MYSQL_ROOT_PASSWORD= my ...
- Docker 容器数据 持久化(系统学习Docker05)
写在前面 本来是可以将数据存储在 容器内部 的.但是存在容器内部,一旦容器被删除掉或者容器毁坏(我亲身经历的痛,当时我们的大数据平台就是运行在docker容器内,有次停电后,不管怎样容器都起不来.以前 ...
- docker 系列 - 容器数据持久化和数据共享
docker 主要有两种数据存储形式, 一种是storage driver(也叫做 Graph driver), 另一种是 volume driver. stroage driver主要是存储那些无状 ...
- Docker集群管理Swarm数据持久化
一.前言 和docker容器一样,Swarm集群中运行的服务也能够做数据持久化.我们可以通过volume.bind和nfs等方式来实现swarm集群应用数据的持久化.其实和docker数据持久化的形式 ...
- 【07】循序渐进学 docker:数据持久化
写在前面的话 学到这里相信有心的朋友都发现问题了,我们每次都会去删掉容器,在创建新的容器.那数据怎么办?岂不删库跑路了? 就算不是数据库,假设公司有日志保留的需求,那每一次发布岂不日志都被干掉了? D ...
- Redis进阶:数据持久化,安全,在PHP中使用
一.redis数据持久化 由于redis是一个内存数据库,如果系统遇到致命问题需要关机或重启,内存中的数据就会丢失,这是生产环境所不能允许的.所以redis提供了数据持久化的能力. redis提供了两 ...
- docker数据持久化
转载/参考: https://www.jianshu.com/p/ef0f24fd0674 Docker的数据持久化主要有两种方式: bind mount docker managed volume ...
随机推荐
- java高并发系列 - 第10天:线程安全和synchronized关键字
这是并发系列第10篇文章. 什么是线程安全? 当多个线程去访问同一个类(对象或方法)的时候,该类都能表现出正常的行为(与自己预想的结果一致),那我们就可以所这个类是线程安全的. 看一段代码: pack ...
- SmtpClient发送邮件时附件名称乱码
在用户环境发现一个现象,使用System.Net.Mail.SmtpClient发送邮件,当附件名包含中文且长度较长时,最终的邮件里附件名会乱掉,写个简单的测试程序: var mail = new M ...
- python基础(33):线程(一)
1. 线程概念的引入背景 1.1 进程 之前我们已经了解了操作系统中进程的概念,程序并不能单独运行,只有将程序装载到内存中,系统为它分配资源才能运行,而这种执行的程序就称之为进程.程序和进程的区别就在 ...
- JQuery的介绍及选择器
1.什么是JQuery. JavaScript开发的过程中,处理浏览器的兼容很复杂而且很耗时,于是一些封装了这些操作的库应运而生.这些库还会把一些常用的代码进行封装. 把一些常用到的方法写到一个单独的 ...
- Python【day 15】基本数据类型-int str bool list
'''''' ''' 1 python的定义 是一门弱类型的解释性的高级编程语言 这里的高级是相对低级(例如:汇编语言等) 高级编程语言和低级编程语言的区别 1.前者更接近于人的理解--字母组成的语法 ...
- Java性能之优化RPC网络通信
服务框架的核心 大型服务框架的核心:RPC通信 微服务的核心是远程通信和服务治理 远程通信提供了服务之间通信的桥梁,服务治理提供了服务的后勤保障 服务的拆分增加了通信的成本,因此远程通信很容易成为系统 ...
- Java实现单链表反转操作
单链表是一种常见的数据结构,由一个个节点通过指针方式连接而成,每个节点由两部分组成:一是数据域,用于存储节点数据.二是指针域,用于存储下一个节点的地址.在Java中定义如下: public class ...
- JAVA 中 Map 与实体类相互转换的简单方法
1. 在 pom.xml 中引入依赖包 <dependency> <groupId>com.alibaba</groupId> <artifactId> ...
- python的wraps函数
当使用@修饰符修饰函数时,会存在这样一个问题:被修饰的函数会消失(这是因为修饰函数没有设置返回值,如果设置了返回值,则就把返回值赋给被修饰函数,比如,test1函数的返回值设置为 return 6, ...
- monkey事件
一.操作事件简介 monkey所操作的随机事件流中包含11大事件,分别是触摸事件.手势事件.二指缩放事件.轨迹球事件.屏幕旋转事件.基本导航事件.主要导航事件.系统按键事件.启动activity事件. ...