PB级数据实现秒级查询ES的安装
什么是ES?ElasticSearch是一个基于Lucene的搜索服务器。它提供了一个分布式多用户能力的全文搜索引擎,基于RESTful web接口。Elasticsearch是用Java语言开发的,并作为Apache许可条款下的开放源码发布,是一种流行的企业级搜索引擎。ElasticSearch用于云计算中,能够达到实时搜索,稳定,可靠,快速,安装使用方便。
- 本教程使用软件为6.4.3版本
下载
ElasticSearch:
Kibana:
上传至Linux服务器
略
解压并修改配置文件
# 注意:需要使用普通用户操作ES,不可使用root用户进行操作。

#使用root用户,添加用户

#添加用户命令:

[root@hadoop137 ~]# useradd shaofei

[root@hadoop137 ~]# passwd shaofei

更改用户 shaofei的密码 。

新的 密码:

无效的密码: 过于简单化/系统化

无效的密码: 过于简单

重新输入新的 密码:

passwd: 所有的身份验证令牌已经成功更新。

#切换为shaofei用户:

[root@hadoop137 ~]# su shaofei

[shaofei@hadoop137 root]$ cd

[shaofei@hadoop137 ~]$

# 解压elasticsearch

[shaofei@hadoop137 softwear]$ tar -zxvf elasticsearch-6.4.3.tar.gz -C ../module/

[shaofei@hadoop137 elasticsearch-6.4.3]$ pwd

/opt/module/elasticsearch-6.4.3

# 修改配置文件

[shaofei@hadoop137 elasticsearch-6.4.3]$ vim config/elasticsearch.yml

# 注意修改yml文件时,配置项后面要空格
elasticsearch.yml
# ======================== Elasticsearch Configuration =========================

#

# NOTE: Elasticsearch comes with reasonable defaults for most settings.

#       Before you set out to tweak and tune the configuration, make sure you

#       understand what are you trying to accomplish and the consequences.

#

# The primary way of configuring a node is via this file. This template lists

# the most important settings you may want to configure for a production cluster.

#

# Please consult the documentation for further information on configuration options:

# https://www.elastic.co/guide/en/elasticsearch/reference/index.html

#

# ---------------------------------- Cluster -----------------------------------

#

# Use a descriptive name for your cluster:

# 修改集群名称

cluster.name: myes

#

# ------------------------------------ Node ------------------------------------

#

# Use a descriptive name for the node:

# 修改当前节点名称——下一步分发到其他集群时需要修改

node.name: hadoop137

#

# Add custom attributes to the node:

#

#node.attr.rack: r1

#

# ----------------------------------- Paths ------------------------------------

#

# Path to directory where to store the data (separate multiple locations by comma):

#

#path.data: /path/to/data

#

# Path to log files:

#

#path.logs: /path/to/logs

#

# ----------------------------------- Memory -----------------------------------

#

# Lock the memory on startup:

#

#bootstrap.memory_lock: true

#

# Make sure that the heap size is set to about half the memory available

# on the system and that the owner of the process is allowed to use this

# limit.

#

# Elasticsearch performs poorly when the system is swapping the memory.

#

# ---------------------------------- Network -----------------------------------

#

# Set the bind address to a specific IP (IPv4 or IPv6):

# 当前节点的ip地址,我这里配置了hosts文件所以写了主机名称——下一步分发之后需要修改为对应主机的ip地址

network.host: hadoop137

#

# Set a custom port for HTTP:

# ES对外开放服务的端口号

http.port: 9200

#

# For more information, consult the network module documentation.

#

# --------------------------------- Discovery ----------------------------------

#

# Pass an initial list of hosts to perform discovery when new node is started:

# The default list of hosts is ["127.0.0.1", "[::1]"]

#

#discovery.zen.ping.unicast.hosts: ["host1", "host2"]

#

# Prevent the "split brain" by configuring the majority of nodes (total number of master-eligible nodes / 2 + 1):

#

#discovery.zen.minimum_master_nodes:

#

# For more information, consult the zen discovery module documentation.

#

# ---------------------------------- Gateway -----------------------------------

#

# Block initial recovery after a full cluster restart until N nodes are started:

#

#gateway.recover_after_nodes: 3

#

# For more information, consult the gateway module documentation.

#

# ---------------------------------- Various -----------------------------------

#

# Require explicit names when deleting indices:

#

#action.destructive_requires_name: true

#添加集群ip地址

discovery.zen.ping.unicast.hosts: ["192.168.23.137", "192.168.23.138", "192.168.23.139"]
分发各个集群中的其他主机
[shaofei@hadoop137 module]$ rsync -rvl elasticsearch-6.4.3 shaofei@hadoop138:`pwd`

[shaofei@hadoop137 module]$ rsync -rvl elasticsearch-6.4.3 shaofei@hadoop139:`pwd`
分别启动集群中的ES
[shaofei@hadoop137 elasticsearch-6.4.3]$ ./bin/elasticsearch

[shaofei@hadoop138 elasticsearch-6.4.3]$ ./bin/elasticsearch

[shaofei@hadoop139 elasticsearch-6.4.3]$ ./bin/elasticsearch
启动中遇到的问题:
ERROR: [4] bootstrap checks failed
[1]: max file descriptors [4096] for elasticsearch process is too low, increase to at least [65536]
[2]: max number of threads [1024] for user [shaofei] is too low, increase to at least [4096]
[3]: max virtual memory areas vm.max_map_count [65530] is too low, increase to at least [262144]
对于第【1】个问题:

[root@hadoop139 shaofei]# vi /etc/security/limits.conf

末尾添加:

# End of file

* soft nofile 65536

* hard nofile 131072

* soft nproc 2048

* hard nproc 4096

对于第【2】个问题:

[root@hadoop139 shaofei]# vim /etc/security/limits.d/90-nproc.conf

修改:

[root@hadoop139 shaofei]# cat /etc/security/limits.d/90-nproc.conf

# Default limit for number of user's processes to prevent

# accidental fork bombs.

# See rhbz #432903 for reasoning.

*          soft    nproc     10240

root       soft    nproc     unlimited

# 重新登陆用户即可

对于第【3】个问题:

vi /etc/sysctl.conf

添加下面配置:

vm.max_map_count=655360

并执行命令:

sysctl -p
java.lang.UnsupportedOperationException: seccomp unavailable: CONFIG_SECCOMP not compiled into kernel, CONFIG_SECCOMP and CONFIG_SECCOMP_FILTER are needed
# 修改elasticsearch.yml 添加一下内容

bootstrap.memory_lock: false

bootstrap.system_call_filter: false
问题解决之后重新启动es即可。
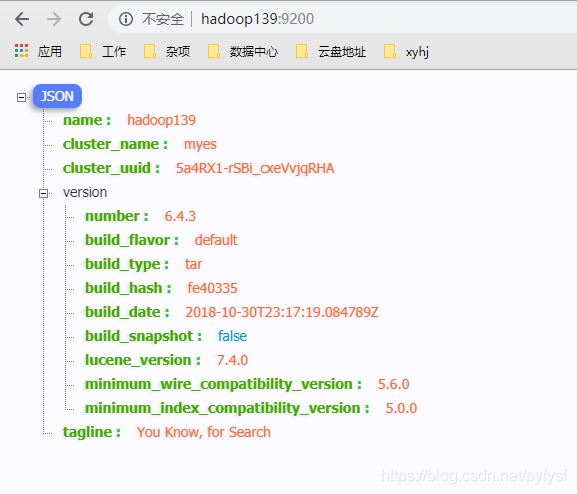
- 启动成功
安装kibana
- 下载安装包
- 解压
- 修改配置文件
kibana.yml
# Kibana is served by a back end server. This setting specifies the port to use.

# 配置端口

server.port: 5601

# Specifies the address to which the Kibana server will bind. IP addresses and host names are both valid values.

# The default is 'localhost', which usually means remote machines will not be able to connect.

# To allow connections from remote users, set this parameter to a non-loopback address.

# 配置主机ip

server.host: "hadoop137"

# Enables you to specify a path to mount Kibana at if you are running behind a proxy.

# Use the `server.rewriteBasePath` setting to tell Kibana if it should remove the basePath

# from requests it receives, and to prevent a deprecation warning at startup.

# This setting cannot end in a slash.

#server.basePath: ""

# Specifies whether Kibana should rewrite requests that are prefixed with

# `server.basePath` or require that they are rewritten by your reverse proxy.

# This setting was effectively always `false` before Kibana 6.3 and will

# default to `true` starting in Kibana 7.0.

#server.rewriteBasePath: false

# The maximum payload size in bytes for incoming server requests.

#server.maxPayloadBytes: 1048576

# The Kibana server's name.  This is used for display purposes.

#server.name: "your-hostname"

# The URL of the Elasticsearch instance to use for all your queries.

#配置elasticsearch的访问

elasticsearch.url: "http://hadoop137:9200"

# When this setting's value is true Kibana uses the hostname specified in the server.host

# setting. When the value of this setting is false, Kibana uses the hostname of the host

# that connects to this Kibana instance.

#elasticsearch.preserveHost: true

# Kibana uses an index in Elasticsearch to store saved searches, visualizations and

# dashboards. Kibana creates a new index if the index doesn't already exist.

#kibana.index: ".kibana"

# The default application to load.

#kibana.defaultAppId: "home"

# If your Elasticsearch is protected with basic authentication, these settings provide

# the username and password that the Kibana server uses to perform maintenance on the Kibana

# index at startup. Your Kibana users still need to authenticate with Elasticsearch, which

# is proxied through the Kibana server.

#elasticsearch.username: "user"

#elasticsearch.password: "pass"

# Enables SSL and paths to the PEM-format SSL certificate and SSL key files, respectively.

# These settings enable SSL for outgoing requests from the Kibana server to the browser.

#server.ssl.enabled: false

#server.ssl.certificate: /path/to/your/server.crt

#server.ssl.key: /path/to/your/server.key

# Optional settings that provide the paths to the PEM-format SSL certificate and key files.

# These files validate that your Elasticsearch backend uses the same key files.

#elasticsearch.ssl.certificate: /path/to/your/client.crt

#elasticsearch.ssl.key: /path/to/your/client.key

# Optional setting that enables you to specify a path to the PEM file for the certificate

# authority for your Elasticsearch instance.

#elasticsearch.ssl.certificateAuthorities: [ "/path/to/your/CA.pem" ]

# To disregard the validity of SSL certificates, change this setting's value to 'none'.

#elasticsearch.ssl.verificationMode: full

# Time in milliseconds to wait for Elasticsearch to respond to pings. Defaults to the value of

# the elasticsearch.requestTimeout setting.

#elasticsearch.pingTimeout: 1500

# Time in milliseconds to wait for responses from the back end or Elasticsearch. This value

# must be a positive integer.

#elasticsearch.requestTimeout: 30000

# List of Kibana client-side headers to send to Elasticsearch. To send *no* client-side

# headers, set this value to [] (an empty list).

#elasticsearch.requestHeadersWhitelist: [ authorization ]

# Header names and values that are sent to Elasticsearch. Any custom headers cannot be overwritten

# by client-side headers, regardless of the elasticsearch.requestHeadersWhitelist configuration.

#elasticsearch.customHeaders: {}

# Time in milliseconds for Elasticsearch to wait for responses from shards. Set to 0 to disable.

#elasticsearch.shardTimeout: 30000

# Time in milliseconds to wait for Elasticsearch at Kibana startup before retrying.

#elasticsearch.startupTimeout: 5000

# Logs queries sent to Elasticsearch. Requires logging.verbose set to true.

#elasticsearch.logQueries: false

# Specifies the path where Kibana creates the process ID file.

#pid.file: /var/run/kibana.pid

# Enables you specify a file where Kibana stores log output.

#logging.dest: stdout

# Set the value of this setting to true to suppress all logging output.

#logging.silent: false

# Set the value of this setting to true to suppress all logging output other than error messages.

#logging.quiet: false

# Set the value of this setting to true to log all events, including system usage information

# and all requests.

#logging.verbose: false

# Set the interval in milliseconds to sample system and process performance

# metrics. Minimum is 100ms. Defaults to 5000.

#ops.interval: 5000

# The default locale. This locale can be used in certain circumstances to substitute any missing

# translations.

#i18n.defaultLocale: "en"
浏览器访问: http://hadoop137:5601/ 即可验证是否成功

PB级数据实现秒级查询ES的安装的更多相关文章
- 《深度访谈:华为开源数据格式 CarbonData 项目,实现大数据即席查询秒级响应》
深度访谈:华为开源数据格式 CarbonData 项目,实现大数据即席查询秒级响应 Tina 阅读数:146012016 年 7 月 13 日 19:00 华为宣布开源了 CarbonData ...
- PB级数据实时查询,滴滴Elasticsearch多集群架构实践
PB级数据实时查询,滴滴Elasticsearch多集群架构实践 mp.weixin.qq.com 点击上方"IT牧场",选择"设为星标"技术干货每日送达 点 ...
- 百亿级别数据量,又需要秒级响应的案例,需要什么系统支持呢?下面介绍下大数据实时分析工具Yonghong Z-Suite
Yonghong Z-Suite 除了提供优秀的前端BI工具之外,Yonghong Z-Suite让用户可以选购分布式数据集市来支持实时大数据分析. 对于这种百亿级的大数据案例,Yonghong Z- ...
- .NET Core下开源任务调度框架Hangfire的Api任务拓展(支持秒级任务)
HangFire的拓展和使用 看了很多博客,小白第一次写博客. 最近由于之前的任务调度框架总出现问题,因此想寻找一个替代品,之前使用的是Quartz.Net,这个框架方便之处就是支持cron表达式适合 ...
- 《阿里如何实现秒级百万TPS?搜索离线大数据平台大数据平台架构解读》读后感
在使用淘宝时发现搜索框很神奇,它可以将将我们想要的商品全部查询出来,但是我们并感觉不到数据库查询的过程,速度很快.通过阅读这篇文章让我知道了搜索框背后包含着很多技术,对我以后的学习可能很有借鉴. 平时 ...
- SQL Server大量数据秒级插入/新增/删除
原文:SQL Server大量数据秒级插入/新增/删除 1.快速保存,该方法有四个参数,第一个参数为数据库连接,第二个参数为需要保存的DataTable,该参数的TableName属性需要设置为数据库 ...
- 软件架构自学笔记-- 转载“虎牙在全球 DNS 秒级生效上的实践”
虎牙在全球 DNS 秒级生效上的实践 这次分享的是全球 DNS 秒级生效在虎牙的实践,以及由此产生的一些思考,整体上,分为以下 5 各部分: 背景介绍: 方案设计和对比: 高可用: 具体实践和落地: ...
- 《DNS稳定保障系列3--快如闪电,域名解析秒级生效》
在刚刚过去的双十一,又是一个全民狂欢的盛宴,天猫双十一的成交量高达2684亿.无数小伙伴在淘宝.天猫里买买买,今年你又剁手了多少?言归正传,在你疯狂秒杀的时候,有没有发现,今年的购物体验一如既往的好, ...
- 虎牙在全球 DNS 秒级生效上的实践
本文整理自虎牙中间件团队在 Nacos Meetup 的现场分享,阿里巴巴中间件受权发布. 这次分享的是全球 DNS 秒级生效在虎牙的实践,以及由此产生的一些思考,整体上,分为以下5各部分: 背景介绍 ...
随机推荐
- 本地(任意)时间戳转化(转换)标准时间格式 js(eg:2019-05-07 17:49:12)
<script> function getLocalTime(timestamp) { // 如果以秒为单位 // var dateObj = new Date(timestamp * 1 ...
- wordpress修改登录密码
wordpress忘记密码更改 网上搜到的方法: 1.后台邮件重置: 2,phpmyadmin登录数据库,执行mysql语句或者在wp_users表中重置密码: 3,利用php文件重置. 这是提供一种 ...
- Java中不得不谈的值传递和地址传递
个人的一些认识,希望能对初学Java的你,或者困惑于方法参数传递的你祈祷一丝帮助! 下面是一些作者的个人观点,如果有错,欢迎各位大牛指出错误,灰常感谢您的观看与支持... -------------- ...
- springboot的异步调用
package com.handsight.platform.fras.aapp; import java.util.Locale; import org.slf4j.Logger; import o ...
- .NET Core 小程序开发零基础系列(1)——开发者启用并牵手成功
最近几个月本人与团队一直与小程序打交道,对小程序的实战开发算比较熟悉,也因一些朋友经常问我各种小程序问题,无不能一一回答,想了很久,决定还是空余时间来写写文章吧,偶尔发现一个人安静的时候写文章特爽 ...
- Flink的JobManager启动(源码分析)
都知道Flink中的角色分为Jobmanager,TaskManger 在启动脚本里面已经找到了jobmanager的启动类org.apache.flink.runtime.entrypoint.St ...
- Vue+ElementUI项目使用webpack输出MPA
目录 Vue+ElementUI项目使用webpack输出MPA 一. 需求分析 二. 原方案分析 三. 多页面改造3步走 四. 小结 Vue+ElementUI项目使用webpack输出MPA 示例 ...
- Unity打包——Android和IOS
推荐阅读: 我的CSDN 我的博客园 QQ群:704621321 我的个人博客 Android包 (1)首先需要安装Android SDK和Java JDK.SDK需要添加tools目录,JD ...
- CodeForces 1058E
题意略. 思路:本题有两个关键点: 一.满足题设的区间条件 1.区间内1的个数和为偶数 2.区间内含1个数最多的那一项,它所含1的个数不得超过区间内1的个数和的一半. 二.长度超过60的区间必然满足上 ...
- Java连载24-break语句、continue语句、输出质数练习
一.break 1.break是Java语言中的关键字,被翻译为“中断/折断” 2.break + ";"可以成为一个单独的完整的java语句: break; 3.break语 ...