
Spring 4 整合RMI技术及发布多个服务(xjl456852原创)
<?xml version="1.0" encoding="UTF-8"?><project xmlns="http://maven.apache.org/POM/4.0.0"xmlns:xsi="http://www.w3.org/2001/XMLSchema-instance"xsi:schemaLocation="http://maven.apache.org/POM/4.0.0 http://maven.apache.org/xsd/maven-4.0.0.xsd"><modelVersion>4.0.0</modelVersion><groupId>com.xiejl</groupId><artifactId>test</artifactId><version>1.0-SNAPSHOT</version><properties><spring-version>4.3.7.RELEASE</spring-version></properties><dependencies><!-- https://mvnrepository.com/artifact/org.springframework/spring-beans --><dependency><groupId>org.springframework</groupId><artifactId>spring-beans</artifactId><version>${spring-version}</version></dependency><dependency><groupId>org.springframework</groupId><artifactId>spring-context</artifactId><version>${spring-version}</version></dependency><dependency><groupId>org.springframework</groupId><artifactId>spring-context-support</artifactId><version>${spring-version}</version></dependency><dependency><groupId>org.springframework</groupId><artifactId>spring-core</artifactId><version>${spring-version}</version></dependency><dependency><groupId>org.springframework</groupId><artifactId>spring-aop</artifactId><version>${spring-version}</version></dependency><dependency><groupId>org.springframework</groupId><artifactId>spring-aop</artifactId><version>${spring-version}</version></dependency><dependency><groupId>org.springframework</groupId><artifactId>spring-orm</artifactId><version>${spring-version}</version></dependency><dependency><groupId>org.springframework</groupId><artifactId>spring-orm</artifactId><version>${spring-version}</version></dependency><dependency><groupId>org.springframework</groupId><artifactId>spring-web</artifactId><version>${spring-version}</version></dependency><dependency><groupId>org.springframework</groupId><artifactId>spring-webmvc</artifactId><version>${spring-version}</version></dependency><!-- https://mvnrepository.com/artifact/org.aspectj/aspectjrt --><dependency><groupId>org.aspectj</groupId><artifactId>aspectjrt</artifactId><version>1.8.10</version></dependency><!-- https://mvnrepository.com/artifact/org.aspectj/aspectjweaver --><dependency><groupId>org.aspectj</groupId><artifactId>aspectjweaver</artifactId><version>1.8.10</version></dependency></dependencies></project>
package com.xjl456852.rmi.spring;/*** 定义一个远程接口** @author leizhimin 2009-8-17 13:53:38*/public interface HelloService {/*** 简单的返回“Hello World!"字样** @return 返回“Hello World!"字样*/public String helloWorld();/*** 一个简单的业务方法,根据传入的人名返回相应的问候语** @param someBodyName 人名* @return 返回相应的问候语*/public String sayHelloToSomeBody(String someBodyName);}
package com.xjl456852.rmi.spring;import org.springframework.stereotype.Service;/*** 远程的接口的实现** @author leizhimin 2009-8-17 13:54:38*/@Servicepublic class HelloServiceImpl implements HelloService {public HelloServiceImpl() {}/*** 简单的返回“Hello World!"字样** @return 返回“Hello World!"字样*/public String helloWorld() {return "Hello World!";}/*** 一个简单的业务方法,根据传入的人名返回相应的问候语** @param someBodyName 人名* @return 返回相应的问候语*/public String sayHelloToSomeBody(String someBodyName) {return "你好," + someBodyName + "!";}}
package com.xjl456852.rmi.spring;import org.springframework.context.ApplicationContext;import org.springframework.context.support.ClassPathXmlApplicationContext;/*** 通过Spring发布RMI服务** @author leizhimin 2009-8-17 14:22:06*/public class HelloHost {public static void main(String[] args) {ApplicationContext ctx = new ClassPathXmlApplicationContext("applicationContext.xml");System.out.println("RMI服务伴随Spring的启动而启动了.....");}}
<beans xmlns="http://www.springframework.org/schema/beans"xmlns:aop="http://www.springframework.org/schema/aop" xmlns:context="http://www.springframework.org/schema/context"xmlns:tx="http://www.springframework.org/schema/tx" xmlns:xsi="http://www.w3.org/2001/XMLSchema-instance"xmlns:task="http://www.springframework.org/schema/task"xsi:schemaLocation="http://www.springframework.org/schema/beans http://www.springframework.org/schema/beans/spring-beans-3.2.xsdhttp://www.springframework.org/schema/aop http://www.springframework.org/schema/aop/spring-aop-3.2.xsdhttp://www.springframework.org/schema/context http://www.springframework.org/schema/context/spring-context-3.2.xsdhttp://www.springframework.org/schema/tx http://www.springframework.org/schema/tx/spring-tx-3.2.xsdhttp://www.springframework.org/schema/task http://www.springframework.org/schema/task/spring-task-3.2.xsd"><!-- component-scan自动搜索@Component , @Controller , @Service , @Repository等标注的类 --><context:component-scan base-package="com.xjl456852" /><bean id="serviceExporter" class="org.springframework.remoting.rmi.RmiServiceExporter"><property name="serviceName" value="rmiSpring"/><property name="serviceInterface" value="com.xjl456852.rmi.spring.HelloService"/><property name="registryPort" value="8888"/><property name="service" ref="helloServiceImpl"/></bean></beans>

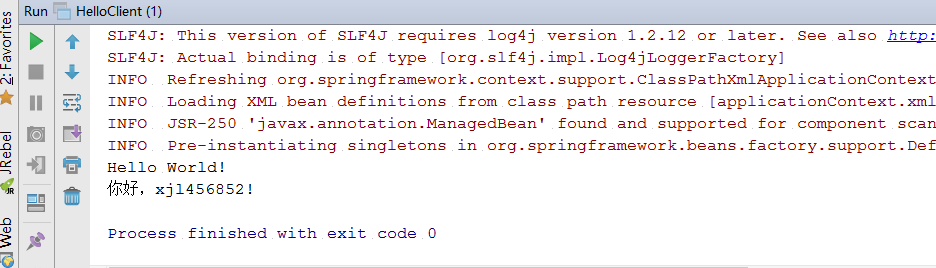
package com.xjl456852.rmi.spring;import org.springframework.context.ApplicationContext;import org.springframework.context.support.ClassPathXmlApplicationContext;import javax.annotation.Resource;import java.rmi.RemoteException;/*** 通过Spring来调用RMI服务** @author leizhimin 2009-8-17 14:12:46*/public class HelloClient {@Resourceprivate HelloService helloService;public static void main(String[] args) throws RemoteException {ApplicationContext ctx = new ClassPathXmlApplicationContext("applicationContext.xml");HelloService hs = (HelloService) ctx.getBean("helloService");System.out.println(hs.helloWorld());System.out.println(hs.sayHelloToSomeBody("xjl456852"));}}
<beans xmlns="http://www.springframework.org/schema/beans"xmlns:aop="http://www.springframework.org/schema/aop" xmlns:context="http://www.springframework.org/schema/context"xmlns:tx="http://www.springframework.org/schema/tx" xmlns:xsi="http://www.w3.org/2001/XMLSchema-instance"xmlns:task="http://www.springframework.org/schema/task"xsi:schemaLocation="http://www.springframework.org/schema/beans http://www.springframework.org/schema/beans/spring-beans-3.2.xsdhttp://www.springframework.org/schema/aop http://www.springframework.org/schema/aop/spring-aop-3.2.xsdhttp://www.springframework.org/schema/context http://www.springframework.org/schema/context/spring-context-3.2.xsdhttp://www.springframework.org/schema/tx http://www.springframework.org/schema/tx/spring-tx-3.2.xsdhttp://www.springframework.org/schema/task http://www.springframework.org/schema/task/spring-task-3.2.xsd"><!-- component-scan自动搜索@Component , @Controller , @Service , @Repository等标注的类 --><context:component-scan base-package="com.xjl456852" /><bean id="helloService" class="org.springframework.remoting.rmi.RmiProxyFactoryBean"><property name="serviceUrl" value="rmi://192.168.176.131:8888/rmiSpring"/><property name="serviceInterface" value="com.xjl456852.rmi.spring.HelloService"/></bean></beans>
package com.xjl456852.rmi.spring;/*** Created by xjl on 2017/3/19.*/public interface OtherService {public int random();}
package com.xjl456852.rmi.spring;import org.springframework.stereotype.Service;import java.util.Random;/*** Created by xjl on 2017/3/19.*/@Servicepublic class OtherServiceImpl implements OtherService{Random random = new Random();public int random() {System.out.println("invoke random method");return random.nextInt(100);}}
<beans xmlns="http://www.springframework.org/schema/beans"xmlns:aop="http://www.springframework.org/schema/aop" xmlns:context="http://www.springframework.org/schema/context"xmlns:tx="http://www.springframework.org/schema/tx" xmlns:xsi="http://www.w3.org/2001/XMLSchema-instance"xmlns:task="http://www.springframework.org/schema/task"xsi:schemaLocation="http://www.springframework.org/schema/beans http://www.springframework.org/schema/beans/spring-beans-3.2.xsdhttp://www.springframework.org/schema/aop http://www.springframework.org/schema/aop/spring-aop-3.2.xsdhttp://www.springframework.org/schema/context http://www.springframework.org/schema/context/spring-context-3.2.xsdhttp://www.springframework.org/schema/tx http://www.springframework.org/schema/tx/spring-tx-3.2.xsdhttp://www.springframework.org/schema/task http://www.springframework.org/schema/task/spring-task-3.2.xsd"><!-- component-scan自动搜索@Component , @Controller , @Service , @Repository等标注的类 --><context:component-scan base-package="com.xjl456852" /><bean id="serviceExporter" class="org.springframework.remoting.rmi.RmiServiceExporter"><property name="serviceName" value="rmiSpring"/><property name="serviceInterface" value="com.xjl456852.rmi.spring.HelloService"/><property name="registryPort" value="8888"/><property name="service" ref="helloServiceImpl"/></bean><bean id="serviceExporter_Other" class="org.springframework.remoting.rmi.RmiServiceExporter"><property name="serviceName" value="rmiSpringOther"/><property name="serviceInterface" value="com.xjl456852.rmi.spring.OtherService"/><property name="registryPort" value="8888"/><property name="service" ref="otherServiceImpl"/></bean></beans>
<beans xmlns="http://www.springframework.org/schema/beans"xmlns:aop="http://www.springframework.org/schema/aop" xmlns:context="http://www.springframework.org/schema/context"xmlns:tx="http://www.springframework.org/schema/tx" xmlns:xsi="http://www.w3.org/2001/XMLSchema-instance"xmlns:task="http://www.springframework.org/schema/task"xsi:schemaLocation="http://www.springframework.org/schema/beans http://www.springframework.org/schema/beans/spring-beans-3.2.xsdhttp://www.springframework.org/schema/aop http://www.springframework.org/schema/aop/spring-aop-3.2.xsdhttp://www.springframework.org/schema/context http://www.springframework.org/schema/context/spring-context-3.2.xsdhttp://www.springframework.org/schema/tx http://www.springframework.org/schema/tx/spring-tx-3.2.xsdhttp://www.springframework.org/schema/task http://www.springframework.org/schema/task/spring-task-3.2.xsd"><!-- component-scan自动搜索@Component , @Controller , @Service , @Repository等标注的类 --><context:component-scan base-package="com.xjl456852" /><bean id="helloService" class="org.springframework.remoting.rmi.RmiProxyFactoryBean"><property name="serviceUrl" value="rmi://192.168.176.131:8888/rmiSpring"/><property name="serviceInterface" value="com.xjl456852.rmi.spring.HelloService"/></bean><bean id="otherService" class="org.springframework.remoting.rmi.RmiProxyFactoryBean"><property name="serviceUrl" value="rmi://192.168.176.131:8888/rmiSpringOther"/><property name="serviceInterface" value="com.xjl456852.rmi.spring.OtherService"/></bean></beans>
package com.xjl456852.rmi.spring;import org.springframework.context.ApplicationContext;import org.springframework.context.support.ClassPathXmlApplicationContext;import javax.annotation.Resource;import java.rmi.RemoteException;/*** 通过Spring来调用RMI服务** @author leizhimin 2009-8-17 14:12:46*/public class HelloClient {@Resourceprivate HelloService helloService;@Resourceprivate OtherService otherService;public static void main(String[] args) throws RemoteException {ApplicationContext ctx = new ClassPathXmlApplicationContext("applicationContext.xml");HelloService hs = (HelloService) ctx.getBean("helloService");System.out.println(hs.helloWorld());System.out.println(hs.sayHelloToSomeBody("xjl456852"));OtherService os = (OtherService) ctx.getBean("otherService");System.out.println("otherService:" + os.random());}}


Spring 4 整合RMI技术及发布多个服务(xjl456852原创)的更多相关文章
- 黑马_13 Spring Boot:05.spring boot 整合其他技术
13 Spring Boot: 01.spring boot 介绍&&02.spring boot 入门 04.spring boot 配置文件 05.spring boot 整合其他 ...
- Spring+CXF整合来管理webservice(服务器启动发布webservice)
Spring+CXF整合来管理webservice 实现步骤: 1. 添加cxf.jar 包(集成了Spring.jar.servlet.jar ),spring.jar包 ,serv ...
- Spring Boot 整合视图层技术,application全局配置文件
目录 Spring Boot 整合视图层技术 Spring Boot 整合jsp Spring Boot 整合freemarker Spring Boot 整合视图层技术 Spring Boot 整合 ...
- Spring 5.x 、Spring Boot 2.x 、Spring Cloud 与常用技术栈整合
项目 GitHub 地址:https://github.com/heibaiying/spring-samples-for-all 版本说明: Spring: 5.1.3.RELEASE Spring ...
- Spring Boot从入门到精通之:二、Spring Boot整合JPA
springboot-jpa 开发工具 系统: windows10 开发工具: Intellij IDEA 2018.2.6 springboot: 2.0.6.RELEASE jdk: 1.8.0_ ...
- Spring MVC & Boot & Cloud 技术教程汇总(长期更新)
昨天我们发布了Java成神之路上的知识汇总,今天继续. Java成神之路技术整理(长期更新) 以下是Java技术栈微信公众号发布的关于 Spring/ Spring MVC/ Spring Boot/ ...
- spring boot 2.0(一)权威发布spring boot2.0
Spring Boot2.0.0.RELEASE正式发布,在发布Spring Boot2.0的时候还出现一个小插曲,将Spring Boot2.0同步到Maven仓库的时候出现了错误,然后Spring ...
- spring.jar是包含有完整发布的单个jar 包,spring.jar中包含除了spring-mock.jar里所包含的内容外其它所有jar包的内容,因为只有在开发环境下才会用到 spring-mock.jar来进行辅助测试,正式应用系统中是用不得这些类的。
Spring jar包的描述:针对3.2.2以上版本 org.springframework spring-aop ——Spring的面向切面编程,提供AOP(面向切面编程)实现 org.spring ...
- WebService之Spring+CXF整合示例
一.Spring+CXF整合示例 WebService是一种跨编程语言.跨操作系统平台的远程调用技术,它是指一个应用程序向外界暴露一个能通过Web调用的API接口,我们把调用这个WebService的 ...
随机推荐
- 使用Google Closure Compiler全力压缩代码(转)
JavaScript压缩代码的重要性不言而喻,如今的压缩工具也有不少,例如YUI Compressor,Google Closure Compiler,以及现在比较红火的UglifyJS.Uglify ...
- IntelliJ IDEA 安装目录的核心文件讲解
转自:https://blog.csdn.net/qq_35246620/article/details/61916751 首先,我们回顾一下前两篇关于 IntelliJ IDEA 的博文的内容: 在 ...
- Java源码——Integer
最近在研究java的源代码,但是由于自己英语水平有限,所以想使用中文注释的方式把源码里的方法全部重写 一遍,下面是楼主整理出来的一小部分.我把整体的项目托管到GitHub上了,欢迎大家前去交流学习. ...
- bzoj 1999: [Noip2007]Core树网的核【树的直径+单调队列】
我要懒死了,所以依然是lyd的课件截图 注意是min{max(max(d[uk]),dis(u1,ui),dis(uj,un))},每次都从这三个的max里取min #include<iostr ...
- poj 1180:Batch Scheduling【斜率优化dp】
我会斜率优化了!这篇讲的超级棒https://blog.csdn.net/shiyongyang/article/details/78299894?readlog 首先列个n方递推,设sf是f的前缀和 ...
- 清北考前刷题day6下午好
/* 贪心 负数一定不取 枚举最高位是1 且答案取为0的 位置, 更新答案. */ #include<iostream> #include<cstdio> #include&l ...
- 构建一个.net的干货类库,以便于快速的开发 - 加密
在开发程序的时候,加密是一个程序一个必须的功能,基本上任何程序都会用到加密,而不同的加密方式又适应不同需求,有些加密是不可逆的,最常见是用于用户密码的加密,因为很多时候程序里面不该显示出用户的明文密码 ...
- Position属性四个值:static、fixed、absolute和relative的区别
1.static(静态定位):默认值.没有定位,元素出现在正常的流中(忽略 top, bottom, left, right 或者 z-index 声明). 2.relative(相对定位):生成相对 ...
- UVM基础之---Command-line Processor
提供一个厂商独立的通用接口命令行参数,支持分类: 1. 基本参数和值:get_args,get_args_matches 2. 工具信息:get_tool_name(),get_tool_ve ...
- FPGA编程技巧系列之输入输出偏移约束详解
1. 偏移约束的作用 偏移约束(Offset Constraint)用来定义一个外部时钟引脚(Pad)和数据输入输出引脚之间的时序关系,这种时序关系也被称为器件上的Pad-to-Setup或Clo ...