前后端分离之mockjs实战demo
基于vue-cli+webpack的demo
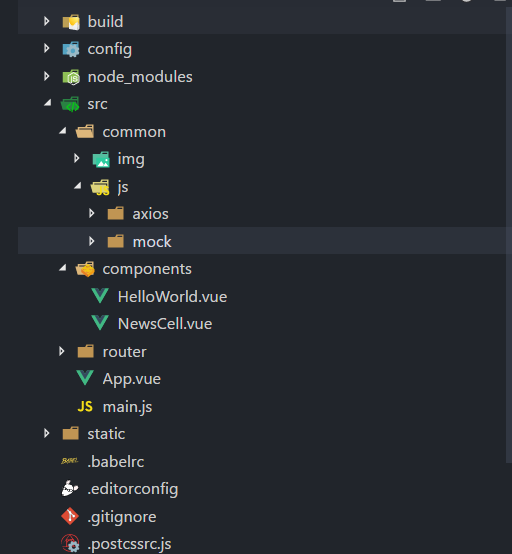
项目结构
axios文件夹用来创建axios相关配置:
import axios from 'axios'

import vue from 'vue'

axios.defaults.headers.post['Content-Type'] = 'application/x-www-form-urlencoded'

// 请求拦截器

axios.interceptors.request.use(function(config) {

    return config;

  }, function(error) {

    return Promise.reject(error);

  })

  // 响应拦截器

axios.interceptors.response.use(function(response) {

  return response;

}, function(error) {

  return Promise.reject(error);

})

// 封装axios的post请求

export function fetch(url, params) {

  return new Promise((resolve, reject) => {

    axios.post(url, params)

      .then(response => {

        resolve(response.data);

      })

      .catch((error) => {

        reject(error);

      })

  })

}

export default {

  JH_news(url, params) {

    return fetch(url, params);

  }

}
mock文件夹建立mock数据,配置mock请求:
// 引入mockjs

const Mock = require('mockjs');

// 获取 mock.Random 对象

const Random = Mock.Random;

// mock一组数据

const produceNewsData = function() {

    let articles = [];

    for (let i = 0; i < 10; i++) {

        let newArticleObject = {

            title: Random.csentence(5, 30), //  Random.csentence( min, max )

            thumbnail_pic_s: Random.dataImage('300x250', 'mock的图片'), // Random.dataImage( size, text ) 生成一段随机的 Base64 图片编码

            author_name: Random.cname(), // Random.cname() 随机生成一个常见的中文姓名

            date: Random.date()  // Random.date()指示生成的日期字符串的格式,默认为yyyy-MM-dd;

        }

        articles.push(newArticleObject)

    }

    return {

        articles: articles

    }

}

// Mock.mock( url, post/get , 返回的数据);

Mock.mock('/news/index', 'post', produceNewsData);
HelloWorld.vue页面首页:
<template>

  <div class="index">

    <div v-for="(item, key) in newsListShow" :key="key">

      <news-cell

      :newsDate="item"

      ></news-cell>

    </div>

  </div>

</template>

<script>

import api from 'js/axios/config'

import NewsCell from './NewsCell.vue'

export default {

  name: 'index',

  data () {

    return {

      newsListShow: [],

    }

  },

  components: {

    NewsCell

  },

  created() {

    this.setNewsApi();

  },

  methods:{

    setNewsApi: function() {

      api.JH_news('/news/index', 'type=top&key=123456')

      .then(res => {

        console.log(res);

        this.newsListShow = res.articles;

      });

    },

  }

}

</script>

<!-- Add "scoped" attribute to limit CSS to this component only -->

<style scoped>

</style>
NewsCell.vue组件渲染数据:
<template>

  <div class="wrap">

    <div class="wrap-top">

      <h1>{{newsDate.title}}</h1>

      <span class="date">{{newsDate.date}}</span>

    </div>

    <div class="wrap-bottom">

      <span class="name">{{newsDate.author_name}}</span>

      <img :src="newsDate.thumbnail_pic_s" alt="">

    </div>

  </div>

</template>

<script>

export default {

  name: 'NewsCell',

  props: {

    newsDate: Object

  },

  data () {

    return {

    }

  },

  computed: {

  },

  methods: {

    jumpPage: function () {

      window.location.href = this.newsDate.url

    }

  }

}

</script>

<style scoped>

  .wrap{

    width: 100%;

    font-size: 0.3rem;

  }

  .wrap-top,.wrap-bottom{

    display: flex;

    align-items: center;

    justify-content:space-between;

  }

  h1{

    width: 6rem;

    text-align: left;

    white-space: nowrap;

    text-overflow: ellipsis;

    overflow: hidden;

  }

  .date{

    width: 4rem;

  }

  .name{

    flex: 1;

  }

  img{

    width: 10rem;

  }

</style>
main.js入口文件:
// The Vue build version to load with the `import` command

// (runtime-only or standalone) has been set in webpack.base.conf with an alias.

import Vue from 'vue'

import App from './App'

import router from './router'

// 引入mockjs

require('js/mock/mock.js')

Vue.config.productionTip = false

/* eslint-disable no-new */

new Vue({

  el: '#app',

  router,

  components: { App },

  template: '<App/>'

})
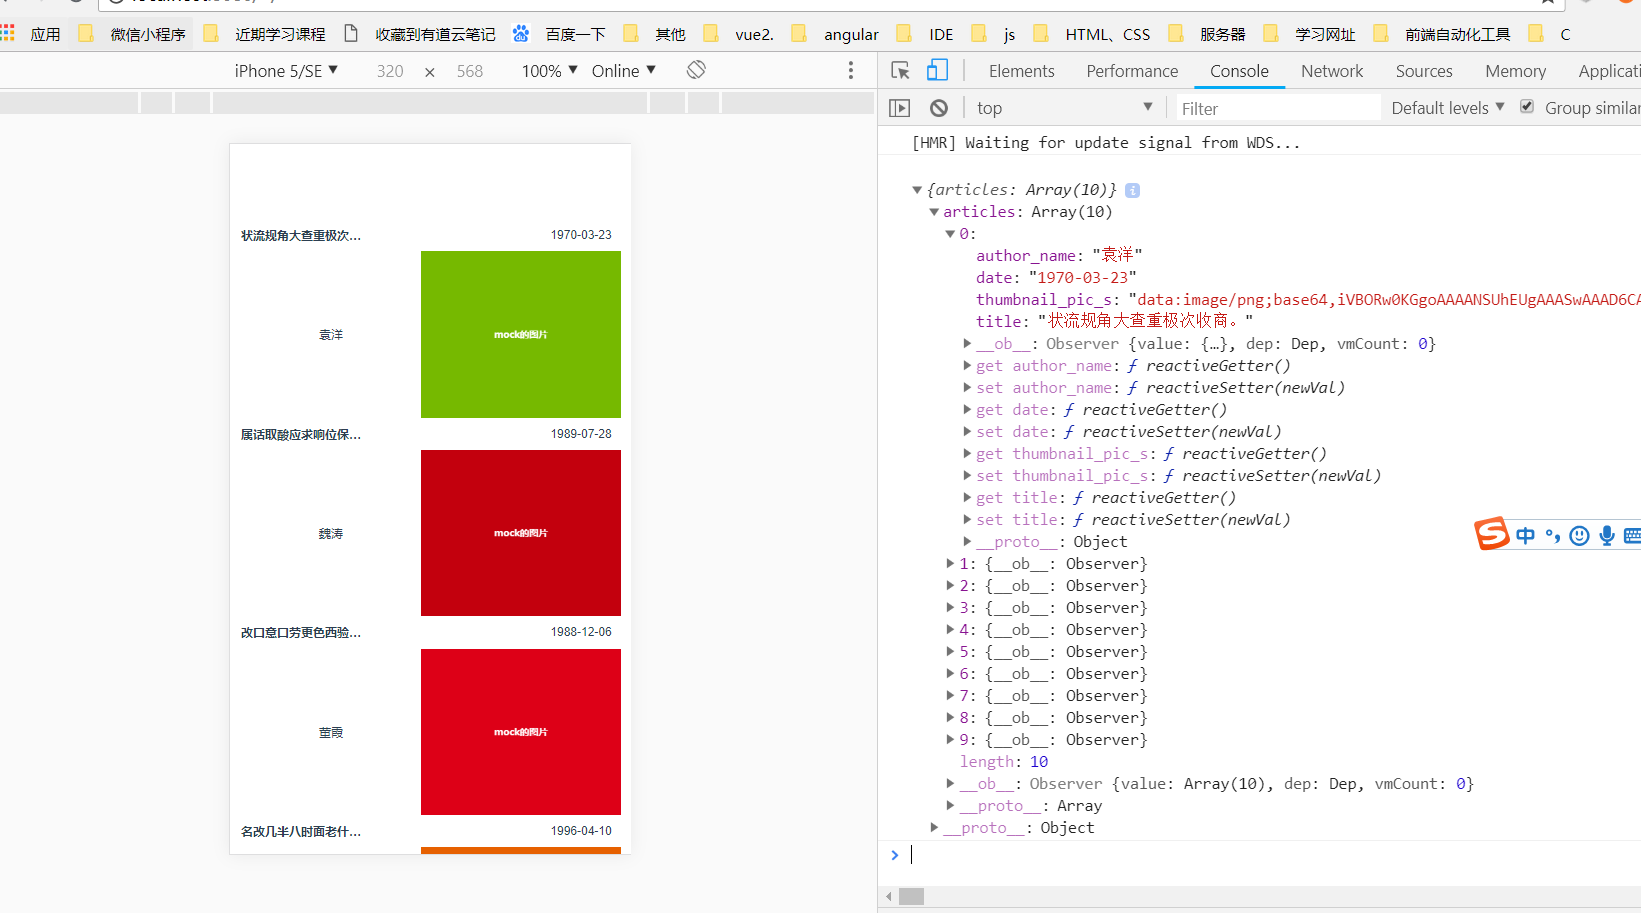
运行结果
更为详细的介绍:
Mock.js简易教程,脱离后端独立开发,实现增删改查功能
前后端分离之mockjs实战demo的更多相关文章
- JEECG前后端分离UI框架实战版本抢先体验(ng2-admin+Angular4+AdminLTE+WebStorm)
JEECG前后端分离UI框架实战版本 - 抢先体验 (ng2-admin+Angular4+AdminLTE) 关键词: ng2-admin.Angular4.AdminLTE.Nodejs.Jeec ...
- SpringMVC+Spring+mybatis+maven+搭建多模块框架前后端分离开发框架的完整demo,拿走不谢。——猿实战02
猿实战是一个原创系列文章,通过实战的方式,采用前后端分离的技术结合SpringMVC Spring Mybatis,手把手教你撸一个完整的电商系统,跟着教程走下来,变身猿人找到工作不是 ...
- SpringBoot+Vue豆宝社区前后端分离项目手把手实战系列教程01---搭建前端工程
豆宝社区项目实战教程简介 本项目实战教程配有免费视频教程,配套代码完全开源.手把手从零开始搭建一个目前应用最广泛的Springboot+Vue前后端分离多用户社区项目.本项目难度适中,为便于大家学习, ...
- JEECG前后端分离UI框架实战抢先体验(ng2-admin+Angular4+AdminLTE+WebStorm)
JEECG前后端分离UI框架 (ng2-admin+Angular4+AdminLTE) 关键词: ng2-admin.Angular4.AdminLTE.Nodejs.Jeecg JEECG紧跟技术 ...
- 用Spring Security, JWT, Vue实现一个前后端分离无状态认证Demo
简介 完整代码 https://github.com/PuZhiweizuishuai/SpringSecurity-JWT-Vue-Deom 运行展示 后端 主要展示 Spring Security ...
- 前后端分离之mockjs基本介绍
安装与使用 # 安装 npm install mockjs #使用 Mock var Mock = require('mockjs') var data = Mock.mock({ // 属性 lis ...
- SpringBoot+Vue豆宝社区前后端分离项目手把手实战系列教程02---创建后端工程
本节代码开源地址 代码地址 项目运行截图 搭建后端工程 0.导入sql 在数据库导入 /* Navicat Premium Data Transfer Source Server : localhos ...
- 前后端分离(手)-- 使用mock.js(好样的)
## 前言: 本篇博文昨天七夕写的,一天下来被虐得体无完肤,苦逼的单身狗只能学习,对!我爱学习,关掉朋友圈,并写了一篇博文发泄发泄.这次写mock.js的使用,能使前后端分离,分离,分离,重要的是说三 ...
- SpringBoot,Vue前后端分离开发首秀
需求:读取数据库的数据展现到前端页面 技术栈:后端有主要有SpringBoot,lombok,SpringData JPA,Swagger,跨域,前端有Vue和axios 不了解这些技术的可以去入门一 ...
随机推荐
- Linux 备份 文件夹的权限 然后在其他机器进行恢复
Study From https://www.cnblogs.com/chenshoubiao/p/4780987.html 用到的命令 getfacl 和 setfacl 备份 getfacl -R ...
- [转帖]SAP MES生产执行系统解决方案
一.SAP MES概述: SAP公司成立于1972年,总部位于德国,是全球最大的企业管理和协同化商务解决方案供应商.全球第三大独立软件供应商.目前,在全球有120多个国家的超过86,000多家用户正在 ...
- CentOS下部署Jupyter
目录 安装 配置 准备密码密文 生成配置文件 修改配置 启动 参考:在服务器搭建Jupyter notebook 安装 为了环境比较轻,使用pip安装,非Anaconda: # 创建Python虚拟环 ...
- orcle 远程连接其他数据库 进行查询数据
CREATE PUBLIC DATABASE LINK testlinkCONNECT TO hxka IDENTIFIED BY bjdscoalUSING '(DESCRIPTION =(ADDR ...
- 从0到1搭建基于Kafka、Flume和Hive的海量数据分析系统(一)数据收集应用
大数据时代,一大技术特征是对海量数据采集.存储和分析的多组件解决方案.而其中对来自于传感器.APP的SDK和各类互联网应用的原生日志数据的采集存储则是基本中的基本.本系列文章将从0到1,概述一下搭建基 ...
- NOIP2018 No regrets youth
NOIP2018在即,20181009总结一些易错的知识点和解题方法 ——by ljc20020730 HGOI NOIP2018 No regrets youth ! NOIP2018 No reg ...
- Python GIL全局解释器锁
'''在python原始解释器Cpython中存在GIL(Global Interpreter Lock,全局解释器锁),因此在执行Python代码 时,会产生互斥锁来限制线程对共享资源的访问,指导接 ...
- github使用记录
背景:一直以来,对github既向往又排斥,是因为感觉高大尚有感觉很陌生.现在跟着辉哥学习项目技术,打算好好的学习下这个工具的使用. 1 基础常识 1.1 基础讲解 star的作用是收藏,目的是方便以 ...
- Linux上软件安装
手动安装 以安装SublimeText3为例: 首先下载安装包 [keysystem@localhost ~]$ wget https://download.sublimetext.com/subli ...
- svn cleanup
SVN 本地更新时,由于一些操作中断更新,如磁盘空间不够,用户取消. 可能会造成本地文件被锁定的情况.一般出现这种情况的解决方法: 1.可以使用SVN clean up来清除锁定. 2.如果不是本目录 ...