
three.js 根据png生成heightmap
Three.js: render real world terrain from heightmap using open data
Three.js is a great library for creating 3D objects and animations. In a couple of previous articles I explored this library a bit and in one of those examples I showed you how you can take GIS information (in geoJSON) format and use D3.js and three.js to convert it to a 3D mesh you can render in the browser using javascript. This is great for infographic, but it doesn't really show a real map, a real terrain. Three.js, luckily also has helper classes to render a terrain as you can see in this demo: http://mrdoob.github.com/three.js/examples/webgl_terrain_dynamic.html
This demo uses a noise generator to generate a random terrain, and adds a whole lot of extra functionality, but we can use this concept to also render maps of real terrain. In this article I'll show you how you can use freely available open geo data containing elevation info to render a simple 3D terrain using three.js. In this example we'll use elevation data that visualizes the data for the island of Corsica.
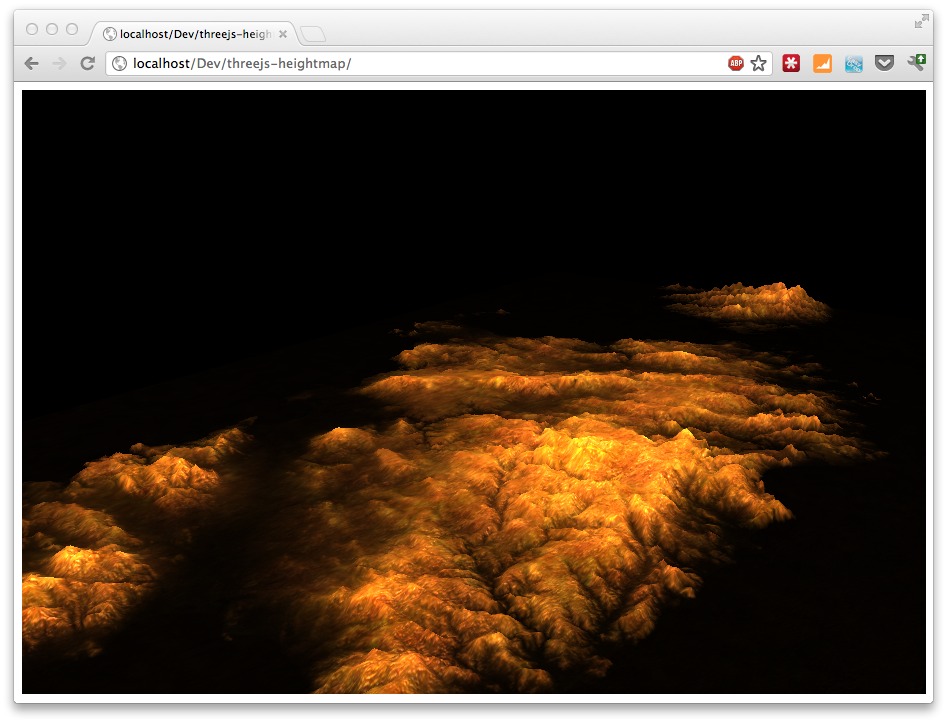
Or look at the live site here: http://www.smartjava.org/examples/heightmap
Where do we get the data?
The open data that we'll use comes from ASTER/GDEM. Which is:
"The ASTER Global Digital Elevation Model (ASTER GDEM) is a joint product developed and made available to the public by the Ministry of Economy, Trade, and Industry (METI) of Japan and the United States National Aeronautics and Space Administration (NASA). It is generated from data collected from the Advanced Spaceborne Thermal Emission and Reflection Radiometer (ASTER), a spaceborne earth observing optical instrument."
This project offers us elevation data (geotagged) with a resolution of 30 meters. On this site you can download tiles for specific areas (after free registration):
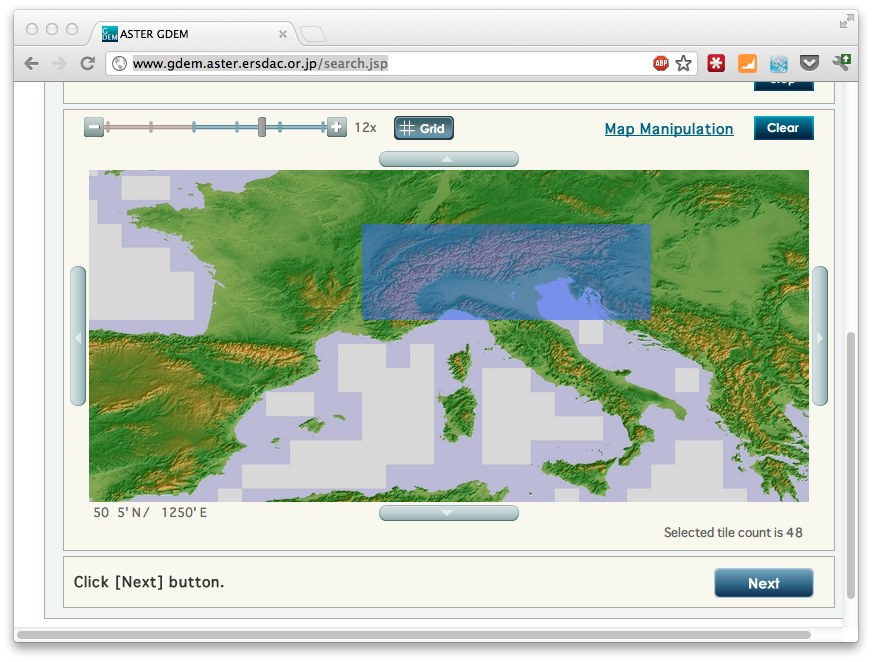
The tiles you download from there are in GeoTIFF format (which I'll dive into in a future article). This format contains values for specific geo coordinates. Three.js, however, can't directly work with geotiff images (which are way to big anyways), so we need to convert them to either JPEG or PNG. For this we'll use GDAL. GDAL is a library and a set of utilities that can be used to perform a wide range of GIS related functions. If you're on a Mac you can install GDAL through macports:
sudo port install gdal


--->  Installing gdal @1.9.0_0+expat

--->  Activating gdal @1.9.0_0+expat

--->  Cleaning gdal
So download some tiles and make sure the form you download is a rectangle (see previous screenshot). Unzip the tiles and copy all the "*_dem.tif" files into a single directory. This isn't really necessary but will make processing easier. With GDAL now you can convert these downloaded tiles to PNGs. For this I use the following very basic bash script.
#!/bin/bash

for file in `ls -d *dem.tif` ; do

   gdal_translate -b 1 -outsize 400 400 -scale -20 2200 -of PNG "$file" ~/output/$file.png

done
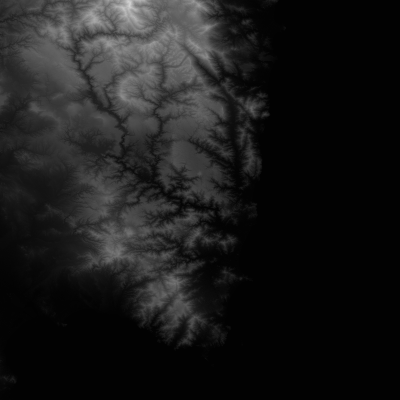
This will convert all the "dem.tif" tiles to a set of PNGs. Each tile is 400x400 pixels and we also define the range of the input to -20 until 2200. In other words the elevation from the input is from -20 tot 2200 meters Since the gray scale in a PNG can only be in a range of 256, this will be downsampled. (We can use other input formats, or use an RGB scale, but that would require some custom code, which is a bit out of scope for this article). For most maps though, this should be enough for a general impression of the landscape.
One of the tiles for Corsica looks like this:
So now we're stuck with a set of seperate PNGs. We need to combine those to a single PNG that we can use as a heightmap for Three.js. For this we'll use another open source library: imagemagick (also available through macports). In the example for Corsica we have 8 files, which are combined into a single png using the following batch file:
process="ASTGTM2_N41E008_dem.tif.png ASTGTM2_N41E009_dem.tif.png  ASTGTM2_N40E008_dem.tif.png ASTGTM2_N40E009_dem.tif.png  ASTGTM2_N39E008_dem.tif.png ASTGTM2_N39E009_dem.tif.png ASTGTM2_N38E008_dem.tif.png ASTGTM2_N38E009_dem.tif.png"

montage -tile 2x4 -border 0 -frame 0 -geometry '1x1+0+0<' $process combined.png
This results in a single PNG with the name "combined.png", which looks like this (scaled down):
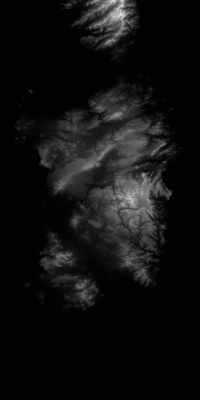
That's it for the preparation part. We've know got a heightmap in grayscale that we can use in Three.js (and in many other programs for that matter).
Create a map using Three.js
Once we got a heightmap we can use it in Three.js. The following code shows how you to do this:
<!DOCTYPE HTML PUBLIC "-//W3C//DTD HTML 4.01 Transitional//EN"

        "http://www.w3.org/TR/html4/loose.dtd">

<html>

<head>

    <title></title>

    <script type="text/javascript" src="js/Three.js"></script>

    <script type="text/javascript" src="js/ShaderTerrain.js"></script>

    <script type="text/javascript" src="js/jquery-1.7.2.js"></script>

</head>

<body>


<div id="main_map">


</div>


<script type="text/javascript">


    var CONS = {

        // THREE.JS CONSTANTS

        // set the scene size

        WIDTH:904,

        HEIGHT:604,


        // set some camera attributes

        VIEW_ANGLE:45,

        NEAR:0.1,

        FAR:10000,


        CAMERA_X:1000,

        CAMERA_Y:600,

        CAMERA_Z:1300

    }


    var scene = {};

    var renderer = {};

    var camera = {};

    var controls;


    var n = 0;

    initMap();


    // Wait until everything is loaded before continuing

    function loaded() {

        n++;

        console.log("loaded: " + n);


        if (n == 3) {

            terrain.visible = true;

            console.log('ff');

            render();

        }

    }


    function initMap() {


        // setup default three.js stuff

        renderer = new THREE.WebGLRenderer();

        renderer.setSize(CONS.WIDTH, CONS.HEIGHT);

        renderer.setClearColor(0x0000cc);

        $("#main_map").append(renderer.domElement);


        camera = new THREE.PerspectiveCamera(CONS.VIEW_ANGLE, CONS.WIDTH / CONS.HEIGHT, CONS.NEAR, CONS.FAR);

        scene = new THREE.Scene();

        scene.add(camera);


        camera.position.z = CONS.CAMERA_Z;

        camera.position.x = CONS.CAMERA_X;

        camera.position.y = CONS.CAMERA_Y;

        camera.lookAt(scene.position);


        // add a light

        pointLight = new THREE.PointLight(0xFFFFFF);

        scene.add(pointLight);

        pointLight.position.x = 1000;

        pointLight.position.y = 3000;

        pointLight.position.z = -1000;

        pointLight.intensity = 8.6;


        // load the heightmap we created as a texture

        var texture = THREE.ImageUtils.loadTexture('assets/combined.png', null, loaded);


        // load two other textures we'll use to make the map look more real

        var detailTexture = THREE.ImageUtils.loadTexture("assets/bg.jpg", null, loaded);


        // the following configuration defines how the terrain is rendered

        var terrainShader = THREE.ShaderTerrain[ "terrain" ];

        var uniformsTerrain = THREE.UniformsUtils.clone(terrainShader.uniforms);


        // how to treat abd scale the normal texture

        uniformsTerrain[ "tNormal" ].texture = detailTexture;

        uniformsTerrain[ "uNormalScale" ].value = 1;


        // the displacement determines the height of a vector, mapped to

        // the heightmap

        uniformsTerrain[ "tDisplacement" ].texture = texture;

        uniformsTerrain[ "uDisplacementScale" ].value = 100;


        // the following textures can be use to finetune how

        // the map is shown. These are good defaults for simple

        // rendering

        uniformsTerrain[ "tDiffuse1" ].texture = detailTexture;

        uniformsTerrain[ "tDetail" ].texture = detailTexture;

        uniformsTerrain[ "enableDiffuse1" ].value = true;

        uniformsTerrain[ "enableDiffuse2" ].value = true;

        uniformsTerrain[ "enableSpecular" ].value = true;


        // diffuse is based on the light reflection

        uniformsTerrain[ "uDiffuseColor" ].value.setHex(0xcccccc);

        uniformsTerrain[ "uSpecularColor" ].value.setHex(0xff0000);

        // is the base color of the terrain

        uniformsTerrain[ "uAmbientColor" ].value.setHex(0x0000cc);


        // how shiny is the terrain

        uniformsTerrain[ "uShininess" ].value = 3;


        // handles light reflection

        uniformsTerrain[ "uRepeatOverlay" ].value.set(3, 3);


        // configure the material that reflects our terrain

        var material = new THREE.ShaderMaterial({

            uniforms:uniformsTerrain,

            vertexShader:terrainShader.vertexShader,

            fragmentShader:terrainShader.fragmentShader,

            lights:true,

            fog:false

        });


        // we use a plain to render as terrain

        var geometryTerrain = new THREE.PlaneGeometry(2000, 4000, 256, 256);

        geometryTerrain.applyMatrix(new THREE.Matrix4().makeRotationX(Math.PI / 2));

        geometryTerrain.computeFaceNormals();

        geometryTerrain.computeVertexNormals();

        geometryTerrain.computeTangents();


        // create a 3D object to add

        terrain = new THREE.Mesh(geometryTerrain, material);

        terrain.position.set(0, -125, 0);

        terrain.rotation.x = -Math.PI / 2;


        // add the terrain

        scene.add(terrain);


        // tell everything is ready

        loaded();

    }


    // render the scene

    function render() {

        renderer.render(scene, camera);

    }

</script>

</body>

</html>
And that's all you need to do. Once you've got this basic setup working, you can easily add custom textures, fog or other extra objects. If you want to see this basic example in action look here: http://www.smartjava.org/examples/heightmap
欢迎大家来我的新家看一看 3wwang个人博客-记录走过的技术之路
three.js 根据png生成heightmap的更多相关文章
- captcha.js一个生成验证码的插件,使用js和canvas生成
一.captcha`captcha.js`是一个生成验证码的插件,使用js和canvas生成的,确保后端服务被暴力攻击,简单判断人机以及系统的安全性,体积小,功能多,支持配置. 验证码插件内容,包含1 ...
- Lodop获取全部JS代码,传统JS模版的生成
Lodop模版有两种方法,一种是传统的JS语句,可以用JS方法里的eval来执行,一种是文档式模版,是特殊格式的base64码,此篇博文介绍传统JS模版的生成方法.两种模版都可以存入一下地方进行调用, ...
- JS中如何生成全局变量
JS中如何生成全局变量 一.总结 一句话总结:在函数内部,一般用var声明的为局部变量,没用var声明的一般为全局变量 在函数内没用var声明的一般为全局变量 1.js中的函数中的this指向的是谁? ...
- Node.js & 页面截图 & 生成画报
Node.js & 页面截图 & 生成画报 https://zzk.cnblogs.com/my/s/blogpost-p?Keywords=headless solution 使用 ...
- js 、jsdoc生成33
============== js 点击事件后没方法名,调用有方法名 document.getElementById('lind').onclick=abc;//传统的id选择器 中没有# 哦 fun ...
- JS文档生成工具:JSDoc 介绍
JSDoc是一个根据javascript文件中注释的信息,生成API文档的工具.生成的文档是html文件.类似JavaDoc和PHPDoc. 用法 /** 一坨注释之类的 */JSDoc会从/**开头 ...
- (转)js jquery.qrcode生成二维码 带logo 支持中文
场景:公司最最近在开发二维码支付业务,所以需要做一个html5中的二维码生成和部署! 前天用js生成二维码,节省服务器资源及带宽 原版jquery.qrcode不能生成logo,本文采用的是修改版 1 ...
- js随机数生成,生成m-n的随机数
使用js生成n到m间的随机数字,主要目的是为后期的js生成验证码做准备,Math.random()函数返回0和1之间的伪随机数 var random = Math.random(); console. ...
- js证书批量生成与打包下载
前边有提到最近的一个证书生成保存下载打印的需求. 之前实现的是一个单个操作的页面,现在把实现的批量效果和进度效果的代码展示出来. html <button class="btn btn ...
随机推荐
- Linux:安装rstatd,报错
[安装] 下载地址:http://heanet.dl.sourceforge.net/sourceforge/rstatd/安装:一次执行--tar -xzvf rpc.rstatd-4.0.1.ta ...
- NK3C:异常处理(前端)
前端的提示有些也不是很规范,主要体现如下: 1.ResultInfo的返回值,false的情况下,未做处理: 2.ResultInfo的返回值,false的情况下,做了其他操作,未提示错误:(虽然没报 ...
- java的继承和重写
继承是面向对象最显著的一个特性.继承是从已有的类中派生出新的类,新的类能吸收已有类的数据属性和行为,并能扩展新的能力.[1] Java继承是使用已存在的类的定义作为基础建立新类的技术,新类的定义可以 ...
- thinkPHP-空操作
空操作 当访问的方法不存在时,可以定义一个empty方法来避免空操作 function _empty() { echo "网页不存在,请检查地址信息"; } 这样当访问不存在的方法 ...
- C# 标准差计算
if (numberList.Any()) { exEntity.MinValue = numberList.First().NumberValue.ToString(); exEntity.MaxV ...
- Jenkins自动部署Tomcat项目
Jenkins自动部署Tomcat项目 1.安装jenkins 插件 启动Jenkins,进入系统管理-插件管理: 选择Deploy to container Plugin 插件安装:
- 16.2.2 Space Needed for keys
myisam表使用btree索引,可以粗略计算出索引文件的大小,使用(key_length+4)/0.67,全部key的总和,全部key被排序顺序插入和表没有被任何压缩的时候,这是最坏的情况 stri ...
- 发邮件 和 excel导出中文文件名
/** * 发邮件 * @param email * @param subject * @param body * @throws UnsupportedEncodingException */ pu ...
- Class对象即反射
Class对象 当ClassLoader加载一个class文件到JVM的时候,会自动创建一个该类的Class对象,并且这个对象是唯一的,后续要创建这个类的任何实例,都会根据这个Class对象来创建.因 ...
- google map 计算地图面积方法
花了几个小时把js的google计算地图面积的算法改成了c# 的. class Program { static void Main(string[] args) { // a = new qq.ma ...