Spring Cloud(四) --- config
Spring Cloud Config
随着线上项目变的日益庞大,每个项目都散落着各种配置文件,如果采用分布式的开发模式,需要的配置文件随着服务增加而不断增多。某一个基础服务信息变更,都会引起一系列的更新和重启,运维苦不堪言也容易出错。就是在这种背景下,基本上BAT的没加公司都研发了配置中心,这里不列举.
Spring Cloud Config就是Spring Cloud团队研发的配置中心,用来为分布式系统中的基础设施和微服务应用提供集中化的外部配置支持,分为服务端和客户端. 服务端是一个独立的微服务应用,用来连接配置仓库并未客户端提供获取配置信息等的访问接口; 客户端则是微服务中的各个微服务应用,通过指定的配置中心来管理应用资源和业务相关的配置内容,并在启动的时候从配置中心中加载配置信息.
Spring Cloud Config 实现的配置中心默认采用 Git 来存储配置信息,所以使用 Spring Cloud Config 构建的配置服务器,天然就支持对微服务应用配置信息的版本管理,并且可以通过 Git 客户端工具来方便的管理和访问配置内容。当然它也提供了对其他存储方式的支持,比如:SVN 仓库、本地化文件系统。这里先使用github来演示案例(也可以使用码云).
案例步骤
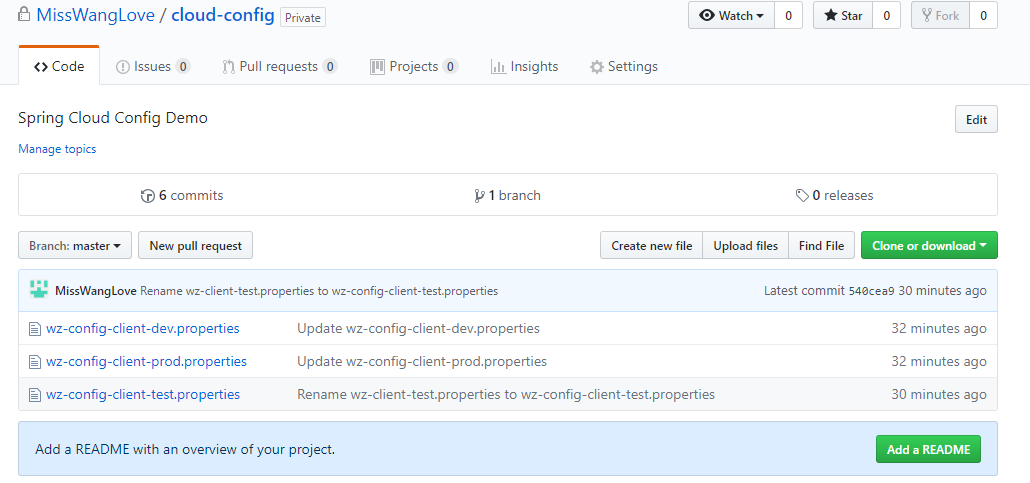
- 首先需要github账号,创建一个仓库,现在私有仓库也是免费的,所以就建立一个私有的仓库,创建三个文件,如下:
内容分别是:
wz.hello=hello in dev

wz.hello=hello in prod

wz.hello=hello in test
- 创建config-server项目,步骤如下
引入依赖:
 <dependency>

    <groupId>org.springframework.cloud</groupId>

    <artifactId>spring-cloud-config-server</artifactId>

</dependency>
配置文件:
spring.application.name=config-server

# 账号密码不予展示

spring.cloud.config.server.git.username=

spring.cloud.config.server.git.password=

spring.cloud.config.server.git.uri=https://github.com/MissWangLove/cloud-config

# git仓库地址下的相对地址,可以配置多个,用,分割。本人的在根目录

spring.cloud.config.server.git.search-paths=

server.port=12000
启动类添加注解:
@SpringBootApplication

@EnableConfigServer

public class CloudConfigDemoApplication {

    public static void main(String[] args) {

        SpringApplication.run(CloudConfigDemoApplication.class, args);

    }

}
之后config server项目就搭建好了,启动之后就可以访问了.http://localhost:12000/wz-config-client-prod.properties就可以访问内容了,当然还有另一种方式是: http://localhost:12000/wz-config.client/prod效果是一样的.
仓库中的配置文件会被转换成web接口,访问可以参照以下的规则:
- /{application}/{profile}[/{label}]
- /{application}-{profile}.yml
- /{label}/{application}-{profile}.yml
- /{application}-{profile}.properties
- /{label}/{application}-{profile}.properties
以wz-config-client-prod.properties为例子,它的application是wz-config-client,profile是prod。client会根据填写的参数来选择读取对应的配置。
- 搭建客户端,创建项目,剩下步骤如下
引入依赖:
<dependency>

    <groupId>org.springframework.boot</groupId>

    <artifactId>spring-boot-starter-actuator</artifactId>

</dependency>

<dependency>

    <groupId>org.springframework.boot</groupId>

    <artifactId>spring-boot-starter-web</artifactId>

</dependency>

<dependency>

    <groupId>org.springframework.cloud</groupId>

    <artifactId>spring-cloud-starter-config</artifactId>

</dependency>
application.properties的内容
server.port=13000

spring.application.name=config-client

management.endpoints.web.exposure.include=*

spring.output.ansi.enabled=ALWAYS
bootstrap.properties的内容
# 配置文件的application

spring.cloud.config.name=wz-config-client

# 配置文件的profile

spring.cloud.config.profile=dev

spring.cloud.config.uri=http://localhost:12000/

spring.cloud.config.label=master
启动类无需改变,接下来创建个controller
@RestController

@RefreshScope

public class HelloController {

    @Value("${wz.hello:null}")

    private String hello;

    @GetMapping("/hello")

    public String hello(){

        return hello;

    }

}
这下就可以启动访问了,访问hello就可以通过客户端访问配置中心了.
上面bootstrapproperties的内容:
- spring.application.name:对应{application}部分
- spring.cloud.config.profile:对应{profile}部分
- spring.cloud.config.label:对应git的分支。如果配置中心使用的是本地存储,则该参数无用
- spring.cloud.config.uri:配置中心的具体地址
- spring.cloud.config.discovery.service-id:指定配置中心的service-id,便于扩展为高可用配置集群。
注意的是上面这些与spring-cloud相关的属性必须配置在bootstrap.properties中,config部分内容才能被正确加载。因为config的相关配置会先于application.properties,而bootstrap.properties的加载也是先于application.properties。
还有就是那个actuator和@RefreshScope的作用是刷新,也就是说当github上的配置文件更新了之后,post请求http://localhost:13000/actuator/refresh就可以起到动态刷新的作用,不用重新启动项目可以获取到更新后的配置.
至于post请求建立本地下载了postman可以模拟请求.
webhook
WebHook是当某个事件发生时,通过发送http post请求的方式来通知信息接收方。Webhook来监测你在Github.com上的各种事件,最常见的莫过于push事件。如果你设置了一个监测push事件的Webhook,那么每当你的这个项目有了任何提交,这个Webhook都会被触发,这时Github就会发送一个HTTP POST请求到你配置好的地址。
如此一来,你就可以通过这种方式去自动完成一些重复性工作,比如,你可以用Webhook来自动触发一些持续集成(CI)工具的运作,比如Travis CI;又或者是通过 Webhook 去部署你的线上服务器。下图就是github上面的webhook配置。
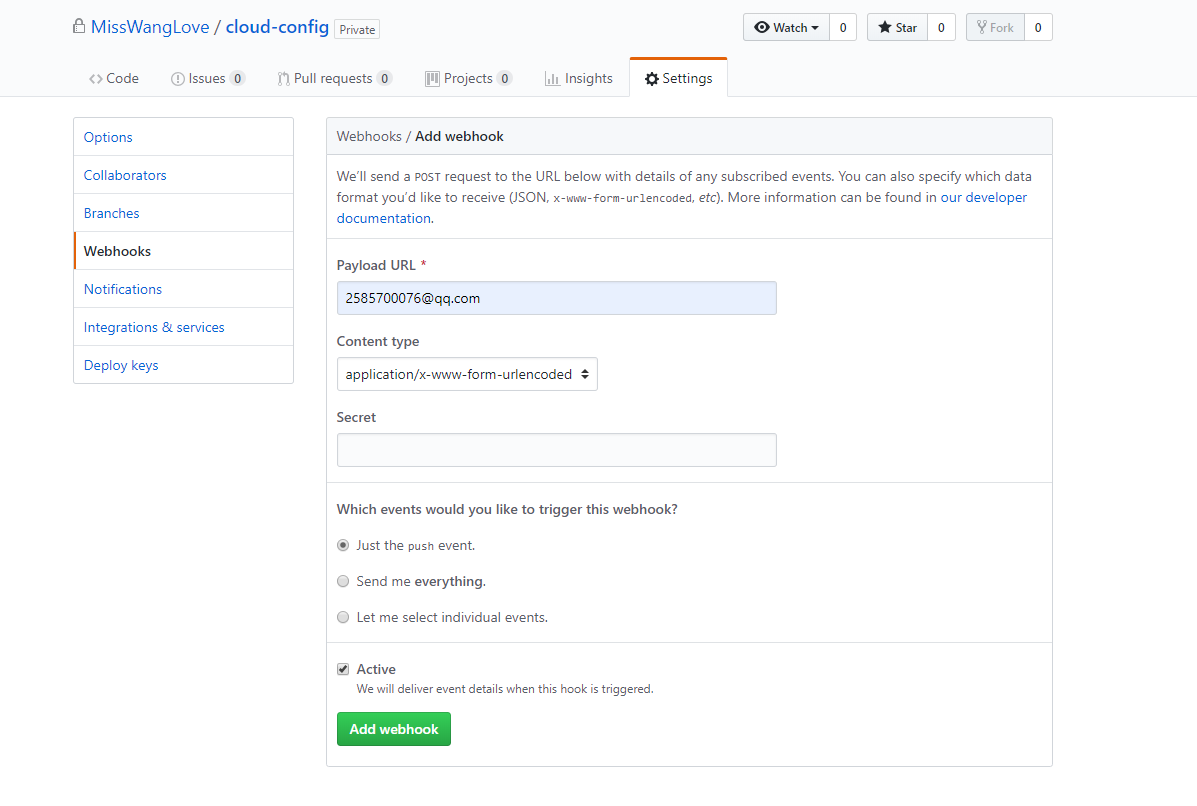
- Payload URL :触发后回调的URL
- Content type :数据格式,两种一般使用json
- Secret :用作给POST的body加密的字符串。采用HMAC算法
- events :触发的事件列表。
| events事件类型 | 描述 |
| push | 仓库有push时触发。默认事件 |
| create | 当有分支或标签被创建时触发 |
| delete | 当有分支或标签被删除时触发 |
svn也有类似的hook机制,每次提交后会触发post-commit脚本,我们可以在这里写一些post请求
这样我们就可以利用hook的机制去触发客户端的更新,但是当客户端越来越多的时候hook支持的已经不够优雅,另外每次增加客户端都需要改动hook也是不现实的。后面会有消息总线bus也会这个功能
Config的配置中心服务化和高可用
前面都是config server和config client的案例,那如何注册到注册中心呢,需要什么改动能实现服务化和高可用呢?下面案例
Spring Cloud Config就到这了.配置中心还有很多,比如Apollo等.
- 修改config-server项目
新增eureka依赖
<dependency>

    <groupId>org.springframework.cloud</groupId>

    <artifactId>spring-cloud-starter-eureka</artifactId>

    <version>1.3.0.RELEASE</version>

</dependency>
添加注解
@SpringBootApplication

@EnableConfigServer

@EnableDiscoveryClient

public class CloudConfigDemoApplication {

    public static void main(String[] args) {

        SpringApplication.run(CloudConfigDemoApplication.class, args);

    }

}
添加配置文件
spring.application.name=config-server

spring.cloud.config.server.git.username=****

spring.cloud.config.server.git.password=****

spring.cloud.config.server.git.uri=https://github.com/MissWangLove/cloud-config

# git仓库地址下的相对地址,可以配置多个,用,分割。本人的在根目录

spring.cloud.config.server.git.search-paths=

server.port=12000

eureka.client.service-url.defaultZone=http://localhost:8761/eureka/
- 修改config-client项目
添加依赖
<dependency>

    <groupId>org.springframework.cloud</groupId>

    <artifactId>spring-cloud-starter-eureka</artifactId>

    <version>1.3.0.RELEASE</version>

</dependency>
添加配置:
server.port=13000

spring.application.name=config-client

management.endpoints.web.exposure.include=*

spring.output.ansi.enabled=ALWAYS

eureka.client.service-url.defaultZone=http://localhost:8761/eureka/
添加注解:
@SpringBootApplication

@EnableDiscoveryClient

public class CloudConfigClientDemoApplication {

    public static void main(String[] args) {

        SpringApplication.run(CloudConfigClientDemoApplication.class, args);

    }

}
上面就实现了配置中心服务化(注册到eureka上)
- 再次创建config-server项目,与前一个项目的唯一区别就是端口号不同
配置文件的修改:
spring.application.name=config-server

spring.cloud.config.server.git.username=*****

spring.cloud.config.server.git.password=*****

spring.cloud.config.server.git.uri=https://github.com/MissWangLove/cloud-config

# git仓库地址下的相对地址,可以配置多个,用,分割。本人的在根目录

spring.cloud.config.server.git.search-paths=

server.port=12001

eureka.client.service-url.defaultZone=http://localhost:8761/eureka/
之后启动eureka-server,config-server-demo,config-server-demo1,config-client-demo;就可以看到eureka的注册中心会有3个服务,两个config-server,一个config-client,访问http://localhost:12000/wz-config-client/prod和http://localhost:12001/wz-config-client/prod就可以看到相同的效果,这样当一个挂掉,另一个还可以正常运行.
前面说了github上的配置文件如果更新的话,需要post发送refresh才能刷新,还有一种就是通过消息总线(bus),这的内容看: http://www.ityouknow.com/springcloud/2017/05/26/springcloud-config-eureka-bus.html,因为这个实现需要消息中间件kafka或者RabbitMQ,需要一个虚拟机或者阿里云服务器,本人的到期了,等弄好了再进行测试.
配合Bus进行修改和测试
本人在windows上安装了个docker,之后创建了个rabbitmq容器,这个过程还是很简单了,自行百度就好.
- 先修改server端吧
添加依赖:
<dependency>

    <groupId>org.springframework.cloud</groupId>

    <artifactId>spring-cloud-starter-bus-amqp</artifactId>

</dependency>
添加配置文件:
# rabbitmq

spring.rabbitmq.host=127.0.0.1

spring.rabbitmq.port=5672

spring.rabbitmq.username=guest

spring.rabbitmq.password=guest
启动类添加注解:
@SpringBootApplication

@EnableConfigServer

@EnableDiscoveryClient

@RefreshScope

public class CloudConfigDemoApplication {

    public static void main(String[] args) {

        SpringApplication.run(CloudConfigDemoApplication.class, args);

    }

}
上卖弄server端就修改完成,之后在github上修改配置文件,这边会自动刷新
- 修改客户端
添加依赖:
<dependency>

    <groupId>org.springframework.cloud</groupId>

    <artifactId>spring-cloud-bus</artifactId>

</dependency>

<dependency>

    <groupId>org.springframework.cloud</groupId>

    <artifactId>spring-cloud-stream-binder-rabbit</artifactId>

</dependency>
添加配置文件:
# rabbitmq

spring.cloud.bus.enabled=true

spring.cloud.bus.trace.enabled=true

spring.rabbitmq.host=127.0.0.1

spring.rabbitmq.port=5672

spring.rabbitmq.username=guest

spring.rabbitmq.password=guest
添加注解:
@SpringBootApplication

@EnableDiscoveryClient

@RefreshScope

public class CloudConfigClientDemoApplication {

    public static void main(String[] args) {

        SpringApplication.run(CloudConfigClientDemoApplication.class, args);

    }

}
本人在修改的时候还在controller上加了@RefreshScope注解,但是还是不能起到自动刷新的作用,也就是在github上进行修改之后,必须在客户端执行curl -X POST http://localhost:13000/actuator/bus-refresh/才可以起到刷新的效果.
Spring Cloud(四) --- config的更多相关文章
- Alibaba Nacos 学习(二):Spring Cloud Nacos Config
Alibaba Nacos 学习(一):Nacos介绍与安装 Alibaba Nacos 学习(二):Spring Cloud Nacos Config Alibaba Nacos 学习(三):Spr ...
- Spring Cloud Consul Config 知识点
Spring Cloud Consul Config 是 Config Server 和 Client的替代方案. 搭建一个配置中心,可以选择的方案: Spring Cloud Config 或者 S ...
- Spring Boot系列(四) Spring Cloud 之 Config Client
Config 是通过 PropertySource 提供. 这节的内容主要是探讨配置, 特别是 PropertySource 的加载机制. Spring Cloud 技术体系 分布式配置 服务注册/发 ...
- Spring Cloud 之 Config与动态路由.
一.简介 Spring Cloud Confg 是用来为分布式系统中的基础设施和微服务应用提供集中化的外部配置支持,它分为服务端与客户端两个部分.其中服务端也称为分布式配置中心,它是一个独立的微服务 ...
- Spring Cloud之——Config(配置中心)
Spring Cloud Config(配置中心) 大家好,有一段时间没有写技术博客了.由于工作上的事情,这方面很难分配时间.近几年随着服务化的兴起,一批服务化的框架应运而生,像dubbo,thrif ...
- spring cloud(三) config
spring cloud 配置中心 config 搭建过程 1.搭建config-server 服务端 1.1. 新建boot工程 pom引入依赖 <!-- config配置中心 --> ...
- spring cloud (八) Config client 和项目公共配置
1 pom.xml <?xml version="1.0" encoding="UTF-8"?> <project xmlns="h ...
- spring cloud (七) Config server基于svn配置
1 pom.xml <?xml version="1.0" encoding="UTF-8"?> <project xmlns="h ...
- 从零开始学spring cloud(四) -------- 基础项目搭建
1.创建一个spring cloud项目 1.1.使用工具创建--idea 点击creat new project,选择spring initializr 点击next,选择下一步 填入自己的Grou ...
随机推荐
- 总结几个常用的系统安全设置(含DenyHosts)
1)禁止系统响应任何从外部/内部来的ping请求攻击者一般首先通过ping命令检测此主机或者IP是否处于活动状态如果能够ping通 某个主机或者IP,那么攻击者就认为此系统处于活动状态,继而进行攻击或 ...
- Java实验二
北京电子科技学院(BESTI) 实 验 报 告 课程:Java程序设计 班级:1351 姓名:黄君如 学号:20135117 成绩: 指导教师:娄 ...
- 实验二Java面向对象程序设计_20135129李畅宇
ava第二次实验报告 课程:Java实验 班级:201352 姓名:池彬宁 学号:20135212 成绩: 指导教师:娄佳鹏 实验日期:15.05.05 ...
- Android中Json数据读取与创建的方法
转自:http://www.jb51.net/article/70875.htm 首先介绍下JSON的定义,JSON是JavaScript Object Notation的缩写. 一种轻量级的数据交换 ...
- <软件体系结构>实验框架选择及其说明
一.框架选择 本次实验,我所采取的框架是SSH框架.那么首先,我想简单的说明一下SSH框架,一方面给自己复习一下知识,另一方面也能使自己在以后看这篇博客的时候不至于太费力. SSH不是一个框架,而是S ...
- Android中加解密算法大全
Base64编码 Base64是网络上最常见的用于传输8Bit字节代码的编码方式之一,本质上是一种将二进制数据转成文本数据的方案,对于非二进制数据,是先将其转换成二进制形式,然后每连续6比特(2的6次 ...
- Vue的router使用
<div id="app"> <router-link to="/home">home</router-link> < ...
- [转载]linux段页式内存管理技术
原始博客地址: http://blog.csdn.net/qq_26626709/article/details/52742470 一.概述 1.虚拟地址空间 内存是通过指针寻址的,因而CPU的字长决 ...
- Python中=、copy、deepcopy
一.Python中的"=" a = 1 b = 1 c = a print(id(a)) print(id(b)) print(id(c)) #输出为 14070784103734 ...
- const修饰符限定的常量
类型前加const修饰符限定变量为只读,称为常量,定义时必须初始化,且初始化后编译器不允许再修改常量的值. 一.常量的定义 const在类型前面 const int value: //value是co ...