【转】Nginx 安装配置
Nginx("engine x")是一款是由俄罗斯的程序设计师Igor Sysoev所开发高性能的 Web和 反向代理 服务器,也是一个 IMAP/POP3/SMTP 代理服务器。
在高连接并发的情况下,Nginx是Apache服务器不错的替代品。
Nginx 安装
系统平台:CentOS release 6.6 (Final) 64位。
一、安装编译工具及库文件
yum -y install make zlib zlib-devel gcc-c++ libtool openssl openssl-devel
二、首先要安装 PCRE
PCRE 作用是让 Ngnix 支持 Rewrite 功能。
1、下载 PCRE 安装包,下载地址: http://downloads.sourceforge.net/project/pcre/pcre/8.35/pcre-8.35.tar.gz
[root@bogon src]# wget http://downloads.sourceforge.net/project/pcre/pcre/8.35/pcre-8.35.tar.gz

2、解压安装包:
[root@bogon src]# tar zxvf pcre-8.35.tar.gz
3、进入安装包目录
[root@bogon src]# cd pcre-8.35
4、编译安装
[root@bogon pcre-8.35]# ./configure

[root@bogon pcre-8.35]# make && make install
5、查看pcre版本
[root@bogon pcre-8.35]# pcre-config --version

安装 Nginx
1、下载 Nginx,下载地址:http://nginx.org/download/nginx-1.6.2.tar.gz
[root@bogon src]# wget http://nginx.org/download/nginx-1.6.2.tar.gz
 2、解压安装包
[root@bogon src]# tar zxvf nginx-1.6.2.tar.gz
3、进入安装包目录
[root@bogon src]# cd nginx-1.6.2
4、编译安装
[root@bogon nginx-1.6.2]# ./configure --prefix=/usr/local/webserver/nginx --with-http_stub_status_module --with-http_ssl_module --with-pcre=/usr/local/src/pcre-8.35

[root@bogon nginx-1.6.2]# make

[root@bogon nginx-1.6.2]# make install
5、查看nginx版本
[root@bogon nginx-1.6.2]# /usr/local/webserver/nginx/sbin/nginx -v

到此,nginx安装完成。
Nginx 配置
创建 Nginx 运行使用的用户 www:
[root@bogon conf]# /usr/sbin/groupadd www

[root@bogon conf]# /usr/sbin/useradd -g www www
配置nginx.conf ,将/usr/local/webserver/nginx/conf/nginx.conf替换为以下内容
[root@bogon conf]#  cat /usr/local/webserver/nginx/conf/nginx.conf

user www www;

worker_processes 2; #设置值和CPU核心数一致

error_log /usr/local/webserver/nginx/logs/nginx_error.log crit; #日志位置和日志级别

pid /usr/local/webserver/nginx/nginx.pid;

#Specifies the value for maximum file descriptors that can be opened by this process.

worker_rlimit_nofile 65535;

events

{

  use epoll;

  worker_connections 65535;

}

http

{

  include mime.types;

  default_type application/octet-stream;

  log_format main  '$remote_addr - $remote_user [$time_local] "$request" '

               '$status $body_bytes_sent "$http_referer" '

               '"$http_user_agent" $http_x_forwarded_for';


#charset gb2312;


  server_names_hash_bucket_size 128;

  client_header_buffer_size 32k;

  large_client_header_buffers 4 32k;

  client_max_body_size 8m;


  sendfile on;

  tcp_nopush on;

  keepalive_timeout 60;

  tcp_nodelay on;

  fastcgi_connect_timeout 300;

  fastcgi_send_timeout 300;

  fastcgi_read_timeout 300;

  fastcgi_buffer_size 64k;

  fastcgi_buffers 4 64k;

  fastcgi_busy_buffers_size 128k;

  fastcgi_temp_file_write_size 128k;

  gzip on;

  gzip_min_length 1k;

  gzip_buffers 4 16k;

  gzip_http_version 1.0;

  gzip_comp_level 2;

  gzip_types text/plain application/x-javascript text/css application/xml;

  gzip_vary on;


  #limit_zone crawler $binary_remote_addr 10m;

 #下面是server虚拟主机的配置

 server

  {

    listen 80;#监听端口

    server_name localhost;#域名

    index index.html index.htm index.php;

    root /usr/local/webserver/nginx/html;#站点目录

      location ~ .*\.(php|php5)?$

    {

      #fastcgi_pass unix:/tmp/php-cgi.sock;

      fastcgi_pass 127.0.0.1:9000;

      fastcgi_index index.php;

      include fastcgi.conf;

    }

    location ~ .*\.(gif|jpg|jpeg|png|bmp|swf|ico)$

    {

      expires 30d;

  # access_log off;

    }

    location ~ .*\.(js|css)?$

    {

      expires 15d;

   # access_log off;

    }

    access_log off;

  }

}
检查配置文件ngnix.conf的正确性命令:
[root@bogon conf]# /usr/local/webserver/nginx/sbin/nginx -t

启动 Nginx
Nginx 启动命令如下:
[root@bogon conf]# /usr/local/webserver/nginx/sbin/nginx

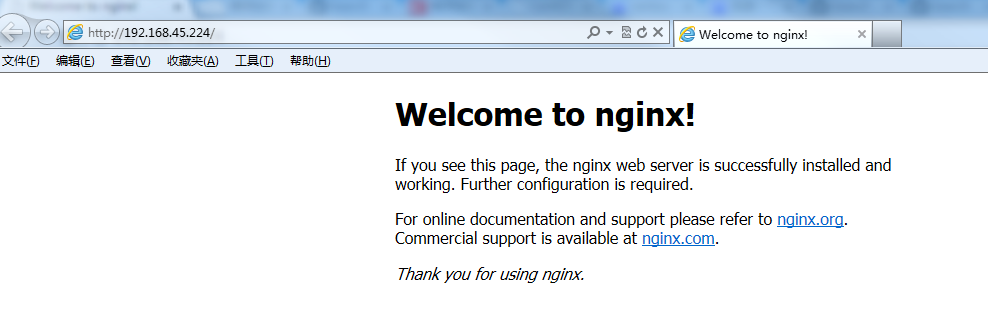
访问站点
从浏览器访问我们配置的站点ip:
Nginx 其他命令
以下包含了 Nginx 常用的几个命令:
/usr/local/webserver/nginx/sbin/nginx -s reload            # 重新载入配置文件

/usr/local/webserver/nginx/sbin/nginx -s reopen            # 重启 Nginx

/usr/local/webserver/nginx/sbin/nginx -s stop              # 停止 Nginx
【转】Nginx 安装配置的更多相关文章
- Nginx安装配置(转)
Nginx 安装配置 Nginx("engine x")是一款是由俄罗斯的程序设计师Igor Sysoev所开发高性能的 Web和 反向代理 服务器,也是一个 IMAP/POP3/ ...
- Nginx安装配置PHP(FastCGI)环境的教程
这篇是Nginx安装配置PHP(FastCGI)环境的教程.Nginx不支持对外部程序的直接调用或者解析,所有的外部程序(包括PHP)必须通过FastCGI接口来调用. 一.什么是 FastCGI F ...
- Nginx安装配置与HelloWorld
<深入理解Nginx>阅读与实践(一):Nginx安装配置与HelloWorld 最近在读陶辉的<深入理解Nginx:模块开发与架构解析>,一是想跟着大牛练练阅读和编写开源代码 ...
- Nginx 安装 配置 使用
Nginx 安装 配置 使用 基本的HTTP服务器特性 处理静态文件,索引文件以及自动索引:打开文件描述符缓存(缓存元数据和文件描述符,下一次可以直接从内存找到数据或者文件的位置): 使用缓存加速反向 ...
- VMware Linux 下 Nginx 安装配置 - nginx.conf 配置 [负载两个 Tomcat] (三)
首先启动Nginx 1. 相关浏览 两个 Tomcat 配置: VMware Linux 下 Nginx 安装配置 - Tomcat 配置 (二) Nginx 安装配置启动: VMware Linu ...
- VMware Linux 下 Nginx 安装配置 - Tomcat 配置 (二)
准备工作 相关浏览: VMware Linux 下 Nginx 安装配置 (一) 1. 选在 /usr/local/ 下创建 softs 文件夹,通过 ftp 命令 把 apache-tomcat-7 ...
- Hearbeat + Nginx 安装配置
Hearbeat + Nginx 安装配置 实验环境 两台主机:Linux Centos 6.5 32位 主 服务端:Hearbeat + Nginx eth0:192.168.1.160(公网) e ...
- Nginx安装配置|Nginx反向代理|Nginx支持HTTPS|Nginx重定向
Nginx安装配置 可以直接看到最下面的HTTPS. Nginx安装 我的系统如下: No LSB modules are available. Distributor ID: Ubuntu Desc ...
- puppet 3+Unicorn+Nginx安装配置
puppet 3+Unicorn+Nginx安装配置 2014-08-15 10:58 酒瓶不倒 酒瓶不倒的博客 字号:T | T 一键收藏,随时查看,分享好友! Unicorn 效率要比 Webri ...
- nginx安装配置_runoob_阅读笔记_20190917
Nginx 安装配置_runoob菜鸟教程 Nginx 安装配置 Nginx("engine x")是一款是由俄罗斯的程序设计师Igor Sysoev所开发高性能的 Web和 反向 ...
随机推荐
- Microsoft Office Excel 不能访问文件及COM无法访问
Microsoft Office Excel 不能访问文件及COM无法访问 Microsoft Office Excel 不能访问文件“*.xls”. 可能的原因有: 1 文件名称或路径不存在. 2 ...
- php中curl模拟浏览器来传输数据
cURL可以使用URL的语法模拟浏览器来传输数据, 因为它是模拟浏览器,因此它同样支持多种协议,FTP, FTPS, HTTP, HTTPS, GOPHER, TELNET, DICT, FILE 以 ...
- C# 中的"yield"使用
yield是C#为了简化遍历操作实现的语法糖,我们知道如果要要某个类型支持遍历就必须要实现系统接口IEnumerable,这个接口后续实现比较繁琐要写一大堆代码才能支持真正的遍历功能.举例说明 usi ...
- [充电][库]Zlib文件压缩和解压
原文链接: http://www.cnblogs.com/fairycao/archive/2009/12/09/1620414.html 开源代码:http://www.zlib.net/zlib使 ...
- [转]error: 'retainCount' is unavailable: not available in automatic reference counting mode
转载地址:http://choijing.iteye.com/blog/1860761 后来发现是编译选项的问题: 1.点击工程名 打开编译选项 2.在编译选项中,选择Bulid Settin ...
- PetaPoco入门(二)
1. Petapoco基本用法 1.1. 创建示例工程 首先创建一个工程文件,为了便于展示数据这里创建一个类型为:WindowsApplication的工程文件.命名为:PetapocoTest. 程 ...
- Android自定义View自定义属性
1.引言 对于自定义属性,大家肯定都不陌生,遵循以下几步,就可以实现: 自定义一个CustomView(extends View )类 编写values/attrs.xml,在其中编写styleabl ...
- python 学习笔记十 rabbitmq(进阶篇)
RabbitMQ MQ全称为Message Queue, 消息队列(MQ)是一种应用程序对应用程序的通信方法.应用程序通过读写出入队列的消息(针对应用程序的数据)来通信,而无需专用连接来链接它们.消 ...
- Python数据分析之numpy学习
Python模块中的numpy,这是一个处理数组的强大模块,而该模块也是其他数据分析模块(如pandas和scipy)的核心. 接下面将从这5个方面来介绍numpy模块的内容: 1)数组的创建 2)有 ...
- [问题2014S05] 解答
[问题2014S05] 解答 (本解答由谷嵘同学提供) 首先, 由 \(\mathrm{tr}(AB)=\mathrm{tr}(BA)\) 可得 \(a=0\), 或者由 Cauchy-Binet ...