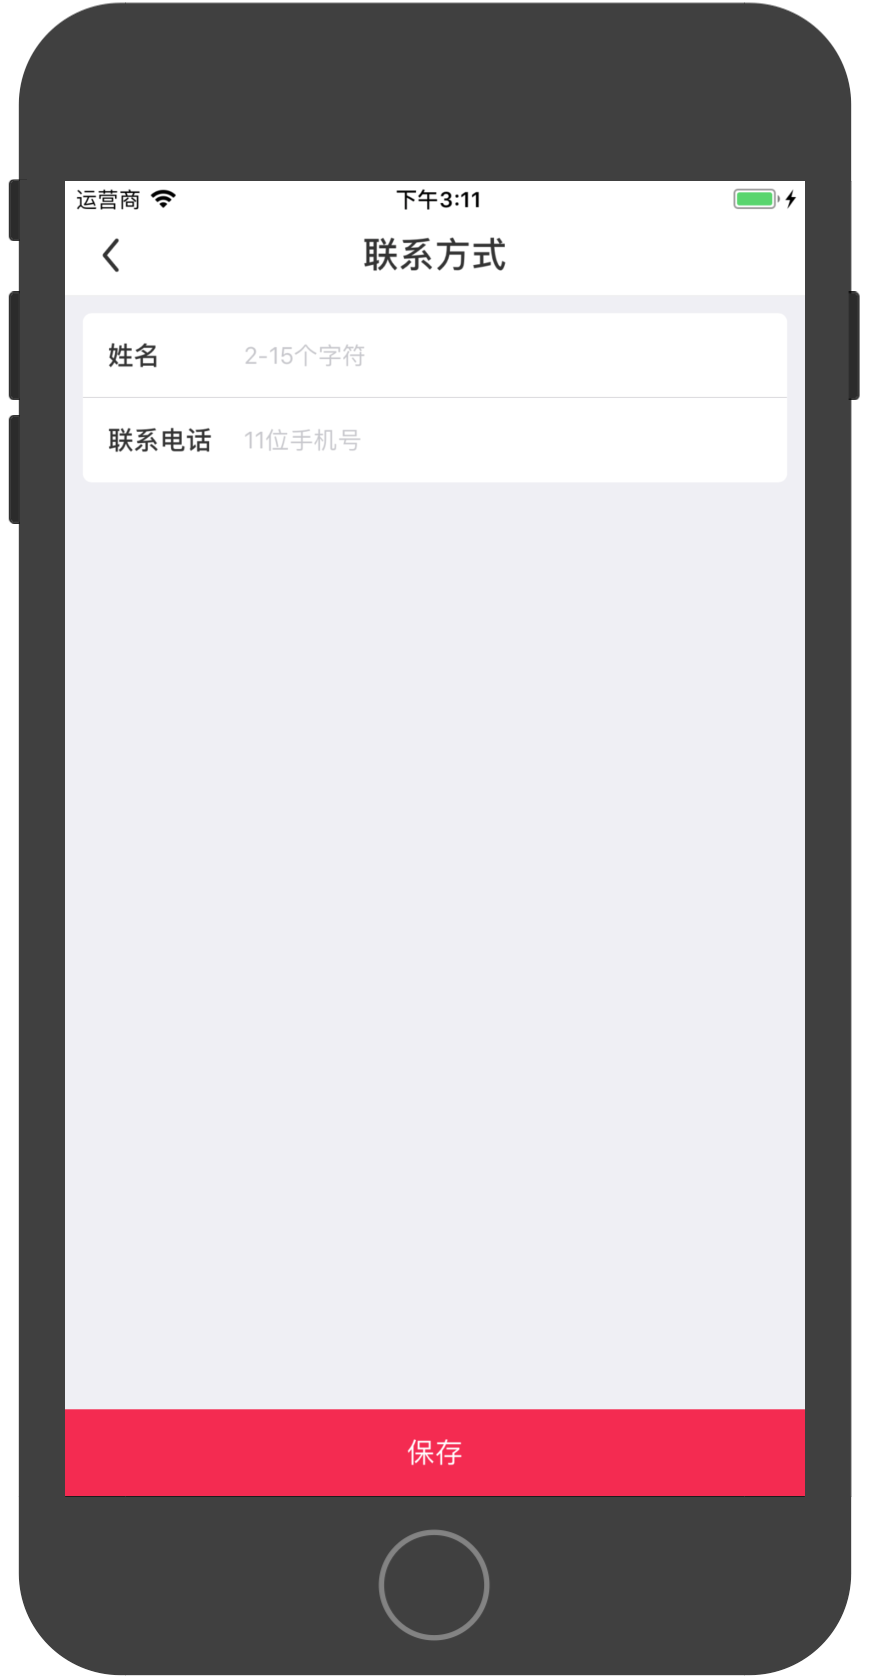
iOS tableView Section圆角方案
给tableView的section设置圆角

- 首先给让cell左右偏移一点的距离,通过重写cell的setframe方法来实现
-(void)setFrame:(CGRect)frame{

    CGFloat margin = 10;

    frame.origin.x = margin;

    frame.size.width = SCREEN_WIDTH - margin*2;

    [super setFrame:frame];

}
- 实现tableView的willDisplayCell方法,给section绘制圆角
- (void)tableView:(UITableView *)tableView willDisplayCell:(UITableViewCell *)cell forRowAtIndexPath:(NSIndexPath *)indexPath

{

    if ([cell respondsToSelector:@selector(tintColor)]) {

        if (tableView == self.tableView) {

            // 圆角弧度半径

            CGFloat cornerRadius = 5.f;

            // 设置cell的背景色为透明,如果不设置这个的话,则原来的背景色不会被覆盖

            cell.backgroundColor = UIColor.clearColor;

            // 创建一个shapeLayer

            CAShapeLayer *layer = [[CAShapeLayer alloc] init];

            CAShapeLayer *backgroundLayer = [[CAShapeLayer alloc] init]; //显示选中

            // 创建一个可变的图像Path句柄,该路径用于保存绘图信息

            CGMutablePathRef pathRef = CGPathCreateMutable();

            // 获取cell的size

            CGRect bounds = CGRectInset(cell.bounds, 0, 0);

            // CGRectGetMinY:返回对象顶点坐标

            // CGRectGetMaxY:返回对象底点坐标

            // CGRectGetMinX:返回对象左边缘坐标

            // CGRectGetMaxX:返回对象右边缘坐标

            // 这里要判断分组列表中的第一行,每组section的第一行,每组section的中间行

            BOOL addLine = NO;

            // CGPathAddRoundedRect(pathRef, nil, bounds, cornerRadius, cornerRadius);

            if (indexPath.row == 0) {

                // 初始起点为cell的左下角坐标

                CGPathMoveToPoint(pathRef, nil, CGRectGetMinX(bounds), CGRectGetMaxY(bounds));

                // 起始坐标为左下角,设为p1,(CGRectGetMinX(bounds), CGRectGetMinY(bounds))为左上角的点,设为p1(x1,y1),(CGRectGetMidX(bounds), CGRectGetMinY(bounds))为顶部中点的点,设为p2(x2,y2)。然后连接p1和p2为一条直线l1,连接初始点p到p1成一条直线l,则在两条直线相交处绘制弧度为r的圆角。

                CGPathAddArcToPoint(pathRef, nil, CGRectGetMinX(bounds), CGRectGetMinY(bounds), CGRectGetMidX(bounds), CGRectGetMinY(bounds), cornerRadius);

                CGPathAddArcToPoint(pathRef, nil, CGRectGetMaxX(bounds), CGRectGetMinY(bounds), CGRectGetMaxX(bounds), CGRectGetMidY(bounds), cornerRadius);

                // 终点坐标为右下角坐标点,把绘图信息都放到路径中去,根据这些路径就构成了一块区域了

                CGPathAddLineToPoint(pathRef, nil, CGRectGetMaxX(bounds), CGRectGetMaxY(bounds));

                addLine = YES;

            } else if (indexPath.row == [tableView numberOfRowsInSection:indexPath.section]-1) {

                // 初始起点为cell的左上角坐标

                CGPathMoveToPoint(pathRef, nil, CGRectGetMinX(bounds), CGRectGetMinY(bounds));

                CGPathAddArcToPoint(pathRef, nil, CGRectGetMinX(bounds), CGRectGetMaxY(bounds), CGRectGetMidX(bounds), CGRectGetMaxY(bounds), cornerRadius);

                CGPathAddArcToPoint(pathRef, nil, CGRectGetMaxX(bounds), CGRectGetMaxY(bounds), CGRectGetMaxX(bounds), CGRectGetMidY(bounds), cornerRadius);

                // 添加一条直线,终点坐标为右下角坐标点并放到路径中去

                CGPathAddLineToPoint(pathRef, nil, CGRectGetMaxX(bounds), CGRectGetMinY(bounds));

            } else {

                // 添加cell的rectangle信息到path中(不包括圆角)

                CGPathAddRect(pathRef, nil, bounds);

                addLine = YES;

            }

            // 把已经绘制好的可变图像路径赋值给图层,然后图层根据这图像path进行图像渲染render

            layer.path = pathRef;

            backgroundLayer.path = pathRef;

            // 注意:但凡通过Quartz2D中带有creat/copy/retain方法创建出来的值都必须要释放

            CFRelease(pathRef);

            // 按照shape layer的path填充颜色,类似于渲染render

            // layer.fillColor = [UIColor colorWithWhite:1.f alpha:0.8f].CGColor;

            layer.fillColor = [UIColor whiteColor].CGColor;

            // 添加分隔线图层

            if (addLine == YES) {

                CALayer *lineLayer = [[CALayer alloc] init];

                CGFloat lineHeight = (1.f / [UIScreen mainScreen].scale);

                lineLayer.frame = CGRectMake(CGRectGetMinX(bounds), bounds.size.height-lineHeight, bounds.size.width, lineHeight);

                // 分隔线颜色取自于原来tableview的分隔线颜色

                lineLayer.backgroundColor = tableView.separatorColor.CGColor;

                [layer addSublayer:lineLayer];

            }

            // view大小与cell一致

            UIView *roundView = [[UIView alloc] initWithFrame:bounds];

            // 添加自定义圆角后的图层到roundView中

            [roundView.layer insertSublayer:layer atIndex:0];

            roundView.backgroundColor = UIColor.clearColor;

            //cell的背景view

            //cell.selectedBackgroundView = roundView;

            cell.backgroundView = roundView;

            //以上方法存在缺陷当点击cell时还是出现cell方形效果,因此还需要添加以下方法

            UIView *selectedBackgroundView = [[UIView alloc] initWithFrame:bounds];

            backgroundLayer.fillColor = tableView.separatorColor.CGColor;

            [selectedBackgroundView.layer insertSublayer:backgroundLayer atIndex:0];

            selectedBackgroundView.backgroundColor = UIColor.clearColor;

            cell.selectedBackgroundView = selectedBackgroundView;

        }

    }

}
iOS tableView Section圆角方案的更多相关文章
- UITableView section 圆角 阴影
在UITableView实现图片上面的效果,百度一下看了别人的实现方案有下面2种: 1.UITableView section里面嵌套UITableView然后在上面实现圆角和阴影, 弊端代码超 ...
- [iOS]UIImageView增加圆角
[iOS]UIImageView增加圆角 "如何给一个UIImageView增加圆角?有几种方法?各自区别?" 备注:本文参考自http://www.jianshu.com/p/d ...
- iOS tableview cell 的展开收缩
iOS tableview cell 的展开收缩 #import "ViewController.h" @interface ViewController ()<UITabl ...
- iOS tableview的常用delegate和dataSource执行顺序
在这次项目中遇到了一个特别奇葩的问题:表视图创建的cell在7以上的系统能正常运行显示,在模拟器上就不能正常实现......为解决这个问题,纠结了好久...... 对在7系统上不显示的猜测: 用mas ...
- iOS 中的 HotFix 方案总结详解
相信HotFix大家应该都很熟悉了,今天主要对于最近调研的一些方案做一些总结.iOS中的HotFix方案大致可以分为四种: WaxPatch(Alibaba) Dynamic Framework(Ap ...
- ios tableview 上加 textfiled
ios tableview 上加 textfiled 首先附上我项目中用曾经用到的几张图 并说明一下我的用法: 图1: 图2: 图3: 心在你我说一下 我当初的实现 方法 ,希望能给你们一些 启 ...
- iOS TableView多级列表
代码地址如下:http://www.demodashi.com/demo/15006.html 效果预览 ### 一.需求 TableView多级列表:分级展开或合并,逐级获取并展示其子级数据,可以设 ...
- iOS TableView如何刷新指定的cell或section
指定的section单独刷新 NSIndexSet *indexSet=[[NSIndexSet alloc]initWithIndex:indexPath.row]; [tableview relo ...
- iOS tableview 优化总结
根据网络上的优化方法进行了总括.并未仔细进行语言组织.正在这些优化方法进行学习,见另一篇文章 提高app流畅度 1.cell子控件创建写在 initWithStyle:reuseIdentifier ...
随机推荐
- Codeforces 920 E Connected Components?
Discription You are given an undirected graph consisting of n vertices and edges. Instead of giving ...
- implements
implements 是实现某个接口的意思. 如果某个类 后面使用 implements,并指定了相应的接口,那在该类下面就需要实现相应接口的方法. 比如:接口interface java.lang. ...
- linux-网络监控命令-netstat初级
简介 Netstat 命令用于显示各种网络相关信息,如网络连接,路由表,接口状态 (Interface Statistics),masquerade 连接,多播成员 (Multicast Member ...
- Visual Studio 行末回车时运算符两侧自动加空格是怎么设置的
在工具—>选项->文本编辑器->c#->格式设置->间距后有三个选项 如果已经选中"二元运算符前后插入空格" 而VS又抽风没有这个功能时,可以选中其余 ...
- 【Linux】CentOS7 上使用yum安装和卸载软件【yum安装wine举例】
关于yum的相关解释,请 man yum 自行查看. 配置常用源:http://www.cnblogs.com/sxdcgaq8080/p/7516186.html yum的使用类似于在windows ...
- hdu1013(C++)
9的余数定理:一个数各位数字的总和除以9的余数与它本身除以9的余数同等 大数问题:防止大数,用字符串来存入数据,再转化为数字 #include<iostream>#include<s ...
- C++ 获取URL图片、html文件,CInternetSession 【转】
http://blog.csdn.net/gnixuyil/article/details/7688439 获取网络图片 CString URL="http://www.google.com ...
- 浅谈C#委托和事件(转载)
委托给了C#操作函数的灵活性,我们可使用委托像操作变量一样来操作函数,其实这个功能并不是C#的首创,早在C++时代就有函数指针这一说法,而在我看来委托就是C#的函数指针,首先先简要的介绍一下委托的基本 ...
- selenium实现失败重运行
UI自动化脚本执行过程中存在非常多的不稳定性,例如网络的不稳定,浏览器无响应等等,这些失败往往并不是产品中的错误.那么这时我们往往需要对执行失败的测试用例进行多次重跑,确认其是否确实失败. 那么失败重 ...
- windows 2003子目录权限丢失及子目录权限无法继承更改的解决方法
对于ntfs格式的分区,不当的操作方式很容易引起各种访问权限问题. 早上,给公司服务器配置网站权限,其中一个网站添加IIS_User权限删除了everyone权限后,发现网站无法访问,要求输入用户名和 ...
