C#版免费离线人脸识别——虹软ArcSoft V3.0
【温馨提示】 本文共678字(不含代码),8张图。预计阅读时间需要6分钟。
1. 前言
人脸识别&比对发展到今天,已经是一个非常成熟的技术了,而且应用在生活的方方面面,比如手机、车站、天网等。
我从2016年就开始做人脸识别相关的App,到现在差不多4个年头了,用过的SDK有微软认知服务、旷视科技的Face++、开源的OpenCV。
这里就之前我用过的做一下对比。
| web api | Windows SDK | Android SDK | iOS SDK | 离线使用 | 价格 | 速度 | |
| 微软认知服务 | ✔️ | ❌ | ❌ | ❌ | ❌ | 收费 | 取决于网速 |
| 旷视Face++ | ✔️ | ❌ | ✔️ | ✔️ | ✔️ | 收费 |
web版取决于网速 本地SDK离线版识别速度没测试过,但应该很快 |
| OpenCV | ❌ | ✔️ | ✔️ | ✔️ | ✔️ | 免费 | 有点慢 |
而今天介绍的这个虹软人脸识别服务,是免费的、免费的、免费的。
最重要的是它还支持离线识别,并且提供Android、iOS、C++、C#版SDK,现在已经升级到全新的3.0版本,支持活体识别。
| web api | Windows SDK | Android SDK | iOS SDK | 离线使用 | 价格 | 速度 | |
| 虹软人脸识别 | ✔️ | ✔️ | ✔️ | ✔️ | ✔️ |
免费版 - 需要在线激活 收费版 - 离线激活,提供更多高级服务 |
web版取决于网速 本地SDK离线版识别速度极快 |
图片来自官网

2. 下载虹软SDK开发包
你可以去https://ai.arcsoft.com.cn/ucenter/resource/build/index.html#/index 注册一个账号,然后就可以申请使用虹软离线SDK。
这里主要讲一下Windows下的SDK使用。
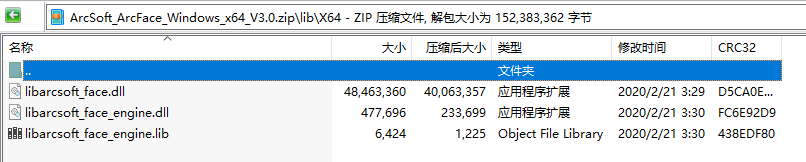
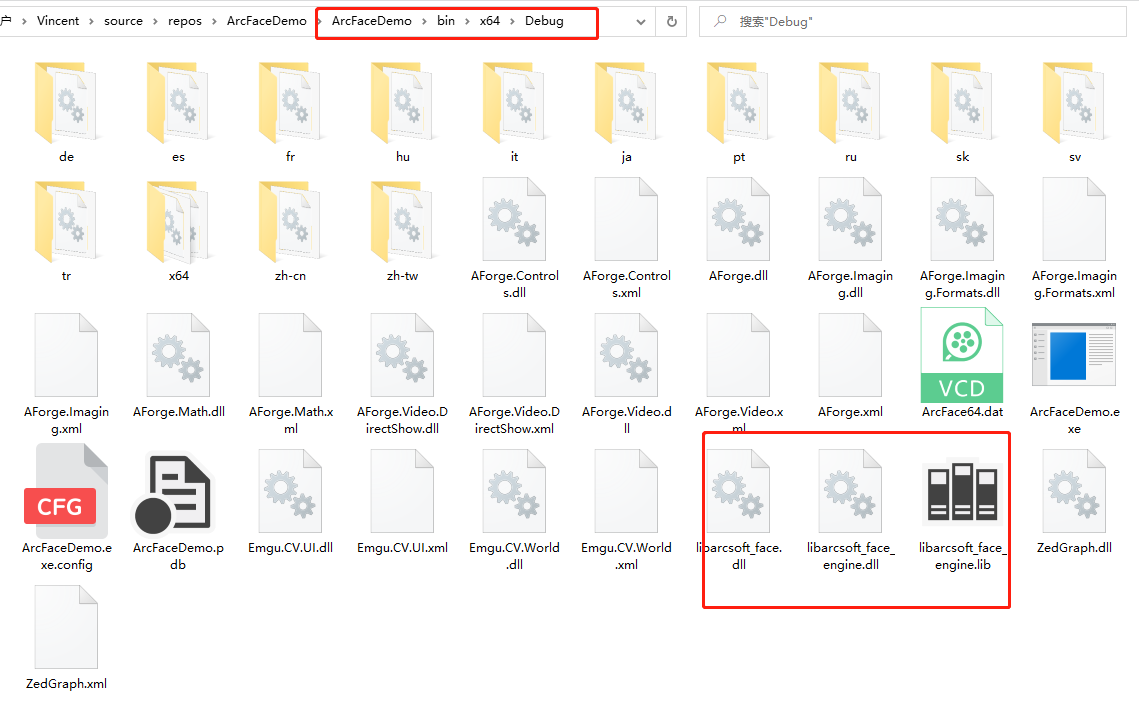
注意Win下面分为x86和x64两个版本,所以在编译App的时候不要选择Any CPU,而是选择和你下载的一样的架构。

新建一个Winform解决方案,选择编译架构,把你下载的SDK/lib里面的文件放进对应的Debug目录。
3. 初始化识别引擎
SDK需要一个ID和KEY,这些你都可以在虹软开发者中心申请到。
private void InitEngines()

        {//在线激活引擎    如出现错误,1.请先确认从官网下载的sdk库已放到对应的bin中,2.当前选择的CPU为x86或者x64

            int retCode = ;

            try

            {

                retCode = ASFFunctions.ASFActivation(appId, sdkKey);

            }

            catch (Exception ex)

            {

                //禁用相关功能按钮

                //ControlsEnable(false, chooseMultiImgBtn, matchBtn, btnClearFaceList, chooseImgBtn);

                if (ex.Message.Contains("无法加载 DLL"))

                {

                    MessageBox.Show("请将sdk相关DLL放入bin对应的x86或x64下的文件夹中!");

                }

                else

                {

                    MessageBox.Show("激活引擎失败!");

                }

                return;

            }

            Console.WriteLine("Activate Result:" + retCode);

            //初始化引擎

            uint detectMode = DetectionMode.ASF_DETECT_MODE_IMAGE;//Image模式下检测脸部的角度优先值

            int imageDetectFaceOrientPriority = ASF_OrientPriority.ASF_OP_0_ONLY;

            //人脸在图片中所占比例,如果需要调整检测人脸尺寸请修改此值,有效数值为2-32

            int detectFaceScaleVal = ;

            //最大需要检测的人脸个数

            int detectFaceMaxNum = ;

            //引擎初始化时需要初始化的检测功能组合

            int combinedMask = FaceEngineMask.ASF_FACE_DETECT | FaceEngineMask.ASF_FACERECOGNITION | FaceEngineMask.ASF_AGE | FaceEngineMask.ASF_GENDER | FaceEngineMask.ASF_FACE3DANGLE;

            //初始化引擎,正常值为0,其他返回值请参考http://ai.arcsoft.com.cn/bbs/forum.php?mod=viewthread&tid=19&_dsign=dbad527e

            retCode = ASFFunctions.ASFInitEngine(detectMode, imageDetectFaceOrientPriority, detectFaceScaleVal, detectFaceMaxNum, combinedMask, ref pImageEngine);

            Console.WriteLine("InitEngine Result:" + retCode);

            AppendText((retCode == ) ? "引擎初始化成功!\r\n" : string.Format("引擎初始化失败!错误码为:{0}\r\n", retCode));

        }
4. 注册人脸
要想识别人脸,首相要像指纹识别那样,把一个人的人脸事先录入进去,才可以实现识别。
我这里做一个简单的demo,输入一个名字,选择照片即可注册。

        private void btnSelectImageToRegister_Click(object sender, EventArgs e)

        {

            OpenFileDialog openFileDialog = new OpenFileDialog();

            openFileDialog.Title = "Select";

            openFileDialog.Filter = "Image File|*.bmp;*.jpg;*.jpeg;*.png";

            //openFileDialog.Multiselect = true;

            openFileDialog.FileName = string.Empty;

            if (openFileDialog.ShowDialog() == DialogResult.OK)

            {

                var numStart = imagePathList.Count;

                string fileName = openFileDialog.FileName;

                if (!checkImage(fileName))

                    return;

                pictureBoxSelected.ImageLocation = fileName;

                currentLeftFeature = IntPtr.Zero;

                //人脸检测以及提取人脸特征

                ThreadPool.QueueUserWorkItem(new WaitCallback(delegate

                {

                    Image image = ImageUtil.readFromFile(fileName);

                    if (image == null)

                    {

                        return;

                    }

                    if (image.Width >  || image.Height > )

                    {

                        image = ImageUtil.ScaleImage(image, , );

                    }

                    if (image == null)

                    {

                        return;

                    }

                    if (image.Width %  != )

                    {

                        image = ImageUtil.ScaleImage(image, image.Width - (image.Width % ), image.Height);

                    }

                    //人脸检测

                    ASF_MultiFaceInfo multiFaceInfo = FaceUtil.DetectFace(pImageEngine, image);

                    //判断检测结果

                    if (multiFaceInfo.faceNum > )

                    {

                        MRECT rect = MemoryUtil.PtrToStructure<MRECT>(multiFaceInfo.faceRects);

                        image = ImageUtil.CutImage(image, rect.left, rect.top, rect.right, rect.bottom);

                    }

                    else

                    {

                        if (image != null)

                        {

                            image.Dispose();

                        }

                        return;

                    }

                    //提取人脸特征

                    ASF_SingleFaceInfo singleFaceInfo = new ASF_SingleFaceInfo();

                    Image image1 = ImageUtil.readFromFile(fileName);

                    if (image1 == null)

                    {

                        return;

                    }

                    currentLeftFeature = FaceUtil.ExtractFeature(pImageEngine, image1, out singleFaceInfo);

                    this.Invoke(new Action(delegate

                    {

                        if (singleFaceInfo.faceRect.left ==  && singleFaceInfo.faceRect.right == )

                        {

                            AppendText(string.Format("No face detected\r\r\n"));

                        }

                        else

                        {

                            AppendText(string.Format("Face landmark detected,[left:{0},right:{1},top:{2},bottom:{3},orient:{4}]\r\r\n", singleFaceInfo.faceRect.left, singleFaceInfo.faceRect.right, singleFaceInfo.faceRect.top, singleFaceInfo.faceRect.bottom, singleFaceInfo.faceOrient));

                            imagesFeatureList.Add(currentLeftFeature);

                        }

                    }));

                    if (image1 != null)

                    {

                        image1.Dispose();

                    }

                }));

            }

        }

        private void btnRegisterFace_Click(object sender, EventArgs e)

        {

            if(string.IsNullOrEmpty(textBoxName.Text))

            {

                MessageBox.Show("Set a name for current person");

                return;

            }

            imagesFeatureDictionary.Add(currentLeftFeature, textBoxName.Text);

            AppendText(string.Format(textBoxName.Text + " register success!\r\r\n"));

        }
5. 人脸识别
当把许多人脸录入到系统中后,我们就可以选择一个需要比对的图片,进行识别了。
        private void btnSelectImageToRecognize_Click(object sender, EventArgs e)

        {

            OpenFileDialog openFileDialog = new OpenFileDialog();

            openFileDialog.Title = "Select";

            openFileDialog.Filter = "Image File|*.bmp;*.jpg;*.jpeg;*.png";

            //openFileDialog.Multiselect = true;

            openFileDialog.FileName = string.Empty;

            if (openFileDialog.ShowDialog() == DialogResult.OK)

            {

                var numStart = imagePathList.Count;

                string fileName = openFileDialog.FileName;

                if (!checkImage(fileName))

                    return;

                image1Feature = IntPtr.Zero;

                pictureBoxToRecognize.ImageLocation = fileName;

                Image srcImage = ImageUtil.readFromFile(fileName);

                ASF_SingleFaceInfo singleFaceInfo = new ASF_SingleFaceInfo();

                //提取人脸特征

                image1Feature = FaceUtil.ExtractFeature(pImageEngine, srcImage, out singleFaceInfo);

                if (imagesFeatureList.Count == )

                {

                    MessageBox.Show("请注册人脸!", "提示", MessageBoxButtons.OK, MessageBoxIcon.Error);

                    return;

                }

                if (image1Feature == IntPtr.Zero)

                {

                    if (pictureBoxToRecognize.Image == null)

                    {

                        MessageBox.Show("请选择识别图!", "提示", MessageBoxButtons.OK, MessageBoxIcon.Error);

                    }

                    else

                    {

                        MessageBox.Show("比对失败,识别图未提取到特征值!", "提示", MessageBoxButtons.OK, MessageBoxIcon.Error);

                    }

                    return;

                }

                for (int i = ; i < imagesFeatureDictionary.Count; i++)

                {

                    IntPtr feature = imagesFeatureDictionary.ElementAt(i).Key;

                    float similarity = 0f;

                    int ret = ASFFunctions.ASFFaceFeatureCompare(pImageEngine, image1Feature, feature, ref similarity);

                    //增加异常值处理

                    if (similarity.ToString().IndexOf("E") > -)

                        similarity = 0f;

                    if(similarity > threshold)

                    {

                        string name = imagesFeatureDictionary.ElementAt(i).Value;

                        AppendText("对比结果:" + name + "  可信度:" + similarity + "\r\n");

                        return;

                    }

                }

                AppendText("无结果\r\n");

            }

        }
6. 运行效果
本地离线识别最大的好处就是没有延迟,识别结果立马呈现。

7. 总结
本文只是简单介绍了如何使用虹软的离线SDK,进行人脸识别的方法,并且是图片的方式。
源码下载地址:https://github.com/hupo376787/ArcFaceDemo.git
如果需要摄像头,那么需要别的摄像头SDK来辅助实现。
如果以后有时间我会加上。
C#版免费离线人脸识别——虹软ArcSoft V3.0的更多相关文章
- 虹软2.0免费离线人脸识别 Demo [C++]
环境: win10(10.0.16299.0)+ VS2017 sdk版本:ArcFace v2.0 OPENCV3.43版本 x64平台Debug.Release配置都已通过编译 下载地址:http ...
- 基于Arcface 免费离线人脸识别 2.0 Demo C#
本来打算做个C#版demo,但没用成功.使用虹软最新人脸识别技术开发完成 过程如下: 1. 传入一张单人脸照片: 2.调用检测人脸函数ASFDetectFaces,成功返回人脸信息的指针: 3.使用 ...
- 离线人脸识别 ArcFaceSharp -- ArcFace 2.0 SDK C#封装库分享
ArcFaceSharp ArcFaceSharp 是ArcSoft 虹软 ArcFace 2.0 SDK 的一个 C# 封装库,为方便进行 C# 开发而封装.欢迎 Start & Fork. ...
- windows下百度离线人脸识别本地部署与使用(nodejs做客户端,c++做服务端,socket做通信)
1.离线人脸识别本地部署 详情请阅读百度人脸识别官网 2.nodejs做socket通信的客户端 为什么不直接通过调用c++编译的exe获得人脸识别结果? 原因:exe运行时会加载很多模型而消耗很多时 ...
- 百度离线人脸识别sdk的使用
1.1下载sdk运行 百度离线人脸识别sdk的使用 1.2配置环境 添加至项目,可以拖动复制或者以类库形式添加face-resource此文件夹 放到根目录上一层 激活文件与所有dll引用放到根目录嫌 ...
- C# 离线人脸识别 ArcSoft V2.0 Demo
本来打算做个C#版demo,但没用成功.使用虹软最新人脸识别技术开发完成 过程如下: 1. 传入一张单人脸照片: 2.调用检测人脸函数ASFDetectFaces,成功返回人脸信息的指针: 3.使用 ...
- windows版 Java调用人脸识别离线sdk
最近因工作需求在java-web服务中调用人脸识别离线sdk,主要通过JNA及JNI技术,但均未调试通过,JNA调用时出现以下异常,一直未解决,求大佬指点,导常信息如下: in BaiduFaceAp ...
- python3+虹软2.0 离线人脸识别 demo
python3+虹软2.0的所有功能整合测试完成,并对虹软所有功能进行了封装,现提供demo主要功能,1.人脸识别2.人脸特征提取3.特征比对4.特征数据存储与比对其他特征没有添加 虹软SDK下载戳这 ...
- 虹软离线人脸识别 ArcFace 2.0 Demo [C++]
环境: win10(10.0.16299.0)+ VS2017 sdk版本:ArcFace v2.0 OPENCV3.43版本 x64平台Debug.Release配置都已通过编译 下载地址:http ...
随机推荐
- JVM如何判断对象能否被回收
•写在前面说起Java和C++,很容易想到让人疯狂的指针,Java使用了内存动态分配和垃圾回收技术,让我们从C++的各种指针问题中摆脱出来,更加专心于业务逻辑,不过如果我们需要深入了解java的JVM ...
- 基于phathomjs token 不定时无响应问题排查
问题描述 基于phathomjs的token池项目,基本原理是,打开淘宝页,获取匿名cookie,再由cookie中提取有效token,调用方通过该token获取淘宝数据 为方便基他人应用,封装了部分 ...
- 读写分离(AMOEBA)
博主本人平和谦逊,热爱学习,读者阅读过程中发现错误的地方,请帮忙指出,感激不尽 1. 环境准备: 1.1新增一台虚拟机 amoeba:192.168.247.80 架构(使用图片源自其它博文): 1. ...
- django框架进阶-cookie和session-长期维护
############### python基础回顾:装饰器 ################ # 装饰器非常重要,1是写代码的时候,2是面试的时候,没有python开发不问装饰器的, # ...
- Linux安装swoole拓展 (一键安装lnmp后安装可用完美)
一键安装lnmp后安装可用完美 swoole(一键安装完lnmp重启下,之前出现502一直解决不了,不清楚啥情况) 找到对应php版本,在lnmp文件夹的src 1.安装swoole cd /usr/ ...
- deeplearning.ai 改善深层神经网络 week1 深度学习的实用层面
1. 应用机器学习是高度依赖迭代尝试的,不要指望一蹴而就,必须不断调参数看结果,根据结果再继续调参数. 2. 数据集分成训练集(training set).验证集(validation/develop ...
- [LC] 211. Add and Search Word - Data structure design
Design a data structure that supports the following two operations: void addWord(word) bool search(w ...
- 推送至远程仓库使用git push -u的原因
第一次把本地仓库推送至远端时,为了以后方便一定要使用 git push -u origin master [此处是把本地的master分支推送至远程的master分支]
- PO设计模式-实现移动端自动化测试
开发环境:python 3.6.5 + selenium 2.48.0 + pytest框架 + Android 5.1 工具:pycharm + Appium + Genymotion 测试机型:S ...
- QQbug--QQ截图不显示保存类型
QQ软件bug--QQ截图不显示保存类型,设置显示后缀名也没用 问题: QQ截图截后,不通过对话框直接保存时,不显示保存类型,文件名下面的类型的框框是一片空白,在文件夹选项设置显示后缀名也没用 ...