锚框 anchor box
代码总览
代码解释
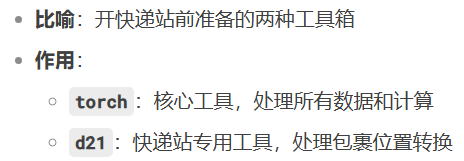
从头到尾用"快递站管理系统"的比喻方式,完整解释每一行代码的功能和意义。
1. 导入库 - 准备工具包
import torch  #  主工具箱:搬运工(张量操作)

from d21 import torch as d21  #  专用工具包:快递站定制工具(边界框转换等)
torch.set_printoptions(2) # 设置测量精度:小数点后2位

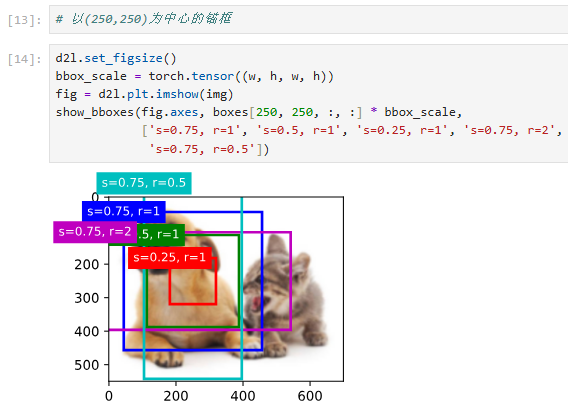
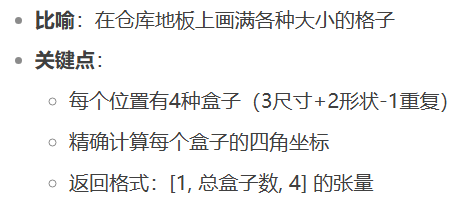
2. 锚框生成 - 布置仓库货架
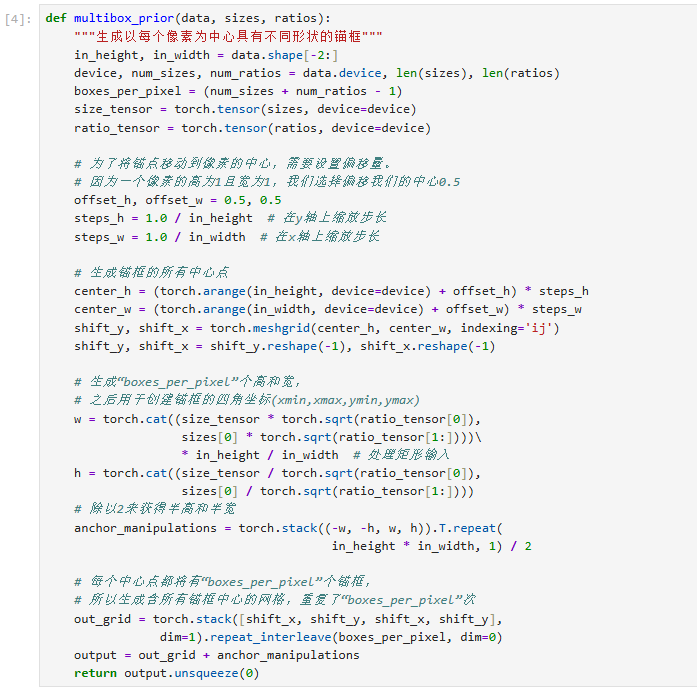
def multisourceplot(data, sizes, ratios):
# 测量仓库尺寸
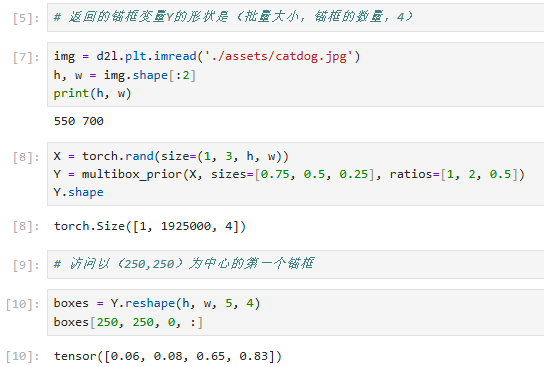
in_height, in_width = data.shape[-2:] # 获取仓库的长宽
# 准备工具
device = data.device # 确定使用哪种搬运车(CPU/GPU)
num_sizes, num_ratios = len(sizes), len(ratios) # 清点盒子类型
# 计算每个位置放几个盒子
boxes_per_pixel = (num_sizes + num_ratios - 1) # 每位置放4个盒子
# 准备盒子模板
size_tensor = torch.tensor(sizes, device=device) # 小/中/大三种盒子
ratio_tensor = torch.tensor(ratios, device=device) # 方形/长方形模板
# 确定每个格子的中心点
offset_h, offset_w = 0.5, 0.5 # 从格子角落往中心走0.5步
steps_h = 1.0 / in_height # 纵向每步距离
steps_w = 1.0 / in_width # 横向每步距离
# ️ 创建坐标网格
center_h = (torch.arange(in_height, device=device) + offset_h) * steps_h
center_w = (torch.arange(in_width, device=device) + offset_w) * steps_w
shift_y, shift_x = torch.meshgrid(center_h, center_w, indexing='ij')
shift_y, shift_x = shift_y.reshape(-1), shift_x.reshape(-1) # 压平网格
# 计算每种盒子的实际尺寸
# 第一类:固定形状,不同大小
w1 = size_tensor * torch.sqrt(ratio_tensor[0])
h1 = size_tensor / torch.sqrt(ratio_tensor[0])
# 第二类:固定大小,不同形状
w2 = sizes[0] * torch.sqrt(ratio_tensor[1:])
h2 = sizes[0] / torch.sqrt(ratio_tensor[1:])
# 合并所有盒子尺寸
w = torch.cat((w1, w2))
h = torch.cat((h1, h2))
# 组装盒子位置偏移量
anchor_manipulations = torch.stack((-w, -h, w, h)).T.repeat(
in_height * in_width, 1) / 2 # 计算每个盒子四角偏移
# ️ 为每个位置分配中心点
out_grid = torch.stack([shift_x, shift_y, shift_x, shift_y],
dim=1).repeat_interleave(boxes_per_pixel, dim=0)
# 最终确定每个盒子位置
output = out_grid + anchor_manipulations # 中心点 + 偏移量
return output.unsqueeze(0) # 返回货架布置图(添加批次维度)
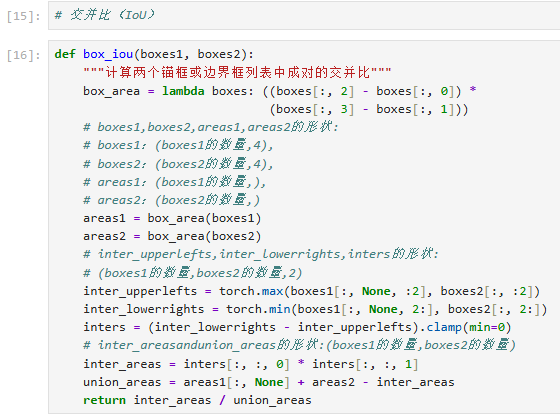
3. IoU计算 - 测量格子重叠率
def box_iou(boxes1, boxes2):

    #  定义量具:计算格子面积

    box_area = lambda boxes: ((boxes[:, 2] - boxes[:, 0]) *

                             (boxes[:, 3] - boxes[:, 1]))

    #  测量两组格子各自面积

    areas1 = box_area(boxes1)  # 第一组格子面积

    areas2 = box_area(boxes2)  # 第二组格子面积

    #  计算重叠区域

    # 左上角取较大值(更靠右下的左上角)

    inter_upperlefts = torch.max(boxes1[:, None, :2], boxes2[:, :2])

    # 右下角取较小值(更靠左上的右下角)

    inter_lowerrights = torch.min(boxes1[:, None, 2:], boxes2[:, 2:])

    # 计算重叠区域尺寸(负数取0)

    inters = (inter_lowerrights - inter_upperlefts).clamp(min=0)

    #  计算重叠面积

    inter_areas = inters[:, :, 0] * inters[:, :, 1]

    #  计算总面积

    union_areas = areas1[:, None] + areas2 - inter_areas

    #  返回重叠比例

    return inter_areas / union_areas

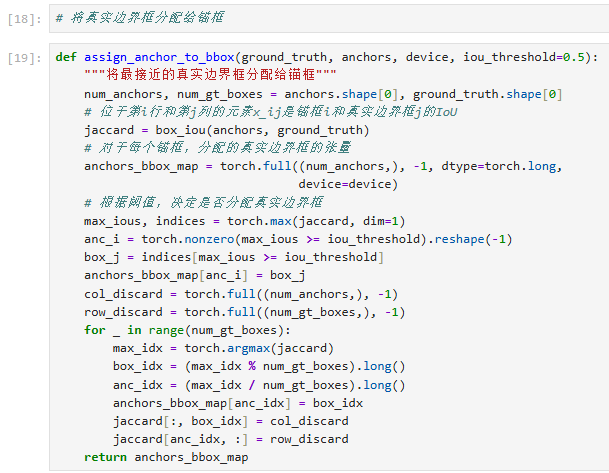
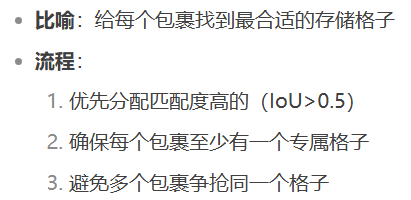
4. 锚框分配 - 给包裹分配存储格
def assign_anchor_to_bbox(ground_truth, anchors, device, iou_threshold=0.5):

    #  清点资源

    num_anchors = anchors.shape[0]  # 空盒子数量

    num_gt = ground_truth.shape[0]   # 包裹数量

    #  测量每个空盒与包裹的匹配度

    jaccard = box_iou(anchors, ground_truth)  # 计算IoU矩阵

    # ️ 初始化分配表(-1表示未分配)

    anchor_bbox_map = torch.full((num_anchors,), -1, dtype=torch.long, device=device)

    #  第一轮分配:高匹配度直接分配

    max_iou, indices = torch.max(jaccard, dim=1)  # 每个盒子找最佳匹配

    anc_i = torch.nonzero(max_iou >= iou_threshold).reshape(-1)  # 找出匹配度高的盒子

    box_j = indices[anc_i]  # 对应的包裹编号

    anchor_bbox_map[anc_i] = box_j  # 登记分配关系

    #  第二轮分配:确保每个包裹都有盒子

    col_discard = torch.full((num_anchors,), -1)  # 列作废标记

    row_discard = torch.full((num_gt,), -1)       # 行作废标记

    for _ in range(num_gt):  # 遍历每个包裹

        max_idx = torch.argmax(jaccard)  # 找全局最佳匹配

        box_idx = (max_idx % num_gt).long()  # 包裹编号

        anc_idx = (max_idx // num_gt).long()  # 盒子编号

        anchor_bbox_map[anc_idx] = box_idx  # 分配盒子

        #  标记已分配的包裹和盒子

        jaccard[:, box_idx] = col_discard  # 该包裹列作废

        jaccard[anc_idx, :] = row_discard  # 该盒子行作废

    return anchor_bbox_map  #  返回分配表
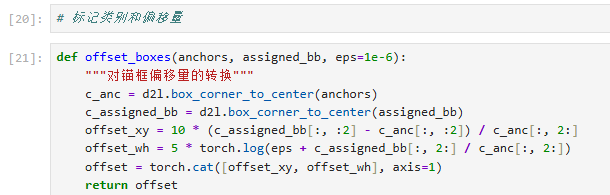
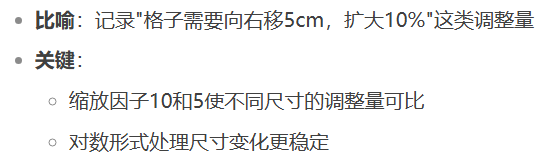
5. 偏移计算 - 记录格子调整量
def offset_boxes(anchors, assigned_bb, eps=1e-6):

    #  转换坐标格式:从四角→中心+尺寸

    c_anc = d21.box_corner_to_center(anchors)  # 格子当前尺寸

    c_assigned = d21.box_corner_to_center(assigned_bb)  # 包裹实际尺寸

    #  计算中心点偏移(带缩放因子)

    offset_xy = 10 * (c_assigned[:, :2] - c_anc[:, :2]) / c_anc[:, 2:]

    #  计算尺寸缩放量(对数形式更稳定)

    offset_wh = 5 * torch.log(eps + c_assigned[:, 2:] / c_anc[:, 2:])

    return torch.cat([offset_xy, offset_wh], axis=1)  #  返回调整量表
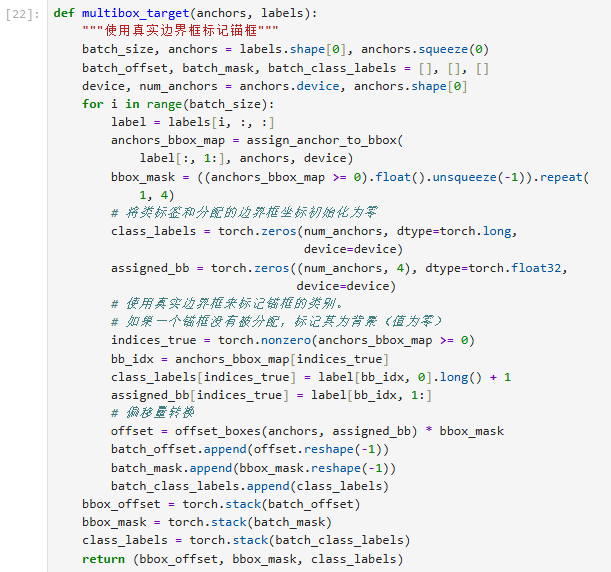
6. 训练标签生成 - 创建员工培训手册
def multibox_target(anchors, labels):

    #  初始化培训资料

    batch_size = labels.shape[0]  # 培训包裹批次大小

    anchors = anchors.squeeze(0)  # 移除批次维度

    batch_offset, batch_mask, batch_class_labels = [], [], []  # 三个培训模块

    #  处理每个培训包裹

    for i in range(batch_size):

        label = labels[i, :, :]  # 当前包裹信息

        # ️ 分配格子

        anchor_bbox_map = assign_anchor_to_bbox(label[:, 1:], anchors, device)

        #  创建格子使用标记

        bbox_mask = ((anchor_bbox_map >= 0).float().unsqueeze(-1)).repeat(1, 4)

        # ️ 初始化标签

        class_labels = torch.zeros(anchors.shape[0], dtype=torch.long, device=device)

        assigned_bb = torch.zeros((anchors.shape[0], 4), dtype=torch.float32, device=device)

        #  标记有包裹的格子

        indices_true = torch.nonzero(anchor_bbox_map >= 0).flatten()

        bb_idx = anchor_bbox_map[indices_true]

        class_labels[indices_true] = label[bb_idx, 0].long() + 1  # 类别+1(0留给空)

        assigned_bb[indices_true] = label[bb_idx, 1:]  # 记录包裹位置

        #  计算格子调整量

        offset = offset_boxes(anchors, assigned_bb) * bbox_mask

        #  收集培训资料

        batch_offset.append(offset.reshape(-1))

        batch_mask.append(bbox_mask.reshape(-1))

        batch_class_labels.append(class_labels)

    #  打包培训手册

    return (torch.stack(batch_offset),

            torch.stack(batch_mask),

            torch.stack(batch_class_labels))

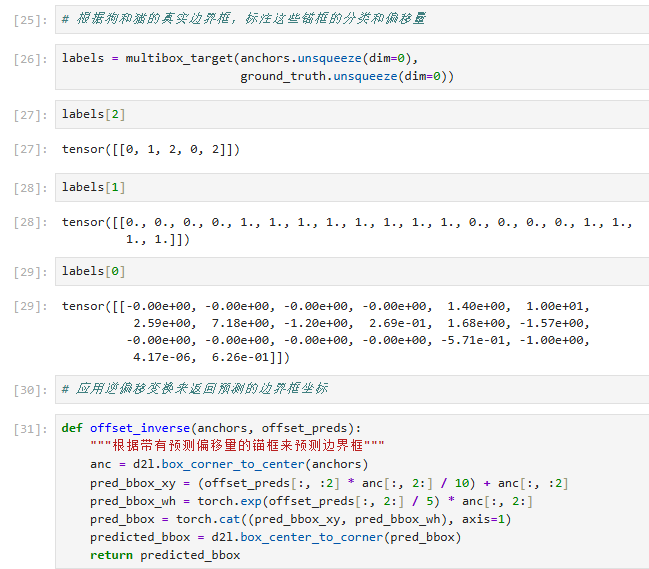
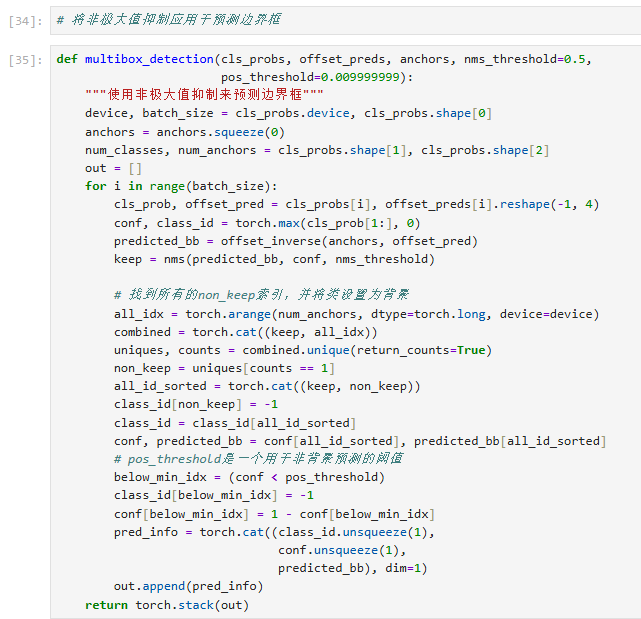
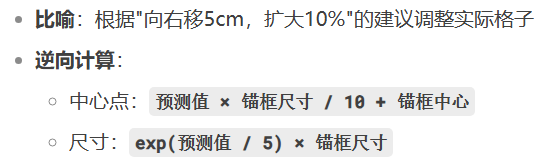
7. 预测解码 - 应用调整建议
def offset_inverse(anchors, offset_preds):

    #  转换坐标格式

    c_anc = d21.box_corner_to_center(anchors)

    #  应用中心点调整

    pred_bbox_xy = (offset_preds[:, :2] * c_anc[:, 2:] / 10 + c_anc[:, :2]

    #  应用尺寸调整

    pred_bbox_wh = torch.exp(offset_preds[:, 2:] / 5) * c_anc[:, 2:]

    #  重组预测框

    pred_bbox = torch.cat([pred_bbox_xy, pred_bbox_wh], axis=1)

    #  转换回四角坐标

    return d21.box_center_to_corner(pred_bbox)
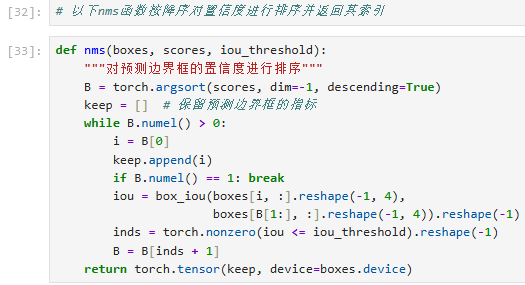
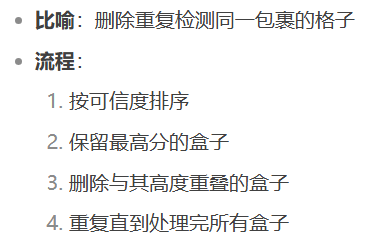
8. NMS - 去重检查
def nms(boxes, scores, iou_threshold):

    #  按可信度排序

    B = torch.argsort(scores, dim=-1, descending=True)

    keep = []  # 保留列表

    #  遍历所有盒子

    while B.numel() > 0:

        i = B[0]  # 当前最可信的盒子

        keep.append(i)  # 加入保留列表

        if B.numel() == 1:  # 只剩一个盒子时退出

            break

        #  计算与其他盒子的重叠率

        iou = box_iou(boxes[i, :].reshape(-1, 4),

                     boxes[B[1:], :].reshape(-1, 4)).reshape(-1)

        #  保留重叠率低的盒子

        inds = torch.nonzero(iou <= iou_threshold).reshape(-1)

        B = B[inds + 1]  # 更新待处理列表

    return torch.tensor(keep, device=boxes.device)  #  返回保留盒子的索引
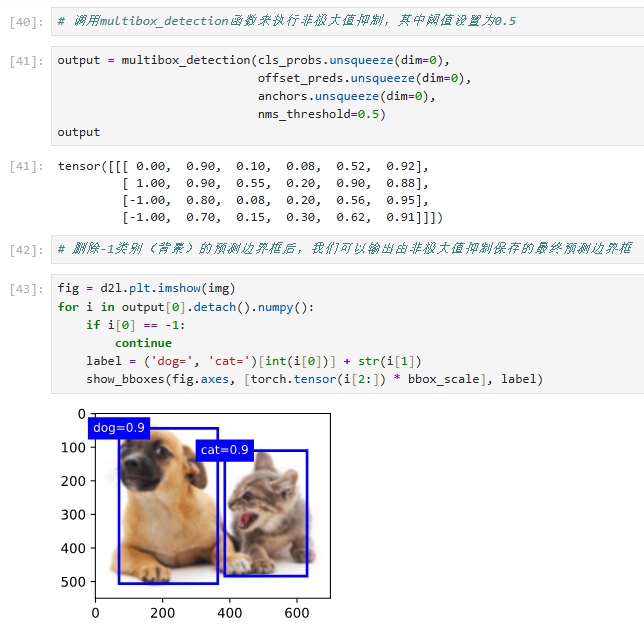
9. 检测后处理 - 生成最终报告
def multibox_detection(cls_probs, offset_preds, anchors, nms_threshold=0.5, pos_threshold=0.01):

    #  准备报告模板

    device = cls_probs.device

    batch_size = cls_probs.shape[0]

    anchors = anchors.squeeze(0)

    out = []  # 最终报告列表

    #  处理每个仓库区域

    for i in range(batch_size):

        #  获取员工扫描结果

        cls_prob = cls_probs[i]  # 每个格子的包裹概率

        offset_pred = offset_preds[i].reshape(-1, 4)  # 尺寸调整建议

        #  找出可能含包裹的格子

        conf, class_id = torch.max(cls_prob[1:], 0)  # 跳过背景类别

        #  应用尺寸调整

        predicted_bb = offset_inverse(anchors, offset_pred)

        #  去重处理

        keep = nms(predicted_bb, conf, nms_threshold)

        #  重组所有格子信息

        all_idx = torch.arange(anchors.shape[0], dtype=torch.long, device=device)

        combined = torch.cat([keep, all_idx])

        uniques, counts = combined.unique(return_counts=True)

        non_keep = uniques[counts == 1]  # 找出NMS未保留的格子

        # ️ 标记空格子

        class_id[non_keep] = -1  # -1表示空格子

        #  排序格子信息

        all_id_sorted = torch.cat([keep, non_keep])

        conf = conf[all_id_sorted]

        predicted_bb = predicted_bb[all_id_sorted]

        #  过滤低可信度格子

        below_min_idx = (conf < pos_threshold)

        class_id[below_min_idx] = -1  # 标记为空

        conf[below_min_idx] = 1 - conf[below_min_idx]  # 计算背景概率

        #  生成区域报告

        pred_info = torch.cat((class_id.unsqueeze(1),

                              conf.unsqueeze(1),

                              predicted_bb), dim=1)

        out.append(pred_info)

    return torch.stack(out)  #  返回最终报告
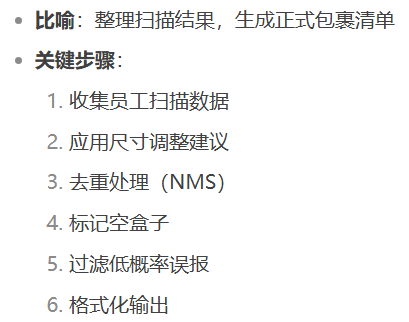
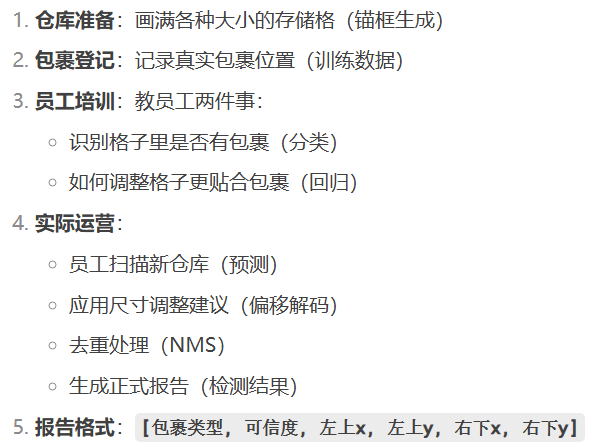
全流程总结
锚框 anchor box的更多相关文章
- 『计算机视觉』Mask-RCNN_锚框生成
Github地址:Mask_RCNN 『计算机视觉』Mask-RCNN_论文学习 『计算机视觉』Mask-RCNN_项目文档翻译 『计算机视觉』Mask-RCNN_推断网络其一:总览 『计算机视觉』M ...
- 『计算机视觉』Mask-RCNN_推断网络其三:RPN锚框处理和Proposal生成
一.RPN锚框信息生成 上文的最后,我们生成了用于计算锚框信息的特征(源代码在inference模式中不进行锚框生成,而是外部生成好feed进网络,training模式下在向前传播时直接生成锚框,不过 ...
- anchor box聚类
fast rcnn和rfcn中使用的都是默认的anchor box设置,都是9种,比例为0.5 .1. 2,大小为128.256.512.但我的数据集的gt框更小,需要找到适合我的数据集的anchor ...
- CSS 框模型( Box module )
框和布局 在 KB005: CSS 层叠 中已经介绍了 CSS 的重要之处.CSS 可以说是页面表现的基础, CSS 可以控制布局,控制元素的渲染. 布局是讲在电影画面构图中,对环境的布置.人物地位的 ...
- KB006: CSS 框模型( Box module )
框和布局 在 KB005: CSS 层叠 中已经介绍了 CSS 的重要之处.CSS 可以说是页面表现的基础, CSS 可以控制布局,控制元素的渲染. 布局是讲在电影画面构图中,对环境的布置.人物地位的 ...
- 列表框List Box
List Box/Check List Box ListBox窗口用来列出一系列的文本,每条文本占一行.创建一个列表窗口可以使用成员函数: BOOL CListBox::Create( LPCTSTR ...
- 『TensorFlow』SSD源码学习_其三:锚框生成
Fork版本项目地址:SSD 上一节中我们定义了vgg_300的网络结构,实际使用中还需要匹配SSD另一关键组件:被选取特征层的搜索网格.在项目中,vgg_300网络和网格生成都被统一进一个class ...
- MFC 下拉框Combo Box
下拉框常用的事件是Change事件.属性常用:Data(英文;分隔),Sort(是否排序) // OnInitDialog()中 m_cbx.SetCurSel();//设置默认选项 //OnBnCl ...
- [04-05]box框模型(Box Model)定义了元素框处理元素内容、内边距、边框和外边距的方式
实际占有的宽 = width + 2padding(内边距) + 2border(边框) + 2margin(外边距) 实际占有的高 = height + 2padding + 2border + 2 ...
- Javascript 实现锚点(Anchor)间平滑跳转
(function($){ $.fn.scroller = function(options){ var defaultVal = { duration: }; var obj = $.extend( ...
随机推荐
- MarchingCube算法之C#实现三维❤
首先致谢该博文,讲解的非常详细:https://blog.csdn.net/u013339596/article/details/19167907?spm=1001.2101.3001.6650.7& ...
- WPF 由TreeView想到的 DataTemplate,HierarchicalDataTemplate
DataTemplate简而言之,解决的就是后台代码中的类以怎么样的形式展现在xaml前台代码中的问题. 所以DataTemplate一般都要指定DataType,一般放在resource中,而Hie ...
- CSS 之overflow属性简结
CSS的overflow 属性用来处理一个元素的尺寸超出其容器尺寸的情况.当一个元素包含的内容超粗自身的大小时,就会发生内容溢出,这种情况,可以对内容进行"裁剪",只让一部分内容可 ...
- Solon AI 正试发布(支持 java8+,RAG,MCP)
Solon AI 正试发布了(版号,随 Solon v3.3.1).历时小半年. 1.简介 Solon AI 是一个 Java AI(智能体) 全场景应用开发框架,提供有丰富的接口能力.主要支持的的智 ...
- 构建具备推理与反思能力的高级 Prompt:LLM 智能代理设计指南
在构建强大的 AI 系统,尤其是基于大语言模型(LLM)的智能代理(Agent)时,Prompt 设计的质量决定了系统的智能程度.传统 Prompt 通常是简单的问答或填空式指令,而高级任务需要更具结 ...
- Linux ls 查看目录结构与文档信息
摘要:Linux ls命令用于列出目标目录中所有的子目录和文件,发掘并掌握ls命令及其参数设置可以驾轻就熟地管理文件,随心所欲地浏览并确定所在的位置! ls命令介绍 今天,楼兰胡杨继续跟各位猿友一 ...
- JVM内存分配:堆、栈和方法区
摘要:基本类型的变量.对象的引用和函数调用的现场等存储在栈中,通过new关键字和构造器创建的对象存储在堆中,字面量如100."hello"和常量等存储在静态区. 概述 我们首先 ...
- Kubernetes小试牛刀(安装)
1.Kubernetes简介 Kubernetes,是一个全新的基于容器技术的分布式架构领先方案,是Google严格保密十几年的秘密武器--Borg系统的一个开源版本,于2014年9月发布第一个版本, ...
- Golang协程和线程区别
一.进程.线程.协程介绍 进程:系统中所有的应用程序都是以进程(process)的方式运行,是系统进行资源分配和调度的基本单位,每个进程都有自己的独立的地址空间,使得进程之间的地址空间相互隔离. 线程 ...
- 如何在FastAPI中打造一个既安全又灵活的权限管理系统?
title: 如何在FastAPI中打造一个既安全又灵活的权限管理系统? date: 2025/06/16 08:17:05 updated: 2025/06/16 08:17:05 author: ...