VSTO开发指南(VB2013版) 第二章 Office解决方案介绍
实例2.1 通过控制台实现对Excel的自动化处理 书本第32页
注:添加两个引用:
第一个:程序集—框架—“System.Windows.Forms 4.0.0.0”
第二个:程序集—扩展—“Microsoft.Office.Interop.Excel 14.0.0.0”
程序清单2.1通过控制台程序对Excel自动化处理
Imports Excel = Microsoft.Office.Interop.Excel

Module Module1

  Private exitXL As Boolean = False

  Dim WithEvents myExcelApp As Excel.Application

  Sub Main()

    myExcelApp = New Excel.Application

    myExcelApp.Visible = True

    myExcelApp.StatusBar = "Hello World"

    myExcelApp.Workbooks.Add()

    While exitXL = False

      System.Windows.Forms.Application.DoEvents()

    End While

  End Sub

  Private Sub myExcelApp_SheetBeforeDoubleClick(ByVal sheet _

    As Object, ByVal target As Excel.Range, ByRef cancel _

    As Boolean) Handles myExcelApp.SheetBeforeDoubleClick

    exitXL = True

  End Sub

End Module
实例代码:
Imports Excel = Microsoft.Office.Interop.Excel

Module Module1

    Private exitXL As Boolean = False

    Dim WithEvents myExcelApp As Excel.Application '有这句需添加引用“Microsoft.Office.Interop.Excel 14.0.0.0”

    Sub Main()

        myExcelApp = New Excel.Application    '运行顺序——1

        myExcelApp.Visible = True             '运行顺序——2

        myExcelApp.StatusBar = "Hello World"  '运行顺序——3

        myExcelApp.Workbooks.Add()            '运行顺序——4

        While exitXL = False                  '运行顺序——5 实质就是程序运行到这里,控制台程序不运行了,控制权交给了Excel程序

            System.Windows.Forms.Application.DoEvents() '有这句需添加引用“System.Windows.Forms 4.0.0.0”

        End While

        MsgBox("通过双击单元格,控制权又由Excel转移到控制台!") '运行顺序——7

    End Sub

    Private Sub myExcelApp_SheetBeforeDoubleClick(ByVal sheet As Object, ByVal target As Excel.Range, ByRef cancel As Boolean) Handles myExcelApp.SheetBeforeDoubleClick

        exitXL = True                         '运行顺序——6 实质就是给exitXL重新赋值并传递给While条件语句,接着运行While以后的语句

    End Sub

End Module

'**************************************************************************

'*双击单元格Office控制权会转回到自动化程序事件处理中,                            *

'*若没有System.Windows.Forms.Application.DoEvents(),控制台窗口将自动关闭,    *

'*System.Windows.Forms.Application.DoEvents()方法可以使窗体处理其他事件,      *

'*所以窗体能够进行重绘。不至于出现假死现象。                                     *

'**************************************************************************
实例效果:

实例2.2 wiki文本表示形式 书本第33页
程序清单2.2 表2.1的wiki文本表示形式
||Property or Method||Name||Return Type||

||Property||Application||Application||

||Property||Autoload||Boolean||

||Property||Compiled||Boolean||

||Property||Creator||Int32||

||Method||Delete||Void||

||Property||Index||Int32||

||Property||Installed||Boolean||

||Property||Name||String||

||Property||Parent||Object||

||Property||Path||String||
实例2.3 将文本文件中的wiki形式的文本以表格的形式输出到Word中 书本37页
程序清单2.3 完整的WordWiki实现
Imports System.Collections.Generic

Imports System.Text

Imports System.IO

Imports Office = Microsoft.Office.Core

Imports Word = Microsoft.Office.Interop.Word

Module Module1

  Sub Main(ByVal args As String())

    Dim theApplication As New Word.Application

    theApplication.Visible = True

    Dim theDocument As Word.Document

    theDocument = theApplication.Documents.Add()

    Dim reader As TextReader

    reader = New System.IO.StreamReader(args())

    Dim separators() As String

    separators() = "||"

    Dim rowCount As Integer =

    Dim columnCount As Integer =

    ' Read rows and calculate number of rows and columns

    Dim rowList As New System.Collections.Generic.List(Of String)

    Dim row As String = reader.ReadLine()

    While row IsNot Nothing

      rowCount +=

      rowList.Add(row)

      ' If this is the first row,

      ' calculate the number of columns

      If rowCount =  Then

        Dim splitHeaderRow As String() = _

          row.Split(separators, StringSplitOptions.None)

        ' Ignore the first and last separator

        columnCount = splitHeaderRow.Length -

      End If

      row = reader.ReadLine()

    End While

    ' Create a table

    Dim range As Word.Range = theDocument.Range()

    Dim table As Word.Table = range.Tables.Add(range, _

      rowCount, columnCount)

    ' Populate table

    Dim columnIndex As Integer =

    Dim rowIndex As Integer =

    For Each r As String In rowList

      Dim splitRow As String() = r.Split(separators, _

        StringSplitOptions.None)

      For columnIndex =  To columnCount

        Dim cell As Word.Cell = table.Cell(rowIndex, columnIndex)

        cell.Range.Text = splitRow(columnIndex)

      Next

      rowIndex +=

    Next

    ' Format table

    table.Rows().Range.Bold =

    table.AutoFitBehavior( _

      Word.WdAutoFitBehavior.wdAutoFitContent)

    ' Wait for input from the command line before exiting

    System.Console.WriteLine("Table complete.")

    System.Console.ReadLine()

    ' Quit without saving changes

    theApplication.Quit(False)

  End Sub

End Module
实例代码:
Imports System.Collections.Generic '默认

Imports System.Text  '默认

Imports System.IO '默认

Imports Office = Microsoft.Office.Core '添加引用“Microsoft Office 14.0 Object Library 2.5

Imports Word = Microsoft.Office.Interop.Word '添加引用"Microsoft.Office.Interop.word 14.0.0.0"

Module Module1

    Sub Main(ByVal args As String())

        Dim theApplication As New Word.Application '定义word程序

        theApplication.Visible = True '使word程序可视

        Dim theDocument As Word.Document '定义word文档

        theDocument = theApplication.Documents.Add() '为程序添加word文档

        Dim reader As TextReader  '定义Txt文本读取器

        reader = New System.IO.StreamReader(My.Application.Info.DirectoryPath & "/test.txt") '实例化读取文本接口,My.Application.Info.DirectoryPath指的是本程序的\bin\Debug目录

        Dim separators() As String  '定义分隔符字符串

        separators() = "||"  '为分隔符变量赋值

        Dim rowCount As Integer =      '定义行数

        Dim columnCount As Integer =   '定义列数

        ' 读取行并计算行数和列数

        Dim rowList As New System.Collections.Generic.List(Of String) '定义字符串型的列表集对象

        Dim row As String = reader.ReadLine() '读取文本存储器中的一行

        While row IsNot Nothing  '读取行没有到结尾

            rowCount +=         '读取下一行

            rowList.Add(row)    '将所读取的一行文本存储在列表集对象中

            ' 如果这是第一行,就计算列数

            If rowCount =  Then

                Dim splitHeaderRow As String() = row.Split(separators, StringSplitOptions.None) 'StringSplitOptions.None,就是分开的数组元素包括空元素

                columnCount = splitHeaderRow.Length -    ' 忽略第一和最后一个分隔符,由于第一个和最后一个没有起到分隔作用,所以5个元素减去2个分隔符元素就是所需的列数3,

            End If

            row = reader.ReadLine()'自带逐行读取的功能

        End While

        ' 在word中创建一个表

        Dim range As Word.Range = theDocument.Range() '定义文档单元格

        Dim table As Word.Table = range.Tables.Add(range, rowCount, columnCount) '创建一个rowCount行columnCount列的表格

        ' 操作word中所创建的表

        Dim columnIndex As Integer =

        Dim rowIndex As Integer =

        For Each r As String In rowList

            Dim splitRow As String() = r.Split(separators, StringSplitOptions.None)  'StringSplitOptions.None,就是分开的数组元素包括空元素

            For columnIndex =  To columnCount

                Dim cell As Word.Cell = table.Cell(rowIndex, columnIndex) '\bin\Debug目录中test.txt文件中的结尾不能有多余的空行,不然会提示超出索引范围而出现错误

                cell.Range.Text = splitRow(columnIndex)

            Next

            rowIndex +=

        Next

        ' 格式化表格

        table.Rows().Range.Bold =

        table.AutoFitBehavior(Word.WdAutoFitBehavior.wdAutoFitContent) 'AutoFitBehavior()方法的作用就是以某种方法调整表格,ord.WdAutoFitBehavior.wdAutoFitContent表示表格根据内容来调节

        ' 退出前等待命令输入

        System.Console.WriteLine("Table complete.")

        System.Console.ReadLine()

        ' 没有保存更改而退出

        theApplication.Quit(False)

    End Sub

End Module
test.txt文档中的内容
||Property or Method||Name||Return Type|| |
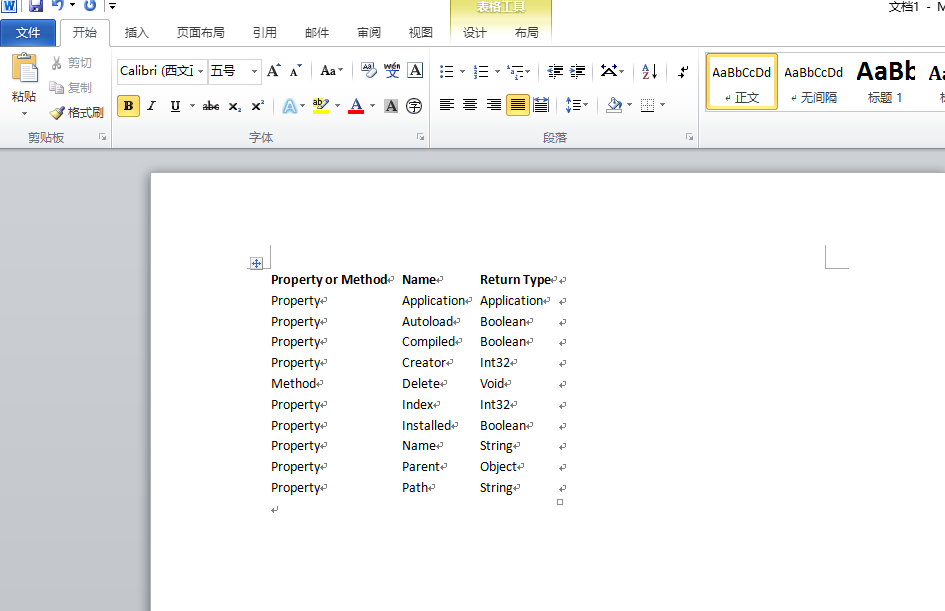
实例效果:
续:对实例2.3逐步详细解读
首先,总的功能就是在读取文本文档中的内容并在新创建word中显示出来
Imports Word = Microsoft.Office.Interop.Word '添加引用"Microsoft.Office.Interop.word 14.0.0.0"

Module Module1

    Sub Main(ByVal args As String())

        Dim App As Word.Application = New Word.Application '创建Word实例程序    *

        Dim myWord As Word.Document = App.Documents.Add()  '创建word文档       *

        Dim range As Word.Range = myWord.Range() '创建一个存放内容的区域         *

        App.Visible = True '显示Word程序                                       *

        Dim reader As New System.IO.StreamReader("D:/test.txt") '读取文本文档,注:文本文档不能为编码文档,不然读过来是乱码!!

        Dim str As String = reader.ReadLine() '读取文本文档中的一行,若要读取全部reader.ReadToEnd(),从当前位置读到结尾,

        '若真正将每行读取,最好使用System.Collections.Generic集合的概念将每行读取到集合中,用for each遍历即可

        range.Text = str   '将文本文档中的内容赋值给Word中

    End Sub

End Module
续2:将文本文档中的内容读取,存入集合中
Imports Word = Microsoft.Office.Interop.Word '添加引用"Microsoft.Office.Interop.word 14.0.0.0"

Module Module1

    Sub Main(ByVal args As String())

        Dim App As Word.Application = New Word.Application '创建Word实例程序  *

        Dim myWord As Word.Document = App.Documents.Add()  '创建word文档      *

        App.Visible = True '显示Word程序                                      *

        Dim reader As New System.IO.StreamReader("D:/test.txt") '读取文本文档,注:文本文档不能为编码文档,不然读过来是乱码!!

        Dim rowList As New System.Collections.Generic.List(Of String) '定义字符串型的列表集对象

        Dim row As String = reader.ReadLine() '读取文本存储器中的一行

        While row IsNot Nothing  '读取行没有到结尾

            rowList.Add(row)    '将所读取的一行文本存储在列表集对象中

            row = reader.ReadLine() '自带逐行读取的功能

        End While

        Dim range As Word.Range = myWord.Range() '定义文档单元格

        Dim table As Word.Table = range.Tables.Add(range, , ) '创建一个11行1列的表格,硬编码更易理解

        Dim rowIndex As Integer =

        For Each r As String In rowList

            Dim cell As Word.Cell = table.Cell(rowIndex, ) '目录中test.txt文件中的结尾不能有多余的空行,不然会提示超出索引范围而出现错误

            cell.Range.Text = r

            rowIndex +=

        Next

    End Sub

End Module
续3:将内容倒着读取出来
Imports Word = Microsoft.Office.Interop.Word '添加引用"Microsoft.Office.Interop.word 14.0.0.0"

Module Module1

    Sub Main(ByVal args As String())

        Dim App As Word.Application = New Word.Application '创建Word实例程序  *

        Dim myWord As Word.Document = App.Documents.Add()  '创建word文档      *

        App.Visible = True '显示Word程序                                      *

        Dim reader As New System.IO.StreamReader("D:/test.txt") '读取文本文档,注:文本文档不能为编码文档,不然读过来是乱码!!

        Dim rowList As New System.Collections.Generic.List(Of String) '定义字符串型的列表集对象

        Dim row As String = reader.ReadLine() '读取文本存储器中的一行

        While row IsNot Nothing  '读取行没有到结尾

            rowList.Add(row)    '将所读取的一行文本存储在列表集对象中

            row = reader.ReadLine() '自带逐行读取的功能

        End While

        Dim range As Word.Range = myWord.Range() '定义文档单元格

        Dim rowIndex As Integer =

        For Each r As String In rowList

            range = myWord.Range(, )  'range方法的第一个参数是开头,第二个参数是结尾,这里指第几段,插入值,插入的值是倒着排列的

            range.Text = r & Chr() ' 注:chr(10) & chr(13)中,chr(10) 换行符,而 chr(13)回车,那么chr(10) & chr(13)就是既换行了又回车了

            rowIndex = rowIndex +

        Next

    End Sub
续4:myWord.Paragraphs.Add().Range()
Imports Word = Microsoft.Office.Interop.Word '添加引用"Microsoft.Office.Interop.word 14.0.0.0"

Module Module1

    Sub Main(ByVal args As String())

        Dim App As Word.Application = New Word.Application '创建Word实例程序  *

        Dim myWord As Word.Document = App.Documents.Add()  '创建word文档      *

        App.Visible = True '显示Word程序                                      *

        Dim reader As New System.IO.StreamReader("D:/test.txt") '读取文本文档,注:文本文档不能为编码文档,不然读过来是乱码!!

        Dim rowList As New System.Collections.Generic.List(Of String) '定义字符串型的列表集对象

        Dim row As String = reader.ReadLine() '读取文本存储器中的一行

        While row IsNot Nothing  '读取行没有到结尾

            rowList.Add(row)    '将所读取的一行文本存储在列表集对象中

            row = reader.ReadLine() '自带逐行读取的功能

        End While

        Dim range As Word.Range = myWord.Paragraphs.Add().Range() '定义文档单元格

        Dim rowIndex As Integer =

        For Each r As String In rowList

            range = myWord.Paragraphs(rowIndex).Range()

            range.Text = r & Chr() ' 注:chr(10) & chr(13)中,chr(10) 换行符,而 chr(13)回车,那么chr(10) & chr(13)就是既换行了又回车了

            rowIndex = rowIndex +

        Next

    End Sub
实例2.4 Outlook外接程序 书本第40页
程序清单2.4 Outlook外接程序项目中ThisApplication类的初始化代码
Public Class ThisApplication

  Private Sub ThisApplication_Startup(ByVal sender As Object, _

    ByVal e As System.EventArgs) Handles Me.Startup

  End Sub

  Private Sub ThisApplication_Shutdown(ByVal sender As Object, _

    ByVal e As System.EventArgs) Handles Me.Shutdown

  End Sub

End Class
实例代码:
Public Class ThisAddIn

    Private Sub ThisAddIn_Startup() Handles Me.Startup

    End Sub

    Private Sub ThisAddIn_Shutdown() Handles Me.Shutdown

    End Sub

End Class
实例2.5 VSTO Outlook 外接程序 书本41页
注:添加引用”System.Windows.Forms”
程序清单2.5 VSTO Outlook 外接程序,用于处理Item事件和检查收件人数是否超过25
Imports Outlook = Microsoft.Office.Interop.Outlook

Public Class ThisApplication

  Private Sub ThisApplication_ItemSend(ByVal item As Object, _

    ByRef cancel As Boolean) Handles Me.ItemSend

    Dim myItem As Outlook.MailItem

    If TypeOf item Is Outlook.MailItem Then

      myItem = CType(item, Outlook.MailItem)

      For Each recip As Outlook.Recipient In myItem.Recipients

        If recip.AddressEntry.Members.Count >  Then

          ' Ask the user if she really wants to send this e-mail

          Dim message As String

          message = "Send mail to {0} with {1} people?"

          Dim caption As String = "More than 25 recipients"

          Dim buttons As MessageBoxButtons

          buttons = MessageBoxButtons.YesNo

          Dim result As DialogResult

          result = MessageBox.Show(String.Format(message, _

            recip.AddressEntry.Name, _

            recip.AddressEntry.Members.Count), _

            caption, buttons)

          If result = DialogResult.No Then

            cancel = True

            Exit For

          End If

        End If

      Next

    End If

  End Sub

End Class
实例2.6 VSTO Excel工作簿自定义机制 书本42页
程序清单 2.6 VSTO Excel工作簿自定义机制
Imports Excel = Microsoft.Office.Interop.Excel

Imports Office = Microsoft.Office.Core

Public Class Sheet1

  Private Sub Sheet1_Startup(ByVal sender As Object, _

      ByVal e As System.EventArgs) Handles Me.Startup

    ' Initial entry point.

    ' This code gets run first when the code behind is created

    ' The context is implicit in the Sheet1 class

    MsgBox("Code behind the document running.")

    MsgBox(String.Format("{0} is the sheet name.", Me.Name))

  End Sub

End Class
实例代码:
Imports Excel = Microsoft.Office.Interop.Excel

Imports Office = Microsoft.Office.Core

Public Class Sheet1

    Private Sub Sheet1_Startup(ByVal sender As Object, _

        ByVal e As System.EventArgs) Handles Me.Startup

        ' 初始化入口点

        ' 创建文档代码时将首次执行此代码

        ' 这里的上下环境是sheet1

        MsgBox("Code behind the document running.")

        MsgBox(String.Format("{0} is the sheet name.", Me.Name))

    End Sub

End Class
实例效果:


实例2.7 VSTO自定义机制:在文档操作任务面板中添加按钮控件以及将ListObject控件与DataTable进行数据绑定 书本46页
程序清单 2.7 VSTO自定义机制:在文档操作任务面板中添加按钮控件以及将ListObject控件与DataTable进行数据绑定
Imports Excel = Microsoft.Office.Interop.Excel

Imports Office = Microsoft.Office.Core

Public Class Sheet1

  Private WithEvents myButton As New Button

  Private table As DataTable

  Private Sub Sheet1_Startup(ByVal sender As Object, _

      ByVal e As System.EventArgs) Handles Me.Startup

    myButton.Text = "Databind!"

    Globals.ThisWorkbook.ActionsPane.Controls.Add(myButton)

  End Sub

  Private Sub myButton_Click(ByVal sender As Object, _

    ByVal e As EventArgs) Handles myButton.Click

    List1.DataSource = Nothing

    table = New DataTable

    Dim r As New Random

    For i As Integer =  To

      table.Columns.Add("Col" & i.ToString())

    Next

    For j As Integer =  To

      table.Rows.Add(r.NextDouble(), r.NextDouble(), _

        r.NextDouble(), r.NextDouble())

    Next

    List1.DataSource = table

  End Sub

End Class
实例代码:
Imports Excel = Microsoft.Office.Interop.Excel

Imports Office = Microsoft.Office.Core

Public Class Sheet1

    Private WithEvents myButton As New Button 'WithEvents的意思是告知VB编译器这是一个可以触发事件对象

    Private table As DataTable   'DataTable是Excel对象的

    Private Sub Sheet1_Startup(ByVal sender As Object, ByVal e As System.EventArgs) Handles Me.Startup

        myButton.Text = "Databind!"

        Globals.ThisWorkbook.ActionsPane.Controls.Add(myButton)'Actionspane.Controls表示右侧的文档操作面板

    End Sub

    Private Sub myButton_Click(ByVal sender As Object, ByVal e As EventArgs) Handles myButton.Click

        List1.DataSource = Nothing  '设置数据源为空

        table = New DataTable   '定义数据表用关键字new,实质就是一个实例对象

        Dim r As New Random   '定义随机数用new关键字,实质就是一实例对象

        For i As Integer =  To

            table.Columns.Add("Col" & i.ToString())

        Next

        For j As Integer =  To

            table.Rows.Add(r.NextDouble(), r.NextDouble(), r.NextDouble(), r.NextDouble())'NextDouble大于或等于 0且小于 1 的随机浮点数

        Next

        List1.DataSource = table

    End Sub

End Class
代码另一种写法:
Imports Excel = Microsoft.Office.Interop.Excel

Imports Office = Microsoft.Office.Core

Public Class Sheet1

    Private WithEvents myButton As New Button

    Private table As DataTable = New DataTable

    Dim r As New Random

    Private Sub Sheet1_Startup(ByVal sender As Object, ByVal e As System.EventArgs) Handles Me.Startup

        myButton.Text = "Databind!"

        Globals.ThisWorkbook.ActionsPane.Controls.Add(myButton)

    End Sub

    Private Sub myButton_Click(ByVal sender As Object, ByVal e As EventArgs) Handles myButton.Click

        List1.DataSource = Nothing

        table.Columns.Add() : table.Columns.Add() : table.Columns.Add() : table.Columns.Add() '添加4列,冒号接续

        For j As Integer =  To

            table.Rows.Add(r.NextDouble(), r.NextDouble(), r.NextDouble(), r.NextDouble()) '生成19行4列的数据

        Next

        List1.DataSource = table '将table中的值作为数据源
Dim str As String
str = table.Rows(2).Item(1).ToString() 'Rows(2).Item(1)表示第3行第2列,索引从0开始
MsgBox(str)
    End Sub

End Class
实例效果:

VSTO开发指南(VB2013版) 第二章 Office解决方案介绍的更多相关文章
- VSTO开发指南(VB2013版) 第一章 Office对象模型
完美地将visual basic和office 办公软件结合起来.来自微软公司VSTO小组的权威专家所编著. 全书共712页,内容极其全面而深入,猛一看,厚地犹如庞然大物.看完离大神就不远了哦< ...
- 《NodeJs开发指南》第五章微博开发实例的中文乱码问题
在<NodeJs开发指南>第五章,按照书中的要求写好微博实例后,运行代码,发现中文显示出现乱码,原因是:views文件夹下的ejs文件的编码格式不是utf-8. 解决方法:以记事本方式打开 ...
- 《Getting Started with WebRTC》第二章 WebRTC技术介绍
<Getting Started with WebRTC>第二章 WebRTC技术介绍 本章作WebRTC的技术介绍,主要讲下面的概念: . 怎样建立P2P的通信 . 有效的信 ...
- 《NodeJS开发指南》第五章微博实例开发总结
所有文章搬运自我的个人主页:sheilasun.me <NodeJS开发指南>这本书用来NodeJS入门真是太好了,而且书的附录部分还讲到了闭包.this等JavaScript常用特性.第 ...
- Pro ASP.NET Core MVC 第6版 第二章(后半章)
增加动态输出 整个web应用平台的关注点在于构建并显示动态输出内容.在MVC里,控制器负责构建一些数据并将其传给视图.视图负责渲染成HTML. 从控制器向视图传递数据的一种方式是使用ViewBag 对 ...
- Pro ASP.NET Core MVC 第6版 第二章(前半章)
目录 第二章 第一个MVC 应用程序 学习一个软件开发框架的最好方法是跳进他的内部并使用它.在本章,你将用ASP.NET Core MVC创建一个简单的数据登录应用.我将它一步一步地展示,以便你能看清 ...
- Spring 3.x 实践 第一个例子(Spring 3.x 企业应用开发实战读书笔记第二章)
前言:工作之后一直在搞android,现在需要更多和后台的人员交涉,技术栈不一样,难免鸡同鸭讲,所以稍稍学习下. 这个例子取自于<Spring 3.x 企业应用开发实战>一书中的第二章,I ...
- 《JS权威指南学习总结--第二章词法结构》
第二章词法结构 内容要点: 一.注释 1. //表示单行注释 2. /*这里是一段注释*/ 3.一般编辑器里加注释是:选中要加注释的语句,按 ctrl+/ 二.直接量 所谓直接量,就是程序中直接使用的 ...
- Python核心编程第三版第二章学习笔记
第二章 网络编程 1.学习笔记 2.课后习题 答案是按照自己理解和查阅资料来的,不保证正确性.如由错误欢迎指出,谢谢 1. 套接字:A network socket is an endpoint of ...
随机推荐
- 影响K8S Pod分配和调度策略的两大关键特性
在Kubernetes中有一个最复杂的调度器可以处理pod的分配策略.基于在pod规范中所提及的资源需求,Kubernetes调度器会自动选择最合适的节点来运行pod. 但在许多实际场景下,我们必须干 ...
- Win10如何关闭最近使用文件夹
如果默认开启了最近使用文件夹功能的话,最近浏览的文件就会被记录下来.所以看完各种教学资料后,并不是关掉或者重启别人就不知道你看了什么. 方法一: Win10怎么关闭最近使用文件夹 如何清理使用痕迹 从 ...
- 提高Dom 访问效率
在浏览器中对于Dom的操作和普通的脚本的操作处于两个不同的dll中,两个dll的交互是比较耗时的,优化对Dom的操作可以提高脚本的执行速度. JS访问DOM是很慢的,尽量不要用JS来设置页面 布局 有 ...
- ASP.Net Core 发布到IIS Http Error 502.5 官方解决办法
Http Error 502.5 - Process Failure 在IIS上发布.NET Core程序出现这个错误.网上搜索到的办法为什么总行不通呢? 有可能年代久远,现在的环境与当年不同,所以解 ...
- 分享一下我在mysql5.6+mysql8数据库安装过程中的一些坑!
Mysql5.6安装 下载好安装包后,在bin目录下用cmd打开,输入mysqld install [服务名]新建个服务 在windows+r输入services.msc即可查看服务 怎样使用mysq ...
- Hexo+coding实现自动化部署
前言 昨天写了一篇利于云环境写博客,但是让群里大佬们看了下.评论道:"写的不错,但还是觉得这个云环境太繁琐了,没有CI/CD自动化部署方便".于是我便百度查了下,网上文章大部分是通 ...
- VC简单操作mysql
#include <iostream> #include <winsock.h> #include <mysql.h> #pragma comment(lib, & ...
- ncbi-blast 本地安装
详见:http://blog.shenwei.me/local-blast-installation/ Linux系统中NCBI BLAST+本地化教程 本文面向初学者(最好还是懂得基本的linux使 ...
- 一台电脑上配置多个git的ssh key
前几天公司的代码库全部迁移到了阿里云上,在配置git的ssh key的时候遇到了一个问题,那就是自己的密钥在添加时提示已经存在,原来是自己的个人账号上已经添加过这个密钥了,公司分配的账号就不能再添加这 ...
- SSH: ssh隧道
简介 Secure Shell(安全外壳协议,简称SSH)是一种加密的网络传输协议,可在不安全的网络中为网络服务提供安全的传输环境.SSH通过在网络中创建安全隧道来实现SSH客户端与服务器之间的连接. ...