Spring通过注解方式实现定时任务
XML配置:
 <?xml version="1.0" encoding="UTF-8"?>

 <beans xmlns="http://www.springframework.org/schema/beans"

     xmlns:xsi="http://www.w3.org/2001/XMLSchema-instance"

      xmlns:context="http://www.springframework.org/schema/context"

     xmlns:task="http://www.springframework.org/schema/task"

     xsi:schemaLocation="

         http://www.springframework.org/schema/beans

         http://www.springframework.org/schema/beans/spring-beans-3.2.xsd

         http://www.springframework.org/schema/context

         http://www.springframework.org/schema/context/spring-context-3.2.xsd

         http://www.springframework.org/schema/task

         http://www.springframework.org/schema/task/spring-task-3.2.xsd ">

     <!-- 扫描包基础目录 -->

     <context:component-scan base-package="com.wisezone" />

     <!-- 识别@Scheduled注解 -->

     <task:annotation-driven/>

 </beans>
java代码:
 package com.wisezone.service;

 import java.text.SimpleDateFormat;

 import java.util.Date;

 import org.springframework.scheduling.annotation.Scheduled;

 import org.springframework.stereotype.Service;

 @Service

 public class JobService {

     @Scheduled(cron="0/2 * * * * ?")

     public void job(){

         System.out.println("定时输出任务:"+new SimpleDateFormat("yyyy-MM-dd hh:mm:ss").format(new Date()));

     }

 }
测试类:
 package com.wisezone.test;

 import org.springframework.context.ApplicationContext;

 import org.springframework.context.support.ClassPathXmlApplicationContext;

 public class Test

 {

     public static void main(String[] args)

     {

         ApplicationContext app = new ClassPathXmlApplicationContext("beans.xml");

     }

 }
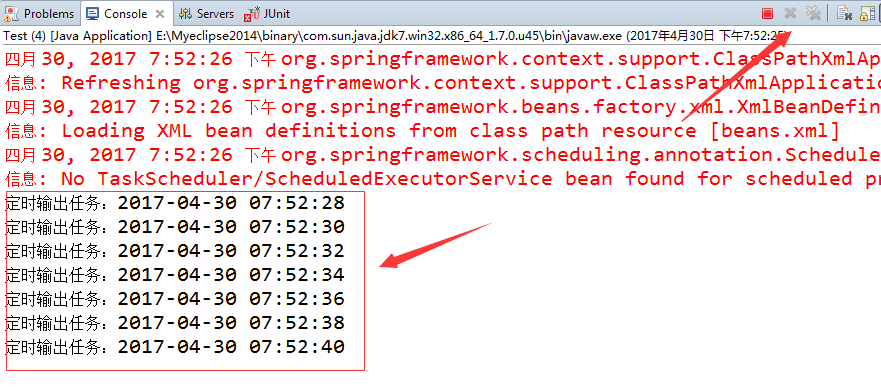
结果:
Spring通过注解方式实现定时任务的更多相关文章
- mybatis源码学习--spring+mybatis注解方式为什么mybatis的dao接口不需要实现类
相信大家在刚开始学习mybatis注解方式,或者spring+mybatis注解方式的时候,一定会有一个疑问,为什么mybatis的dao接口只需要一个接口,不需要实现类,就可以正常使用,笔者最开始的 ...
- (转)使用Spring的注解方式实现AOP的细节
http://blog.csdn.net/yerenyuan_pku/article/details/52879669 前面我们已经入门使用Spring的注解方式实现AOP了,现在我们再来学习使用Sp ...
- (转)使用Spring的注解方式实现AOP入门
http://blog.csdn.net/yerenyuan_pku/article/details/52865330 首先在Eclipse中新建一个普通的Java Project,名称为spring ...
- spring boot注解之@Scheduled定时任务实现
java实现定时任务一般使用timer,或者使用quartz组件.现在在spring boot提供了更加方便的实现方式. spring boot已经集成了定时任务.使用@Secheduled注解. @ ...
- spring aop注解方式与xml方式配置
注解方式 applicationContext.xml 加入下面配置 <!--Spring Aop 启用自动代理注解 --> <aop:aspectj-autoproxy proxy ...
- Spring的注解方式实现AOP
Spring对AOP的实现提供了很好的支持.下面我们就使用Spring的注解来完成AOP做一个例子. 首先,为了使用Spring的AOP注解功能,必须导入如下几个包.aspectjrt.jar,asp ...
- 使用Spring的注解方式实现AOP
Spring对AOP的实现提供了很好的支持.下面我们就使用Spring的注解来完成AOP做一个例子. 首先,为了使用Spring的AOP注解功能,必须导入如下几个包.aspectjrt.jar,asp ...
- Spring的注解方式
在Java代码中可以使用@Resource或者@Autowired注解方式来经行注入.虽然@Resource和@Autowired都可以来完成注入依赖,但它们之间是有区别的. a.@Resource默 ...
- Spring 使用注解方式进行事务管理
转载:http://www.cnblogs.com/younggun/archive/2013/07/16/3193800.html 使用步骤: 步骤一.在spring配置文件中引入<tx:&g ...
随机推荐
- MSDN使用
比如我想查一下fopen这个函数怎么用,在索引里搜索一下fopen,很容易找到了. 但是如果我想横向扩展一下,查看一些与fopen相关的函数,应该怎么找呢? 很简单,点击定位: 你就能把fopen定位 ...
- ag-grid
使用: import { AgGridVue } from "ag-grid-vue"; <ag-grid-vue style="width:100%;height ...
- 【读书笔记】《Java Web整合开发实践》第3章 JSP
1. JSP:Java Server Pages 2. JSP注释:<%--注释内容--%> 3. page指令(页面指令):定义JSP页面的全局属性. <%@ page langu ...
- 【Flask】Sqlalchemy 外键
### 外键:使用SQLAlchemy创建外键非常简单.在从表中增加一个字段,指定这个字段外键的是哪个表的哪个字段就可以了.从表中外键的字段,必须和父表的主键字段类型保持一致.示例代码如下: from ...
- 查看oracle当前连接数和进程数
查询数据库当前进程的连接数: select count(*) from v$process; 查看数据库当前会话的连接数: select count(*) from v$session; 查看数据库的 ...
- 跨平台移动开发_Windows Phone 8 使用 PhoneGap 方法
第一步,下载Windows Phone SDK 8.0 http://www.microsoft.com/zh-cn/download/details.aspx?id=35471 离线下载地址(推荐使 ...
- Linux下的文件查找命令——find
Linux下几个常见的文件查找命令: which 查看可执行文件的位置 whereis 寻找特定文件,查看文件的位置 locate 配合数据库查看文件位置 find ...
- seajs 入门
最近想搞搞JS模块化, 读到了园子里的一篇好文: http://www.cnblogs.com/lvdabao/p/js-modules-develop.html 看里面讲seajs不错, 于是想学 ...
- POJ 1144 无向图求割点
学长写的: #include<cstdio>#include<cstdlib>#include<cmath>#include<iostream>#in ...
- StringTemplateLoader的用法
作为一个模板框架,freemarker的功能还是很强大的.在模板处理方面,freemarker有多种形式,最常见的方式是将模板文件放在一个统一的文件夹下面,如下形式:Configuration cfg ...