OpenResty + ModSecurity + OWASP CRS
本篇将介绍如何使用OpenResty和ModSecurity 来构建自己的WAF,安装过程整体与Nginx是类似的,但也有些区别,在文中会特别指出,本篇算是用openresty对前面两篇nginx和crs的集中介绍。
Preface
版本信息
- CentOS Linux release 7.6.1810 (Core)
- nginx version: openresty/1.13.6.1
- ModSecurity 3.0
安装依赖
# yum install epel-release -y

# 安装modsecurity依赖

# yum install gcc-c++ flex bison yajl yajl-devel curl-devel curl GeoIP-devel doxygen zlib-devel pcre pcre-devel libxml2 libxml2-devel autoconf automake lmdb-devel ssdeep-devel ssdeep-libs lua-devel libmaxminddb-devel git apt-utils autoconf automake build-essential git libcurl4-openssl-dev libgeoip-dev liblmdb-dev ibpcre++-dev libtool libxml2-dev libyajl-dev pkgconf wget zlib1g-dev -y

# 安装nginx/openresty依赖
# yum install gcc pcre pcre-devel zlib zlib-devel openssl openssl-devel -y
下载
# mkdir /opt/waf          #创建一个专属目录

# cd /opt/waf

# git clone --depth  -b v3/master --single-branch https://github.com/SpiderLabs/ModSecurity      # 下载ModSecurity

# wget https://openresty.org/download/openresty-1.13.6.1.tar.gz                        # 下载openresty

# git clone --depth  https://github.com/SpiderLabs/ModSecurity-nginx.git                  # 下载ModSecurity-nginx连接器
# pwd

/opt/waf

# ls

ModSecurity  ModSecurity-nginx  openresty-1.13.6.1.tar.gz
编译ModSecurity
# cd /opt/waf/

# cd ModSecurity/        # 切换到ModSecurity目录

# git submodule init      # 初始化

# git submodule update    # 更新

# ./build.sh

# ./configure

# make

# make install
【注】在执行build.sh会出现如下错误,可忽略。
fatal: No names found, cannot describe anything
编译modsecurity_module
# cd /opt/waf/

# tar xvf openresty-1.13.6.1.tar.gz

# ls

ModSecurity  ModSecurity-nginx  openresty-1.13.6.1  openresty-1.13.6.1.tar.gz
# cd openresty-1.13.6.1/

# ./configure --with-compat --add-dynamic-module=/opt/waf/ModSecurity-nginx    # 需用绝对路径,相对路径会出问题

# gmake            # 不能使用make modules命令

# gmake install
... 上一步的输出

cp objs/ngx_http_modsecurity_module.so '/usr/local/openresty/nginx/modules/ngx_http_modsecurity_module.so'

gmake[]: Leaving directory `/opt/waf/openresty-1.13.6.1/build/nginx-1.13.'

gmake[]: Leaving directory `/opt/waf/openresty-1.13.6.1/build/nginx-1.13.'

mkdir -p /usr/local/openresty/site/lualib /usr/local/openresty/site/pod /usr/local/openresty/site/manifest

ln -sf /usr/local/openresty/nginx/sbin/nginx /usr/local/openresty/bin/openresty
openresty默认安装到/usr/local/openresty,最终的是ngx_http_modsecurity_module.so库文件ok。
配置
基本测试
为了便于后续操作,创建一个openresty的符号链接。
# ln -s /usr/local/openresty/bin/openresty /usr/bin/openresty

# openresty -v

nginx version: openresty/1.13.6.1
# cd /usr/local/openresty/nginx/conf

# head - nginx.conf

load_module /usr/local/openresty/nginx/modules/ngx_http_modsecurity_module.so;    # 首行加入
# openresty             # 启动

# openresty -s reload       # 重载配置(如果已启动则重载配置即可)

# openresty -t           # 测试ok

nginx: the configuration file /usr/local/openresty/nginx/conf/nginx.conf syntax is ok

nginx: configuration file /usr/local/openresty/nginx/conf/nginx.conf test is successful
启用WAF
# cd /usr/local/openresty/nginx

# ls

client_body_temp  conf  fastcgi_temp  html  logs  modules  proxy_temp  sbin  scgi_temp  uwsgi_temp

# mkdir modsec      # 创建一个专属modsecurity的规则文件夹

# cd modsec/

# sudo wget https://raw.githubusercontent.com/SpiderLabs/ModSecurity/v3/master/modsecurity.conf-recommended

# mv modsecurity.conf-recommended modsecurity.conf
修改modsecurity.conf配置文件
# vim  modsecurity.conf

# -- Rule engine initialization ----------------------------------------------
...

SecRuleEngine On    <== 设置为On
拷贝mapping文件。
# cp /opt/waf/ModSecurity/unicode.mapping .

# ls

main.conf  modsecurity.conf  unicode.mapping
创建一个主规则文件main.conf,内容如下。
# cat /etc/nginx/modsec/main.conf

# Include the recommended configuration

Include /usr/local/openresty/nginx/modsec/modsecurity.conf

# A test rule

SecRule ARGS:testparam "@contains test" "id:1234,deny,log,status:403"
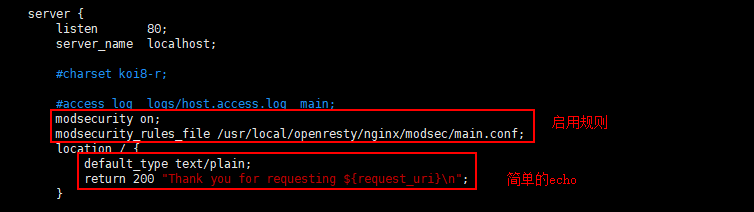
修改nginx配置文件,简要图示如下:
...

server {

        listen       ;

        server_name  localhost;

        #charset koi8-r;

        #access_log  logs/host.access.log  main;

        modsecurity on;

        modsecurity_rules_file /usr/local/openresty/nginx/modsec/main.conf;

        location / {

            default_type text/plain;

            return  "Thank you for requesting ${request_uri}\n";

        }

...
- modsecurity on:启用Nginx WAF;
- modsecurity_rules_file:指定规则文件路径。
测试WAF
# curl localhost

Thank you for requesting /

[root@localhost conf]# curl localhost/foo?testparam=thisisatestofmodsecurity    # 携带恶意参数test

<html>

<head><title> Forbidden</title></head>

<body bgcolor="white">

<center><h1> Forbidden</h1></center>        <<= 禁止访问

<hr><center>openresty/1.13.6.1</center>

</body>

</html>
可以看到参数testparam中带有test关键字会被拦截。
CRS
OpenResrty 配置文件nginx.conf请参考:https://www.cnblogs.com/Hi-blog/p/ModSecurity.html#autoid-3-4-0
CRS请参考:OWASP ModSecurity Core Rule Set (CRS)的基本使用
OpenResty + ModSecurity + OWASP CRS的更多相关文章
- 网站waf检测
WAFW00F WAFW00F识别和指纹Web应用防火墙(WAF)产品. 其工作原理是首先通过发送一个正常http请求,然后观察其返回有没有一些特征字符,若没有在通过发送一个恶意的请求触发waf拦截来 ...
- kali linux之防火墙识别
通过检查回包,可能识别端口是否经过防火墙过滤,设备多种多样,结果存在一定的误差 Send Response Type SYN NO Filtered(先发送syn 如果不给回复 防火墙可 ...
- 针对Web的信息搜集
信息收集(Information Gathering),信息收集是指通过各种方式获取所需要的信息,在整个渗透测试环节中,信息搜集是整个渗透过程中最为重要的一环,信息搜集可占据整个渗透测试80%左右的工 ...
- OWASP ModSecurity Core Rule Set (CRS)的基本使用
Preface 前述文章开源WAF工具ModSecurity,介绍了ModSecurity作为Nginx的动态加载模块的基本安装和使用. 本篇简单介绍ModSecurity CRS规则集的使用. # ...
- ModSecurity:一款优秀的开源WAF
一.ModSecurity3.0介绍 ModSecurity是一个开源的跨平台Web应用程序防火墙(WAF)引擎,用于Apache,IIS和Nginx,由Trustwave的SpiderLabs开发. ...
- Azure WAF防火墙工作原理分析和配置向导
Azure WAF工作原理分析和配置向导 本文博客地址为:http://www.cnblogs.com/taosha/p/6716434.html ,转载请保留出处,多谢! 本地数据中心往云端迁移的的 ...
- [security] security engine things
1. luarock luarock 之于 lua,就好比 pip 之于 python https://luarocks.org/ 2. lua的库 [root@base package]# ls ...
- modsecurity3.0 nginx 安装
备注: 使用的是modsecurity 3.0 的版本,也是nginx 官方推荐使用的,同时使用的是nginx 的dynamic module 1. 环境准备 https://github.com/S ...
- Azure上通过haproxy实现APP Gateway或WAF的http跳转https
Azure上的APP Gateway是七层负载均衡服务,WAF是APP Gateway服务的扩展.在实现七层负载均衡的同时,增加了WAF的功能,可以对后台的HTTP服务进行保护. Azure WAF采 ...
随机推荐
- python logging模块小记
1.简单的将日志打印到屏幕 import logging logging.debug('This is debug message') logging.info('This is info messa ...
- c语言I博客专业04
问题 答案 这个作业属于那个课程 C语言程序设计II 这个作业要求在哪里 https://edu.cnblogs.com/campus/zswxy/CST2019-2/homework/8655 我在 ...
- 洛谷P2085——最小函数值
题目描述 有n个函数,分别为\(F_1,F_2,...,F_n\).定义\(F_i(x)=A_i*x^2+B_i*x+C_i (x∈N*)\).给定这些\(A_i.B_i和C_i\),请求出所有函数的 ...
- 2019-2020-3 20199317《Linux内核原理与分析》第三周作业
第2章 操作系统是如何工作的 1 计算机的三大法宝 存储程序计算机:冯诺依曼结构 函数调用堆栈机制:记录调用的路径和参数的空间 中断机制:由CPU和内核代码共同实现了保存现场和恢复现场, ...
- F#周报2019年第49期
新闻 宣告.NET Core 3.1 新书:Kevin Avignon的F#提升效率 .NET Core 2.2将在2019年12月23日迎来终结 Visual Studio 16.5预览版1中升级了 ...
- MongoDB 谨防索引seek的效率问题【华为云技术分享】
目录 背景 初步分析 索引seeks的原因 优化思路 小结 声明:本文同步发表于 MongoDB 中文社区,传送门:http://www.mongoing.com/archives/27310 背景 ...
- 在modelarts上部署backend为TensorFlow的keras模型
最近老山在研究在modelarts上部署mask-rcnn,源代码提供的是keras模型.我们可以将keras转化成savedModel模型,在TensorFlow Serving上部署,可参考老山的 ...
- 转:linux 安装 Elasticsearch5.6.x 详细步骤以及问题解决方案
在网上有很多那种ES步骤和问题的解决 方案的,不过没有一个详细的整合,和问题的梳理:我就想着闲暇之余,来记录一下自己安装的过程以及碰到的问题和心得:有什么不对的和问题希望及时拍砖. 第一步:环境 li ...
- Nginx 404 Not Found 解决办法
环境:宝塔Nginx面板 解决办法: 宝塔面板--站点设置-配置文件. 去掉: error_page 404 /404.html; 前面的 # 号.
- ios开发入门- WebView使用
转自:http://mahaile.blog.51cto.com/2891586/1021515/ 目标 : webview使用 在一些移动app中,有时程序会载入 外表的html 界面, andro ...