pytest文档27-pytest分布式执行(pytest-xdist)
前言
平常我们手工测试用例非常多时,比如有1千条用例,假设每个用例执行需要1分钟。如果一个测试人员执行需要1000分钟才能执行完,当项目非常紧急的时候,
我们会用测试人力成本换取时间成本,这个时候多找个小伙伴把任务分成2部分,于是时间缩减一半。如果是十个人一起执行,1000个用例理论上只需100分钟就能完成,时间缩短到了1/10。大大节省的测试时间,为项目节省了时间成本。
- pytest 3.6.3
- pytest-allure-adaptor 1.7.10
- pytest-forked 0.2
- pytest-html 1.19.0
- pytest-metadata 1.7.0
- pytest-repeat 0.7.0
- pytest-xdist 1.23.2
同样道理,当我们测试用例非常多的时候,一条条执行,很显然会比较慢,那么如何让测试用例并行执行呢,这就是我们接下来要讲的pytest分布式执行插件pytest-xdist
pytest-xdist
cmd里面使用pip安装,目前版本号Version: 1.23.2
pip install pytest-xdist
>pip show pytest-xdist

Name: pytest-xdist

Version: 1.23.2

Summary: pytest xdist plugin for distributed testing and loop-on-failing modes

Home-page: https://github.com/pytest-dev/pytest-xdist

Author: holger krekel and contributors

Author-email: pytest-dev@python.org,holger@merlinux.eu

License: MIT

Location: e:\python36\lib\site-packages

Requires: execnet, pytest-forked, six, pytest
pytest-xdist官网地址:【Home-page: https://github.com/pytest-dev/pytest-xdist】
该pytest-xdist插件扩展了一些独特的测试执行模式pytest:
测试运行并行化:如果有多个CPU或主机,则可以将它们用于组合测试运行。会加快运行速度
--looponfail:在子进程中重复运行测试。每次运行之后,pytest会等待,直到项目中的文件发生更改,然后重新运行以前失败的测试。
重复此过程直到所有测试通过,之后再次执行完整运行。多平台覆盖:您可以指定不同的Python解释器或不同的平台,并在所有平台上并行运行测试。
在远程运行测试之前,pytest有效地将您的程序源代码“rsyncs”到远程位置。报告所有测试结果并显示给您的本地终端。您可以指定不同的Python版本和解释器。
如果您想知道pytest-xdist如何在幕后工作,可以看这里【OVERVIEW】
并行测试
多cpu并行执行用例,直接加个-n参数即可,后面num参数就是并行数量,比如num设置为3
pytest -n 3
运行以下代码,项目结构如下
web_conf_py是项目工程名称

│  conftest.py

│  __init__.py

│

├─baidu

│  │  conftest.py

│  │  test_1_baidu.py

│  │  test_2.py

│  │  __init__.py

│

├─blog

│  │  conftest.py

│  │  test_2_blog.py

│  │  __init__.py
代码参考:
# web_conf_py/conftest.py

import pytest

@pytest.fixture(scope="session")

def start():

    print("\n打开首页")

    return "yoyo"

# web_conf_py/baidu/conftest.py

import pytest

@pytest.fixture(scope="session")

def open_baidu():

    print("打开百度页面_session")

# web_conf_py/baidu/test_1_baidu.py

import pytest

import time

def test_01(start, open_baidu):

    print("测试用例test_01")

    time.sleep(1)

    assert start == "yoyo"

def test_02(start, open_baidu):

    print("测试用例test_02")

    time.sleep(1)

    assert start == "yoyo"

if __name__ == "__main__":

    pytest.main(["-s", "test_1_baidu.py"])

# web_conf_py/baidu/test_2.py

import pytest

import time

def test_06(start, open_baidu):

    print("测试用例test_01")

    time.sleep(1)

    assert start == "yoyo"

def test_07(start, open_baidu):

    print("测试用例test_02")

    time.sleep(1)

    assert start == "yoyo"

if __name__ == "__main__":

    pytest.main(["-s", "test_2.py"])

# web_conf_py/blog/conftest.py

import pytest

@pytest.fixture(scope="function")

def open_blog():

    print("打开blog页面_function")

# web_conf_py/blog/test_2_blog.py

import pytest

import time

def test_03(start, open_blog):

    print("测试用例test_03")

    time.sleep(1)

    assert start == "yoyo"

def test_04(start, open_blog):

    print("测试用例test_04")

    time.sleep(1)

    assert start == "yoyo"

def test_05(start, open_blog):

    '''跨模块调用baidu模块下的conftest'''

    print("测试用例test_05,跨模块调用baidu")

    time.sleep(1)

    assert start == "yoyo"

if __name__ == "__main__":

    pytest.main(["-s", "test_2_blog.py"])
正常运行需要消耗时间:7.12 seconds
E:\YOYO\web_conf_py>pytest

============================= test session starts =============================

platform win32 -- Python 3.6.0, pytest-3.6.3, py-1.5.4, pluggy-0.6.0

rootdir: E:\YOYO\web_conf_py, inifile:

plugins: xdist-1.23.2, metadata-1.7.0, html-1.19.0, forked-0.2

collected 7 items

baidu\test_1_baidu.py ..                                                 [ 28%]

baidu\test_2.py ..                                                       [ 57%]

blog\test_2_blog.py ...                                                  [100%]

========================== 7 passed in 7.12 seconds ===========================
设置并行运行数量为3,消耗时间:3.64 seconds,大大的缩短了用例时间
E:\YOYO\web_conf_py>pytest -n 3

============================= test session starts =============================

platform win32 -- Python 3.6.0, pytest-3.6.3, py-1.5.4, pluggy-0.6.0

rootdir: E:\YOYO\web_conf_py, inifile:

plugins: xdist-1.23.2, metadata-1.7.0, html-1.19.0, forked-0.2

gw0 [7] / gw1 [7] / gw2 [7]

scheduling tests via LoadScheduling

.......                                                                  [100%]

========================== 7 passed in 3.64 seconds ===========================
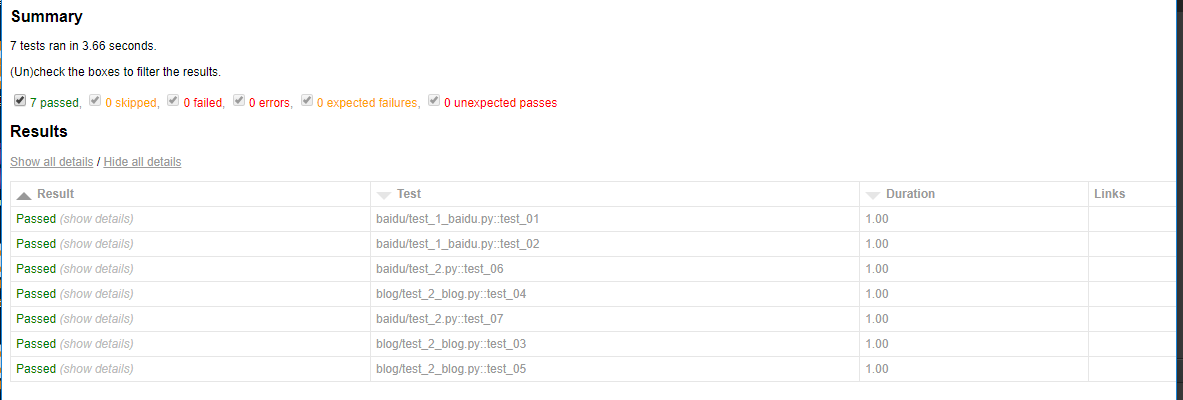
测试报告
使用pytest-xdist插件也能生成html报告,完美支持pytest-html插件
pytest -n 3 --html=report.html --self-contained-html
---------------------------------pytest结合selenium自动化完整版-------------------------
全书购买地址 https://yuedu.baidu.com/ebook/902224ab27fff705cc1755270722192e4536582b
作者:上海-悠悠 QQ交流群:874033608
也可以关注下我的个人公众号:yoyoketang

pytest文档27-pytest分布式执行(pytest-xdist)的更多相关文章
- pytest文档7-pytest-html生成html报告
前言 pytest-HTML是一个插件,pytest用于生成测试结果的HTML报告.兼容Python 2.7,3.6 pytest-html 1.github上源码地址[https://github. ...
- pytest文档3-pycharm运行pytest
前言 上一篇pytest文档2-用例运行规则已经介绍了如何在cmd执行pytest用例,平常我们写代码在pycharm比较多 写完用例之后,需要调试看看,是不是能正常运行,如果每次跑去cmd执行,太麻 ...
- pytest文档46-关于https请求警告问题(InsecureRequestWarning: Unverified HTTPS request is being made)
前言 使用 pytest 执行 https 请求用例的时候,控制台会出现警告:InsecureRequestWarning: Unverified HTTPS request is being mad ...
- Uncode-Schedule首页、文档和下载 - 分布式任务调度组件 - 开源中国社区
Uncode-Schedule首页.文档和下载 - 分布式任务调度组件 - 开源中国社区 分布式任务调度组件 Uncode-Schedule
- 4: ES内执行Groovy脚本,做文档部分更新、执行判断改变操作类型
ES有内置的Groovy脚本执行内核,可以在命令的Json内嵌入Groovy脚本语句 前提数据:
- pytest文档52-命令行参数--setup-show查看fixture的执行过程
前言 使用命令行运行 pytest 用例的时候,看不到 fixture 的执行过程. 如果我们想知道fixture的执行过程和先后顺序,可以加上 --setup-show 命令行参数,帮助查看 fix ...
- pytest文档19-doctest测试框架
前言 doctest从字面意思上看,那就是文档测试.doctest是python里面自带的一个模块,它实际上是单元测试的一种. 官方解释:doctest 模块会搜索那些看起来像交互式会话的 Pytho ...
- pytest文档1-环境准备与入门
前言 首先说下为什么要学pytest,在此之前相信大家已经掌握了python里面的unittest单元测试框架,那再学一个框架肯定是需要学习时间成本的. 刚开始我的内心是拒绝的,我想我用unittes ...
- pytest文档56-插件打包上传到 pypi 库
前言 pytest 的插件完成之后,可以上传到 github,方便其他小伙伴通过 pip 源码安装.如果我们想通过 pip install packages 这种方式安装的话,需上传到 pypi 仓库 ...
随机推荐
- CentOS7.5安装MongoDB4.0与CRUD基本操作
一 MongoDB简介 MongoDB 是一个基于分布式文件存储的数据库.由 C++ 语言编写.旨在为 WEB 应用提供可扩展的高性能数据存储解决方案. MongoDB 是一个介于关系数据库和非关系数 ...
- centos7+python3.6+nginx+uwsgi+django2的搭建笔记
公司需上线一套python编写的代码,需要给搭建一套环境 ,本次采用centos7+python3.6+nginx+uwsgi2+django2+mysql5.7的方式来进行搭建 写在部署前 在线上 ...
- Server sent passive reply with unroutable address. Using server address instead
最近在linux服务器安装vsftp服务.经过一轮设置,终于可以连接上了,用winSCP连接,刷新目录就提示这个错误. 解决办法: vim /etc/vsftpd.conf ,编辑配置文件,最后加上 ...
- [js]DOM 篇
DOM 是 JavaScript 操作网页的接口,全称为“文档对象模型”(Document Object Model).它的作用是将网页转为一个 JavaScript 对象,从而可以用脚本进行各种操作 ...
- 六、django rest_framework源码之解析器剖析
1 绪论 网络传输数据只能传输字符串格式的,如果是列表.字典等数据类型,需要转换之后才能使用但是我们之前的rest_framework例子都没有转换就直接可以使用了,这是因为rest_framewor ...
- IdentityServer4之JWT签名(RSA加密证书)及验签
一.前言 在IdentityServer4中有两种令牌,一个是JWT和Reference Token,在IDS4中默认用的是JWT,那么这两者有什么区别呢? 二.JWT与Reference Token ...
- CSS基础-DAY1
CSS 概述CSS 指层叠样式表 (Cascading Style Sheets),样式定义了如何显示 HTML文件中的标签元素,CSS是一种用来表现HTML(标准通用标记语言的一个应用)或XML(标 ...
- [WC2018]州区划分(状压DP+FWT/FMT)
很裸的子集反演模板题,套上一些莫名其妙的外衣. 先预处理每个集合是否合法,再作显然的状压DP.然后发现可以写成子集反演的形式,直接套模板即可. 子集反演可以看这里. 子集反演的过程就是多设一维代表集合 ...
- [BZOJ5305][HAOI2018]苹果树(DP)
首先注意到每种树都是等概率出现的,于是将问题转化成计数求和问题. f[n]表示所有n个点的树的两两点距离和的总和. g[n]表示所有n个点的树的所有点到根的距离和的总和. h[n]表示n个点的树的可能 ...
- ShellExecuteA函数
原型: ShellExecuteA(, , , );//最大化打开记事本 第一个参数//系统启动第二个参数//open打开第三个参数//指令第四个参数//默认0第五个参数//默认0第六个参数//0隐藏 ...