IdentityServer4 实现 OpenID Connect 和 OAuth 2.0

关于 OAuth 2.0 的相关内容,点击查看:ASP.NET WebApi OWIN 实现 OAuth 2.0
OpenID 是一个去中心化的网上身份认证系统。对于支持 OpenID 的网站,用户不需要记住像用户名和密码这样的传统验证标记。取而代之的是,他们只需要预先在一个作为 OpenID 身份提供者(identity provider, IdP)的网站上注册。OpenID 是去中心化的,任何网站都可以使用 OpenID 来作为用户登录的一种方式,任何网站也都可以作为 OpenID 身份提供者。OpenID 既解决了问题而又不需要依赖于中心性的网站来确认数字身份。
OpenID 相关基本术语:
- 最终用户(End User):想要向某个网站表明身份的人。
- 标识(Identifier):最终用户用以标识其身份的 URL 或 XRI。
- 身份提供者(Identity Provider, IdP):提供 OpenID URL 或 XRI 注册和验证服务的服务提供者。
- 依赖方(Relying Party, RP):想要对最终用户的标识进行验证的网站。
以上概念来自:https://zh.wikipedia.org/wiki/OpenID
针对 .NET Core 跨平台,微软官方并没有针对 OAuth 2.0 的实现(Microsoft.AspNetCore.Authentication.OAuth组件,仅限客户端),IdentityServer4 实现了 ASP.NET Core 下的 OpenID Connect 和 OAuth 2.0,IdentityServer4 也是微软基金会成员。
阅读目录:
- OpenID 和 OAuth 的区别
- 客户端模式(Client Credentials)
- 密码模式(resource owner password credentials)
- 简化模式-With OpenID(implicit grant type)
- 简化模式-With OpenID & OAuth(JS 客户端调用)
- 混合模式-With OpenID & OAuth(Hybrid Flow)
- ASP.NET Core Identity and Using EntityFramework Core for configuration data
开源地址:https://github.com/yuezhongxin/IdentityServer4.Demo
1. OpenID 和 OAuth 的区别
简单概括:
- OpenID:authentication(认证),用户是谁?
- OAuth:authorization(授权),用户能做什么?
其实,OAuth 的密码授权模式和 OpenID 有些类似,但也不相同,比如用户登录落网选择微博快捷登录方式,大致的区别:
- OAuth:用户在微博授权页面输入微博的账号和密码,微博验证成功之后,返回 access_token,然后落网拿到 access_token 之后,再去请求微博的用户 API,微博授权中心验证 access_token,如果验证通过,则返回用户 API 的请求数据给落网。
- OpenID:落网可以没有用户的任何实现,落网需要确认一个 URL 标识(可以是多个),然后用户登录的时候,选择一个 URL 进行登录(比如微博),跳转到微博 OpenID 登录页面,用户输入微博的账号和密码,微博验证成功之后,按照用户的选择,返回用户的一些信息。
可以看到,OAuth 首先需要拿到一个授权(access_token),然后再通过这个授权,去资源服务器(具体的 API),获取想要的一些数据,上面示例中,用户 API 只是资源服务器的一种(可以是视频 API、文章 API 等等),在这个过程中,OAuth 最重要的就是获取授权(四种模式),获取到授权之后,你就可以通过这个授权,做授权范围之类的任何事了。
而对于 OpenID 来说,授权和它没任何关系,它只关心的是用户,比如落网,可以不进行用户的任何实现(具体体现就是数据库没有 User 表),然后使用支持 OpenID 的服务(比如微博),通过特定的 URL 标识(可以看作是 OpenID 标识),然后输入提供服务的账号和密码,返回具体的用户信息,对于落网来说,它关心的是用户信息,仅此而已。
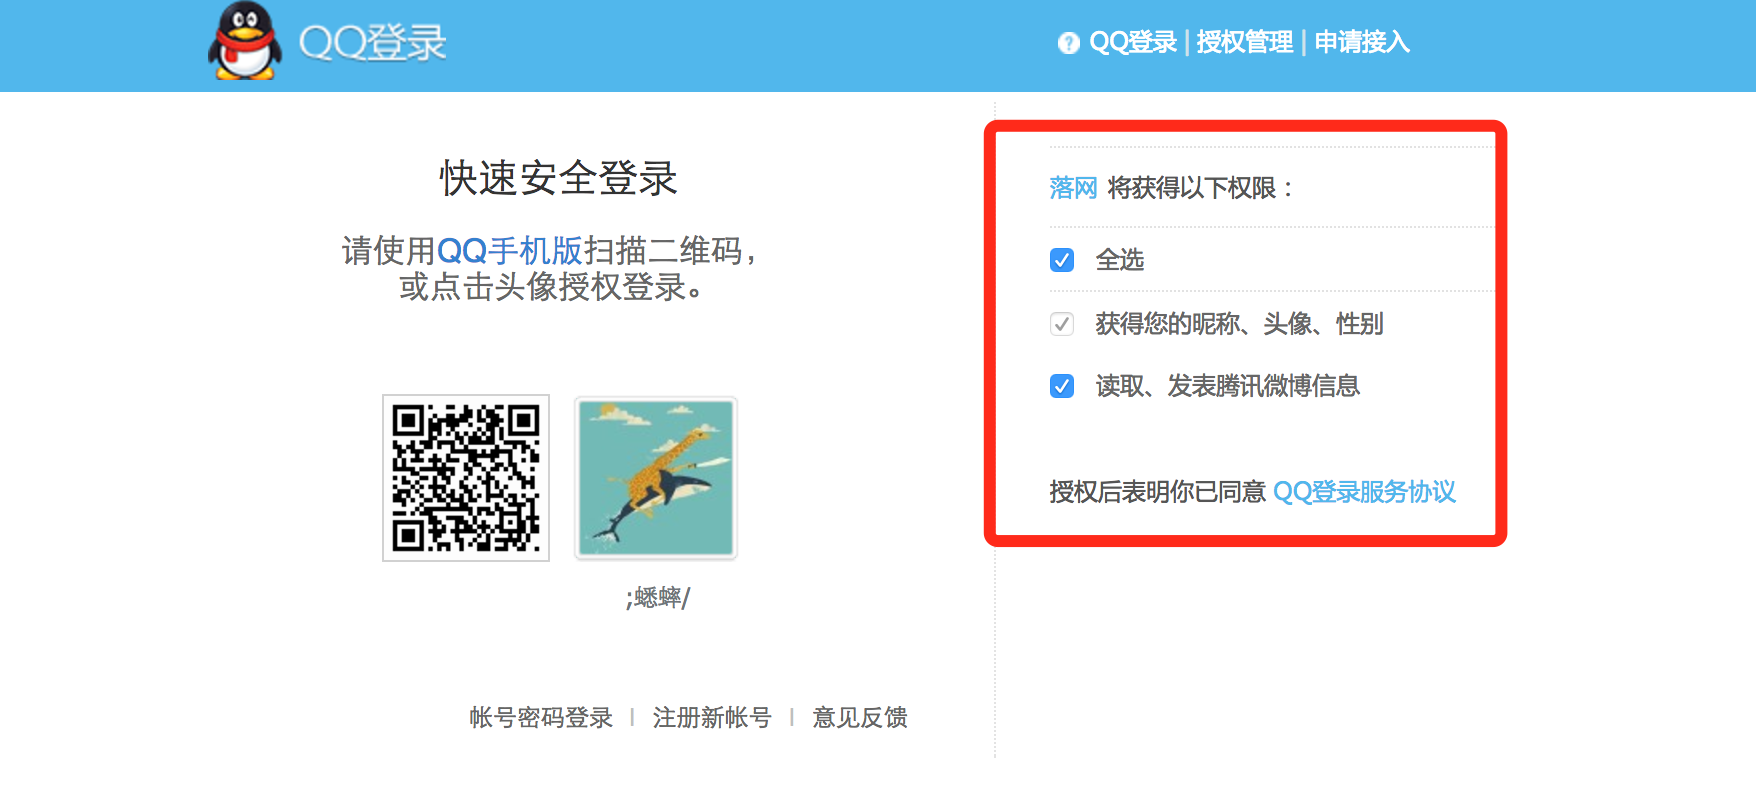
上面其实是 OAuth 的授权,所以会有“获得以下权限”提示,如果是 OpenID 的话,“权限”应该改为“用户信息”。
支持 OpenID 的服务列表:http://openid.net/get-an-openid/
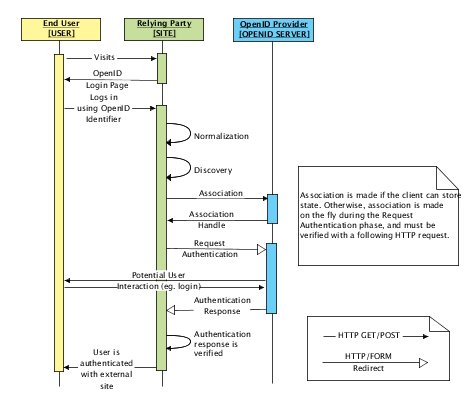
OpenID 流程图(来自 Using OpenID):
2. 客户端模式(Client Credentials)
简单概述:客户端提供 ClientId 和 ClientSecret 给认证授权服务,验证如果成功,返回 access_token,客户端拿到 access_token,访问 API 资源服务。
2.1 认证授权服务配置
创建 ASP.NET Core 站点,Startup 配置修改如下:
public class Startup

{

    public void ConfigureServices(IServiceCollection services)

    {

        // configure identity server with in-memory stores, keys, clients and scopes

        services.AddIdentityServer()

            .AddTemporarySigningCredential()

            .AddInMemoryApiResources(new List<ApiResource>

            {

                new ApiResource("api1", "My API")

            })

            .AddInMemoryClients(new List<Client>

            {

                // client credentials client

                new Client

                {

                    ClientId = "client",

                    AllowedGrantTypes = GrantTypes.ClientCredentials,

                    ClientSecrets =

                    {

                        new Secret("secret".Sha256())

                    },

                    AllowedScopes = { "api1" }

                }

            });

    }

    public void Configure(IApplicationBuilder app, ILoggerFactory loggerFactory)

    {

        loggerFactory.AddConsole(LogLevel.Debug);

        app.UseDeveloperExceptionPage();

        app.UseIdentityServer();

    }

}
IdentityServer4 中AddInMemory的相关配置,都是 Mock 的(代码配置),也可以把这些配置存储在数据库中,这个后面再讲。
AddInMemoryApiResources 增加的 API 资源服务(List 集合),也就此认证授权服务所管辖的 API 资源,比如上面配置的 api1,这个会在客户端调用的时候用到,如果不一致,是不允许访问的,另外,Clinet 中配置的AllowedScopes = { "api1" },表示此种授权模式允许的 API 资源集合(前提是需要添加ApiResource)。
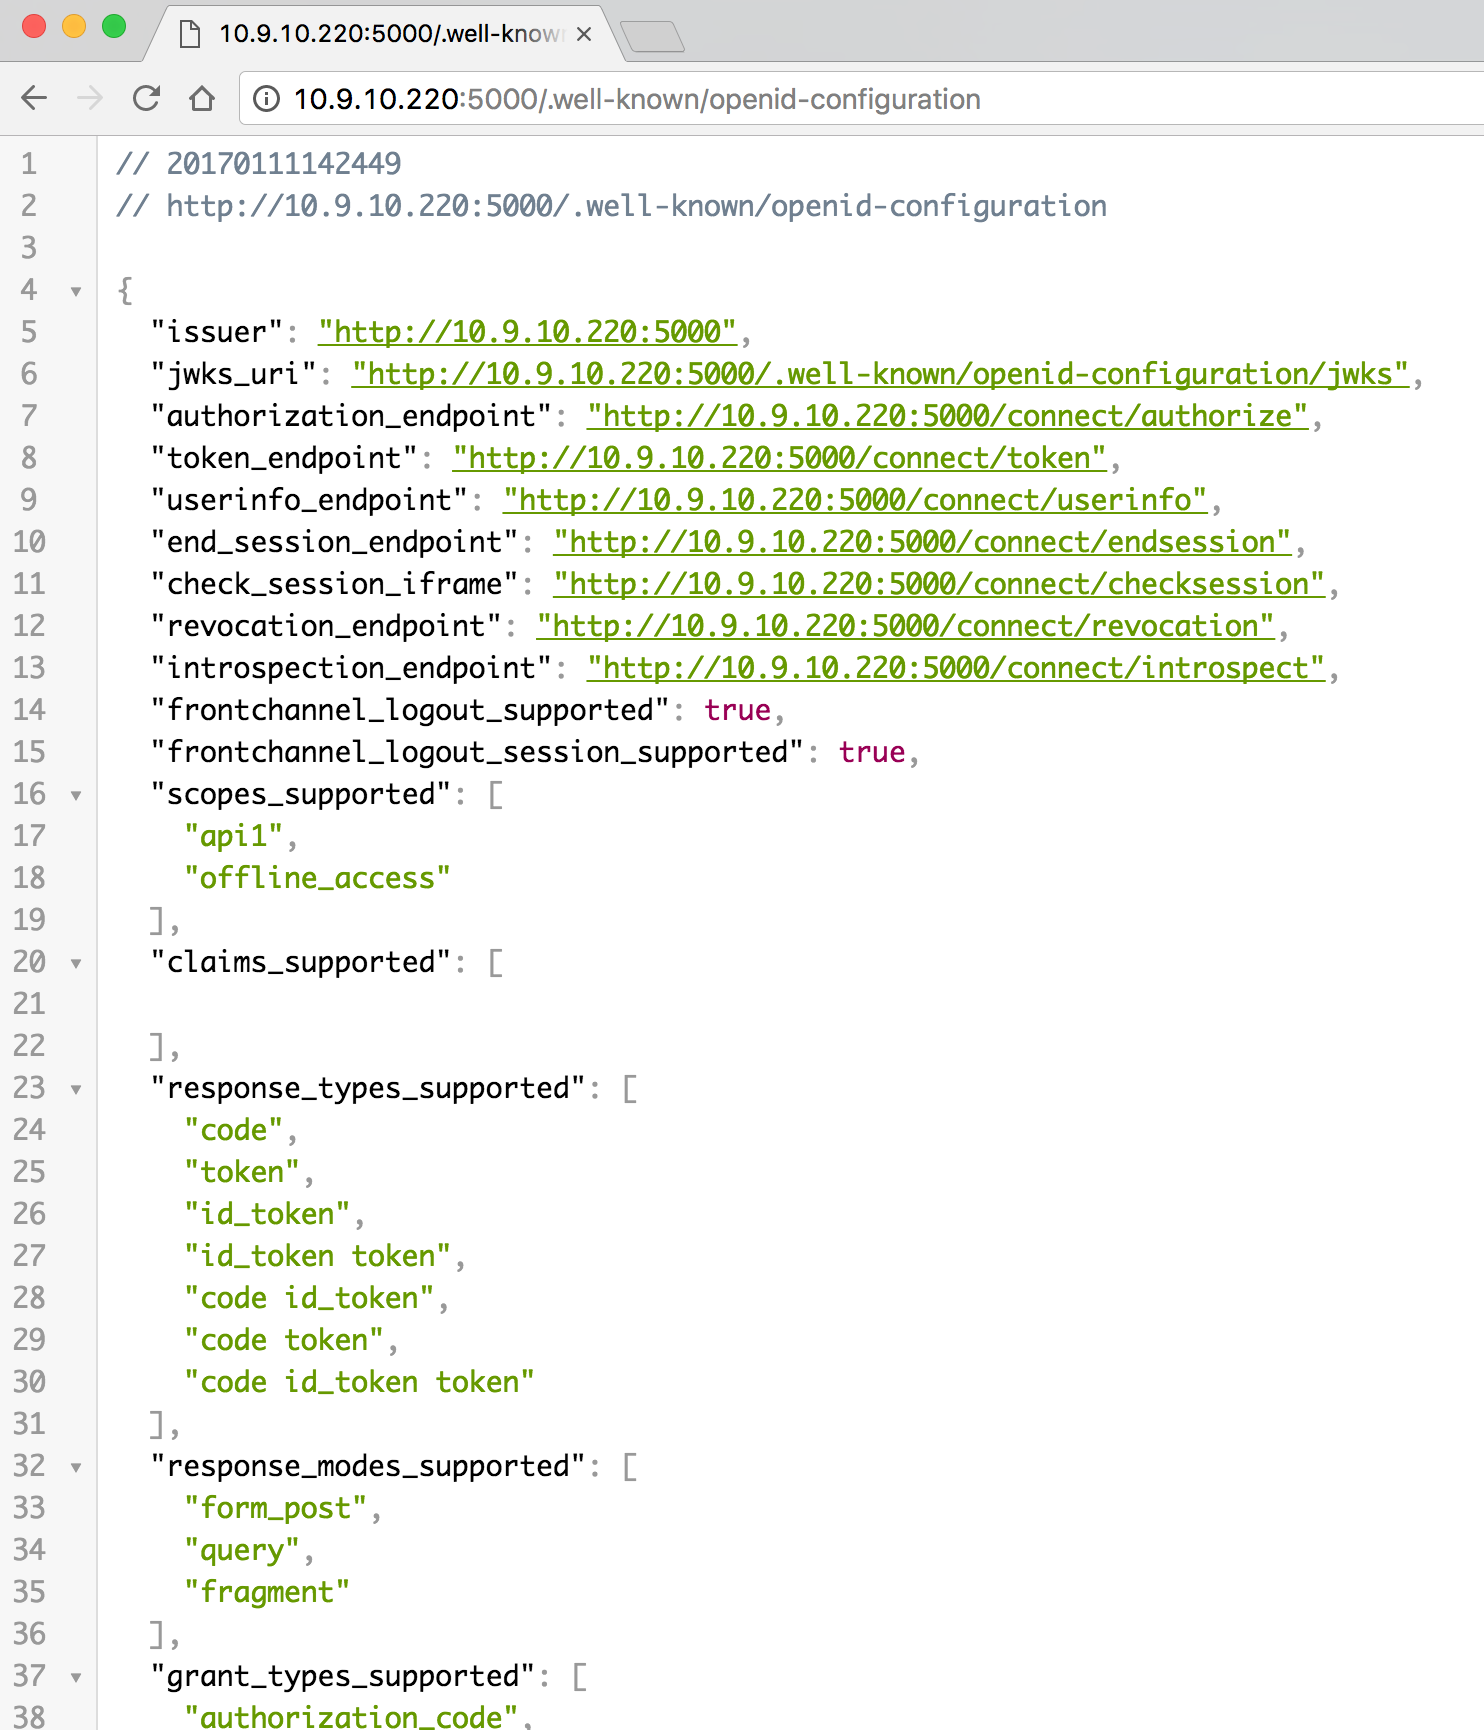
配置很简单,我们也可以访问http://localhost:5000/.well-known/openid-configuration,查看具体的配置信息:
2.2 API 资源服务配置
API 资源服务站点,需要添加程序包:
"IdentityServer4.AccessTokenValidation": "1.0.1"
添加一个ValuesController:
[Route("[controller]")]

[Authorize]

public class ValuesController : ControllerBase

{

    [HttpGet]

    public IActionResult Get()

    {

        return Content("hello world");

    }

}
2.3 单元测试
需要添加程序包:
"IdentityModel": "2.0.0"
单元测试代码:
[Fact]

public async Task ClientCredentials_Test()

{

    // request token

    var disco = await DiscoveryClient.GetAsync("http://localhost:5000");

    var tokenClient = new TokenClient(disco.TokenEndpoint, "client", "secret");

    var tokenResponse = await tokenClient.RequestClientCredentialsAsync("api1");

    Assert.False(tokenResponse.IsError);

    Console.WriteLine(tokenResponse.Json);

    // call api

    var client = new HttpClient();

    client.SetBearerToken(tokenResponse.AccessToken);

    var response = await client.GetAsync("http://localhost:5010/values");

    Assert.True(response.IsSuccessStatusCode);

    var content = await response.Content.ReadAsStringAsync();

    Console.WriteLine(content);

}
很简单,和我们之前用 ASP.NET WebApi OWIN 实现 OAuth 2.0 一样,只不过配置和调用简化了很多,因为 IdentityServer4 替我们做了很多工作。
3. 密码模式(resource owner password credentials)
简单概述:客户端提供 UserName 和 Password 给认证授权服务,验证如果成功,返回 access_token,客户端拿到 access_token,访问 API 资源服务。
3.1 认证授权服务配置
创建 ASP.NET Core 站点,Startup 配置修改如下:
public class Startup

{

    public void ConfigureServices(IServiceCollection services)

    {

        // configure identity server with in-memory stores, keys, clients and scopes

        services.AddIdentityServer()

            .AddTemporarySigningCredential()

            .AddInMemoryApiResources(new List<ApiResource>

            {

                new ApiResource("api1", "My API")

            })

            .AddInMemoryClients(new List<Client>

            {

                // resource owner password grant client

                new Client

                {

                    ClientId = "ro.client",

                    AllowedGrantTypes = GrantTypes.ResourceOwnerPassword,

                    ClientSecrets =

                    {

                        new Secret("secret".Sha256())

                    },

                    AllowedScopes = { "api1" }

                }

            })

            .AddTestUsers(new List<TestUser>

            {

                new TestUser

                {

                    SubjectId = "1",

                    Username = "xishuai",

                    Password = "123"

                }

            });

    }

    public void Configure(IApplicationBuilder app, ILoggerFactory loggerFactory)

    {

        loggerFactory.AddConsole(LogLevel.Debug);

        app.UseDeveloperExceptionPage();

        app.UseIdentityServer();

    }

}
和客户端模式不同的是,AllowedGrantTypes授权模式改为了ResourceOwnerPassword,然后增加了测试用户(用来验证用户名和密码),也可以存储在数据库中。
3.2 API 资源服务配置
API 资源服务站点,需要添加程序包:
"IdentityServer4.AccessTokenValidation": "1.0.1"
添加一个IdentityController:
[Route("[controller]")]

[Authorize]

public class IdentityController : ControllerBase

{

    [HttpGet]

    public IActionResult Get()

    {

        return new JsonResult(from c in User.Claims select new { c.Type, c.Value });

    }

}
3.3 单元测试
需要添加程序包:
"IdentityModel": "2.0.0"
单元测试代码:
[Fact]

public async Task ResourceOwnerPassword_Test()

{

    // request token

    var disco = await DiscoveryClient.GetAsync("http://localhost:5000");

    var tokenClient = new TokenClient(disco.TokenEndpoint, "ro.client", "secret");

    var tokenResponse = await tokenClient.RequestResourceOwnerPasswordAsync("xishuai", "123", "api1");

    Assert.False(tokenResponse.IsError);

    Console.WriteLine(tokenResponse.Json);

    // call api

    var client = new HttpClient();

    client.SetBearerToken(tokenResponse.AccessToken);

    var response = await client.GetAsync("http://localhost:5010/identity");

    Assert.True(response.IsSuccessStatusCode);

    var content = await response.Content.ReadAsStringAsync();

    Console.WriteLine(JArray.Parse(content));

}
4. 简化模式-With OpenID(implicit grant type)
简化模式在 IdentityServer4 中的实现,就是 OpenID Connect。
简单概述:客户端确定 URL(用户认证服务),登录在用户认证服务,验证成功,返回客户端想要的用户数据,并使此用户为登录状态,可以在客户端进行注销用户。
4.1 认证授权服务配置
创建 ASP.NET Core 站点,Startup 配置修改如下:
public class Startup

{

    public void ConfigureServices(IServiceCollection services)

    {

        // configure identity server with in-memory stores, keys, clients and scopes

        services.AddIdentityServer()

            .AddTemporarySigningCredential()

            .AddInMemoryIdentityResources(new List<IdentityResource>

            {

                new IdentityResources.OpenId(),

                new IdentityResources.Profile(),

            })

            .AddInMemoryClients(new List<Client>

            {

                // OpenID Connect implicit flow client (MVC)

                new Client

                {

                    ClientId = "mvc",

                    ClientName = "MVC Client",

                    AllowedGrantTypes = GrantTypes.Implicit,

                    RedirectUris = { "http://localhost:5020/signin-oidc" },

                    PostLogoutRedirectUris = { "http://localhost:5020" },

                    AllowedScopes =

                    {

                        IdentityServerConstants.StandardScopes.OpenId,

                        IdentityServerConstants.StandardScopes.Profile

                    }

                }

            })

            .AddTestUsers(new List<TestUser>

            {

                new TestUser

                {

                    SubjectId = "1",

                    Username = "xishuai",

                    Password = "123",

                    Claims = new List<Claim>

                    {

                        new Claim("name", "xishuai"),

                        new Claim("website", "http://xishuai.cnblogs.com")

                    }

                }

            });

    }

    public void Configure(IApplicationBuilder app, ILoggerFactory loggerFactory)

    {

        loggerFactory.AddConsole(LogLevel.Debug);

        app.UseDeveloperExceptionPage();

        app.UseIdentityServer();

    }

}
AddInMemoryIdentityResources和AllowedScopes所配置的,是客户端允许访问的用户信息,具体查看:Requesting Claims using Scope Values
ClientId 很重要,必须和客户端一一对应,所以想要使用 OpenID 认证服务的客户端,需要向提供 OpenID 认证服务的机构,申请一个 ClientId,OpenID 认证服务会统一发放一个用户登录的 URL。
TestUser中的Claims配置,其实就是IdentityServerConstants.StandardScopes.Profile。
另外,还有用户登录的一些操作代码,这边就不贴了,可以查看具体的实现:ImplicitServer.Web
4.2 客户端服务配置
创建 ASP.NET Core 站点,添加程序包:
"Microsoft.AspNetCore.Authentication.Cookies": "1.0.*",

"Microsoft.AspNetCore.Authentication.OpenIdConnect": "1.0.*"
Startup 配置修改如下:
public Startup(IHostingEnvironment env)

{

    var builder = new ConfigurationBuilder()

        .SetBasePath(env.ContentRootPath)

        .AddJsonFile("appsettings.json", optional: true, reloadOnChange: true)

        .AddJsonFile($"appsettings.{env.EnvironmentName}.json", optional: true)

        .AddEnvironmentVariables();

    Configuration = builder.Build();

}

public IConfigurationRoot Configuration { get; }

public void ConfigureServices(IServiceCollection services)

{

    services.AddMvc();

}

public void Configure(IApplicationBuilder app, IHostingEnvironment env, ILoggerFactory loggerFactory)

{

    JwtSecurityTokenHandler.DefaultInboundClaimTypeMap.Clear();

    loggerFactory.AddConsole(Configuration.GetSection("Logging"));

    loggerFactory.AddDebug();

    if (env.IsDevelopment())

    {

        app.UseDeveloperExceptionPage();

    }

    else

    {

        app.UseExceptionHandler("/Home/Error");

    }

    app.UseCookieAuthentication(new CookieAuthenticationOptions

    {

        AuthenticationScheme = "Cookies"

    });

    app.UseOpenIdConnectAuthentication(new OpenIdConnectOptions

    {

        AuthenticationScheme = "oidc",

        SignInScheme = "Cookies",

        Authority = "http://localhost:5001",

        RequireHttpsMetadata = false,

        ClientId = "mvc",

        SaveTokens = true

    });

    app.UseStaticFiles();

    app.UseMvcWithDefaultRoute();

}
UseOpenIdConnectAuthentication配置中的Authority,就是 OpenID 认证服务的 URL。
添加一个HomeController:
public class HomeController : Controller

{

    public IActionResult Index()

    {

        return View();

    }

    [Authorize]

    public IActionResult Secure()

    {

        ViewData["Message"] = "Secure page.";

        return View();

    }

    public async Task Logout()

    {

        await HttpContext.Authentication.SignOutAsync("Cookies");

        await HttpContext.Authentication.SignOutAsync("oidc");

    }

    public IActionResult Error()

    {

        return View();

    }

}
访问 Secure 页面,跳转到认证服务地址,进行账号密码登录,Logout 用于用户的注销操作。
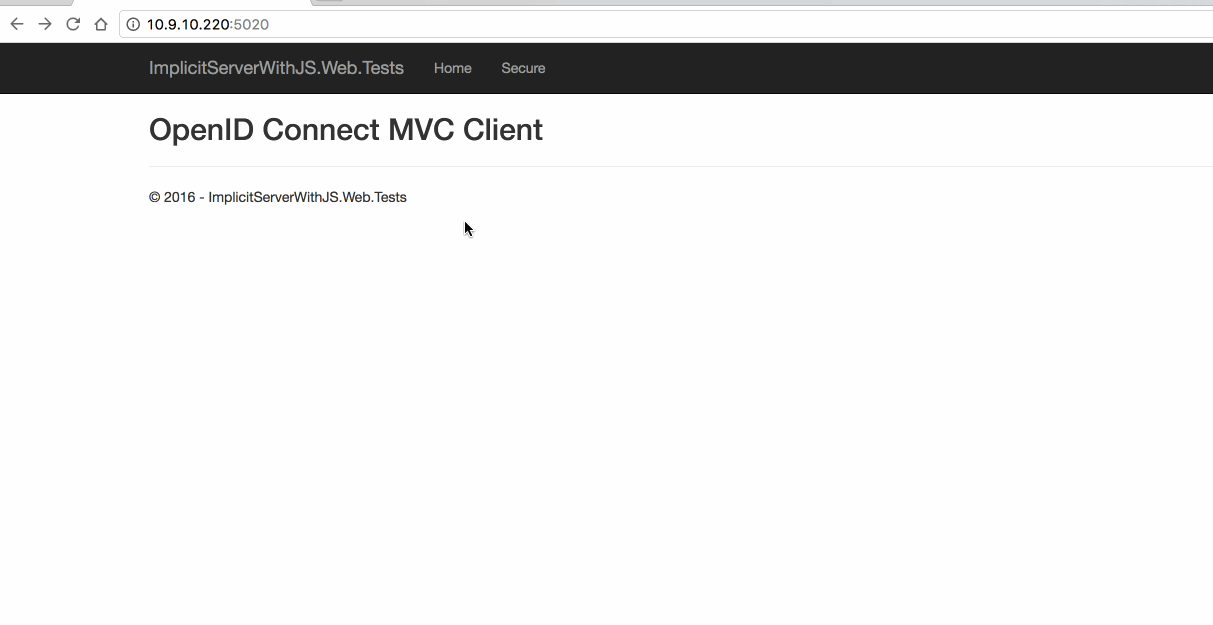
4.3 Web 测试
5. 简化模式-With OpenID & OAuth(JS 客户端调用)
简单概述:客户端确定 URL(用户认证服务),登录在用户认证服务,验证成功,返回客户端想要的用户数据 和 access_token,并使此用户为登录状态,可以在客户端进行注销用户,客户端可以拿到 access_token,去访问授权范围之内的 API 资源。
需要注意的是:因为简化模式,所以 access_token 是作为 URL 参数返回的。
5.1 认证授权服务配置
创建 ASP.NET Core 站点,Startup 配置修改如下:
public class Startup

{

    public void ConfigureServices(IServiceCollection services)

    {

        // configure identity server with in-memory stores, keys, clients and scopes

        services.AddIdentityServer()

            .AddTemporarySigningCredential()

            .AddInMemoryIdentityResources(new List<IdentityResource>

            {

                new IdentityResources.OpenId(),

                new IdentityResources.Profile(),

            })

            .AddInMemoryApiResources(new List<ApiResource>

            {

                new ApiResource("api1", "My API")

            })

            .AddInMemoryClients(new List<Client>

            {

                // OpenID Connect implicit flow client (MVC)

                new Client

                {

                    ClientId = "js",

                    ClientName = "JavaScript Client",

                    AllowedGrantTypes = GrantTypes.Implicit,

                    AllowAccessTokensViaBrowser = true,

                    RedirectUris = { "http://localhost:5022/callback.html" },

                    PostLogoutRedirectUris = { "http://localhost:5022/index.html" },

                    AllowedCorsOrigins = { "http://localhost:5022" },

                    RequireConsent = false, //禁用 consent 页面确认 https://github.com/IdentityServer/IdentityServer3/issues/863

                    AllowedScopes =

                    {

                        IdentityServerConstants.StandardScopes.OpenId,

                        IdentityServerConstants.StandardScopes.Profile,

                        "api1"

                    }

                }

            })

            .AddTestUsers(new List<TestUser>

            {

                new TestUser

                {

                    SubjectId = "1",

                    Username = "xishuai",

                    Password = "123",

                    Claims = new List<Claim>

                    {

                        new Claim("name", "xishuai"),

                        new Claim("website", "http://xishuai.cnblogs.com")

                    }

                }

            });

    }

    public void Configure(IApplicationBuilder app, ILoggerFactory loggerFactory)

    {

        loggerFactory.AddConsole(LogLevel.Debug);

        app.UseDeveloperExceptionPage();

        app.UseIdentityServer();

    }

}
因为涉及到访问 API 资源操作,需要需要添加AddInMemoryApiResources配置,AllowedScopes也需要添加对应的 API 资源名称,AllowAccessTokensViaBrowser = true的配置的作用就是,可以在浏览器地址中访问 access_token。
更多实现代码,点击查看:ImplicitServerWithJS.Web
5.2 API 资源服务配置
API 资源服务站点,需要添加程序包:
"IdentityServer4.AccessTokenValidation": "1.0.1",

"Microsoft.AspNetCore.Cors": "1.1.0"
Startup 配置修改如下:
public Startup(IHostingEnvironment env)

{

    var builder = new ConfigurationBuilder()

        .SetBasePath(env.ContentRootPath)

        .AddJsonFile("appsettings.json", optional: true, reloadOnChange: true)

        .AddJsonFile($"appsettings.{env.EnvironmentName}.json", optional: true);

    builder.AddEnvironmentVariables();

    Configuration = builder.Build();

}

public IConfigurationRoot Configuration { get; }

public void ConfigureServices(IServiceCollection services)

{

    services.AddCors(options =>

    {

        // this defines a CORS policy called "default"

        options.AddPolicy("default", policy =>

        {

            policy.WithOrigins("http://localhost:5022")

                .AllowAnyHeader()

                .AllowAnyMethod();

        });

    });

    services.AddMvcCore()

        .AddAuthorization()

        .AddJsonFormatters();

}

public void Configure(IApplicationBuilder app, ILoggerFactory loggerFactory)

{

    loggerFactory.AddConsole(Configuration.GetSection("Logging"));

    loggerFactory.AddDebug();

    app.UseCors("default");

    app.UseIdentityServerAuthentication(new IdentityServerAuthenticationOptions

    {

        Authority = "http://localhost:5003",

        RequireHttpsMetadata = false,

        ApiName = "api1"

    });

    app.UseMvc();

}
因为 JS 需要跨域访问 API 资源服务,所以需要增加 CORS 配置。
添加一个IdentityController:
[Route("[controller]")]

[Authorize]

public class IdentityController : ControllerBase

{

    [HttpGet]

    public IActionResult Get()

    {

        return new JsonResult(from c in User.Claims select new { c.Type, c.Value });

    }

}
5.3 JS Web 站点测试
创建一个 ASP.NET Core 站点,添加oidc-client.js前端组件,测试 JS 代码:
/// <reference path="oidc-client.js" />

function log() {

    document.getElementById('results').innerText = '';

    Array.prototype.forEach.call(arguments, function (msg) {

        if (msg instanceof Error) {

            msg = "Error: " + msg.message;

        }

        else if (typeof msg !== 'string') {

            msg = JSON.stringify(msg, null, 2);

        }

        document.getElementById('results').innerHTML += msg + '\r\n';

    });

}

document.getElementById("login").addEventListener("click", login, false);

document.getElementById("api").addEventListener("click", api, false);

document.getElementById("logout").addEventListener("click", logout, false);

var config = {

    authority: "http://localhost:5003",

    client_id: "js",

    redirect_uri: "http://localhost:5022/callback.html",

    response_type: "id_token token",

    scope:"openid profile api1",

    post_logout_redirect_uri: "http://localhost:5022/index.html",

};

var mgr = new Oidc.UserManager(config);

mgr.getUser().then(function (user) {

    if (user) {

        log("User logged in", user.profile);

    }

    else {

        log("User not logged in");

    }

});

function login() {

    mgr.signinRedirect();

}

function api() {

    mgr.getUser().then(function (user) {

        var url = "http://localhost:5012/identity";

        var xhr = new XMLHttpRequest();

        xhr.open("GET", url);

        xhr.onload = function () {

            log(xhr.status, JSON.parse(xhr.responseText));

        }

        xhr.setRequestHeader("Authorization", "Bearer " + user.access_token);

        xhr.send();

    });

}

function logout() {

    mgr.signoutRedirect();

}
测试过程(注意下 URL 中的参数):

6. 混合模式-With OpenID & OAuth(Hybrid Flow)
混合模式(Hybrid Flow)是一种新的模式,是简化模式(implicit flow)和验证码模式(authorization code flow)的混合。
简单概述:客户端确定 URL(用户认证服务),登录在用户认证服务,验证成功,返回客户端想要的用户数据 和 access_token,并使此用户为登录状态,可以在客户端进行注销用户,客户端可以拿到 access_token,去访问授权范围之内的 API 资源。
和上面的简化模式流程差不多,不过 access_token 不是通过浏览器获取的,而是通过后台服务获取。
6.1 认证授权服务配置
创建 ASP.NET Core 站点,Startup 配置修改如下:
public class Startup

{

    public void ConfigureServices(IServiceCollection services)

    {

        // configure identity server with in-memory stores, keys, clients and scopes

        services.AddIdentityServer()

            .AddTemporarySigningCredential()

            .AddInMemoryIdentityResources(new List<IdentityResource>

            {

                new IdentityResources.OpenId(),

                new IdentityResources.Profile(),

            })

            .AddInMemoryApiResources(new List<ApiResource>

            {

                new ApiResource("api1", "My API")

            })

            .AddInMemoryClients(new List<Client>

            {

                // OpenID Connect implicit flow client (MVC)

                new Client

                {

                    ClientId = "mvc",

                    ClientName = "MVC Client",

                    AllowedGrantTypes = GrantTypes.HybridAndClientCredentials,

                    ClientSecrets =

                    {

                        new Secret("secret".Sha256())

                    },

                    RedirectUris = { "http://localhost:5021/signin-oidc" },

                    PostLogoutRedirectUris = { "http://localhost:5021" },

                    AllowedScopes =

                    {

                        IdentityServerConstants.StandardScopes.OpenId,

                        IdentityServerConstants.StandardScopes.Profile,

                        "api1"

                    },

                    AllowOfflineAccess = true

                }

            })

            .AddTestUsers(new List<TestUser>

            {

                new TestUser

                {

                    SubjectId = "1",

                    Username = "xishuai",

                    Password = "123",

                    Claims = new List<Claim>

                    {

                        new Claim("name", "xishuai"),

                        new Claim("website", "http://xishuai.cnblogs.com")

                    }

                }

            });

    }

    public void Configure(IApplicationBuilder app, ILoggerFactory loggerFactory)

    {

        loggerFactory.AddConsole(LogLevel.Debug);

        app.UseDeveloperExceptionPage();

        app.UseIdentityServer();

    }

}
AllowedGrantTypes配置改为HybridAndClientCredentials,AllowOfflineAccess需要设置为true。
更多实现代码,点击查看:HybridServer.Web
6.2 API 资源服务配置
API 资源服务站点,需要添加程序包:
"IdentityServer4.AccessTokenValidation": "1.0.1"
Startup 配置修改如下:
public Startup(IHostingEnvironment env)

{

    var builder = new ConfigurationBuilder()

        .SetBasePath(env.ContentRootPath)

        .AddJsonFile("appsettings.json", optional: true, reloadOnChange: true)

        .AddJsonFile($"appsettings.{env.EnvironmentName}.json", optional: true);

    builder.AddEnvironmentVariables();

    Configuration = builder.Build();

}

public IConfigurationRoot Configuration { get; }

public void ConfigureServices(IServiceCollection services)

{

    services.AddMvcCore()

        .AddAuthorization()

        .AddJsonFormatters();

}

public void Configure(IApplicationBuilder app, ILoggerFactory loggerFactory)

{

    loggerFactory.AddConsole(Configuration.GetSection("Logging"));

    loggerFactory.AddDebug();

    app.UseIdentityServerAuthentication(new IdentityServerAuthenticationOptions

    {

        Authority = "http://localhost:5002",

        RequireHttpsMetadata = false,

        ApiName = "api1"

    });

    app.UseMvc();

}
添加一个IdentityController:
[Route("[controller]")]

[Authorize]

public class IdentityController : ControllerBase

{

    [HttpGet]

    public IActionResult Get()

    {

        return new JsonResult(from c in User.Claims select new { c.Type, c.Value });

    }

}
6.3 客户端服务配置
创建 ASP.NET Core 站点,添加程序包:
"Microsoft.AspNetCore.Authentication.Cookies": "1.0.*",

"Microsoft.AspNetCore.Authentication.OpenIdConnect": "1.0.*",

"IdentityModel": "2.0.0"
Startup 配置修改如下:
public Startup(IHostingEnvironment env)

{

    var builder = new ConfigurationBuilder()

        .SetBasePath(env.ContentRootPath)

        .AddJsonFile("appsettings.json", optional: true, reloadOnChange: true)

        .AddJsonFile($"appsettings.{env.EnvironmentName}.json", optional: true)

        .AddEnvironmentVariables();

    Configuration = builder.Build();

}

public IConfigurationRoot Configuration { get; }

public void ConfigureServices(IServiceCollection services)

{

    services.AddMvc();

}

public void Configure(IApplicationBuilder app, IHostingEnvironment env, ILoggerFactory loggerFactory)

{

    JwtSecurityTokenHandler.DefaultInboundClaimTypeMap.Clear();

    loggerFactory.AddConsole(Configuration.GetSection("Logging"));

    loggerFactory.AddDebug();

    if (env.IsDevelopment())

    {

        app.UseDeveloperExceptionPage();

    }

    else

    {

        app.UseExceptionHandler("/Home/Error");

    }

    app.UseCookieAuthentication(new CookieAuthenticationOptions

    {

        AuthenticationScheme = "Cookies"

    });

    app.UseOpenIdConnectAuthentication(new OpenIdConnectOptions

    {

        AuthenticationScheme = "oidc",

        SignInScheme = "Cookies",

        Authority = "http://localhost:5002",

        RequireHttpsMetadata = false,

        ClientId = "mvc",

        ClientSecret = "secret",

        ResponseType = "code id_token",

        Scope = { "api1", "offline_access" },

        GetClaimsFromUserInfoEndpoint = true,

        SaveTokens = true

    });

    app.UseStaticFiles();

    app.UseMvcWithDefaultRoute();

}
添加一个HomeController:
public class HomeController : Controller

{

    public IActionResult Index()

    {

        return View();

    }

    [Authorize]

    public IActionResult Secure()

    {

        ViewData["Message"] = "Secure page.";

        return View();

    }

    public async Task Logout()

    {

        await HttpContext.Authentication.SignOutAsync("Cookies");

        await HttpContext.Authentication.SignOutAsync("oidc");

    }

    public IActionResult Error()

    {

        return View();

    }

    public async Task<IActionResult> CallApiUsingClientCredentials()

    {

        var tokenClient = new TokenClient("http://localhost:5002/connect/token", "mvc", "secret");

        var tokenResponse = await tokenClient.RequestClientCredentialsAsync("api1");

        var client = new HttpClient();

        client.SetBearerToken(tokenResponse.AccessToken);

        var content = await client.GetStringAsync("http://localhost:5011/identity");

        ViewBag.Json = JArray.Parse(content).ToString();

        return View("json");

    }

    public async Task<IActionResult> CallApiUsingUserAccessToken()

    {

        var accessToken = await HttpContext.Authentication.GetTokenAsync("access_token");

        var client = new HttpClient();

        client.SetBearerToken(accessToken);

        var content = await client.GetStringAsync("http://localhost:5011/identity");

        ViewBag.Json = JArray.Parse(content).ToString();

        return Content("json");

    }

}
CallApiUsingClientCredentials是通过客户端模式获取 access_token,CallApiUsingUserAccessToken是通过上下文获取保存的 access_token,其实和浏览器 URL 中获取是一样的意思,但需要配置SaveTokens = true。
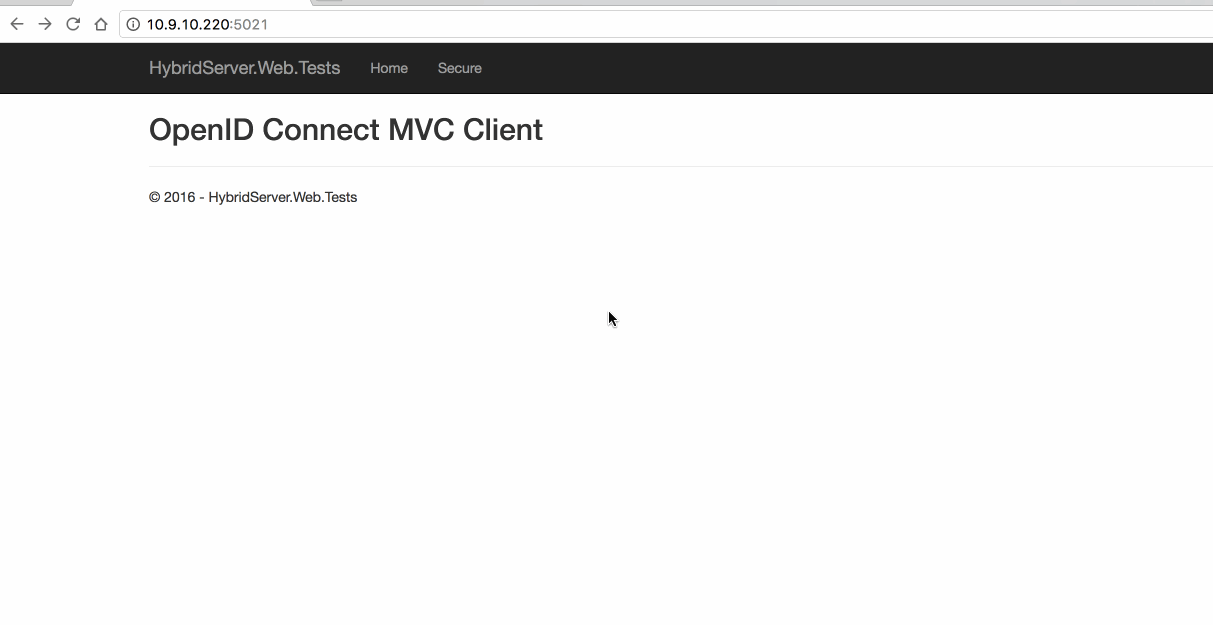
6.4 Web 测试
7. ASP.NET Core Identity and Using EntityFramework Core for configuration data
使用 ASP.NET Core Identity,就是用户管理不由 OpenID 认证服务进行提供,ASP.NET Core Identity 就相当于用户的一个管理者,比如用户的存储等。
我没做这一块的示例,配置比较简单:
public void ConfigureServices(IServiceCollection services)

{

    services.AddDbContext<ApplicationDbContext>(options =>

        options.UseSqlServer(Configuration.GetConnectionString("DefaultConnection")));

    services.AddIdentity<ApplicationUser, IdentityRole>()

        .AddEntityFrameworkStores<ApplicationDbContext>()

        .AddDefaultTokenProviders();

    services.AddMvc();

    services.AddTransient<IEmailSender, AuthMessageSender>();

    services.AddTransient<ISmsSender, AuthMessageSender>();

    // Adds IdentityServer

    services.AddIdentityServer()

        .AddTemporarySigningCredential()

        .AddInMemoryIdentityResources(Config.GetIdentityResources())

        .AddInMemoryApiResources(Config.GetApiResources())

        .AddInMemoryClients(Config.GetClients())

        .AddAspNetIdentity<ApplicationUser>();

}
详细使用:Using ASP.NET Core Identity
关于 IdentityServer4 的配置信息,可以使用 EntityFramework Core 进行存储,配置如下:
public void ConfigureServices(IServiceCollection services)

{

    services.AddMvc();

    var connectionString = @"server=(localdb)\mssqllocaldb;database=IdentityServer4.Quickstart;trusted_connection=yes";

    var migrationsAssembly = typeof(Startup).GetTypeInfo().Assembly.GetName().Name;

    // configure identity server with in-memory users, but EF stores for clients and resources

    services.AddIdentityServer()

        .AddTemporarySigningCredential()

        .AddTestUsers(Config.GetUsers())

        .AddConfigurationStore(builder =>

            builder.UseSqlServer(connectionString, options =>

                options.MigrationsAssembly(migrationsAssembly)))

        .AddOperationalStore(builder =>

            builder.UseSqlServer(connectionString, options =>

                options.MigrationsAssembly(migrationsAssembly)));

}
详细使用:Using EntityFramework Core for configuration data
最后,简要总结下使用 IdentityServer4 的几种应用场景:
- 客户端模式(Client Credentials):和用户无关,用于应用程序与 API 资源的直接交互场景。
- 密码模式(resource owner password credentials):和用户有关,一般用于第三方登录。
- 简化模式-With OpenID(implicit grant type):仅限 OpenID 认证服务,用于第三方用户登录及获取用户信息,不包含授权。
- 简化模式-With OpenID & OAuth(JS 客户端调用):包含 OpenID 认证服务和 OAuth 授权,但只针对 JS 调用(URL 参数获取),一般用于前端或无线端。
- 混合模式-With OpenID & OAuth(Hybrid Flow):推荐使用,包含 OpenID 认证服务和 OAuth 授权,但针对的是后端服务调用。
开源地址:https://github.com/yuezhongxin/IdentityServer4.Demo
参考资料:
- IdentityServer4
- IdentityServer4.Samples
- Welcome to IdentityServer4
- Welcome to OpenID Connect
- OpenID 学习笔记
- OAuth 和 OpenID 的区别
- OAuth、OAuth 与 OpenID 区别和联系
- 使用 OpenID、OAuth 和 Facebook Connect 武装你的站点
- OpenID Connect 身份认证标准推出,获谷歌微软支持
IdentityServer4 实现 OpenID Connect 和 OAuth 2.0的更多相关文章
- OpenID Connect:OAuth 2.0协议之上的简单身份层
OpenID Connect是什么?OpenID Connect(目前版本是1.0)是OAuth 2.0协议(可参考本人此篇:OAuth 2.0 / RCF6749 协议解读)之上的简单身份层,用 A ...
- IdentityServer4 使用OpenID Connect添加用户身份验证
使用IdentityServer4 实现OpenID Connect服务端,添加用户身份验证.客户端调用,实现授权. IdentityServer4 目前已更新至1.0 版,在之前的文章中有所介绍.I ...
- 【转载】IdentityServer4 使用OpenID Connect添加用户身份验证
使用IdentityServer4 实现OpenID Connect服务端,添加用户身份验证.客户端调用,实现授权. IdentityServer4 目前已更新至1.0 版,在之前的文章中有所介绍.I ...
- 入门教程:.NET开源OpenID Connect 和OAuth解决方案IdentityServer v3 介绍 (一)
现代的应用程序看起来像这样: 典型的交互操作包括: 浏览器与 web 应用程序进行通信 Web 应用程序与 web Api (有时是在他们自己的有时代表用户) 通信 基于浏览器的应用程序与 web A ...
- 入门教程:.NET开源OpenID Connect 和OAuth解决方案IdentityServer v3 术语(二)
你应该知道的在文档和对象模型中使用一些特定的术语: OpenID Connect Provider (OP) 授权服务器 Thinktecture IdentityServer v3 是一个.NET ...
- 入门教程:.NET开源OpenID Connect 和OAuth解决方案IdentityServer v3 创建简单的OAuth2.0服务器,客户端和API(三)
本教程的目的在于创造尽可能简单的identityserver安装作为一个oauth2授权服务器.这应该能够让你了解一些基本功能和配置选项(完整的源代码可以发现在这里).在后面的文档中会介绍更多的高级功 ...
- IdentityServer4 实现 OAuth 2.0(密码模式 - HTTP Post 方式)
之前写了一篇文章:<IdentityServer4 实现 OpenID Connect 和 OAuth 2.0> 上面这篇文章虽然详细,但都是点到为止的介绍,并没有实际应用的示例,所以,后 ...
- OAuth 2.0学习笔记
文章目录 OAuth的作用就是让"客户端"安全可控地获取"用户"的授权,与"服务商提供商"进行互动. OAuth在"客户端&quo ...
- 一个功能完备的.NET开源OpenID Connect/OAuth 2.0框架——IdentityServer3
今天推荐的是我一直以来都在关注的一个开源的OpenID Connect/OAuth 2.0服务框架--IdentityServer3.其支持完整的OpenID Connect/OAuth 2.0标准, ...
随机推荐
- Introduction to gaussian filter 高斯滤波器
Introduction to gaussian filter 我尝试尽可能低门槛的介绍这些好玩的东东-这里只须要正态分布函数作为基础就可以開始玩图像的高斯滤波了. Don't panic ! 在通常 ...
- lua及luci学习
由于项目需要对Luci进行修改,所以这里开始地luci进行较深入的研究. 探索其中的运行路径. Openwrt默认的HTTP服务器为uhttpd,该WEB服务器是由Luci的开发者自行开发的,非常小巧 ...
- CentOS 7 结构体GCC 4.8.2 32位编译环境
centos 7 结构体gcc 32位编译环境 1介绍 1.1背景 学习新 C++ 2011和C11标准. 1.2使用软件 CentOS 7(Linux version 3.10.0-123.el7. ...
- leetcode第27题--Implement strStr()
Implement strStr(). Returns a pointer to the first occurrence of needle in haystack, or null if need ...
- 【SSRS】入门篇(二) -- 建立数据源
原文:[SSRS]入门篇(二) -- 建立数据源 通过 [SSRS]入门篇(一) -- 创建SSRS项目 这篇,我们建立了一个SSRS项目: 接下来,我们以 AdventureWorks2012 示例 ...
- Java凝视Override、Deprecated、SuppressWarnings详细解释
一.什么是视线 说起目光,你必须先提什么是元数据(metadata). 所谓元数据是数据的数据.那.元数据是描述数据的叙述. 像在表中的数据字段,叙述了这个字段下的数据的含义.而J2SE5.0 ...
- 【转】百度API获取城市名地名(附源码)
在做一个软件时,用到了定位功能.网上有很多关于google 的GPS定位,但网上关于google定位都没有用, 搜索下原因:(这里建议大家在中国就尽量不使用系统自带的定位) 因为Google的服务器不 ...
- 【转】怎么导出jar包
如何导出jar包 右键工程->Export->Java->JAR file->Next-> Next 选中工程和工程中你要打包的内容,如果是Android的项目,需要把M ...
- String.Join的实现
String.Join的实现 在开发中,有时候会遇到需要把一个List对象中的某个字段用一个分隔符拼成一个字符串的情况.比如在SQL语句的in条件中,我们通常需要把List<int>这样的 ...
- vim实用笔记
vim实用笔记 真是不知不觉过了一年,前段时间忙着考试什么的,没再写笔记写博客,考完又懒懒地玩了几天.这几天其实都在读别人的博客,感受一下大神的工作和生活感悟,感受一下过来人的经历和经验,对自己总 ...