C# Redis安装 使用教程
前言:lz自打工作以来第一次遇到电脑问题需要重装系统,全盘格式化。打击是沉痛的。特别伤。 然后需要重新在本地部署 redis。这是写这篇博客的原因。希望对大家有所帮助,安装资源和引用DLL可以引用 只用于学习 ( windows环境安装 )
一:安装Redis
首先我们需要在本地或是服务器安装Redis。安装包可以去redis官网下载,去Gethub上down 我这里直接给我的百度云
链接:https://pan.baidu.com/s/1WJ48XMaHOmgb1J0KaQkdEw 密码:xjf4 下载后解压

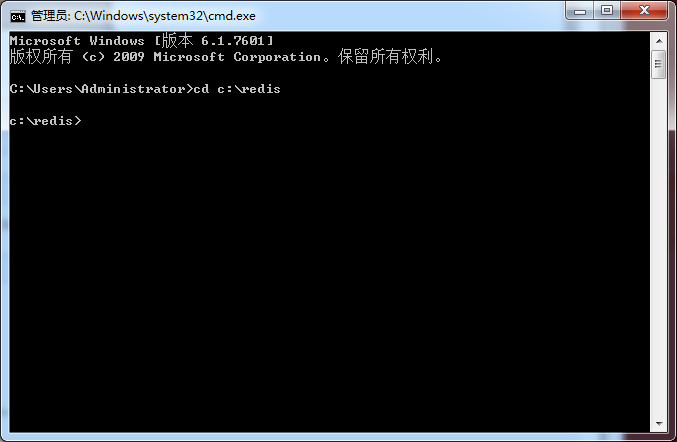
本地的话 你可以直接打开 redis-server.exe这个应用程序。也可以打开cmd命令 然后把路径换成你redis文件的路径 我的是放在 c:\redis 可以跟我的来,方便搬运代码 切换文件路径 cd
然后我们启动redis服务,运行 redis-server.exe redis.windows.conf
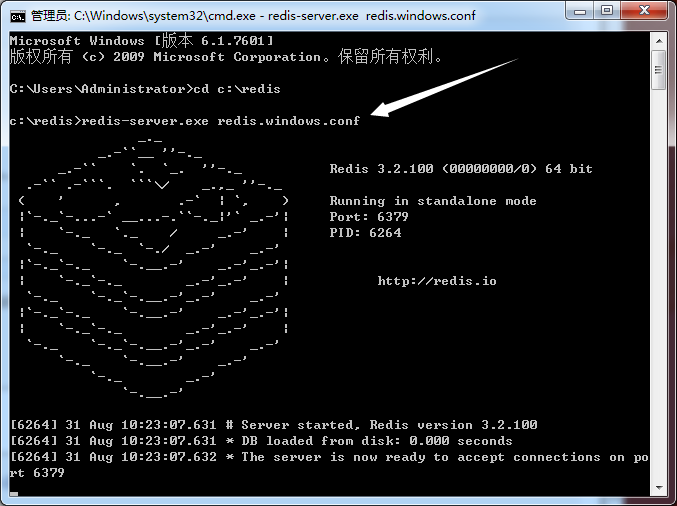
出现这个界面说明OK了,这个窗口别关 如果关闭了 重新来一遍
继续,再打开一个cmd窗口,切换到redis目录下面
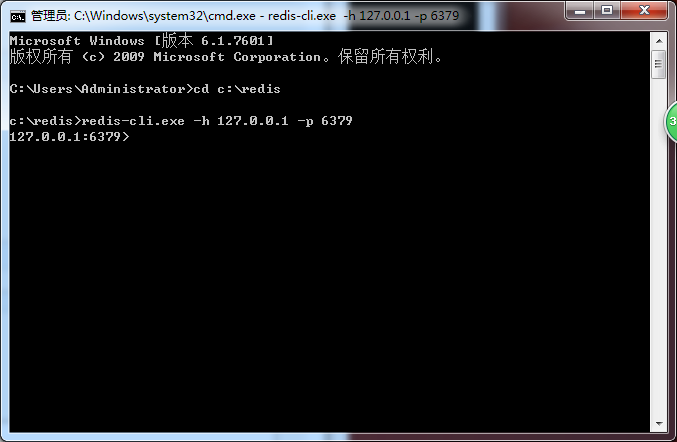
这里解释一下这个 127.0.0.1 是本地访问,相当于localhost 6379是redis默认的端口
继续,redis是存储键值对的所以我们测试一下
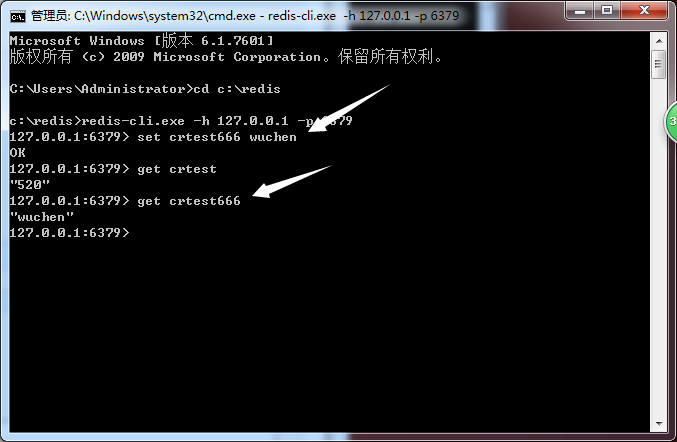
set一个 key value
get 一个key
机制就是把数据set 到 redis的数据库里,就是我们说的缓存 用的时候在get取值
接下来我们下载一个redis可视化工具,作用是相当于我们平时使用的数据库 可以去官网上下载,可以我直接上资源,方便 链接:https://pan.baidu.com/s/1K7QtxSVV_15kxP8zkEvIng 密码:k4f8
解压文件,安装成功 打开

字面意思,很简单吧
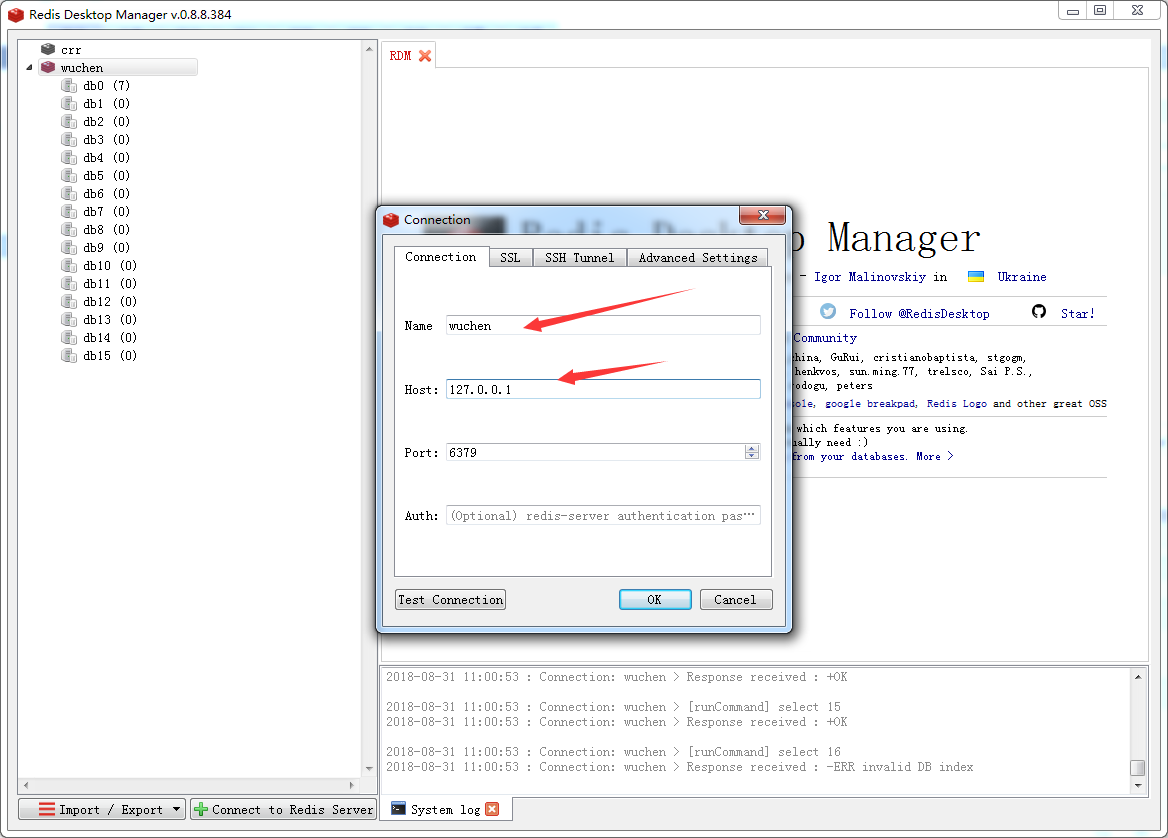
name 测试阶段随便写 HOST呢 就是主机IP地址 链接上之后 打开我们的DB

crtest666 wuchen 这个键值队是成功添加了的 (关于redis key是名字无所谓 value可以是列表,集合,自由使用,今天先不讲这个)
二:C# 中使用redis(查找,增加,删除的使用)
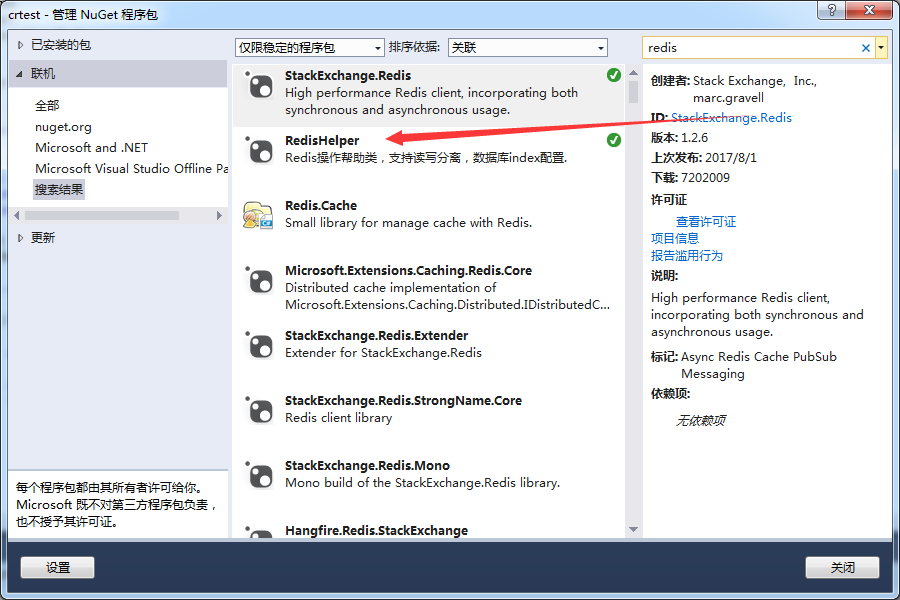
首先我们需要添加redis的引用。nuget包 搜索redis第一个就是。--StackExchange.Redis
根据运行的环境不同。还需要以下dll
1.ServiceStack.Common.dll
2.ServiceStack.Interfaces.dll
3.ServiceStack.Text.dll
可以去Gethub上去down, https://github.com/ServiceStack/ServiceStack.Redis 真的慢
博主百度云资源: 链接:https://pan.baidu.com/s/1gQLJlIcHhZtPikIgFHnHxA 密码:scqt
Lg:本博一直用win10,按理说只需要这些DLL的 现在装成win7,发现不行了 后来我在Nuget包中添加 RedisHelper,(现在好像直接叫做Redis了,看下备注说明确认一下)
这里举个很简单的使用redis的例子
添加一个控制台应用程序
然后在主程序类 program.cs 代码
using System;

using System.Collections.Generic;

using System.Linq;

using System.Text;

using System.Threading.Tasks;

namespace crtest

{

    class Program

    {

        /// <summary>

        /// 基无尘 18-8-31

        /// </summary>

        /// <param name="args"></param>

        static void Main(string[] args)

        {

            Console.WriteLine("Redis写入缓存:wuchengtest"); //添加

            RedisCacheHelper.Add("wuchen", "jiwuchen", DateTime.Now.AddDays());

            Console.WriteLine("Redis获取缓存:crtest666");//查找

            string str3 = RedisCacheHelper.Get<string>("crtest666");

            Console.WriteLine(str3);

            RedisCacheHelper.Remove("hellow");//删除

            string str = RedisCacheHelper.Get<string>("hellow");//查看是否删除成功

            Console.WriteLine(str == null ? "未找到" : str);

            Console.ReadKey();

        }

    }

}
然后添加一个帮助类 作用类似于我们常用的DbHelper
using ServiceStack.Redis;

using System;

using System.Collections.Generic;

using System.Linq;

using System.Text;

using System.Threading.Tasks;

namespace crtest

{

   public  class RedisCacheHelper

    {

        private static readonly PooledRedisClientManager pool = null;

        private static readonly string[] redisHosts = null;

        public static int RedisMaxReadPool = ;

        public static int RedisMaxWritePool = ;

        static RedisCacheHelper()

        {

            var redisHostStr = "127.0.0.1:6379";

            if (!string.IsNullOrEmpty(redisHostStr))

            {

                redisHosts = redisHostStr.Split(',');

                if (redisHosts.Length > )

                {

                    pool = new PooledRedisClientManager(redisHosts, redisHosts,

                        new RedisClientManagerConfig()

                        {

                            MaxWritePoolSize = RedisMaxWritePool,

                            MaxReadPoolSize = RedisMaxReadPool,

                            AutoStart = true

                        });

                }

            }

        }

        #region Add

        public static void Add<T>(string key, T value, DateTime expiry)

        {

            if (value == null)

            {

                return;

            }

            if (expiry <= DateTime.Now)

            {

                Remove(key);

                return;

            }

            try

            {

                if (pool != null)

                {

                    using (var r = pool.GetClient())

                    {

                        if (r != null)

                        {

                            r.SendTimeout = ;

                            r.Set(key, value, expiry - DateTime.Now);

                        }

                    }

                }

            }

            catch (Exception ex)

            {

                string msg = string.Format("{0}:{1}发生异常!{2}", "cache", "存储", key);

            }

        }

        public static void Add<T>(string key, T value, TimeSpan slidingExpiration)

        {

            if (value == null)

            {

                return;

            }

            if (slidingExpiration.TotalSeconds <= )

            {

                Remove(key);

                return;

            }

            try

            {

                if (pool != null)

                {

                    using (var r = pool.GetClient())

                    {

                        if (r != null)

                        {

                            r.SendTimeout = ;

                            r.Set(key, value, slidingExpiration);

                        }

                    }

                }

            }

            catch (Exception ex)

            {

                string msg = string.Format("{0}:{1}发生异常!{2}", "cache", "存储", key);

            }

        }

        public static T Get<T>(string key)

        {

            if (string.IsNullOrEmpty(key))

            {

                return default(T);

            }

            T obj = default(T);

            try

            {

                if (pool != null)

                {

                    using (var r = pool.GetClient())

                    {

                        if (r != null)

                        {

                            r.SendTimeout = ;

                            obj = r.Get<T>(key);

                        }

                    }

                }

            }

            catch (Exception ex)

            {

                string msg = string.Format("{0}:{1}发生异常!{2}", "cache", "获取", key);

            }

            return obj;

        }

        #endregion

        public static void Remove(string key)

        {

            try

            {

                if (pool != null)

                {

                    using (var r = pool.GetClient())

                    {

                        if (r != null)

                        {

                            r.SendTimeout = ;

                            r.Remove(key);

                        }

                    }

                }

            }

            catch (Exception ex)

            {

                string msg = string.Format("{0}:{1}发生异常!{2}", "cache", "删除", key);

            }

        }

        public static bool Exists(string key)

        {

            try

            {

                if (pool != null)

                {

                    using (var r = pool.GetClient())

                    {

                        if (r != null)

                        {

                            r.SendTimeout = ;

                            return r.ContainsKey(key);

                        }

                    }

                }

            }

            catch (Exception ex)

            {

                string msg = string.Format("{0}:{1}发生异常!{2}", "cache", "是否存在", key);

            }

            return false;

        }

    }

}
OK,生成一下 然后运行看看效果

OK,我们去redis-server上看看效果,也可以用上面的控制台来get 看看效果(cmd命令窗口自始至终都是开着的)
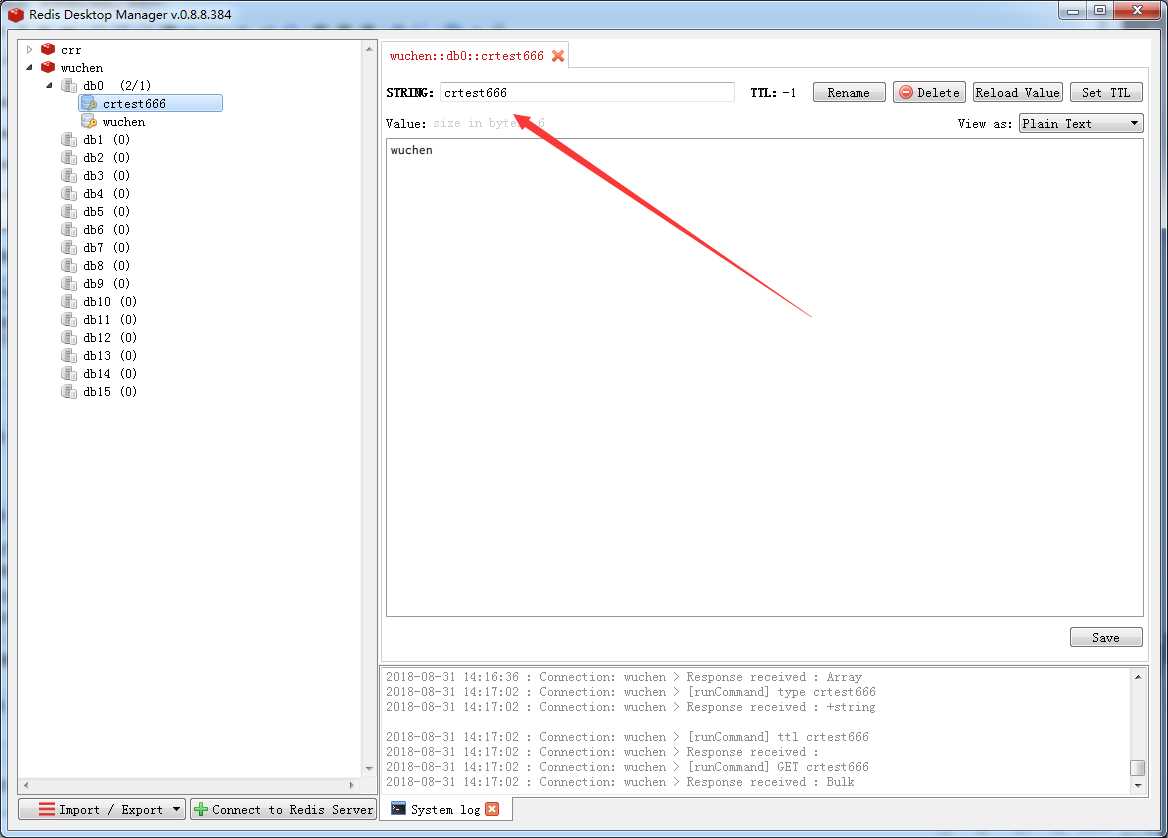
可以看到是成功添加的。好啦
通过简单的两句代码,慢慢发现编程的乐趣
C# Redis安装 使用教程的更多相关文章
- Redis安装部署教程
1)下载 redis-3.2.9.tar.gz 2)用ssh工具连接目录主机,在命令窗口输入:mkdir -p /opt/redis创建redis文件夹 3)通过WinSCP工具将redis-3.2. ...
- linux下redis安装运行教程——redis系列
天没降大任于我,照样苦我心智,劳我筋骨. 安装运行的过程 由于官网太慢,csdn里的资源又要钱,所以呢,只能使用我自己本地以前下载的陈年..哦不,3.xredis安装包 资源已经放到百度云,需要的可以 ...
- Linux下Redis安装使用教程
https://redis.io/download 第一步:安装redis需要在有c语言的编译环境下,执行命令安装c语言环境: yum install gcc-c++ https://blog.csd ...
- redis安装使用教程
一:安装redis 1.下载redis并安装 $wget http://redis.googlecode.com/files/redis-2.2.10.tar.gz $tar zvxf redis-2 ...
- 【Docker】Redis 安装使用教程
1.安装 1.1 拉取镜像 docker pull redis redis:4.0 1.2 创建redis容器名"redistest1",并开启持久化 docker run -d ...
- linux +redis 安装 +mongo 安装
Linux 下redis安装 本教程使用的最新文档版本为 2.8.17,下载并安装: $ wget http://download.redis.io/releases/redis-2.8.17.tar ...
- Redis安装教程
1. Linux下Redis安装教程 (1)安装 #tar xf redis-2.6.14.tar.gz #cd redis-2.6.14 #make #make install (2)配置 修改re ...
- Redis安装教程及可视化工具RedisDesktopManager下载安装
Redis安装教程: 1. Windows下安装教程: 下载:https://github.com/MSOpenTech/redis/releases Redis 支持 32 位和 64 位.这个需要 ...
- [ecmagent][redis学习][1初识redis] redis安装+redis快速教程+python操作redis
# redis安装 # redis安装教程 -- 服务器(ubuntu)安装redis服务 sudo apt-get install redis-server -- 源码安装 -- $ wget ht ...
随机推荐
- hdu 1052 Tian Ji -- The Horse Racing【田忌赛马】
题目 这道题主要是需要考虑到各种情况:先对马的速度进行排序,然后分情况考虑: 1.当田忌最慢的马比国王最慢的马快则赢一局 2.当田忌最快的马比国王最快的马快则赢一局 3.当田忌最快的马比国王最快的马慢 ...
- FPGA学习之旅
从大学就开始使用stm32,工作之后,仍然没有摆脱,从f1系列,到f4系列,然后又到L1系列,尽管可以满足工作需要,但还是希望可以摆脱束缚,尝试学习FPGA,希望能够遇到一个好机遇.
- CSS3中很容易混淆的transform,translate,transition。如何去区分,以及综合写法。
属性 含义 transition(过渡) 用于设置元素的样式过度,和animation有着类似的效果,但细节上有很大的不同 transform(变形) 用于元素进行旋转.缩放.移动或倾斜,和设 ...
- Oracle Data Guard配置
Oracle Data Guard 的配置在网上有很多资料,但是没有一个完整的,配置下来多少有些问题.在踩了各种坑之后,自己终于配置成功,就想把这过程记录下来. 1 测试环境 主数据库:windo ...
- 升讯威微信营销系统开发实践:(1)功能概要与架构设计( 完整开源于 Github)
GitHub:https://github.com/iccb1013/Sheng.WeixinConstruction因为个人精力时间有限,不会再对现有代码进行更新维护,不过微信接口比较稳定,经测试至 ...
- [Swift]错误提示:Method does not override any method from its superclass
问题原因:方法名称书写错误! ViewController 生命周期 // 加载视图时会调用该方法 override func loadView() { super.loadView() print( ...
- Linux 下 pushd,popd,cd- 用法
一,为何要使用这几个命令? 可能大家会有疑问,为何要使用这几个命令, 难道用cd不就可以切换目录了吗? 没错,使用cd就可以切换到需要访问的目录, 但是有时会是一个路径很长,层次很多的目录 ...
- Liunx服务管理(Centos)
RPM包安装的服务其安装文件是遵循系统默认安装位置,所以可以通过命令快速启动,但源码包的安装是统一放在一个自定义文件夹下,所有其服务要使用绝对路径,但也可以通过软连接方式,让其支持RPM包相同管理方式 ...
- Vue SSR不可不知的问题
Vue SSR不可不知的问题 本文主要介绍Vue SSR(vue服务端渲染)的应用场景,开发中容易遇到的一些问题,提升ssr性能的方法,以及ssr的安全性问题. ssr的应用场景 1.SEO需求 SE ...
- 机器学习(Machine Learning)算法总结-K临近算法
一.算法详解 1.什么是K临近算法 Cover 和 Hart在1968年提出了最初的临近算法 属于分类(classification)算法 邻近算法,或者说K最近邻(kNN,k-NearestNeig ...