第五章 springboot + mybatis
springboot集成了springJDBC与JPA,但是没有集成mybatis,所以想要使用mybatis就要自己去集成。集成方式相当简单。
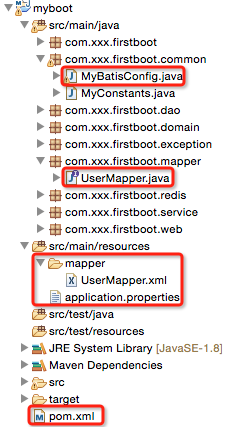
1、项目结构
2、pom.xml
         <!-- 与数据库操作相关的依赖 -->

         <dependency>

             <groupId>org.springframework.boot</groupId>

             <artifactId>spring-boot-starter-jdbc</artifactId>

         </dependency>

         <!-- 使用数据源 -->

         <dependency>

             <groupId>com.alibaba</groupId>

             <artifactId>druid</artifactId>

             <version>1.0.14</version>

         </dependency>

         <!-- mysql -->

         <dependency>

             <groupId>mysql</groupId>

             <artifactId>mysql-connector-java</artifactId>

             <scope>runtime</scope>

         </dependency>

         <!-- mybatis -->

         <dependency>

             <groupId>org.mybatis</groupId>

             <artifactId>mybatis</artifactId>

             <version>3.2.8</version>

         </dependency>

         <dependency>

             <groupId>org.mybatis</groupId>

             <artifactId>mybatis-spring</artifactId>

             <version>1.2.2</version>

          </dependency>
说明:
spring-boot-starter-jdbc:引入与数据库操作相关的依赖,例如daoSupport等
- druid:阿里巴巴的数据源
- mysql-connector-java:mysql连接jar,scope为runtime
- mybatis + mybatis-spring:mybatis相关jar
3、application.properties
 jdbc.driverClassName = com.mysql.jdbc.Driver

 jdbc.url = jdbc:mysql://xxx:3306/mytestdb?zeroDateTimeBehavior=convertToNull&useUnicode=true&characterEncoding=utf-8

 jdbc.username = root

 jdbc.password = vvvxxx

 mybatis.typeAliasesPackage=com.xxx.firstboot.domain

 mybatis.mapperLocations=classpath:mapper/*.xml
说明:
- mybatis.typeAliasesPackage:指定domain类的基包,即指定其在*Mapper.xml文件中可以使用简名来代替全类名(看后边的UserMapper.xml介绍)
mybatis.mapperLocations:指定*Mapper.xml的位置
4、com.xxx.firstboot.common.MyBatisConfig
作用:mybatis与springboot集成的入口
 package com.xxx.firstboot.common;

 import java.util.Properties;

 import javax.sql.DataSource;

 import org.apache.ibatis.session.SqlSessionFactory;

 import org.mybatis.spring.SqlSessionFactoryBean;

 import org.mybatis.spring.annotation.MapperScan;

 import org.springframework.beans.factory.annotation.Autowired;

 import org.springframework.context.annotation.Bean;

 import org.springframework.context.annotation.Configuration;

 import org.springframework.core.env.Environment;

 import org.springframework.core.io.support.PathMatchingResourcePatternResolver;

 import com.alibaba.druid.pool.DruidDataSourceFactory;

 /**

  * springboot集成mybatis的基本入口

  * 1)创建数据源

  * 2)创建SqlSessionFactory

  */

 @Configuration    //该注解类似于spring配置文件

 @MapperScan(basePackages="com.xxx.firstboot.mapper")

 public class MyBatisConfig {

     @Autowired

     private Environment env;

     /**

      * 创建数据源

      * @Primary 该注解表示在同一个接口有多个实现类可以注入的时候,默认选择哪一个,而不是让@autowire注解报错

      */

     @Bean

     //@Primary

     public DataSource getDataSource() throws Exception{

         Properties props = new Properties();

         props.put("driverClassName", env.getProperty("jdbc.driverClassName"));

         props.put("url", env.getProperty("jdbc.url"));

         props.put("username", env.getProperty("jdbc.username"));

         props.put("password", env.getProperty("jdbc.password"));

         return DruidDataSourceFactory.createDataSource(props);

     }

     /**

      * 根据数据源创建SqlSessionFactory

      */

     @Bean

     public SqlSessionFactory sqlSessionFactory(DataSource ds) throws Exception{

         SqlSessionFactoryBean fb = new SqlSessionFactoryBean();

         fb.setDataSource(ds);//指定数据源(这个必须有,否则报错)

         //下边两句仅仅用于*.xml文件,如果整个持久层操作不需要使用到xml文件的话(只用注解就可以搞定),则不加

         fb.setTypeAliasesPackage(env.getProperty("mybatis.typeAliasesPackage"));//指定基包

         fb.setMapperLocations(new PathMatchingResourcePatternResolver().getResources(env.getProperty("mybatis.mapperLocations")));//指定xml文件位置

         return fb.getObject();

     }

 }
说明:
- 类上边添加两个
- @Configuration注解(该注解类似于spring的配置文件)
- @MapperScan注解,指定扫描的mapper接口所在的包
- 在该类中,注入了Environment实例,使用该实例可以去读取类路径下application.properties文件中的内容,读取文件内容的三种方式,见第二章 第二个spring-boot程序
- 在该类中,使用druid数据源定义了数据源Bean,spring-boot默认使用的是tomcat-jdbc数据源,这是springboot官方推荐的数据源(性能和并发性都很好)
- 根据数据源生成SqlSessionFactory
- 值得注意的是,数据源是必须指定的,否则springboot启动不了
- typeAliasesPackage和mapperLocations不是必须的,如果整个项目不需要用到*Mapper.xml来写SQL的话(即只用注解就可以搞定),那么不需要配
- @Primary注解:指定在同一个接口有多个实现类可以注入的时候,默认选择哪一个,而不是让@Autowire注解报错(一般用于多数据源的情况下)
这样之后,在项目中再使用springboot就和在ssm中(配置完成后)使用一样了。
5、com.xxx.firstboot.mapper.UserMapper
 package com.xxx.firstboot.mapper;

 import org.apache.ibatis.annotations.Insert;

 import org.apache.ibatis.annotations.Param;

 import com.xxx.firstboot.domain.User;

 public interface UserMapper {

     @Insert("INSERT INTO tb_user(username, password) VALUES(#{username},#{password})")

     public int insertUser(@Param("username") String username, @Param("password")  String password);

     /**

      * 插入用户,并将主键设置到user中

      * 注意:返回的是数据库影响条数,即1

      */

     public int insertUserWithBackId(User user);

 }
说明:该接口中有两个方法,
- 一个普通插入:直接用注解搞定
- 一个插入返回主键:需要使用xml来搞定
 <?xml version="1.0" encoding="UTF-8" ?>

 <!DOCTYPE mapper PUBLIC "-//mybatis.org//DTD Mapper 3.0//EN" "http://mybatis.org/dtd/mybatis-3-mapper.dtd">

 <!-- 指定工作空间,要与接口名相同,源代码没有去看,猜测应该是通过"这里的namespace.下边方法的id"来定位方法的 -->

 <mapper namespace="com.xxx.firstboot.mapper.UserMapper">

     <!-- 若不需要自动返回主键,将useGeneratedKeys="true" keyProperty="id"去掉即可(当然如果不需要自动返回主键,直接用注解即可) -->

     <insert id="insertUserWithBackId" parameterType="User" useGeneratedKeys="true" keyProperty="id" >

        <![CDATA[

        INSERT INTO tb_user

        (

            username,

            password

        )

        VALUES

        (

            #{username, jdbcType=VARCHAR},

            #{password, jdbcType=VARCHAR}

        )

        ]]>

    </insert>

 </mapper>
6、com.xxx.firstboot.dao.UserDao
 package com.xxx.firstboot.dao;

 import org.springframework.beans.factory.annotation.Autowired;

 import org.springframework.stereotype.Repository;

 import com.xxx.firstboot.domain.User;

 import com.xxx.firstboot.mapper.UserMapper;

 @Repository

 public class UserDao {

     @Autowired

     private UserMapper userMapper;

     public int insertUser(String username, String password){

         return userMapper.insertUser(username, password);

     }

     public int insertUserWithBackId(User user){

         return userMapper.insertUserWithBackId(user);

     }

 }
7、com.xxx.firstboot.service.UserService
 package com.xxx.firstboot.service;

 import org.springframework.beans.factory.annotation.Autowired;

 import org.springframework.stereotype.Service;

 import com.xxx.firstboot.dao.UserDao;

 import com.xxx.firstboot.domain.User;

 @Service

 public class UserService {

     @Autowired

     private UserDao userDao;

     public boolean addUser(String username, String password){

         return userDao.insertUser(username, password)==1?true:false;

     }

     public User addUserWithBackId(String username, String password){

         User user = new User();

         user.setUsername(username);

         user.setPassword(password);

         userDao.insertUserWithBackId(user);//该方法后,主键已经设置到user中了

         return user;

     }

 }
8、com.xxx.firstboot.controller.UserController
 package com.xxx.firstboot.web;

 import org.springframework.beans.factory.annotation.Autowired;

 import org.springframework.web.bind.annotation.RequestMapping;

 import org.springframework.web.bind.annotation.RequestMethod;

 import org.springframework.web.bind.annotation.RequestParam;

 import org.springframework.web.bind.annotation.RestController;

 import com.xxx.firstboot.domain.User;

 import com.xxx.firstboot.service.UserService;

 import io.swagger.annotations.Api;

 import io.swagger.annotations.ApiImplicitParam;

 import io.swagger.annotations.ApiImplicitParams;

 import io.swagger.annotations.ApiOperation;

 import io.swagger.annotations.ApiResponse;

 import io.swagger.annotations.ApiResponses;

 @RestController

 @RequestMapping("/user")

 @Api("userController相关api")

 public class UserController {

     @Autowired

     private UserService userService;

     @ApiOperation("添加用户")

     @ApiImplicitParams({

         @ApiImplicitParam(paramType="query",name="username",dataType="String",required=true,value="用户的姓名",defaultValue="zhaojigang"),

         @ApiImplicitParam(paramType="query",name="password",dataType="String",required=true,value="用户的密码",defaultValue="wangna")

     })

     @ApiResponses({

         @ApiResponse(code=400,message="请求参数没填好"),

         @ApiResponse(code=404,message="请求路径没有或页面跳转路径不对")

     })

     @RequestMapping(value="/addUser",method=RequestMethod.POST)

     public boolean addUser(@RequestParam("username") String username,

                            @RequestParam("password") String password) {

         return userService.addUser(username,password);

     }

     @ApiOperation("添加用户且返回已经设置了主键的user实例")

     @ApiImplicitParams({

         @ApiImplicitParam(paramType="query",name="username",dataType="String",required=true,value="用户的姓名",defaultValue="zhaojigang"),

         @ApiImplicitParam(paramType="query",name="password",dataType="String",required=true,value="用户的密码",defaultValue="wangna")

     })

     @ApiResponses({

         @ApiResponse(code=400,message="请求参数没填好"),

         @ApiResponse(code=404,message="请求路径没有或页面跳转路径不对")

     })

     @RequestMapping(value="/addUserWithBackId",method=RequestMethod.POST)

     public User addUserWithBackId(@RequestParam("username") String username,

                                      @RequestParam("password") String password) {

         return userService.addUserWithBackId(username, password);

     }

 }
测试:
进入项目的pom.xml文件所在目录,执行"mvn spring-boot:run"(这是最推荐的spring-boot的运行方式),另外一种在主类上右击-->"run as"-->"java application"不常用
参考自:
http://www.111cn.net/jsp/Java/93604.htm :springboot+mybatis+多数据源
http://blog.csdn.net/xiaoyu411502/article/details/48164311:springboot+mybatis+读写分离(其实读写分离就是两个数据源对两个库进行操作)
第五章 springboot + mybatis的更多相关文章
- 第五章 springboot + mybatis(转载)
本编博客转发自:http://www.cnblogs.com/java-zhao/p/5350021.html springboot集成了springJDBC与JPA,但是没有集成mybatis,所以 ...
- 第九章 springboot + mybatis + 多数据源 (AOP实现)
在第八章 springboot + mybatis + 多数据源代码的基础上,做两点修改 1.ShopDao package com.xxx.firstboot.dao; import org.spr ...
- 第二十五章 springboot + hystrixdashboard
注意: hystrix基本使用:第十九章 springboot + hystrix(1) hystrix计数原理:附6 hystrix metrics and monitor 一.hystrixdas ...
- SpringBoot | 第三十五章:Mybatis的集成和使用
前言 最近收到公众号留言说,单纯的Mybatis的集成和使用.前面在第九章:Mybatis-plus的集成和使用介绍了基于mybatis-plus的集成和使用.后者也只是对mybatis进行了功能增强 ...
- javaweb各种框架组合案例(五):springboot+mybatis+generator
一.介绍 1.springboot是spring项目的总结+整合 当我们搭smm,ssh,ssjdbc等组合框架时,各种配置不胜其烦,不仅是配置问题,在添加各种依赖时也是让人头疼,关键有些jar包之间 ...
- 第九章 springboot + mybatis + 多数据源 (AOP实现)(转载)
本编博客转发自:http://www.cnblogs.com/java-zhao/p/5415896.html 1.ShopDao package com.xxx.firstboot.dao; imp ...
- 第十五章 springboot + pojo默认值设置
我们有时需要给POJO设置默认值 pojo设置(推荐) 1.User package com.xxx.firstboot.domain; import lombok.Getter; import lo ...
- SpringBoot Mybatis整合(注解版),SpringBoot集成Mybatis(注解版)
SpringBoot Mybatis整合(注解版),SpringBoot集成Mybatis(注解版) ================================ ©Copyright 蕃薯耀 2 ...
- springboot + mybatis + 多数据源
此文已由作者赵计刚薪授权网易云社区发布. 欢迎访问网易云社区,了解更多网易技术产品运营经验 在实际开发中,我们一个项目可能会用到多个数据库,通常一个数据库对应一个数据源. 代码结构: 简要原理: 1) ...
随机推荐
- KO+bootstrap 模态窗全选绑定
HTML <div id="modalAreaID01"> <button type="button" class="btn btn ...
- [zz] 英文大写缩写前要加THE吗
http://zhidao.baidu.com/link?url=BvXRdoE0OjGh46rlodbyM3wirORSGGcnYGq0xYEtcoIMTkLnXd4Hl3iMLbKNb2npRdI ...
- 必须使用“角色管理工具”安装或配置Microsoft .NET Framework 3.5 SP1
在Windows Server 2008下直接安装SQL Server 2008时,会出现如下错误: 必须使用“角色管理工具”安装或配置Microsoft .NET Framework 3.5 SP1 ...
- JVM参数(三)打印所有XX参数及值
本篇文章基于Java 6(update 21oder 21之后)版本, HotSpot JVM 提供给了两个新的参数,在JVM启动后,在命令行中可以输出所有XX参数和值. -XX:+PrintFlag ...
- SQL中ISNULL用法示例
ISNULLSQL查询示例SELECT ISNULL 使用指定的替换值替换 NULL. 语法 :ISNULL ( check_expression , replacement_val ...
- FW: javascripts 要不要加引号
Javascript编程风格 http://www.ruanyifeng.com/blog/2012/04/javascript_programming_style.html 作者: 阮一峰 日期: ...
- archlinux 传统方法编译内核linux kernel 3.3.7
From: http://hi.baidu.com/flashgive/item/eaef6326b5eb73d3a417b662 archlinux中传统方法编译内核 1)下载内核以及补丁并解压: ...
- Lua 5.1 参考手册
Lua 5.1 参考手册 by Roberto Ierusalimschy, Luiz Henrique de Figueiredo, Waldemar Celes 云风 译 www.codingno ...
- 三、Distributing Maya Plugins
For example, a fully implemented render utility node will have at least three files: the plug-in fil ...
- webstrom 2016 破解
本篇文章经过笔者实验结果,网友均可放心使用 版权声明:本文为博主原创文章,未经博主允许不得转载. 工欲善其事,必先利其器 websrtom作为前端开发神器,现在是越来越多的用户使用.很多小白们下载好了 ...