
.NET Core微服务之基于IdentityServer建立授权与验证服务
Tip: 此篇已加入.NET Core微服务基础系列文章索引
一、IdentityServer的预备知识

要学习IdentityServer,事先得了解一下基于Token的验证体系,这是一个庞大的主题,涉及到Token,OAuth&OpenID,JWT,协议规范等等等等,园子里已经有很多介绍的文章了,个人觉得solenovex的这一篇文章《学习IdentityServer4的预备知识》言简意赅,可以快速的看看。另外savaboard的《ASP.NET Core 之 Identity 入门(一)》和《ASP.NET Core 之 Identity 入门(二)》这两篇也可以一看,对Claims和Identity的基本知识讲的比较通俗易懂,深入浅出,有故事情节,哈哈。
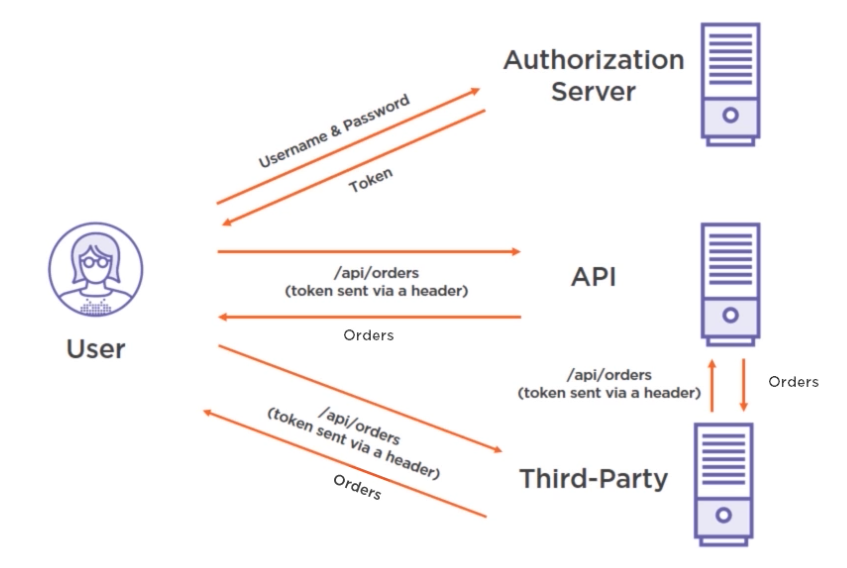
重点关注一下上面这张图(也是来自solenovex的文章),对于一个User(已注册)来说,他会首先向Authorization Server表明自己的身份(比如输入用户名和密码),然后Authorization Server为其发放了一个token,而这个token就好比是把家里的钥匙配了一把(clone)新的,此后该User就可以访问API请求获取Orders(订单)数据了。当然,实际中可能Authorization Server和API Server不在同一个区域内,它们可能只能遥望对方。此外,User还可以基于这个token去访问第三方服务,第三方服务会使用这个API来访问API Server,向其提供token比提供username&password要安全得多。
二、IdentityServer极简介绍
IdentityServer4(这里只使用版本号为4)是一个基于OpenID Connect和OAuth 2.0的针对ASP.NET Core 2.0的框架。IdentityServer是将规范兼容的OpenID Connect和OAuth 2.0终结点添加到任意ASP.NET Core应用程序的中间件。通常,你构建(或重新使用)包含登录和注销页面的应用程序,IdentityServer中间件会向其添加必要的协议头,以便客户端应用程序可以使用这些标准协议与其对话。

我们可以用IdentityServer来做啥?
(1)身份验证服务=>官方认证的OpenID Connect实现
(2)单点登录/注销(SSO)
(3)访问受控的API=>为不同的客户提供访问API的令牌,比如:MVC网站、SPA、Mobile App等
(4)等等等......
三、Started:第一个AuthorizationServer
1.1 建立一个ASP.NET Core空Web项目
建立ASP.NET Core项目,使用Empty空模板。
为了更好地查看日志信息,同时考虑到IISExpress启动起来真的很慢,修改lanuchSettings.json文件如下:
{

  "profiles": {

    "Manulife.DNC.MSAD.IdentityServer4Test": {

      "commandName": "Project",

      "launchBrowser": false,

      "environmentVariables": {

        "ASPNETCORE_ENVIRONMENT": "Development"

      },

      "applicationUrl": "http://localhost:5000/"

    }

  }

}
1.2 安装并配置IdentityServer4
Step1.首先安装IdentityServer4:
NuGet>Install-Package IdentityServer4
Step2.配置ASP.NET Core管道,即修改Configure方法
    public void Configure(IApplicationBuilder app, IHostingEnvironment env)

    {

        if (env.IsDevelopment())

        {

            app.UseDeveloperExceptionPage();

        }

        app.UseIdentityServer();

    }
Step3.为了要把IdentityServer注册到容器中,需要对其进行配置,而这个配置中要包含三个信息:
(1)哪些API可以使用这个AuthorizationServer
(2)哪些Client可以使用这个AuthorizationServer
(3)哪些User可以被这个AuthrizationServer识别并授权
这里为了快速演示,我们写一个基于内存的静态类来快速填充上面这些信息(实际中,可以持久化在数据库中通过EF等ORM获取,也可以通过Redis获取):
    public class InMemoryConfiguration

    {

        public static IConfiguration Configuration { get; set; }

        /// <summary>

        /// Define which APIs will use this IdentityServer

        /// </summary>

        /// <returns></returns>

        public static IEnumerable<ApiResource> GetApiResources()

        {

            return new[]

            {

                new ApiResource("clientservice", "CAS Client Service"),

                new ApiResource("productservice", "CAS Product Service"),

                new ApiResource("agentservice", "CAS Agent Service")

            };

        }

        /// <summary>

        /// Define which Apps will use thie IdentityServer

        /// </summary>

        /// <returns></returns>

        public static IEnumerable<Client> GetClients()

        {

            return new[]

            {

                new Client

                {

                    ClientId = "client.api.service",

                    ClientSecrets = new [] { new Secret("clientsecret".Sha256()) },

                    AllowedGrantTypes = GrantTypes.ResourceOwnerPasswordAndClientCredentials,

                    AllowedScopes = new [] { "clientservice" }

                },

                new Client

                {

                    ClientId = "product.api.service",

                    ClientSecrets = new [] { new Secret("productsecret".Sha256()) },

                    AllowedGrantTypes = GrantTypes.ResourceOwnerPasswordAndClientCredentials,

                    AllowedScopes = new [] { "clientservice", "productservice" }

                },

                new Client

                {

                    ClientId = "agent.api.service",

                    ClientSecrets = new [] { new Secret("agentsecret".Sha256()) },

                    AllowedGrantTypes = GrantTypes.ResourceOwnerPasswordAndClientCredentials,

                    AllowedScopes = new [] { "agentservice", "clientservice", "productservice" }

                }

            };

        }

        /// <summary>

        /// Define which uses will use this IdentityServer

        /// </summary>

        /// <returns></returns>

        public static IEnumerable<TestUser> GetUsers()

        {

            return new[]

            {

                new TestUser

                {

                    SubjectId = "",

                    Username = "edison@hotmail.com",

                    Password = "edisonpassword"

                },

                new TestUser

                {

                    SubjectId = "",

                    Username = "andy@hotmail.com",

                    Password = "andypassword"

                },

                new TestUser

                {

                    SubjectId = "",

                    Username = "leo@hotmail.com",

                    Password = "leopassword"

                }

            };

        }

    }
Step4.对于Token签名需要一对公钥和私钥,不过IdentityServer为开发者提供了一个AddDeveloperSigningCredential()方法,它会帮我们搞定这个事,并默认存到硬盘中。当切换到生产环境时,还是得使用正儿八经的证书,更换为使用AddSigningCredential()方法。
    public void ConfigureServices(IServiceCollection services)

    {

        InMemoryConfiguration.Configuration = this.Configuration;

        services.AddIdentityServer()

            .AddDeveloperSigningCredential()

            .AddTestUsers(InMemoryConfiguration.GetUsers().ToList())

            .AddInMemoryClients(InMemoryConfiguration.GetClients())

            .AddInMemoryApiResources(InMemoryConfiguration.GetApiResources());

    }
1.3 获取你心心念念的Token
Step1.启动刚刚我们建立的AuthorizationServer程序,这里我们绑定的是5000端口。
Step2.启动Postman/SoapUI等API测试工具,通过向HTTP Body中填写数据发起POST请求:
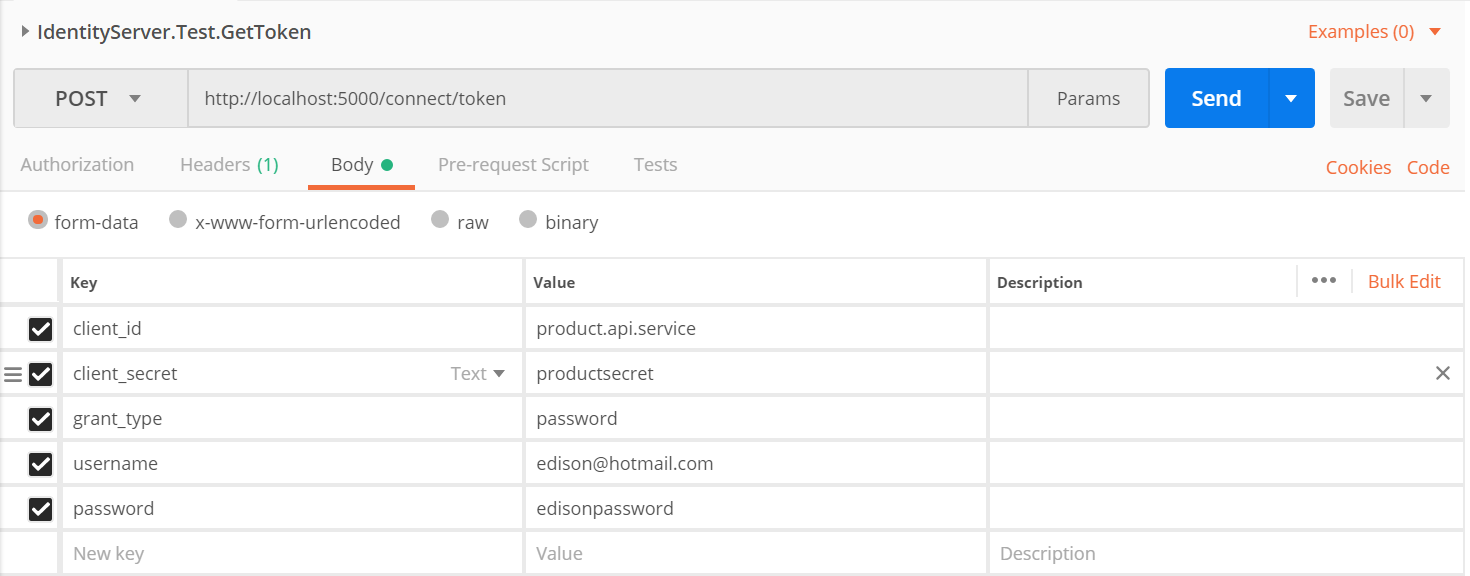
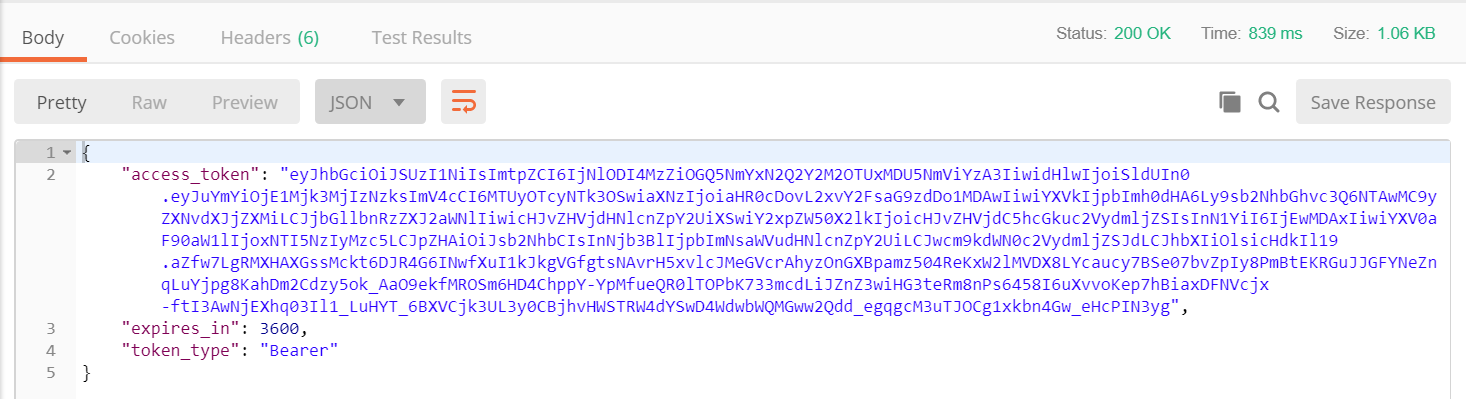
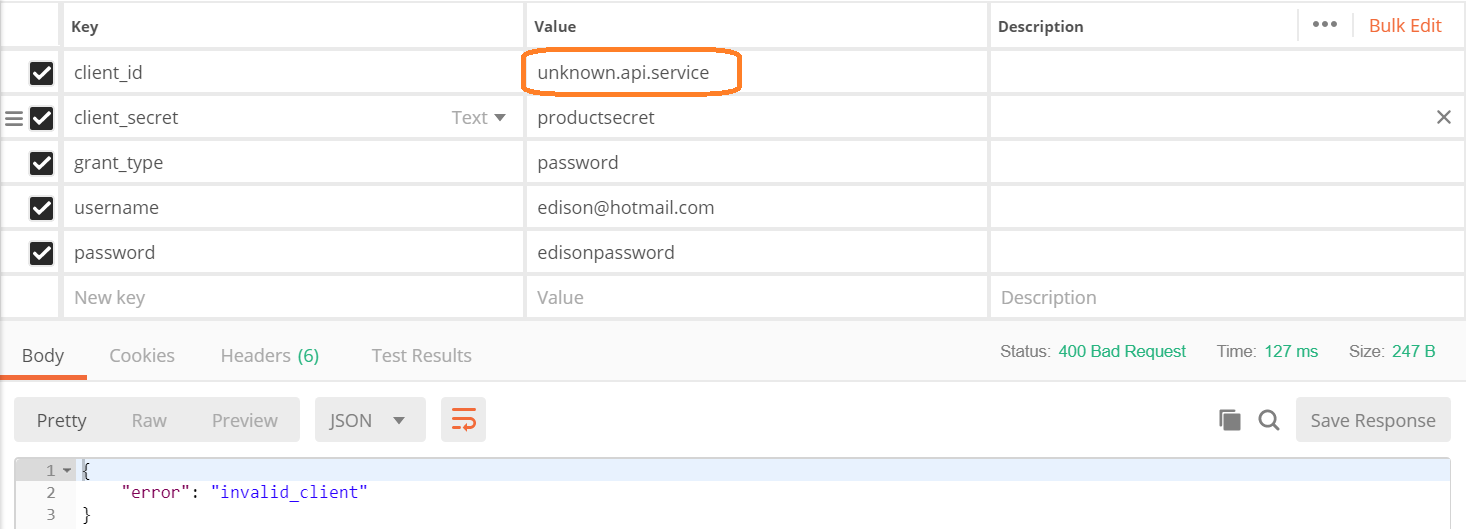
Step3.发送一个错误的数据,看看返回的是啥?(这里输入了一个不在定义列表中的client_id)
Step4.查看控制台的日志信息:表示获取Token的这个请求成功了,日志中client_secret和password都是不会直接明文显示的。
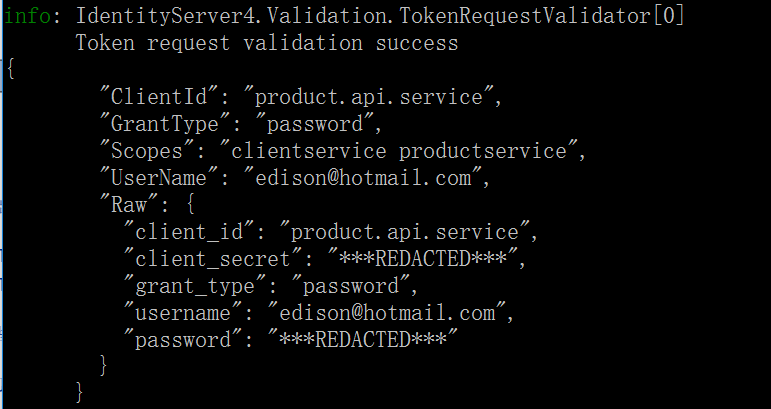
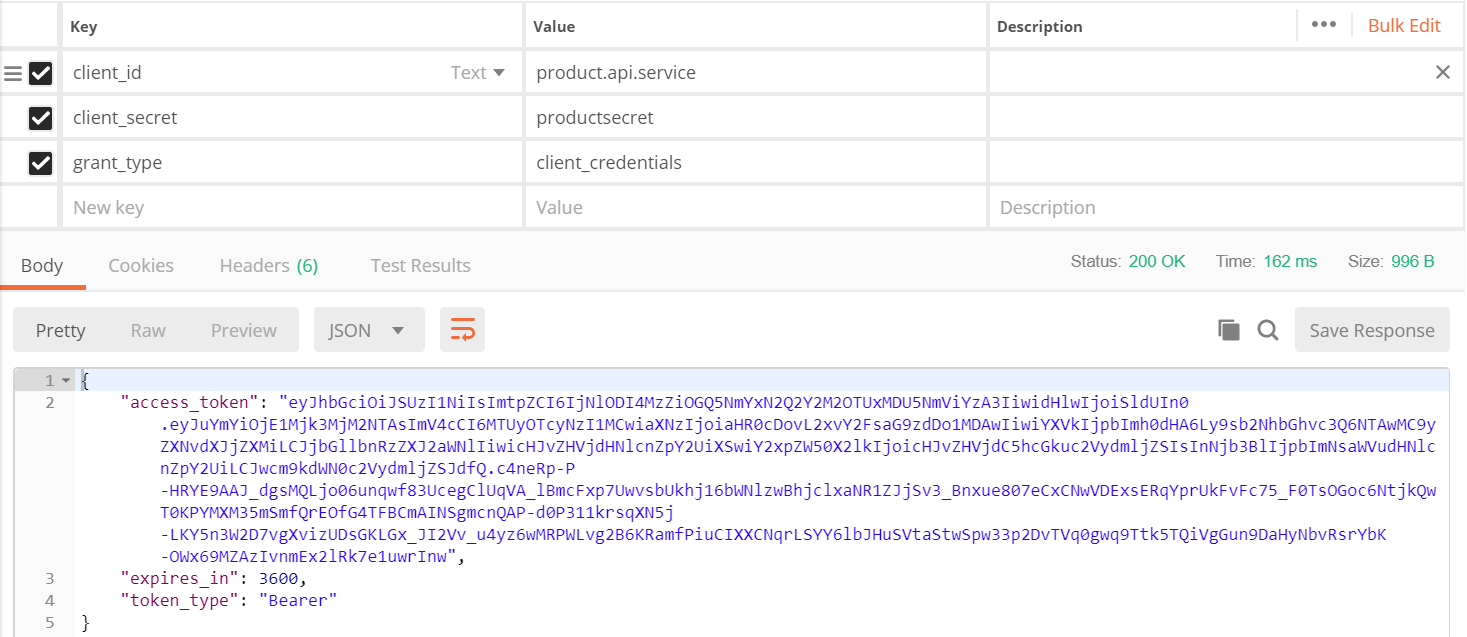
Step5.IdentityServer中我们设置这几个API Service的Grant_Type是ResourceOwnerPasswordAndClientCredentials(点击这里了解=>资源拥有者密码凭据许可),因此我们还可以使用ClientCredentials(点击这里了解=>客户端凭据许可),如下所示:
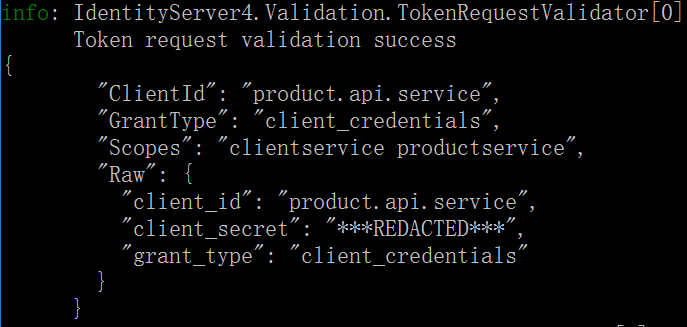
Step6.再次查看控制台日志信息:这次没有关于User相关的任何信息显示了。
Step7.基本的开发结束,对于开发阶段,我们使用IdentityServer为开发者提供的临时证书即可,但是后面仍然需要生成一些正儿八经的证书。这里我们通过OpenSSL来生成,首先去官网下载一个,这里使用的是Win64_1.1版本。打开Powershell或者CMD,输入以下命令:
cmd>openssl req -newkey rsa:2048 -nodes -keyout cas.clientservice.key -x509 -days 365 -out cas.clientservice.cer
下面将生成的证书和Key封装成一个文件,以便IdentityServer可以使用它们去正确地签名tokens
cmd>openssl pkcs12 -export -in cas.clientservice.cer -inkey cas.clientservice.key -out cas.clientservice.pfx
中途会提示让你输入Export Password,这个password后面会用到,记住它。最终导出后的结果如下图所示:

这里我将其放到了项目结构文件夹中,并设置这个pfx文件为“如果较新则复制”,确保可以在最后生成的目录里边。现在就可以修改一下ConfigureServices()方法了:
    public void ConfigureServices(IServiceCollection services)

    {

        var basePath = PlatformServices.Default.Application.ApplicationBasePath;

        InMemoryConfiguration.Configuration = this.Configuration;

        services.AddIdentityServer()

            //.AddDeveloperSigningCredential()

            .AddSigningCredential(new X509Certificate2(Path.Combine(basePath,

                Configuration["Certificates:CerPath"]),

                Configuration["Certificates:Password"]))

          .AddTestUsers(InMemoryConfiguration.GetUsers().ToList())

          .AddInMemoryClients(InMemoryConfiguration.GetClients())

        .AddInMemoryApiResources(InMemoryConfiguration.GetApiResources());

    }
这里我将证书的路径和导出密码都写到了配置文件中:
{

  "Certificates": {

    "CerPath": "certificate\\cas.clientservice.pfx",

    "Password": "manulife"

  }

}
好,配置正儿八经的证书这一步骤Over。
四、IdentityServer QuickStart-UI
4.1 关于QuickStart UI
IdentityServer为我们提供了一套UI以便使我们能够快速地开发具有基本功能的认证/授权界面,我们可以去这个地址:https://github.com/IdentityServer/IdentityServer4.Quickstart.UI/tree/release 下载,并将其复制到我们的项目目录中。
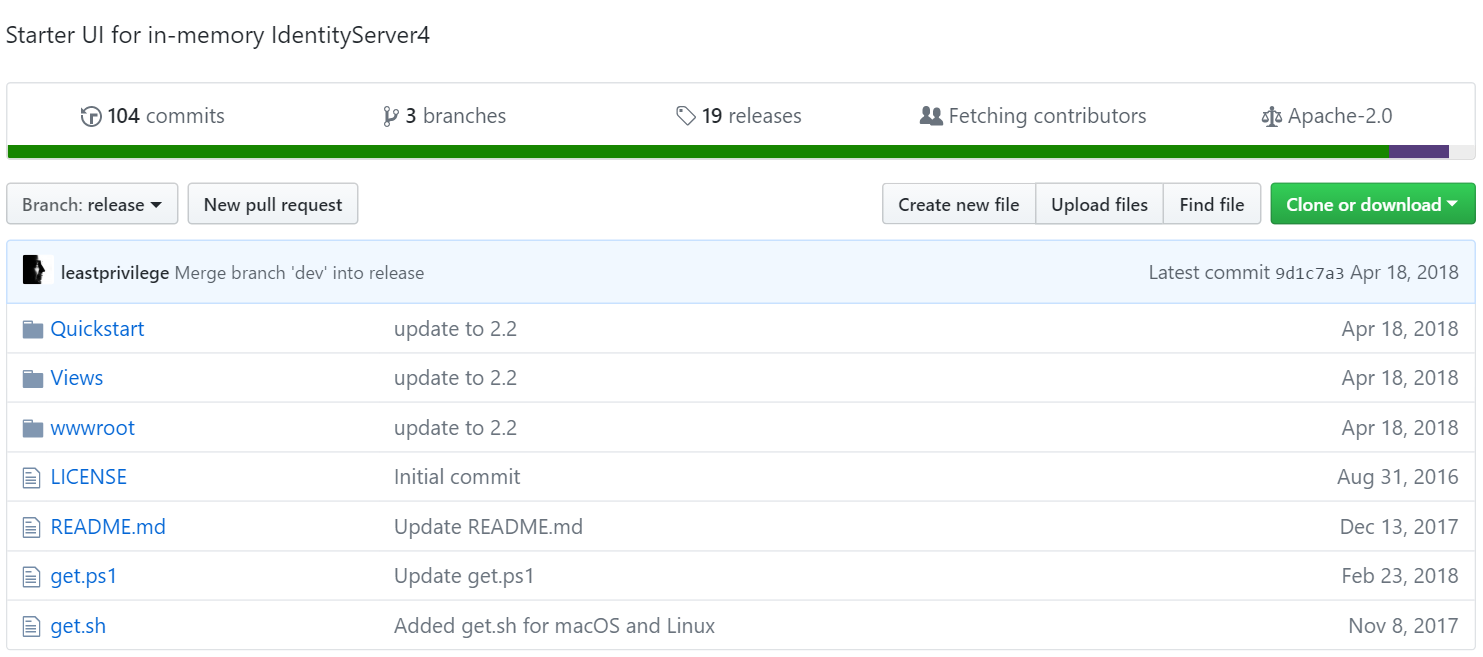
复制完成后,我们的项目结构如下图所示:

4.2 修改DI方法
(1)使用MVC与静态文件(由于wwwroot下有很多静态资源文件)
    public void Configure(IApplicationBuilder app, IHostingEnvironment env)

    {

        if (env.IsDevelopment())

        {

            app.UseDeveloperExceptionPage();

        }

        app.UseIdentityServer();

        // for QuickStart-UI

        app.UseStaticFiles();

        app.UseMvcWithDefaultRoute();

    }
(2)注册MVC
    public void ConfigureServices(IServiceCollection services)

    {

        var basePath = PlatformServices.Default.Application.ApplicationBasePath;

        InMemoryConfiguration.Configuration = this.Configuration;

        services.AddIdentityServer()

            //.AddDeveloperSigningCredential()

            .AddSigningCredential(new X509Certificate2(Path.Combine(basePath,

                Configuration["Certificates:CerPath"]),

                Configuration["Certificates:Password"]))

          .AddTestUsers(InMemoryConfiguration.GetUsers().ToList())

          .AddInMemoryClients(InMemoryConfiguration.GetClients())

          .AddInMemoryApiResources(InMemoryConfiguration.GetApiResources());

        // for QuickStart-UI

        services.AddMvc();

    }
4.3 Run
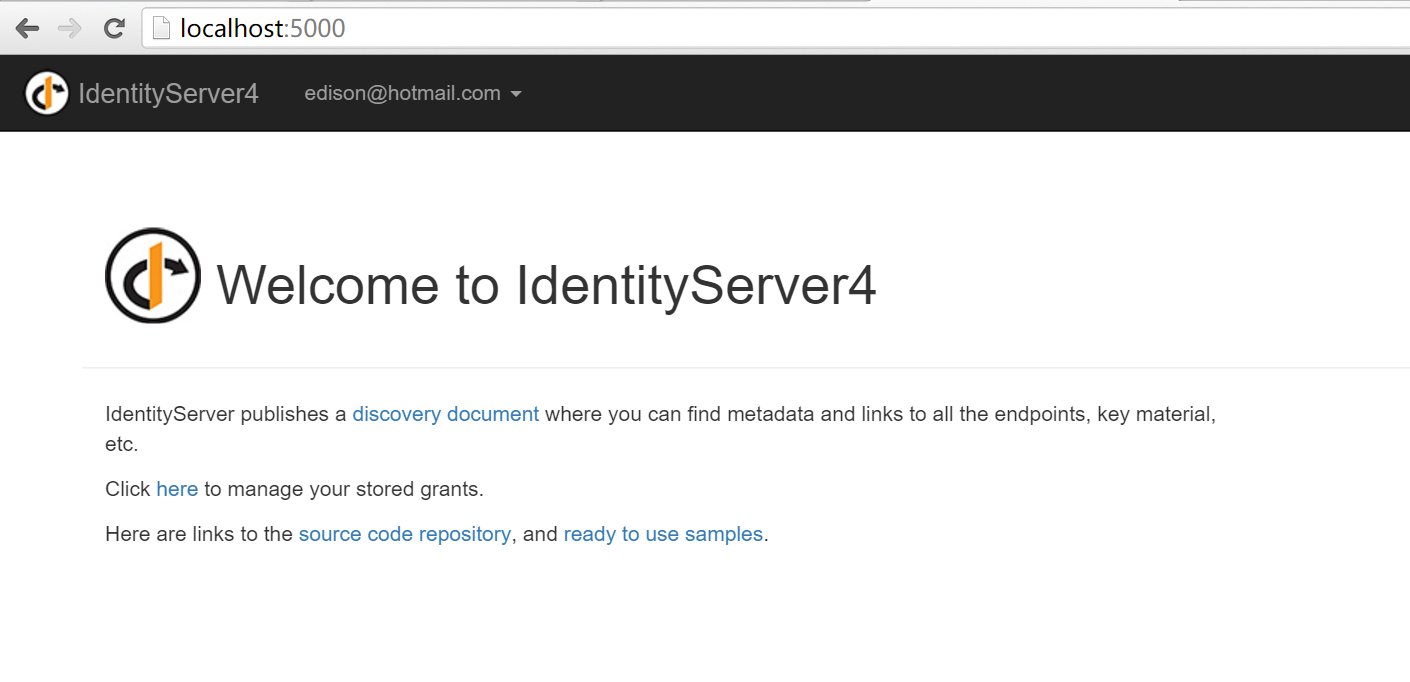
(1)首页(这里由于我已经登录,所以这里会把我的账号显示了出来)
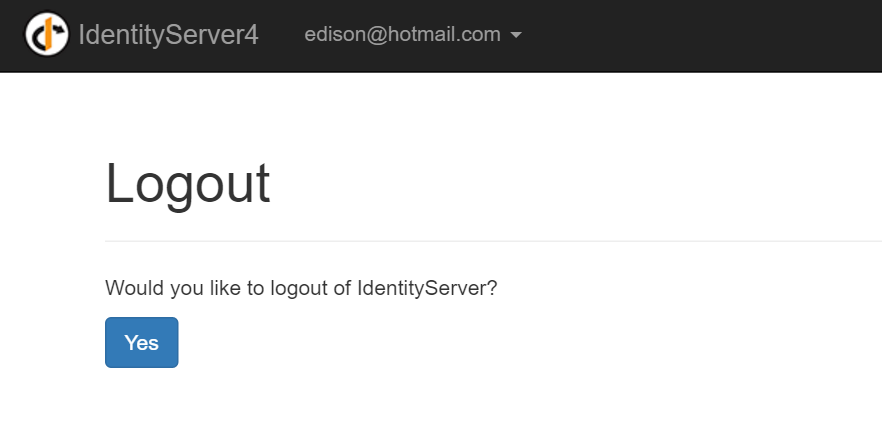
(2)Logout页,刚刚说到我已经实现Login了,所以我这里Logout一下

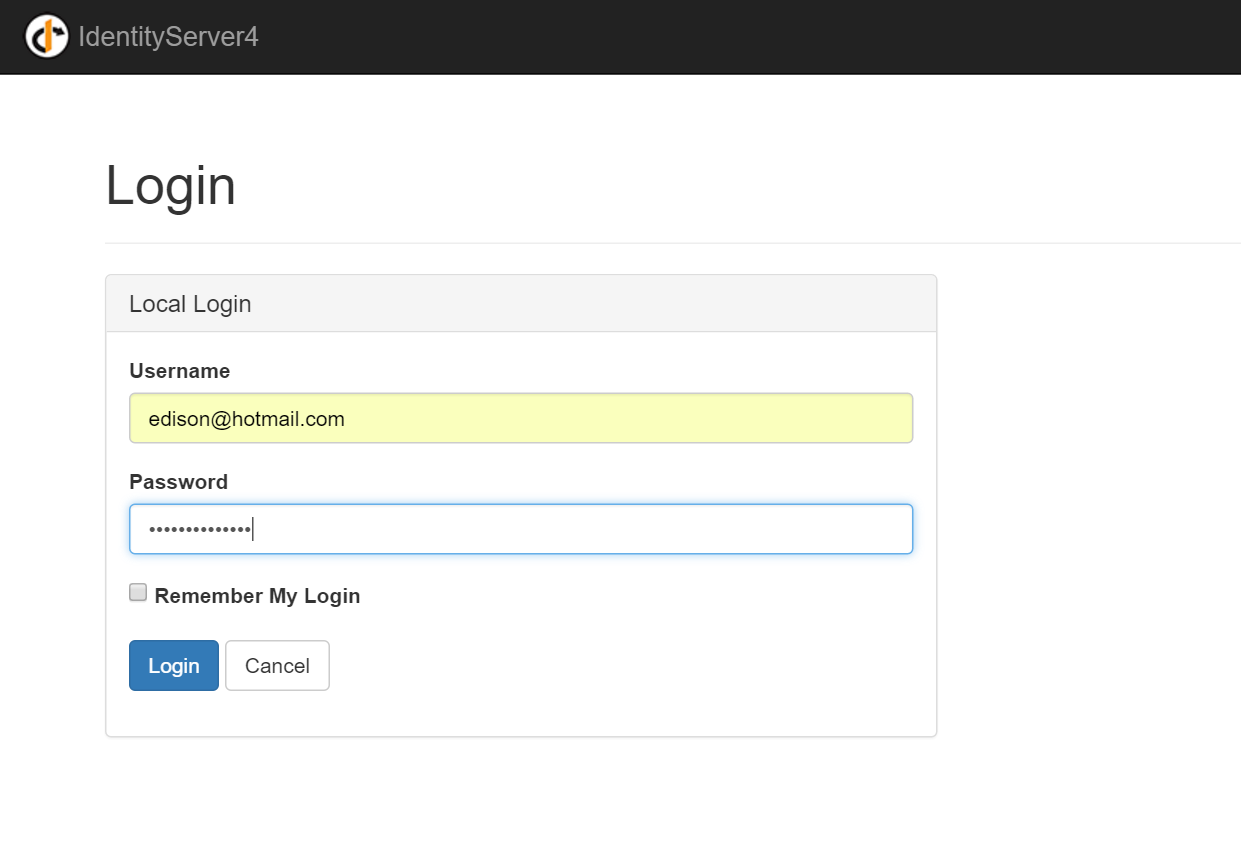
(3)Login页:这里只能识别我们在之前配置的静态User列表中那些User
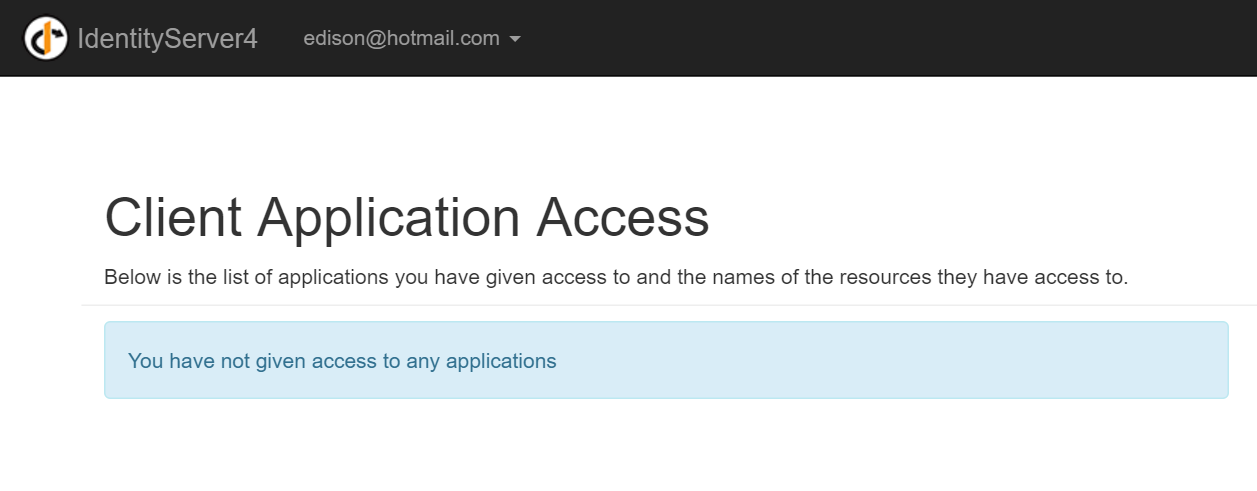
登录之后,显示:"You have not given access to any applications",表示我们还没有给他授予访问任何API或网站模块的权限。后续我们会创建API和MVC网站来演示如何对其进行授权和访问。
五、小结
本篇主要简单的介绍了IdentityServer以及如何基于IdentityServer建立一个基本的AuthorizationServer,如何获取Token,以及集成QuickStart UI实现基本的界面展示。后续还会创建API和MVC网站,来和IdentityServer进行集成,以演示如何对User授予访问API和MVC网站的访问权限。
示例代码
Click => https://github.com/EdisonChou/EDC.IdentityServer4.Demo
参考资料
《identityserver4官方文档》=> 重点关注那些流程图与术语
ddrsql,《IdentityServer4之Resource Owner Password Credentials(资源拥有者密码凭据许可)》
ddrsql,《IdentityServer4之Client Credentials(客户端凭据许可)》
solenovex,《学习Identity Server4的预备知识》
solenovex,《使用Identity Server 4建立Authorization Server (1)》
solenovex,《使用Identity Server 4建立Authorization Server (2)》
solenovex,《使用Identity Server 4建立Authorization Server (3)》
.NET Core微服务之基于IdentityServer建立授权与验证服务的更多相关文章
- .NET Core微服务之基于IdentityServer建立授权与验证服务(续)
Tip: 此篇已加入.NET Core微服务基础系列文章索引 上一篇我们基于IdentityServer4建立了一个AuthorizationServer,并且继承了QuickStartUI,能够成功 ...
- ASP.NET Core 2.1中基于角色的授权
ASP.NET Core 2.1中基于角色的授权 授权是来描述用户能够做什么的过程.例如,只允许管理员用户可以在电脑上进行软件的安装以及卸载.而非管理员用户只能使用软件而不能进行软件的安装以及卸载.它 ...
- .NET Core微服务系列基础文章索引(目录导航Final版)
一.为啥要总结和收集这个系列? 今年从原来的Team里面被抽出来加入了新的Team,开始做Java微服务的开发工作,接触了Spring Boot, Spring Cloud等技术栈,对微服务这种架构有 ...
- .NET Core微服务系列基础文章
今年从原来的Team里面被抽出来加入了新的Team,开始做Java微服务的开发工作,接触了Spring Boot, Spring Cloud等技术栈,对微服务这种架构有了一个感性的认识.虽然只做了两个 ...
- .NET Core微服务架构学习与实践系列文章索引目录
一.为啥要总结和收集这个系列? 今年从原来的Team里面被抽出来加入了新的Team,开始做Java微服务的开发工作,接触了Spring Boot, Spring Cloud等技术栈,对微服务这种架构有 ...
- .NET Core微服务系列基础文章索引(目录导航Draft版)
一.为啥要写这个系列? 今年从原来的Team里面被抽出来加入了新的Team,开始做Java微服务的开发工作,接触了Spring Boot, Spring Cloud等技术栈,对微服务这种架构有了一个感 ...
- .NET Core微服务之基于Ocelot+IdentityServer实现统一验证与授权
Tip: 此篇已加入.NET Core微服务基础系列文章索引 一.案例结构总览 这里,假设我们有两个客户端(一个Web网站,一个移动App),他们要使用系统,需要通过API网关(这里API网关始终作为 ...
- .NET Core微服务之基于Exceptionless实现分布式日志记录
Tip: 此篇已加入.NET Core微服务基础系列文章索引 一.Exceptionless极简介绍 Exceptionless 是一个开源的实时的日志收集框架,它可以应用在基于 ASP.NET,AS ...
- 庐山真面目之十二微服务架构基于Docker搭建Consul集群、Ocelot网关集群和IdentityServer版本实现
庐山真面目之十二微服务架构基于Docker搭建Consul集群.Ocelot网关集群和IdentityServer版本实现 一.简介 在第七篇文章<庐山真面目之七微服务架构Consul ...
随机推荐
- Python字符串的操作
字符串常用操作 name = "my name is alex" # 注: python中方法名前后带下划线的是供内部使用的方法, 如方法__dir__(). 这种方法是不对外提供 ...
- MFC中打开选择文件夹对话框,并将选中的文件夹地址显示在编辑框中
一般用于选择你要将文件保存到那个目录下,此程序还包含新建文件夹功能 BROWSEINFO bi; ZeroMemory(&bi, sizeof(BROWSEINFO)); //指定存放文件的 ...
- 【BZOJ 4016】 [FJOI2014]最短路径树问题
题目链接: TP 题解: 我就是个智障.明明是道大水题,硬是拖了6h. 关于这道题我唯一想说的就是,记得更新拆分后的子树大小!!!我就是ZZ恒(QwQ. 代码: #define Troy 10/26 ...
- loj553 「LibreOJ Round #8」MINIM
最简单的暴力dp就是f[i][j]表示到i异或和为j的最小花费. 然后我们发现两堆大小为i,j的石子合并,可以更新到一堆大小为k=i,j最高公共的1以下都是1,以上是i|j,权值为v1+v2的石子. ...
- BZOJ_1101_[POI2007]Zap_莫比乌斯反演
题意:FGD正在破解一段密码,他需要回答很多类似的问题:对于给定的整数a,b和d,有多少正整数对x,y,满足x<=a ,y<=b,并且gcd(x,y)=d.作为FGD的同学,FGD希望得到 ...
- BZOJ_3174_[Tjoi2013]拯救小矮人_贪心+DP
BZOJ_3174_[Tjoi2013]拯救小矮人_贪心+DP Description 一群小矮人掉进了一个很深的陷阱里,由于太矮爬不上来,于是他们决定搭一个人梯.即:一个小矮人站在另一小矮人的 肩膀 ...
- 关于Python元祖,列表,字典,集合的比较
定义 方法 列表 可以包含不同类型的对象,可以增减元素,可以跟其他的列表结合或者把一个列表拆分,用[]来定义的 eg:aList=[123,'abc',4.56,['inner','list'], ...
- IE浏览器下ajax和缓存的那些事儿
项目经理最近返回了一些问题: (客户浏览器为IE11,本地360,谷歌没发现任何问题) 1.加载页面时下拉框中没有数据,关闭之后再打开出现数据: 2.数据保存之后页面没有刷新: 我也是接手别人的项目, ...
- AT89S52最小系统
NC是NOT CONNECTED的缩写,即空脚. 芯片中NC引脚没有任何用途,只是限于封装形式,该引脚必须存在.
- Linux的内存分页管理
作者:Vamei 出处:http://www.cnblogs.com/vamei 严禁转载 内存是计算机的主存储器.内存为进程开辟出进程空间,让进程在其中保存数据.我将从内存的物理特性出发,深入到内存 ...