聊一聊 Linux 上对函数进行 hook 的两种方式
一:背景
1. 讲故事
前两篇我们介绍了 Minhook 在 Windows 平台上的强大功效,这一篇我们来聊一聊如何在 Linux 上对函数进行hook,这里介绍两种方式。
- 轻量级的 LD_PRELOAD 拦截
LD_PRELOAD是一种共享库拦截,这种方式的优点在于不需要对源程序做任何修改,达到无侵入的功效,这是windows平台上不可想象的。
- funchook 拦截
在 github 有很多可用于 linux 上的函数 hook,我发现轻量级的,活跃的,开源的 要属 funchook 吧。
二:两种拦截方式
1. LD_PRELOAD 如何实现拦截
要想明白 LD_PRELOAD 如何实现拦截?需要你对 linux 上的进程初始化时的链接器 ld.so 的工作过程有一个了解,简单来说就是它的加载顺序为 主程序的可执行文件 -> LD_PRELOAD 指定的库 -> glibc 标准库 -> 其他依赖库 。
由于 LD_PRELOAD 指定的 so 文件优于 glibc.so 解析,所以可以利用这种先入为主的方式覆盖后续的同名符号方法,那 ld.so 长啥样呢?在我的ubuntu上就是 ld-linux-x86-64.so.2。
root@ubuntu2404:/data2# cat /proc/5322/maps

60c0f8687000-60c0f8688000 r--p 00000000 08:03 1966089                    /data2/main

60c0f8688000-60c0f8689000 r-xp 00001000 08:03 1966089                    /data2/main

60c0f8689000-60c0f868a000 r--p 00002000 08:03 1966089                    /data2/main

60c0f868a000-60c0f868b000 r--p 00002000 08:03 1966089                    /data2/main

60c0f868b000-60c0f868c000 rw-p 00003000 08:03 1966089                    /data2/main

60c1266de000-60c1266ff000 rw-p 00000000 00:00 0                          [heap]

7efd5c600000-7efd5c628000 r--p 00000000 08:03 2242169                    /usr/lib/x86_64-linux-gnu/libc.so.6

7efd5c628000-7efd5c7b0000 r-xp 00028000 08:03 2242169                    /usr/lib/x86_64-linux-gnu/libc.so.6

7efd5c7b0000-7efd5c7ff000 r--p 001b0000 08:03 2242169                    /usr/lib/x86_64-linux-gnu/libc.so.6

7efd5c7ff000-7efd5c803000 r--p 001fe000 08:03 2242169                    /usr/lib/x86_64-linux-gnu/libc.so.6

7efd5c803000-7efd5c805000 rw-p 00202000 08:03 2242169                    /usr/lib/x86_64-linux-gnu/libc.so.6

7efd5c805000-7efd5c812000 rw-p 00000000 00:00 0

7efd5c964000-7efd5c967000 rw-p 00000000 00:00 0

7efd5c977000-7efd5c979000 rw-p 00000000 00:00 0

7efd5c979000-7efd5c97d000 r--p 00000000 00:00 0                          [vvar]

7efd5c97d000-7efd5c97f000 r-xp 00000000 00:00 0                          [vdso]

7efd5c97f000-7efd5c980000 r--p 00000000 08:03 2242166                    /usr/lib/x86_64-linux-gnu/ld-linux-x86-64.so.2

7efd5c980000-7efd5c9ab000 r-xp 00001000 08:03 2242166                    /usr/lib/x86_64-linux-gnu/ld-linux-x86-64.so.2

7efd5c9ab000-7efd5c9b5000 r--p 0002c000 08:03 2242166                    /usr/lib/x86_64-linux-gnu/ld-linux-x86-64.so.2

7efd5c9b5000-7efd5c9b7000 r--p 00036000 08:03 2242166                    /usr/lib/x86_64-linux-gnu/ld-linux-x86-64.so.2

7efd5c9b7000-7efd5c9b9000 rw-p 00038000 08:03 2242166                    /usr/lib/x86_64-linux-gnu/ld-linux-x86-64.so.2

7ffe03c95000-7ffe03cb6000 rw-p 00000000 00:00 0                          [stack]

ffffffffff600000-ffffffffff601000 --xp 00000000 00:00 0                  [vsyscall]
说了这么多,接下来我们演示下如何对 openat 进行拦截,首先定义一个 LD_PRELOAD 需要加载的共享库,代码如下:
#define _GNU_SOURCE

#include <dlfcn.h>

#include <stdio.h>

#include <fcntl.h>

#include <stdarg.h>

#include <unistd.h>

#include <sys/types.h>

static int (*real_openat)(int, const char *, int, ...) = NULL;

int openat(int dirfd, const char *pathname, int flags, ...)

{

    mode_t mode = 0;

    pid_t pid = getpid();

    pid_t tid = gettid();

    printf("hooked openat: PID=%d, TID=%d, path=%s\n", pid, tid, pathname);

    if (!real_openat)

    {

        real_openat = dlsym(RTLD_NEXT, "openat");

    }

    if (flags & O_CREAT)

    {

        return real_openat(dirfd, pathname, flags, mode);

    }

    else

    {

        return real_openat(dirfd, pathname, flags);

    }

}
将上面的 hook_openat.c 做成动态链接库,其中的 -ldl 表示对外提供加载该库的api,比如(dlopen,dlsym), 参考如下:
root@ubuntu2404:/data2# gcc -shared -fPIC -o libhookopenat.so hook_openat.c -ldl

root@ubuntu2404:/data2# ls -lh

total 24K

-rw-r--r-- 1 root root 688 Jun 12 09:14 hook_openat.c

-rwxr-xr-x 1 root root 16K Jun 12 09:20 libhookopenat.so

-rw-r--r-- 1 root root 782 Jun 12 09:18 main.c
共享库搞定之后,接下来就是写 C 代码来调用了,这里我们通过 openat 打开文件,然后让 libhookopenat.so 拦截,参考代码如下:
#define _GNU_SOURCE

#include <fcntl.h>

#include <unistd.h>

#include <stdio.h>

#include <stdlib.h>

#include <string.h>

int main()

{

    // 在当前目录下创建一个新文件

    int fd = openat(AT_FDCWD, "example.txt", O_WRONLY | O_CREAT | O_TRUNC, 0644);

    if (fd == -1)

    {

        perror("openat failed");

        exit(EXIT_FAILURE);

    }

    // 写入一些内容到文件

    const char *text = "This is a test file created with openat!\n";

    ssize_t bytes_written = write(fd, text, strlen(text));

    if (bytes_written == -1)

    {

        perror("write failed");

        close(fd);

        exit(EXIT_FAILURE);

    }

    // 关闭文件

    close(fd);

    printf("File created and written successfully! Wrote %zd bytes.\n", bytes_written);

    return 0;

}
root@ubuntu2404:/data2# gcc -o main ./main.c

root@ubuntu2404:/data2# LD_PRELOAD=./libhookopenat.so ./main

hooked openat: PID=4646, TID=4646, path=example.txt

File created and written successfully! Wrote 41 bytes.
从卦中可以清晰的看到 hook 成功!
2. funchook 如何实现拦截
LD_PRELOAD 这种共享库的粒度还是太大,如果粒度再小一点就更加灵活了,比如函数级,这就是本节要介绍到的 funchook,源码在github上:https://github.com/kubo/funchook ,唯一麻烦一点的就是你需要通过源码编译来生成对应的 头文件,静态链接文件,动态链接库 ,参考如下:
root@ubuntu2404:/data4# sudo apt install -y git gcc cmake make

root@ubuntu2404:/data4# git clone https://github.com/kubo/funchook.git

root@ubuntu2404:/data4# cd funchook

root@ubuntu2404:/data4# mkdir build && cd build

root@ubuntu2404:/data4# cmake ..

root@ubuntu2404:/data4# make

root@ubuntu2404:/data4/funchook/build# sudo make install

[ 25%] Built target distorm

[ 42%] Built target funchook-shared

[ 60%] Built target funchook-static

[ 71%] Built target funchook_test

[ 85%] Built target funchook_test_shared

[100%] Built target funchook_test_static

Install the project...

-- Install configuration: ""

-- Installing: /usr/local/include/funchook.h

-- Installing: /usr/local/lib/libfunchook.so.2.0.0

-- Installing: /usr/local/lib/libfunchook.so.2

-- Installing: /usr/local/lib/libfunchook.so

-- Installing: /usr/local/lib/libfunchook.a

root@ubuntu2404:/data4/funchook/build# ldconfig
由于默认安装在了 /usr/local/lib 下,一定要记得用 ldconfig 命令刷新下,否则程序可能找不到新库,最后就是 C 的调用代码,参考如下:
#define _GNU_SOURCE
#include <stdio.h>
#include <dlfcn.h>
#include <fcntl.h>
#include <unistd.h>
#include <funchook.h>
// 原始函数指针
static int (*orig_openat)(int dirfd, const char *pathname, int flags, mode_t mode);
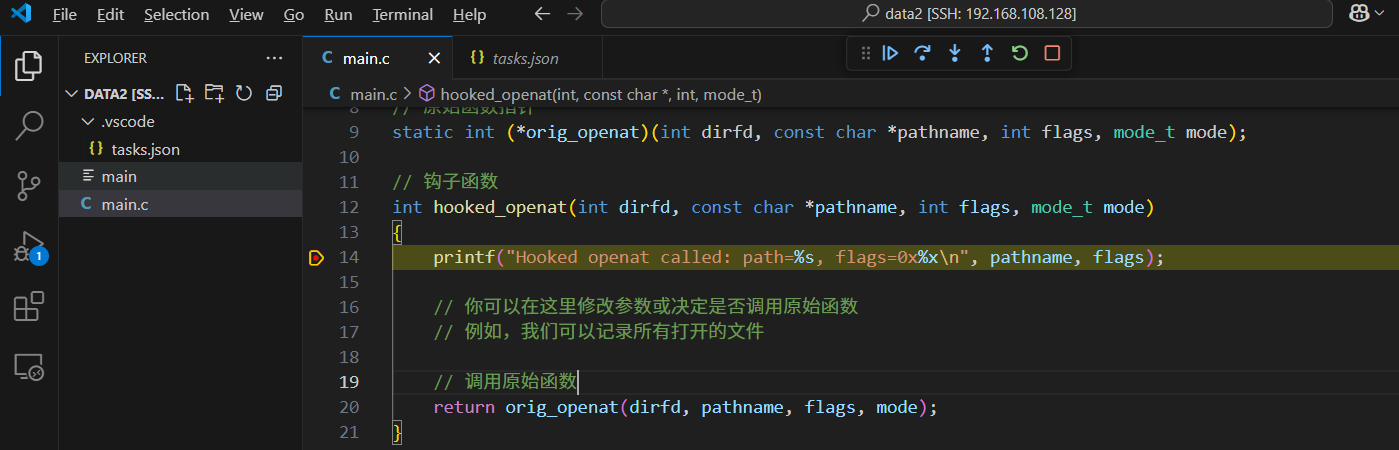
// 钩子函数
int hooked_openat(int dirfd, const char *pathname, int flags, mode_t mode)
{
printf("Hooked openat called: path=%s, flags=0x%x\n", pathname, flags);
// 调用原始函数
return orig_openat(dirfd, pathname, flags, mode);
}
int main()
{
// 获取原始 openat 函数地址
orig_openat = dlsym(RTLD_NEXT, "openat");
if (!orig_openat)
{
fprintf(stderr, "Failed to find openat: %s\n", dlerror());
return 1;
}
// 创建 funchook 实例
funchook_t *funchook = funchook_create();
if (!funchook)
{
perror("funchook_create failed");
return 1;
}
// 准备 Hook
int rv = funchook_prepare(funchook, (void **)&orig_openat, hooked_openat);
if (rv != 0)
{
fprintf(stderr, "Prepare failed: %s\n", funchook_error_message(funchook));
return 1;
}
// 安装 Hook
rv = funchook_install(funchook, 0);
if (rv != 0)
{
fprintf(stderr, "Install failed: %s\n", funchook_error_message(funchook));
return 1;
}
// 测试调用
printf("=== Testing openat hook ===\n");
int fd = openat(AT_FDCWD, "/etc/passwd", O_RDONLY);
if (fd >= 0)
{
printf("Successfully opened file, fd=%d\n", fd);
close(fd);
}
else
{
perror("openat failed");
}
// 清理
funchook_uninstall(funchook, 0);
funchook_destroy(funchook);
return 0;
}
接下来就是编译执行了。
root@ubuntu2404:/data2# gcc -o main main.c -lfunchook -ldl

root@ubuntu2404:/data2# ./main

=== Testing openat hook ===

Hooked openat called: path=/etc/passwd, flags=0x0

Successfully opened file, fd=3
一切都是美好的,当然如果你想可视化的单步调试,可以配置到 vs 的 tasks.json 中,参考如下:
{

    "tasks": [

        {

            "type": "cppbuild",

            "label": "C/C++: gcc build active file",

            "command": "/usr/bin/gcc",

            "args": [

                "-fdiagnostics-color=always",

                "-g",

                "${file}",

                "-o",

                "${fileDirname}/${fileBasenameNoExtension}",

                "-lfunchook",

                "-L/usr/local/lib"

            ],

            "options": {

                "cwd": "${fileDirname}"

            },

            "problemMatcher": [

                "$gcc"

            ],

            "group": {

                "kind": "build",

                "isDefault": true

            },

            "detail": "Task generated by Debugger."

        }

    ],

    "version": "2.0.0"

}
三:总结
这里给大家总结的两种注入方式,LD_PRELOAD 虽然简单,但粒度粗,适合简单的无侵入场景,如果希望更细粒度,建议使用活跃的 funchook 吧,虽然是一个岛国大佬实现的。

聊一聊 Linux 上对函数进行 hook 的两种方式的更多相关文章
- Android手机上监听短信的两种方式
Android手机上监听短信有两种方式: 1. 接受系统的短信广播,操作短信内容. 优点:操作方便,适合简单的短信应用. 缺点:来信会在状态栏显示通知信息. AndroidManifest.xml: ...
- Hyper-V 下linux虚拟机静态IP上网配置的两种方式(2)
工作需要,搭建linux环境,网上搜了两种Hyper-V配置linux静态IP及上网的方式,记录一下,方便查阅,如下设置网络共享方式: win10下使用hyper-v在本机安装linux虚拟机后,网络 ...
- Hyper-V 下linux虚拟机静态IP上网配置的两种方式(1)
工作需要,搭建linux环境,网上搜了两种Hyper-V配置linux静态IP及上网的方式,记录一下,方便查阅,如下是桥接方式的配置: 本实例所用的各项资源说明,系统是windows10企业版64bi ...
- AspNetCore 文件上传(模型绑定、Ajax) 两种方式 get到了吗?
就目前来说,ASP.NET Core2.1了,已经相当成熟了,希望下个项目争取使用吧!! 上传文件的三种方式("我会的,说不定还有其他方式") 模型绑定 Ajax WebUploa ...
- 在github上删除项目或某个文件(两种方式)
一.使用命令删除 首先先上传一个文件到远程仓库,测试一下 输入命令git rm -r --cached 文件名 删除本地跟暂存区的文件,如下图 再输入命令 git commit -m "删除 ...
- AntDesign VUE:上传组件自定义限制的两种方式(Boolean、Promise)
AntD上传组件 AntDesign VUE文档 第一种方式 beforeUpload(file) { let isLt = true if (filesSize) { isLt = file.siz ...
- .net 调用SAP RFC函数获取数据的两种方式
方式1:使用客户端自带的组件 安装客户端以后,添加引用:SAPFunctionsOCX(.net 的Com列表里一般找不到,需要引用DLL[一般位于以下路径:Program Files\SAP\Fro ...
- Linux学习笔记21——线程同步的两种方式
一 用信号量同步 1 信号量函数的名字都以sem_开头,线程中使用的基本信号量函数有4个 2 创建信号量 #include<semaphore.h> int sem_init(sem_t ...
- C++函数传递数组的两种方式
数组与指针. 传首地址过去,然后通过地址输出数组元素. 1.一维数组 #include<iostream> using namespace std; #include <cstrin ...
- Lua 调用的 C 函数保存 state 的两种方式: Storing State in C Functions 笔记
http://yanbin.is-programmer.com/posts/94214.html Registery的Key 1. 整数Key用于Lua的引用机制,所以不要使用整数作为Key 2. 通 ...
随机推荐
- 唐僧,一名合格的IT项目经理
唐僧, 家喻户晓的唐三藏是也, 他是参悟佛法的大唐高僧,他还是大话西游的男一号, 可是有谁知道,他曾经是一名杰出的项目经理.他所领导的项目是是当时最庞大的IT项目--西天之行求取真经;他所领导的项目团 ...
- APEX实战第2篇:构建自己第一个APEX程序
为了尽快实现从0到1的突破,第一个程序就选择一个最简单易懂的生活场景. 后续随着APEX学习过程不断迭代增强这个程序. 现在就开始吧,我给孩子看一些公开网络课时,习惯把课程资源做分片,然后有计划的让孩 ...
- 【Linux】3.8 Linux磁盘分区、挂载
Linux磁盘分区.挂载 1. 分区方式 mbr分区 最多支持四个主分区 系统只能安装在主分区 扩展分区要占一个主分区 MBR最大只支持2TB,但拥有最好的兼容性 gpt分区 支持无限多个主分区(但操 ...
- 【HTML】步骤进度条组件
HTML步骤进度条 效果图 思路 分份: 有多少个步骤就可以分成多少分,每份宽度应该为100%除以步骤数,故以上效果图中的每份宽度应该为25%,每份用一个div. 每份: 每份中可以看成是三个元素,一 ...
- 【虚拟机】VirtualBox设置共享文件夹
VirtualBox设置共享文件夹 1.选中你要设置的虚拟机,点设置 2.共享文件夹,点右边的加号,设置一个共享文件夹路径,选择其他, 3.选一个你知道的位置,比如我的在E盘的共享文件夹下面 4.选好 ...
- Ink 和 TravisCI 更配哦
前言 去年还是前年,无意间接触到ink,看到是用go写的,非常小巧和精简,于是乎fork了下,还整了个供ink用的docker镜像``. 不过那时候热衷于折腾博客...结果也没折腾出什么来, 今天整理 ...
- 学习unigui【23】uniDBGrid的使用摘要
Unidbgrid自动调整列宽 UniDBGrid1 -> ClientEvents -> ExtEvents [Ext.data.Store[store] ] add store.loa ...
- tomcat非root用户启动
部署远程服务器时候, 基本都是用root账户登录, 习惯上会直接使用root启动tomcat. 这样其实是有风险的, 黑客获取的权限即容器的权限, 如果容器运行权限就很高,被攻破黑客即可获取很高的权限 ...
- this 和super 关键字的区别
this关键字 (1) 每个类的每个非静态方法(没有被static修饰)都会隐含一个this关键字,它指向调用这个方法的对象:当在方法中使用本类属性时,都会隐含地使用this关键字,当然也可以明确使用 ...
- SpringMVC的执行过程
环境准备 package org.example.springmvclearn; public record Greeting(long id, String content) { } package ...