Android应用第一次启动时的欢迎界面制作
原理是这样,我们在SharedPreferences中存储一个int型数据,用来代表第几次登录,每次启动时都读取出来判断是不是第一次启动,然后依次判断是否要显示欢迎界面,
具体实现如下:
设置一个欢迎界面的Activity,并设置为主Activity,在判断第几次启动后来决定要不要跳转到MainActivity
package com.example.f;

import androidx.appcompat.app.AppCompatActivity;

import android.content.Intent;

import android.content.SharedPreferences;

import android.os.Bundle;

import android.view.View;

import android.widget.Button;

public class StartActivity extends AppCompatActivity {

private Button go=null;

    @Override

    protected void onCreate(Bundle savedInstanceState) {

        super.onCreate(savedInstanceState);

        setContentView(R.layout.activity_start);

        go=(Button)findViewById(R.id.go);

        SharedPreferences userInfo = getSharedPreferences("start", MODE_PRIVATE);

        SharedPreferences.Editor editor = userInfo.edit();

        Int x;
//获取记录启动次数的值,若获取不到就默认为1

        x=userInfo.getInt("start",1);

//判断第几次启动

        if(x==1)

        {
//为启动数加一

            x++;

            editor.putInt("start",x);

            editor.commit();

        }

        else {

//若不是第一次登录就直接跳转MainActivity

            x++;

            editor.putInt("start",x);

            editor.commit();

            Intent it=new Intent();

            it.setClass(StartActivity.this,MainActivity.class);

            startActivity(it);

            StartActivity.this.finish();

        }

//欢迎界面进入应用的按钮

        go.setOnClickListener(new View.OnClickListener() {

            @Override

            public void onClick(View v) {

                Intent it=new Intent();

                it.setClass(StartActivity.this,MainActivity.class);

                startActivity(it);

                StartActivity.this.finish();

            }

        });

    }

}
布局文件只有一个按钮
<?xml version="1.0" encoding="utf-8"?>

<androidx.constraintlayout.widget.ConstraintLayout xmlns:android="http://schemas.android.com/apk/res/android"

    xmlns:app="http://schemas.android.com/apk/res-auto"

    xmlns:tools="http://schemas.android.com/tools"

    android:layout_width="match_parent"

    android:layout_height="match_parent"

    tools:context=".StartActivity">

    <Button

        android:id="@+id/go"

        android:layout_width="wrap_content"

        android:layout_height="wrap_content"

        android:text="开始"

        app:layout_constraintBottom_toBottomOf="parent"

        app:layout_constraintEnd_toEndOf="parent"

        app:layout_constraintStart_toStartOf="parent"

        app:layout_constraintTop_toTopOf="parent" />

</androidx.constraintlayout.widget.ConstraintLayout>
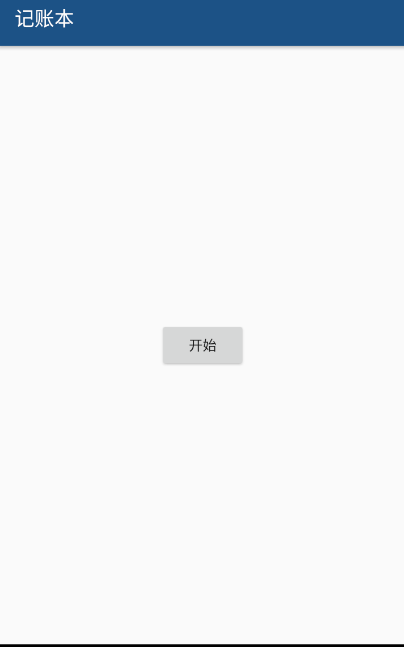
初次启动效果如下
Android应用第一次启动时的欢迎界面制作的更多相关文章
- android应用程序第一次启动时显示引导界面
市面上好多优秀的应用(举例新浪微博.UC浏览器)都采用了欢迎页面与使用向导的方式给用户带来了良好的用户体验. 一般来说用户第一次安装应用或者安装了新版本后第一次进入应用都会显示成 欢迎页面-使用向导- ...
- android实现应用程序仅仅有在第一次启动时显示引导界面
概述 SharedPreferences的使用很easy,可以轻松的存放数据和读取数据.SharedPreferences仅仅能保存简单类型的数据,比如,String.int等.通常会将复杂类型的数据 ...
- Android Studio的安装及第一次启动时的配置
Android Studio的安装及第一次启动时的配置 一.下载Android Studio 百度搜索“Android Studio" 点击中文社区进入,选择最新版本下载. 下载后双击安装包 ...
- uni-app开发经验分享十二: Android平台应用启动时读写手机存储、访问设备信息(如IMEI)等权限策略及提示信息
Android平台从6.0(API23)开始系统对权限的管理更加严格,所有涉及敏感权限都需要用户授权允许才能获取.因此一些应用基础业务逻辑需要的权限会在应用启动时申请,并引导用户允许. 读写手机存储权 ...
- Android应用程序启动时发生AndroidRuntime : ClassNotFoundException for Activity class的解决方法
在android应用程序启动时抛出下面异常导致启动失败:07-09 17:12:35.709: ERROR/AndroidRuntime(3866): Uncaught handler: thread ...
- 【Android端 APP 启动时长获取】启动时长获取方案及具体实施
一.什么是启动时长? 1.启动时长一般包括三种场景,分别是:新装包的首次启动时长,冷启动时长.热启动时长 冷启动 和 热启动 : (1)冷启动:当启动应用时,后台没有该程序的进程,此时启动的话系统会分 ...
- Android Studio 第一次启动配置
第一次启动AS前,为了避免重新下载新版本的SDK 操作如下: AS启动前,请先将bin目录的idea.properties文件中增加一行:disable.android.first.run=true ...
- Android Studio第一次启动失败的解决办法
Android Studio Android 开发环境 由于GFW的问题,安装后第一次启动会在显示Fetching android sdk component information对话框后,提示错误 ...
- freshStartTail 第一次启动时 抛弃旧的日志
freshStartTail [on/off] (requires v8.18.0+) Default: off This is used to tell rsyslog to seek to the ...
随机推荐
- 面试系列-面试官:你能给我解释一下javascript中的this吗?
一.前言 关于javascript中的this对象,可能已经被大家说烂了. 即使是这样,我依然决定将这篇文章给水出来.毕竟全国在新型肺炎的影响下,公司没法正常复工. 除了刷刷手机,还是要适当的学习一下 ...
- git hub安装
windows下GitHub的安装.配置以及项目的上传过程详细介绍 阅读目录 概要 操作必备 GitHub的安装 Git的初始配置 本地Git与远程GitHub连接的建立 将本地项目上传到GitHub ...
- mysql创建流水号
mysql数据库创建流水号 CREATE TRIGGER saledetail_id BEFORE INSERT ON saledetail FOR EACH ROW BEGIN declare n ...
- markdown常用语法使用笔记+使用技巧(持续更新......)
参考引用内容: 简书教程 一 基本语法 1. 标题 语法: 在想要设置为标题的文字前面加#来表示,一个#是一级标题,二个#是二级标题,以此类推.支持六级标题. 注:标准语法一般在#后跟个空格再写文字 ...
- pico g2 触摸板手柄射线检测---for unity
1.pico g2手柄射线检测UI,需要在canvas添加Graphic Raycaster脚本和Pvr_Ui Canvas脚本. 2.删除掉原有的maincamera,将Pvr_unitySDK下h ...
- qt QSplitter分割窗口
#include <QApplication> #include <QFont> #include <QTextEdit> #include <QSplitt ...
- List<E> 、Set<E>和Map<K,E>的简单应用
题目一: 创建两个线性表,分别存储{“chen”,“wang”,“liu”,“zhang”}和{“chen”,“hu”,“zhang”},求这两个线性表的交集和并集. 代码: List_Test.ja ...
- [Python]获取win平台文件的详细信息
import win32api def getFileProperties(fname): """ 读取给定文件的所有属性, 返回一个字典. ""&q ...
- Codeforces_713_A
http://codeforces.com/problemset/problem/713/A 将读入的数全都存为二进制,用map保存对应的个数. #include<iostream> #i ...
- Intel发布神经网络压缩库Distiller:快速利用前沿算法压缩PyTorch模型——AttributeError: module ‘tensorboard' has no attribute 'lazy'
转载自:CSDN Nine-days 近日,Intel 开源了一个用于神经网络压缩的开源 Python 软件包 Distiller,它可以减少深度神经网络的内存占用.加快推断速度及节省能耗.Dis ...