Python学习之文件操作(二)
CSV文件处理
在Python中处理CSV文件可以使用模块csv。有关csv模块的官方资料看这里。
1 读取csv文件
csv.reader(csvfile, dialect='excel', **fmtparams)
使用reader()函数来读取csv文件,返回一个reader对象。reader对象可以使用迭代获取其中的每一行。
>>> import csv

>>> with open('userlist.csv','rt') as csv_file:

    csv_conent = [ row for row in csv.reader(csv_file)]

>>> csv_conent

[['Doctor', 'No'], ['Rosa', 'Klebb'], ['Mister', 'Big'], ['Auric', 'Goldfinger'], ['Ernst', 'Blofeld']]

>>>
class csv.DictReader(csvfile, fieldnames=None, restkey=None, restval=None, dialect='excel', *args, **kwds)
可以使用DicReader()按照字典的方式读取csv内容,如下:
>>> import csv

>>> with open('userlist3.csv','rt',newline='') as csvfile:

    reader = csv.DictReader(csvfile, fieldnames =[1,2],delimiter=':')

    for row in reader:

        print(row[1],row[2])

Doctor No

Rosa Klebb

Mister Big

Auric Gold

Ernst Blofeld

>>>
2 写入csv文件
csv.writer(csvfile, dialect='excel', **fmtparams)
使用writer()函数来写csv文件,返回一个writer对象。writer对象可以使用writerow()写一行数据,或者使用。writerows()写多行数据
>>> import csv
>>> namelist = []
>>> namelist = [
['Doctor','No'],
['Rosa','Klebb'],
['Mister','Big'],
['Auric','Gold'],
['Ernst','Blofeld'],
]
>>> with open('userlist2.csv','wt') as c_file:
csvout = csv.writer(c_file, delimiter=':')
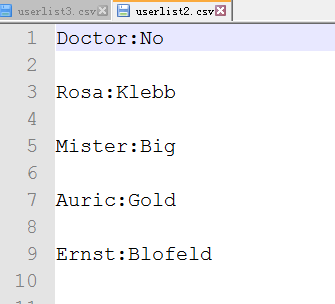
csvout.writerows(namelist) >>> with open('userlist3.csv','wt',newline='') as c_file:
csvout = csv.writer(c_file, delimiter=':')
csvout.writerows(namelist)
生成的csv文件如下:

class csv.DictWriter(csvfile, fieldnames, restval='', extrasaction='raise', dialect='excel', *args, **kwds)
使用DictWriter把字典类型的数据写入到csv文件中,如下:
>>> import csv
>>> villains = [
{'first': 'Doctor', 'last': 'No'},
{'first': 'Rosa', 'last': 'Klebb'},
{'first': 'Mister', 'last': 'Big'},
{'first': 'Auric', 'last': 'Goldfinger'},
{'first': 'Ernst', 'last': 'Blofeld'},
]
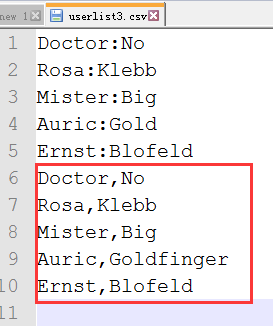
>>> with open('userlist3.csv','at',newline='') as csvfile:
writer = csv.DictWriter(csvfile,['first','last'])
writer.writerows(villains)
XML文件处理
XML是可扩展标记语言,它使用tag来分隔数据。
处理XML文件,可以使用python中的xml模块,它包含下面的几个子模块:
xml.etree.ElementTree: the ElementTree API, a simple and lightweight XML processor
xml.dom: the DOM API definition
xml.dom.minidom: a minimal DOM implementation
xml.dom.pulldom: support for building partial DOM trees
xml.sax: SAX2 base classes and convenience functions
xml.parsers.expat: the Expat parser binding
xml模块更多的相关内容参考官方文档。
使用xml.etree.ElementTree来解析处理XML文件内容,如下:
<?xml version="1.0"?>

<data>

    <country name="Liechtenstein">

        <rank>1</rank>

        <year>2008</year>

        <gdppc>141100</gdppc>

        <neighbor name="Austria" direction="E"/>

        <neighbor name="Switzerland" direction="W"/>

    </country>

    <country name="Singapore">

        <rank>4</rank>

        <year>2011</year>

        <gdppc>59900</gdppc>

        <neighbor name="Malaysia" direction="N"/>

    </country>

    <country name="Panama">

        <rank>68</rank>

        <year>2011</year>

        <gdppc>13600</gdppc>

        <neighbor name="Costa Rica" direction="W"/>

        <neighbor name="Colombia" direction="E"/>

    </country>

</data>
sample.xml
>>> import xml.etree.ElementTree as et

>>> tree = et.ElementTree(file='sample.xml')

>>> root = tree.getroot()

>>> root.tag

'data'

>>> for child in root:

    print('tag:',child.tag, 'attributes:',child.attrib)

    for grandchild in child:

        print('\ttag:',grandchild.tag,'attributes:',grandchild.attrib)

tag: country attributes: {'name': 'Liechtenstein'}

    tag: rank attributes: {}

    tag: year attributes: {}

    tag: gdppc attributes: {}

    tag: neighbor attributes: {'name': 'Austria', 'direction': 'E'}

    tag: neighbor attributes: {'name': 'Switzerland', 'direction': 'W'}

tag: country attributes: {'name': 'Singapore'}

    tag: rank attributes: {}

    tag: year attributes: {}

    tag: gdppc attributes: {}

    tag: neighbor attributes: {'name': 'Malaysia', 'direction': 'N'}

tag: country attributes: {'name': 'Panama'}

    tag: rank attributes: {}

    tag: year attributes: {}

    tag: gdppc attributes: {}

    tag: neighbor attributes: {'name': 'Costa Rica', 'direction': 'W'}

    tag: neighbor attributes: {'name': 'Colombia', 'direction': 'E'}

>>> len(root)

3

>>> len(root[0])

5

>>> len(root[1])

4

>>>
JSON/pickle数据处理
python中使用json模块把复杂结构的数据转换成JSON字符串,或者把JSON字符串转换成数据。
一个典型的复杂结构的数据如下:
>>> menu = \

    {

    "breakfast": {

                "hours": "7-11",

                "items": {

                        "breakfast burritos": "$6.00",

                        "pancakes": "$4.00"

                        }

                },

    "lunch" : {

            "hours": "11-3",

            "items": {

                    "hamburger": "$5.00"

                    }

            },

    "dinner": {

            "hours": "3-10",

            "items": {

                    "spaghetti": "$8.00"

                    }

            }

    }
menu
1 转换成JSON字符串
使用dumps()将menu转换成JSON格式的字符串如下:
>>> import json

>>> menu_json = json.dumps(menu)

>>> menu_json

'{"dinner": {"items": {"spaghetti": "$8.00"}, "hours": "3-10"}, "breakfast": {"items": {"pancakes": "$4.00", "breakfast burritos": "$6.00"}, "hours": "7-11"}, "lunch": {"items": {"hamburger": "$5.00"}, "hours": "11-3"}}'

>>>
更多json模块的用法参考官方文档。
2 转换成复杂结构的数据
使用loads()函数把JSON字符串转换成python的结构数据,如下:
>>> menu2 = json.loads(menu_json)

>>> menu2

{'dinner': {'items': {'spaghetti': '$8.00'}, 'hours': '3-10'}, 'breakfast': {'items': {'pancakes': '$4.00', 'breakfast burritos': '$6.00'}, 'hours': '7-11'}, 'lunch': {'items': {'hamburger': '$5.00'}, 'hours': '11-3'}}

>>> type(menu2)

<class 'dict'>

>>> type(menu_json)

<class 'str'>

>>>
pickle的功能类似于json,也可以将python中的结构化的数据序列化(转换为字符串)。其优点是可以序列化更多的python中的数据对象,比如datetime对象。其缺点是只能在python中使用,json的话其他语言也支持。
例子如下:
>>> import json

>>> import pickle

>>> import datetime

>>> now1 = datetime.datetime.utcnow()

>>> jsoned = json.dumps(now1)

Traceback (most recent call last):

  File "<pyshell#89>", line 1, in <module>

    jsoned = json.dumps(now1)

  File "C:\Python35-32\lib\json\__init__.py", line 230, in dumps

    return _default_encoder.encode(obj)

  File "C:\Python35-32\lib\json\encoder.py", line 199, in encode

    chunks = self.iterencode(o, _one_shot=True)

  File "C:\Python35-32\lib\json\encoder.py", line 257, in iterencode

    return _iterencode(o, 0)

  File "C:\Python35-32\lib\json\encoder.py", line 180, in default

    raise TypeError(repr(o) + " is not JSON serializable")

TypeError: datetime.datetime(2016, 11, 5, 7, 22, 20, 551139) is not JSON serializable

>>> pickled = pickle.dumps(now1)

>>> now1

datetime.datetime(2016, 11, 5, 7, 22, 20, 551139)

>>> now2 = pickle.loads(pickled)

>>> now2

datetime.datetime(2016, 11, 5, 7, 22, 20, 551139)

>>>
YAML文件处理
python使用第三方模块pyyaml来操作数据。官方文档点这里。
一个典型的YAML文件如下:
name:

    first: James

    last: McIntyre

dates:

    birth: 1828-05-25

    death: 1906-03-31

details:

    bearded: true

    themes: [cheese, Canada]

books:

    url: http://www.gutenberg.org/files/36068/36068-h/36068-h.htm

poems:

    - title: 'Motto'

      text: |

        Politeness, perseverance and pluck,

        To their possessor will bring good luck.

    - title: 'Canadian Charms'

      text: |

        Here industry is not in vain,

        For we have bounteous crops of grain,

        And you behold on every field

        Of grass and roots abundant yield,

        But after all the greatest charm

        Is the snug home upon the farm,

        And stone walls now keep cattle warm.
>>> with open('sample.yml','rt') as y_file:

    text = y_file.read()

>>> data = yaml.load(text)

>>> data['poems']

[{'text': 'Politeness, perseverance and pluck,\nTo their possessor will bring good luck.\n', 'title': 'Motto'}, {'text': 'Here industry is not in vain,\nFor we have bounteous crops of grain,\nAnd you behold on every field\nOf grass and roots abundant yield,\nBut after all the greatest charm\nIs the snug home upon the farm,\nAnd stone walls now keep cattle warm.', 'title': 'Canadian Charms'}]

>>> data['details']

{'bearded': True, 'themes': ['cheese', 'Canada']}

>>> data['poems'][0]

{'text': 'Politeness, perseverance and pluck,\nTo their possessor will bring good luck.\n', 'title': 'Motto'}

>>>
配置文件处理
Python中可以使用configparser模块来处理如下格式的配置文件。
[DEFAULT]

ServerAliveInterval = 45

Compression = yes

CompressionLevel = 9

ForwardX11 = yes

[bitbucket.org]

User = hg

[topsecret.server.com]

Port = 50022

ForwardX11 = no
>>> import configparser

>>> config = configparser.ConfigParser()

>>> config['DEFAULT'] = {'ServerAliveInterval': '',

...                      'Compression': 'yes',

...                      'CompressionLevel': ''}

>>> config['bitbucket.org'] = {}

>>> config['bitbucket.org']['User'] = 'hg'

>>> config['topsecret.server.com'] = {}

>>> topsecret = config['topsecret.server.com']

>>> topsecret['Port'] = ''     # mutates the parser

>>> topsecret['ForwardX11'] = 'no'  # same here

>>> config['DEFAULT']['ForwardX11'] = 'yes'

>>> with open('example.ini', 'w') as configfile:

...   config.write(configfile)

...
更多configeparser的内容参考官方文档。
Excel表格处理
处理Excel文件的模块有很多,例如openpyxl, xlsxwriter, xlrd等。详细请参考官方文档。
Python学习之文件操作(二)的更多相关文章
- python学习笔记:文件操作和集合(转)
转自:http://www.nnzhp.cn/article/16/ 这篇博客来说一下python对文件的操作. 对文件的操作分三步: 1.打开文件获取文件的句柄,句柄就理解为这个文件 2.通过文件句 ...
- python学习日记(文件操作)
文件操作概述 计算机系统分为:操作系统,计算机硬件,应用程序. 我们用python或其他语言编写的应用程序若想要把数据永久保存下来,必须要保存于硬盘中,这就涉及到应用程序要操作硬件,众所周知,应用程序 ...
- python学习总结---文件操作
# 文件操作 ### 目录管理(os) - 示例 ```python # 执行系统命令 # 清屏 # os.system('cls') # 调出计算器 # os.system('calc') # 查看 ...
- 03 python学习笔记-文件操作(三)
本文内容主要包括以下方面: 1. 文件操作基本认识2. 只读(r, rb)3. 只写(w, wb)4. 追加(a, ab)5. r+读写6. w+写读7. a+写读(追加写读)8. 文件的修改 一.文 ...
- python学习day8 文件操作(深度学习)
文件操作 (day7内容扩展) 1 文件基本操作 obj = open('路径',mode='模式',encoding='编码')obj.write()obj.read()obj.close() 2 ...
- Python学习 :文件操作
文件基本操作流程: 一. 创建文件对象 二. 调用文件方法进行操作 三. 关闭文件(注意:只有在关闭文件后,才会写入数据) fh = open('李白诗句','w',encoding='utf-8') ...
- python 学习分享-文件操作篇
文件操作 f_open=open('*.txt','r')#以只读的方式(r)打开*.txt文件(需要与py文件在同一目录下,如果不同目录,需写全路径) f_open.close()#关闭文件 打开文 ...
- Python学习笔记——文件操作
python中,一切皆对象. 一.文件操作流程 (1)打开文件,得到一个文件句柄(对象),赋给一个对象: (2)通过文件句柄对文件进行操作: (3)关闭文件. 文件对象f通过open()函数来创建 ...
- Python学习之==>文件操作
1.打开文件的模式 r,只读模式(默认)[不可写:文件不存在,会报错] w,只写模式[不可读:不存在则创建:存在则删除内容] a,追加模式[不可读:不存在则创建:存在则追加内容] r+,读写模式[可读 ...
随机推荐
- 7.12模拟T2(套路容斥+多项式求逆)
Description: \(n<=10,max(w)<=1e6\) 题解: 考虑暴力,相当于走多维格子图,不能走有些点. 套路就是设\(f[i]\)表示第一次走到i的方案数 \(f[i] ...
- Flume详解
Flume是一种分布式,可靠且可用的服务,用于有效地收集,聚合和移动大量日志数据.它具有基于流数据流的简单灵活的架构.它具有可靠的可靠性机制和许多故障转移和恢复机制,具有强大的容错性.它使用简单的可扩 ...
- 解决php-fpm占用cpu memory过高,开启php-fpm request_slowlog_timeout
项目刚从win下挪到linux下,发现cpu过高,内存也占用较多,以下是我解决问题的过程: 首先更改php-fpm配置 vim /usr/local/php/etc/php-fpm.conf 找到 r ...
- hexo next主题深度优化(四),自定义一个share功能,share.js。
文章目录 背景: 开始: 引入资源: 代码 关键的一步 附:方便学习的小demo 一次成功后还出现上面的bug 结束 2018.12.23发现bug(读者可忽略) 个人博客:https://mmmmm ...
- Instrumentation 实践详解
原文地址:https://blog.csdn.net/pengjunlee/article/details/72717622
- 使用Beyond Compare作为Perforce默认的文件比较工具
使用perforce自带的文件比较工具有时候会遇到乱码的情况,如下: 暂时不知道如何解决上述问题,因此想换个文件比对工具,比如Beyond Compare. 设定位置:Edit->prefere ...
- jvm监控命令-jstat
jstat 用于查看服务器上某个服务的GC情况. 一般使用方式jstat –gcpid或jstat –utilpid 时间间隔-每个一定时间(指定的时间间隔)输出一次进程pid的内存情况及gc情况. ...
- Spring AOP之注解实现
在自定义个注解之后,通过这个注解,标注需要切入的方法,同时把需要的参数传到切面去.那么我们怎么在切面使用这个注解.我们使用这个自定义注解一方面是为了传一些参数,另一方面也是为了省事.具体怎么省事,看我 ...
- 剑指offer——16二进制中1的个数
题目描述 输入一个整数,输出该数二进制表示中1的个数.其中负数用补码表示. 有可能引起死循环解法: 每次判断最右端是不是1[与 & 1即可],是就cnt++,然后右移一位,直到num为0,结束 ...
- 20140408 父类指针指向子类对象 ;delete ;static作用
1.父类指针可以指向子类对象 静态联翩:如果以父类指针指向派生类对象,那么经由该指针只能访问父类定义的函数 动态联编:根据指针实际指向的对象类型确定 2.面试宝典 P110 面试题5 #includ ...