python nose测试框架全面介绍七--日志相关
引:
之前使用nose框架时,一直使用--logging-config的log文件来生成日志,具体的log配置可见之前python nose测试框架全面介绍四。
但使用一段时间后,发出一个问题,生成的报告只有错误提示,没有日志,查看nose的官网,nose默认支持将日志显示的,如下:
脚本如下:
#coding:utf-8

'''

Created on 2016年6月22日

@author: huzq

'''

import logging

from test_case import new

from nose.tools import ok_

from nose.tools import eq_

import nose

import os

from nose.plugins.attrib import attr

from nose.plugins.skip import SkipTest

import sys

#TODO:jfjfjf

log = logging.getLogger(__name__)

def test_learn_1():

    u'''测试取消'''

    print 'xxx'

    log.info("afdffdfdfd")

    #raise SkipTest

    #print "test_lean_1"

    #pass

    #assert 1==2

    eq_(7, 9, msg=u"错误")

test_learn_1.slow=1

@attr(mode=2)

def test_lean_2():

    u'''测试失败'''

    try:

        print "test_learn_2"

        ok_(4==3,msg="xxx")

        print sys._getframe().f_code.co_name

    except Exception:

        print sys._getframe().f_code.co_name

@attr(mode=2)

def test_lean_3():

    u'''测试成功'''

    pass

def setUp():

    #set_trace()

    global a

    print "0001 test setUp"

    #addCleanup(aa)

def tearDown():

    print "0001 test teardown"

    a='resource setup'

    b='c'

    #assert a==b

    print a
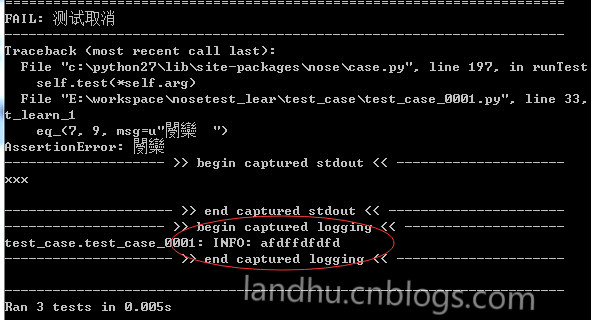
可以看出,报告中将日志及print的日志也都打印出来了。
问题分析
但存在一个问题是,日志日志,格式好像不太美观
那我们就重温下nose的Logcapture: capture logging during tests
支持以下几个参数:
--nologcapture

Disable logging capture plugin. Logging configuration will be left intact. [NOSE_NOLOGCAPTURE]

不抓log

--logging-format=FORMAT

Specify custom format to print statements. Uses the same format as used by standard logging handlers. [NOSE_LOGFORMAT]

自定义log格式

--logging-datefmt=FORMAT

Specify custom date/time format to print statements. Uses the same format as used by standard logging handlers. [NOSE_LOGDATEFMT]

log时间格式

--logging-filter=FILTER

Specify which statements to filter in/out. By default, everything is captured. If the output is too verbose, use this option to filter out needless output. Example: filter=foo will capture statements issued ONLY to foo or foo.what.ever.sub but not foobar or other logger. Specify multiple loggers with comma: filter=foo,bar,baz. If any logger name is prefixed with a minus, eg filter=-foo, it will be excluded rather than included. Default: exclude logging messages from nose itself (-nose). [NOSE_LOGFILTER]

log过滤

--logging-clear-handlers

Clear all other logging handlers

--logging-level=DEFAULT

Set the log level to capture
接下来我们就通过实例来演示下
--nologcapture 这个就不解释了,不会抓取日志
--logging-format:
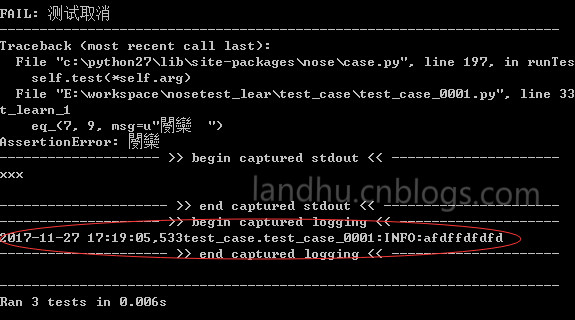
默认格式是:
logformat = '%(name)s: %(levelname)s: %(message)s'
可以看出,默认格式是没有日期的,我们可以重新定义日期
nosetests -v   test_case_0001.py l --logging-format=%(asctime)s:%(name)s:%(levelname)s:%(message)s

nosetests -v   test_case_0001.py  --logging-format="%(asctime)s:%(name)s:%(levelname)s: %(message)s"
注意,带空格的日期必须要双引号扩起来,单引号不行
在windows下,将脚本写成bat时,%%会识别成变量,这个要注意。没法规避
结果如下
--logging-filter
将日志过滤,比如要有多文件要运行时,不同的日志要过滤,可以使用该参数
nosetests -v test_case_0001.py --logging-filter=root
只过滤root的日志
使用文件来定义参数
在参数一多时,每次运行要输那么多参数,不方便,可以使用文件形式来定义
nose执行时,默认使用home目录下的.noserc或者nose.cfg文件,也可以自己写文件如下
[nosetests]

verbosity=2

logging-format=%(asctime)s%(name)s:%(levelname)s:%(message)s
执行时,使用-c指定文件即可
nosetests -v test_case_0001.py -c nose.ini
遗留问题:
在运行测试时,本想同时使用--logging-file及--logging-format来同时在运行时显示日志及运行后抓取日志至报告。
但--logging-file是最高级别,会忽略其它日志配置。
so,想同时看日志或结果报告中带日志只能二选一了。
-----------------------------------分隔线---------------------------------------------
------------------------------------update 2.9----------------------------------------
上次说到鱼和熊掌不能兼得,但最近发现上github发现一个插件,即可以在控制台输出日志,也可以将日志显示在caplog中,好用,名字就是nose-printlog
安装:
pip install nose-printlog
使用
只需要在后面加--with-printlog即可,
E:\workspace\nosetest_lear\test_case>nosetests -v -s test_case_0001.py --with-printlog
如果想要输出格式之类的,见上面,如果想输出至文件,可以加参数--debug-log=xxx,默认是标准输出至屏幕
------------------------------------update 2.28----------------------------------------
noselog也可以使用
pip install noselog
--with-noselog 还可以--noselog-file到指定文件,可多个使用
python nose测试框架全面介绍七--日志相关的更多相关文章
- python nose测试框架全面介绍十---用例的跳过
又来写nose了,这次主要介绍nose中的用例跳过应用,之前也有介绍,见python nose测试框架全面介绍四,但介绍的不详细.下面详细解析下 nose自带的SkipTest 先看看nose自带的S ...
- python nose测试框架全面介绍六--框架函数别名
之前python nose测试框架全面介绍二中介绍了nose框架的基本构成,但在实际应该中我们也会到setup_function等一系列的名字,查看管网后,我们罗列下nose框架中函数的别名 1.pa ...
- python nose测试框架全面介绍五--attr介绍
之前写了一系列nose框架的,这篇介绍下attr tag 在nose框架中attr用来标识用例,使得在运行时可以通过标识来执行用例,之前在nose测试框架全面介绍四中有说明,但没有说明清楚,这里再总结 ...
- python nose测试框架全面介绍一
一.简介 nose 是python自带框架unttest的扩展,使测试更简单高效:nose是一个开源的项目,可以在官网上下载源码 1.快速安装 有以下几中安装方式: easy_install ...
- python nose测试框架全面介绍四
四.内部插件介绍 1.Attrib 标记,用于筛选用例 在很多时候,用例可以分不同的等级来运行,在nose中很增加了这个功能,使用attrib将用例进行划分 有两种方式: ef test_big_do ...
- python nose测试框架全面介绍三
三.nose的测试工具集 nose.tools模块提供了一系列的小工具,包括测试执行时间.异常输出及unittest框架中所有的assert功能. 为了使写用例更加容易,nose.tools提供了部分 ...
- python nose测试框架全面介绍二
二.基本使用 nosetest脚本的使用(在安装完nose之后) nosetests [options] [(optional) test files or directories] 我们可以使用配置 ...
- python nose测试框架全面介绍十二 ----用例执行顺序打乱
在实际执行自动化测试时,发现我们的用例在使用同一个资源的操作时,用例的执行顺序对测试结果有影响,在手工测试时是完全没法覆盖的. 但每一次都是按用例名字来执行,怎么打乱来执行的. 在网上看到一个有意思的 ...
- python nose测试框架全面介绍十一---用例的发现
nose是怎么发现用例的??网上一大把说函数以test开头的都会自动发现,真的是这样吗???还是自己来试验下吧 首先,我们还是来看看官方文档怎么说的吧: If it looks like a test ...
随机推荐
- DWZ主从表界面唯一性验证(自写js)(一)
最近在项目中遇到一个问题,它的需求是: 利用DWZ的主从表结构批量添加课程信息,需要在触发课程代码文本框的离开事件时验证: 1.是否选择学院. 2.数据库里是否已存在该课程代码. 3.多条数据添加时, ...
- Linq 实现两个对象实例List之间的赋值
public class UserCopy { public class LoginEntity { public string UserName { get; set; } public strin ...
- UNIX环境编程学习笔记(16)——进程管理之进程环境变量
lienhua342014-10-03 1 环境表和环境指针 在每个进程启动时,都会接到一张环境表.环境表是一个字符指针数组,其中每个指针包含一个以 null 结束的 C 字符串的地址.全局变量env ...
- 如果BarTender出现卸载不干净的问题如何处理
自从BarTender 2016出了之后,好多小伙伴都想试试新功能咋样,这就意味着首先要卸载电脑上旧版BarTender.然而就是这个操作,难倒了好一批人,他们表示BarTender卸载卸不干净,不仅 ...
- 【QT学习】QT GUI应用程序的框架,文件分析
有几个名字,项目名,类名,界面对象名. 1.项目文件 项目名.pro(MyHelloQt.pro) 主要包括项目用到的模块,项目包含哪些源码文件,头文件,窗体文件,生成应用程序的名称. 由QT自动生成 ...
- A标签添加JS事件,不跳转不刷新办法
<a href="javascript:;" id="submit-btn" class="submit-btn" title=&qu ...
- winform 打开一个窗体,关闭一个窗体
例如 我要打开一个窗体b,关闭一个窗体a a中的代码添加: private void pictureBox5_Click(object sender, EventArgs e) { W_MainFo ...
- 【NodeJS】http-server.cmd
npm install http-server @echo off start cmd /k "D:\Program Files\nodejs\node_global\http-serve ...
- .Net学习心得
把握自己就是,就是时时拥一颗清澈的心,拥有一片明朗的情怀,缓缓地,从2014的国度里跨进了2015,而我们也就随之告别了2个月的学习之旅,在这里我们拥有了如白色漂渺的梦,黯然升起,在彩色的云霄里飘 ...
- mysql错误:got error 28 from storage engine
今天碰到数据库出错 Got error 28 from storage engine 查了一下,数据库文件所在的盘应该没事,应该是数据库用的临时目录空间不够 引用 磁盘临时空间不够导致.解决办法:清空 ...