ELK系列三:Elasticsearch的简单使用和配置文件简介
1、定义模板创建索引:
首先定义好一个模板的例子
{

  "order":14,

  "template":"ids-1",

  "state":"open",

  "settings":{

    "number_of_shards":1

  },

  "mappings":{

    "warnning":{

      "properties":{

        "name":{

          "type":"keyword"

        },

        "createtime":{

            "type":"date",

            "format":"strict_date_optional_time||epoch_millis"

        },

        "category":{

          "type":"keyword"

        },

        "srcip":{

          "type":"keyword"

        },

        "dstip":{

          "type":"keyword"

        }

      }

    }

  }

}
然后使用PUT方法,发送给Elasticsearch。可以使用下图插件:
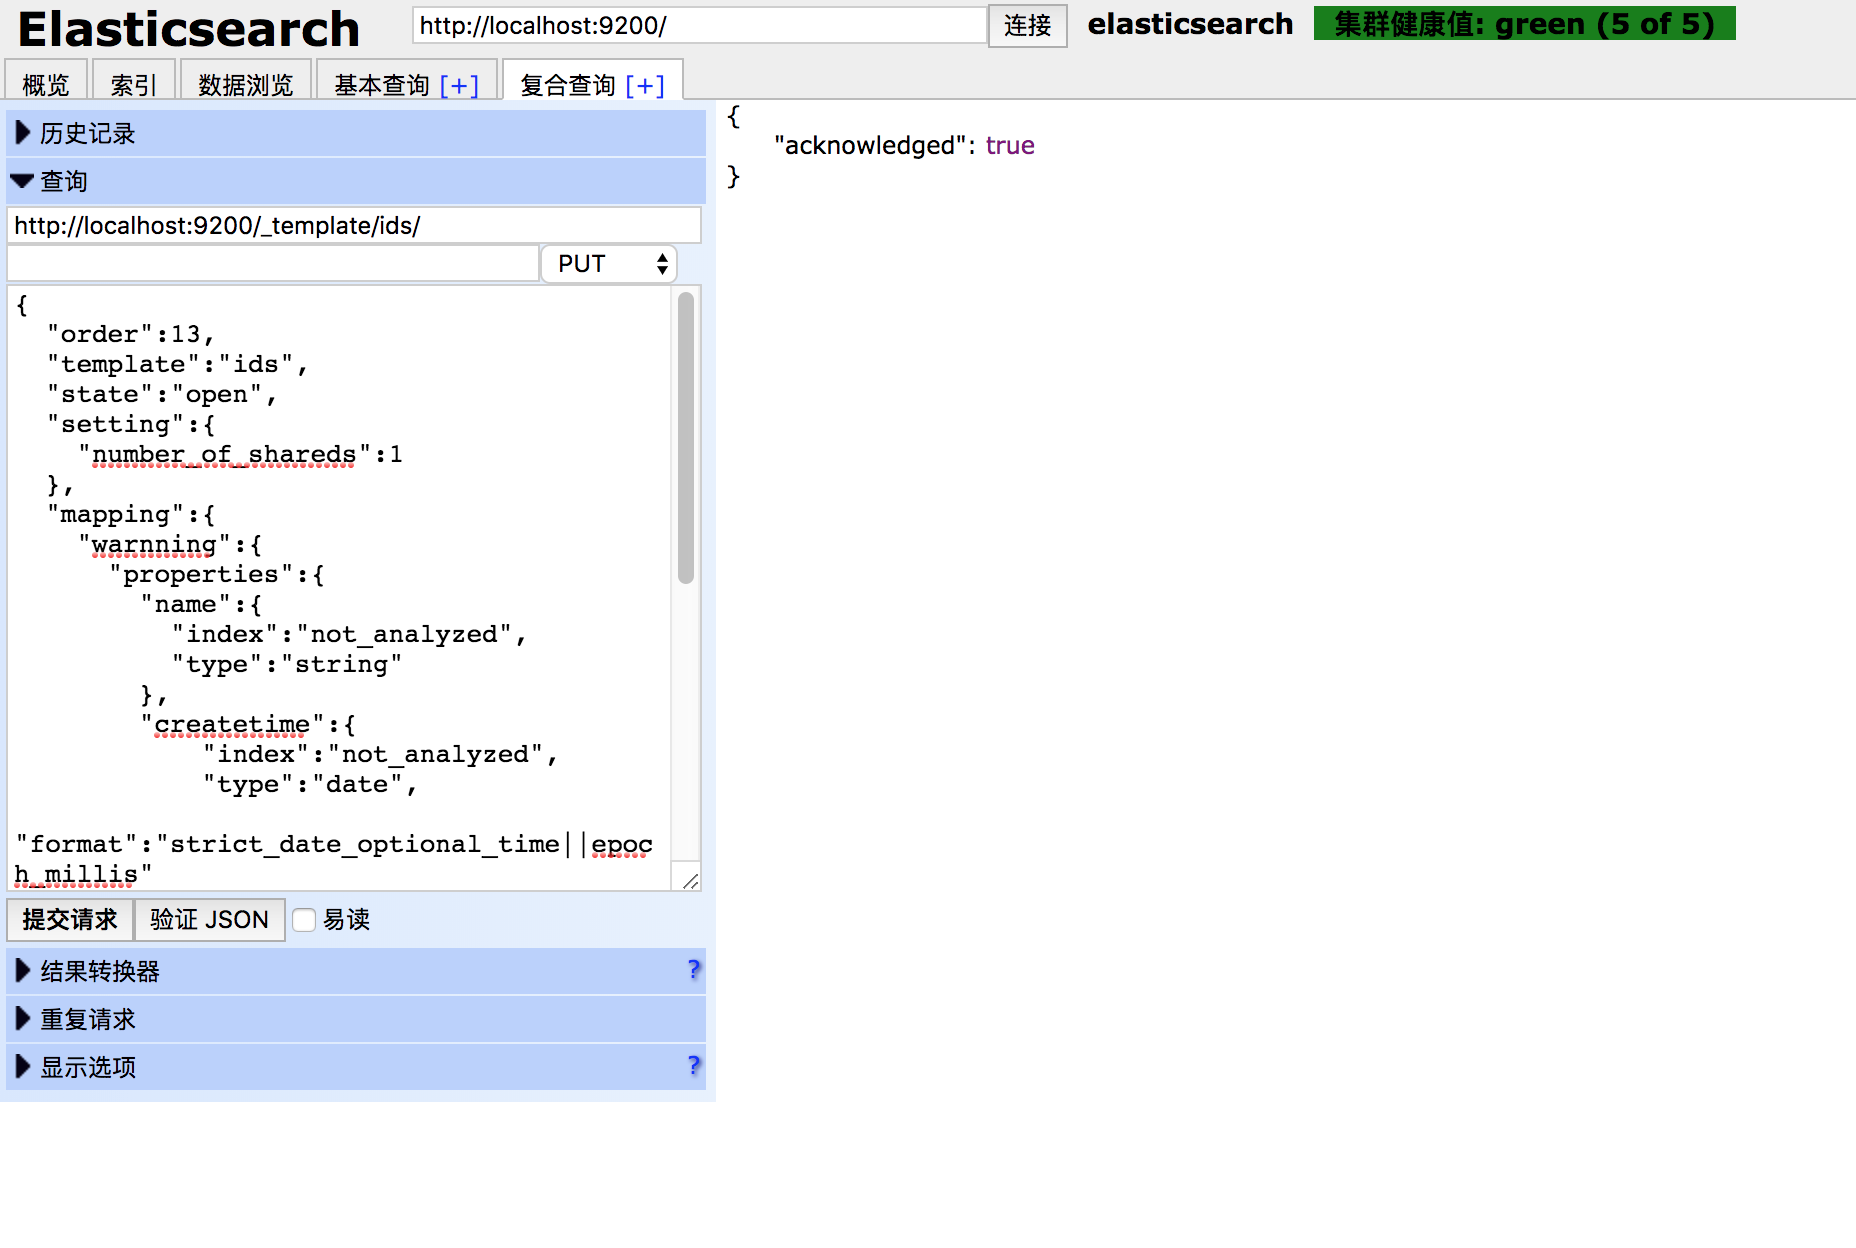
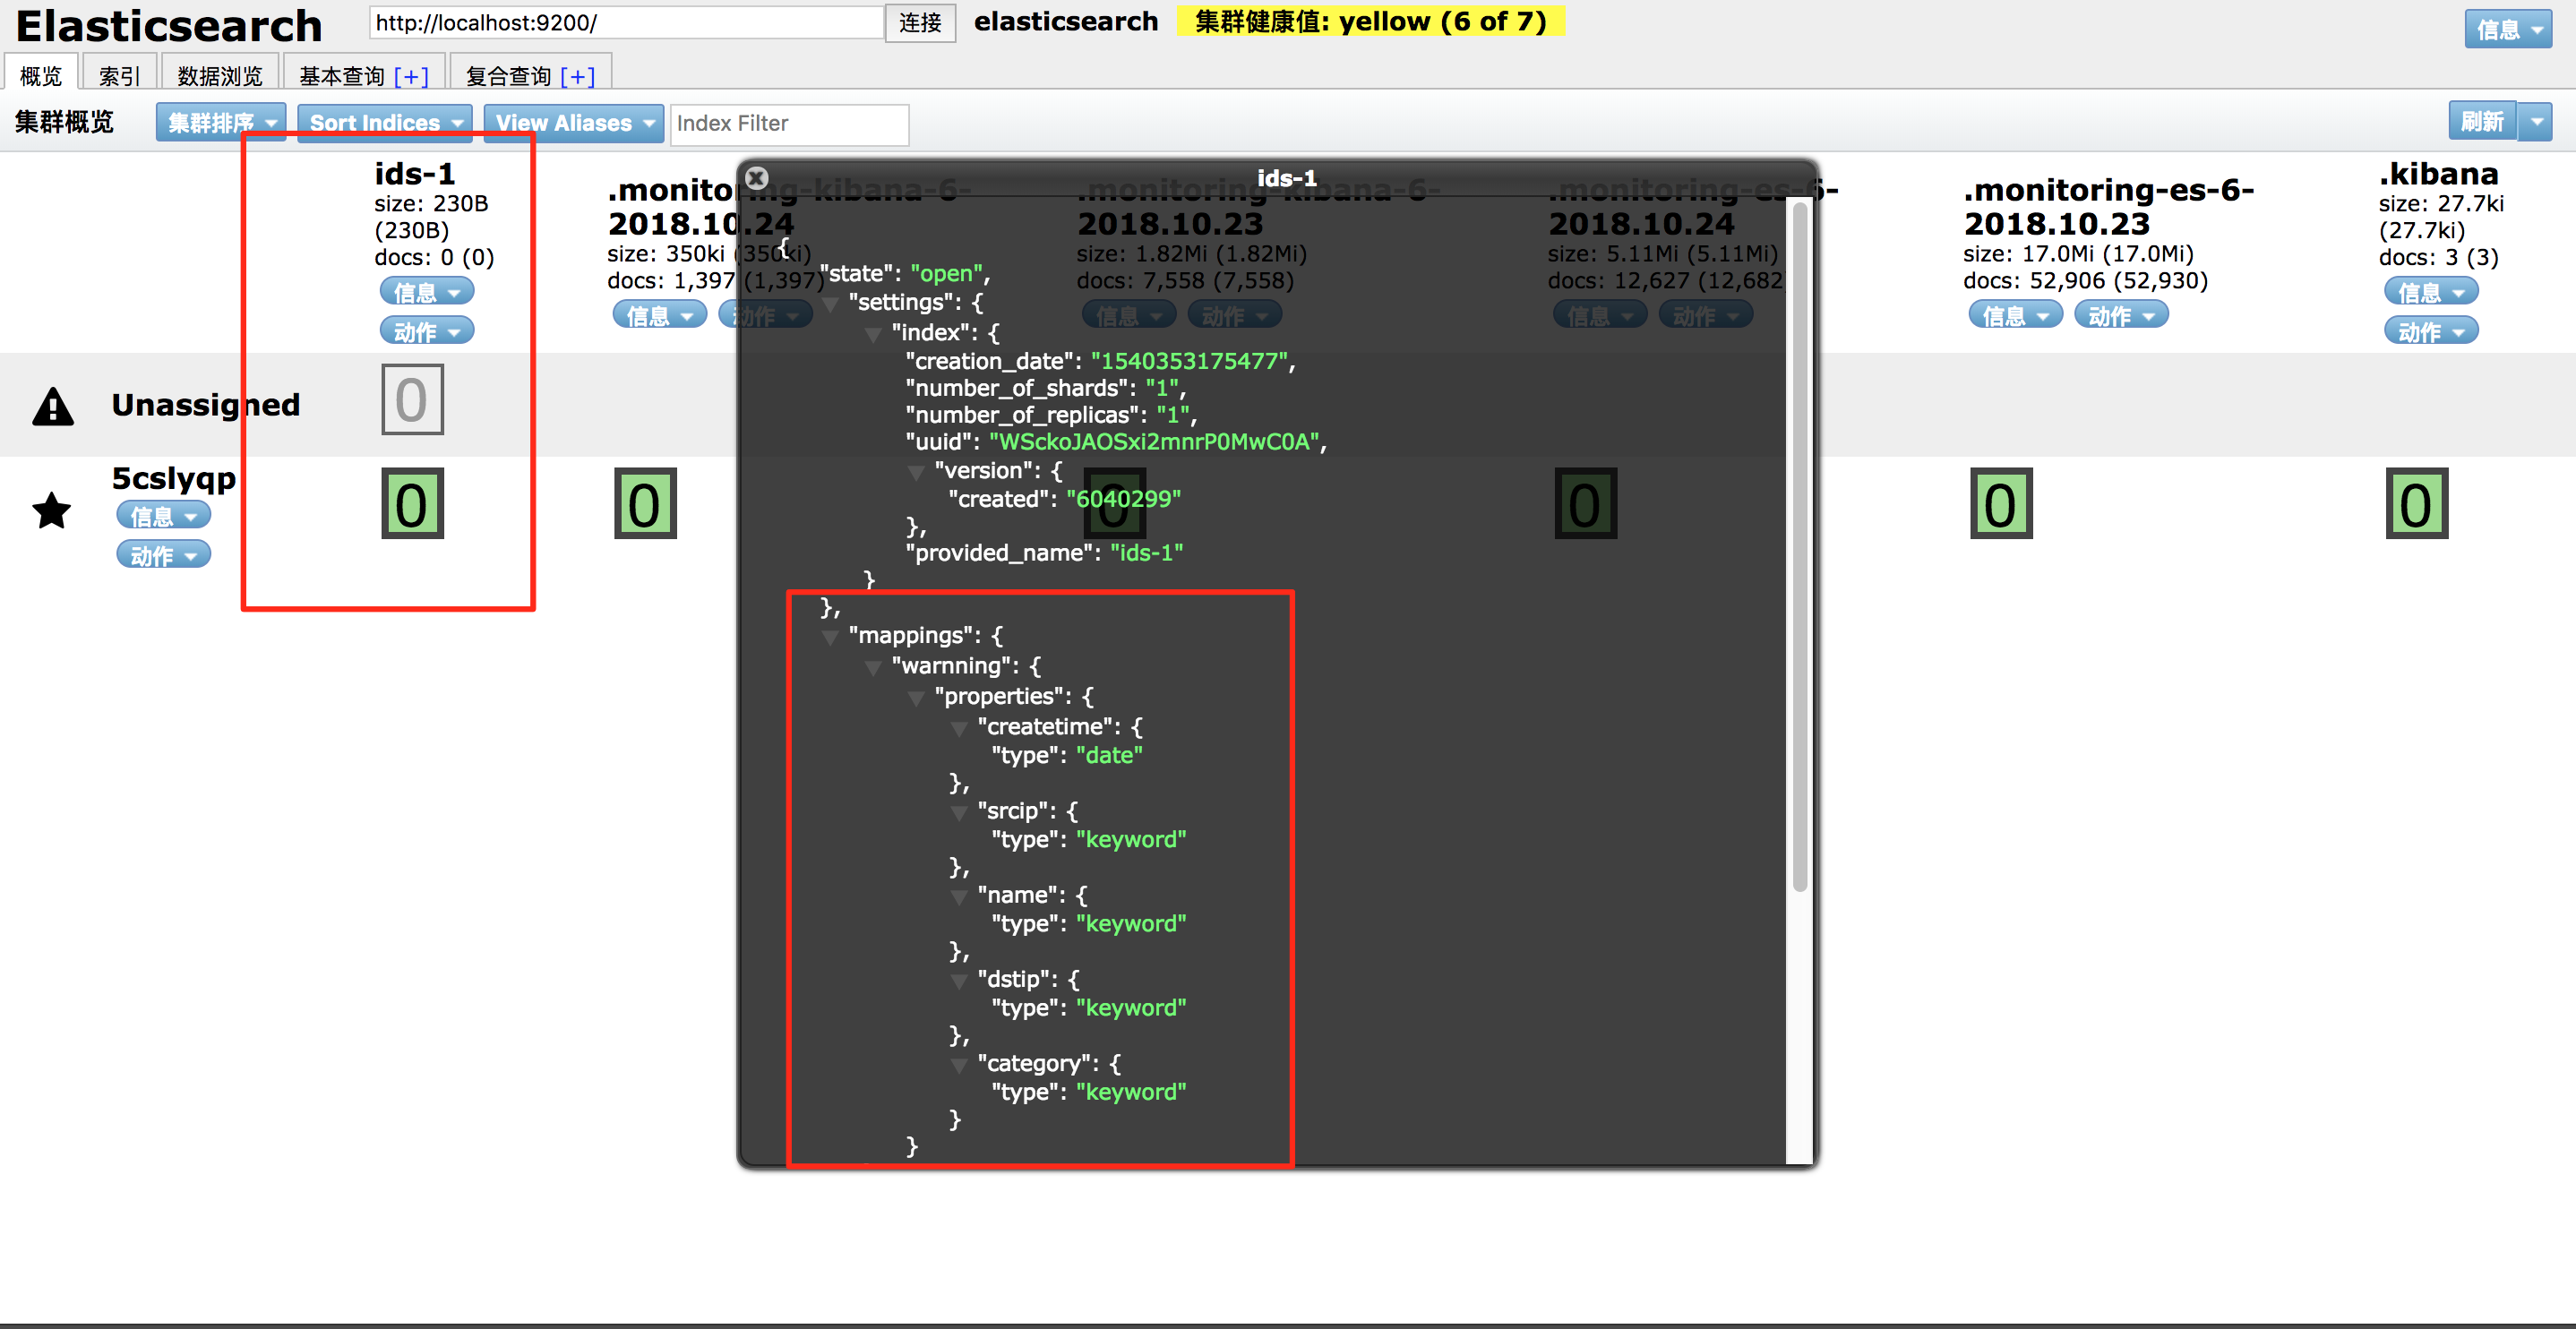
然后查看一下,模板是否上传成功:

我博客前面的Elasticsearch中曾经有关于模板的介绍,这里因为Elasticsearch的升级改版,要对模板知识做一些修改
#1、新版本的elasticsearch中,模板的index只能有true何false两个选择,与是否分词无关;不分词请把类型(type)设置成keyword。

#2、新版本中不在保留string类型,取而代之的是text类型和keyword类型,text类型可分词,keyword类型不分词。
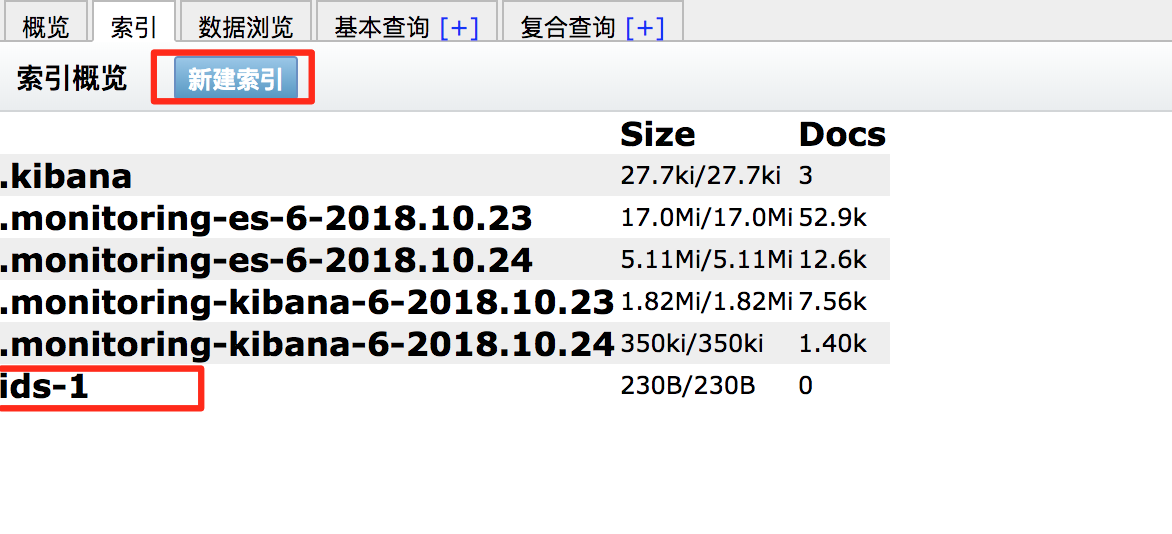
2、创建索引操作:
3、传入数据
restful api接口,见我写的前面的文章《ELK基础学习》
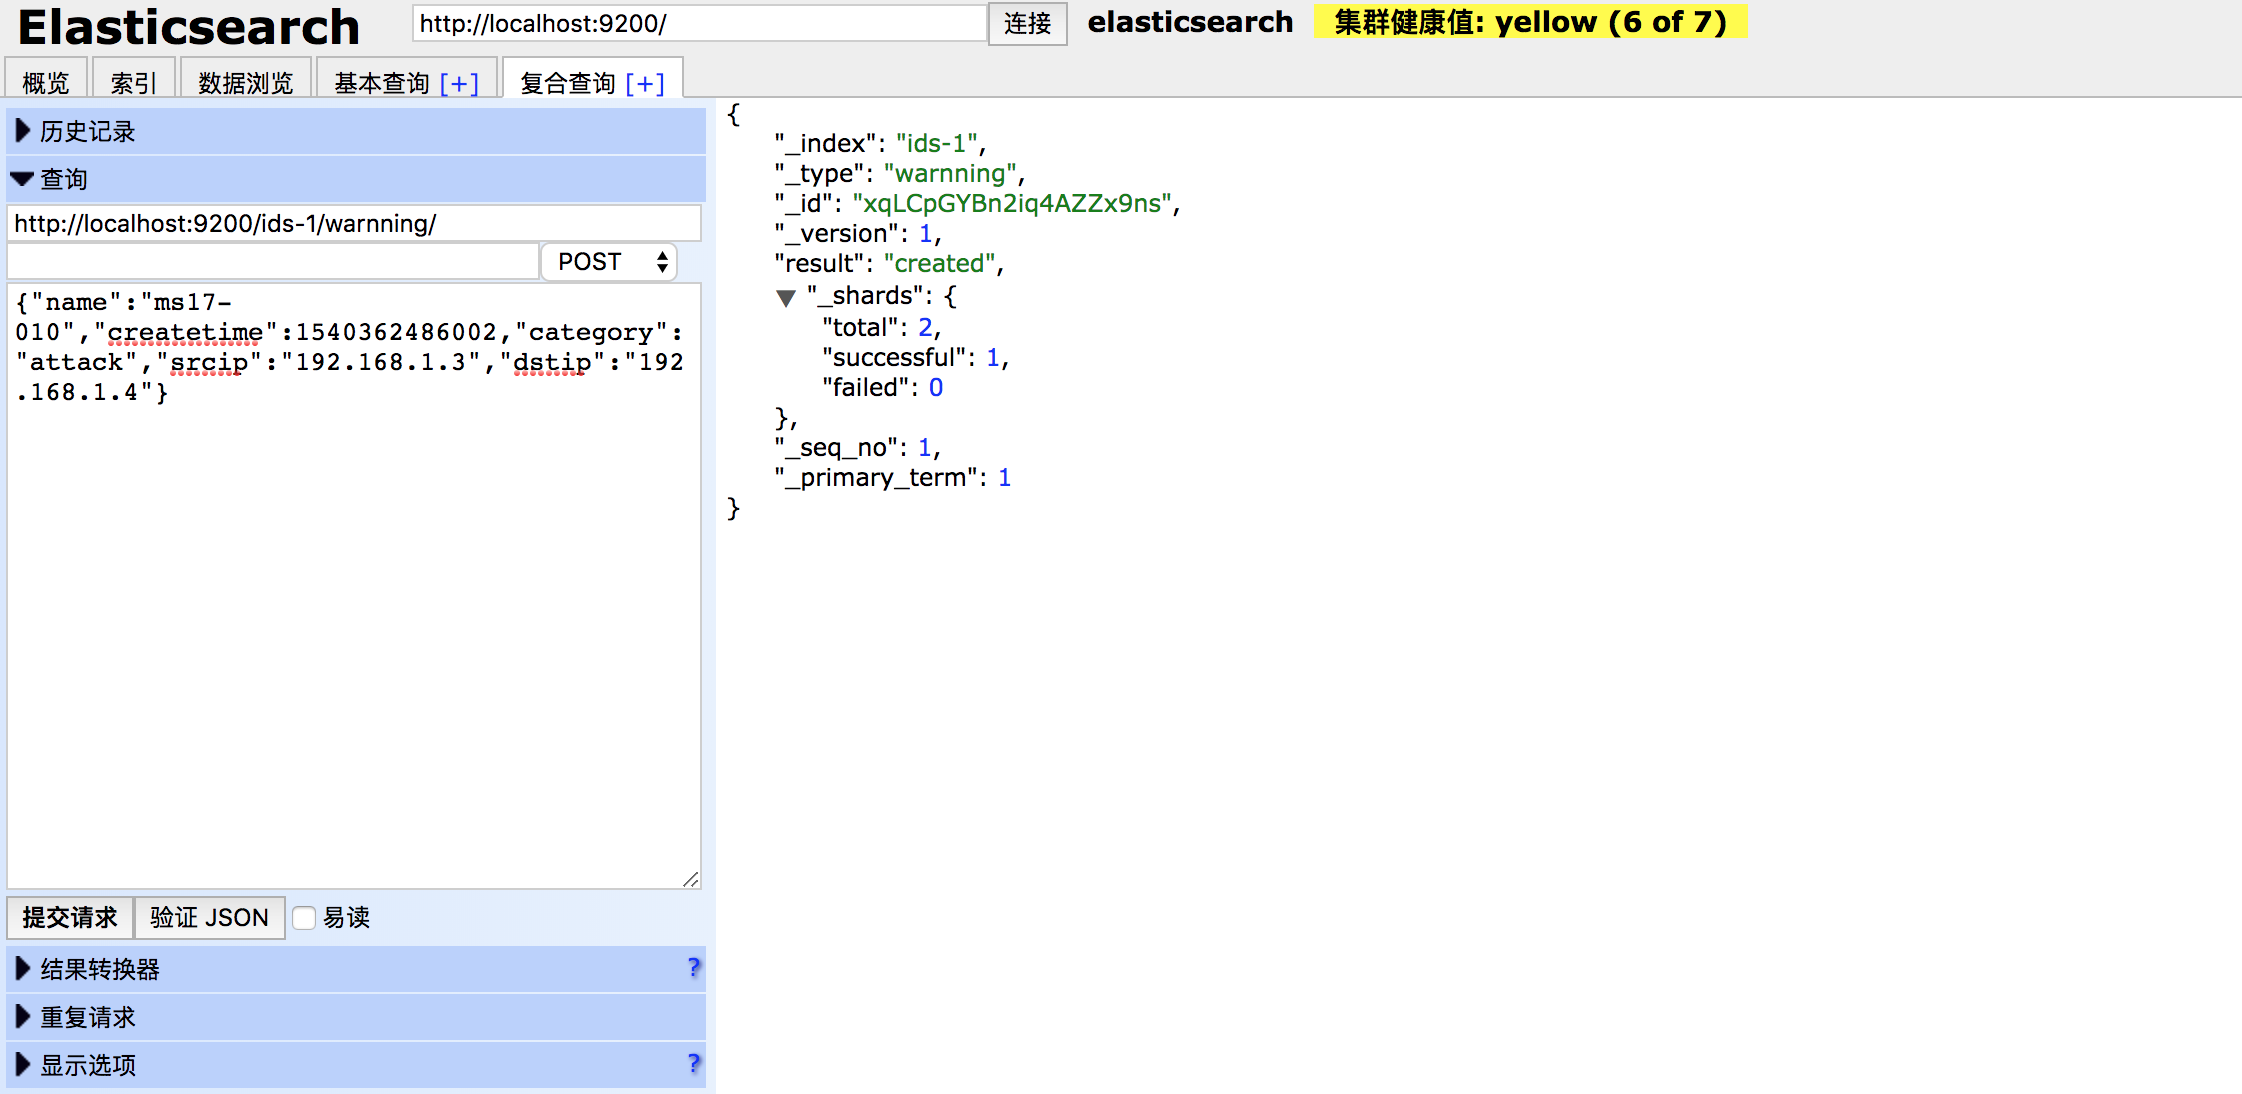
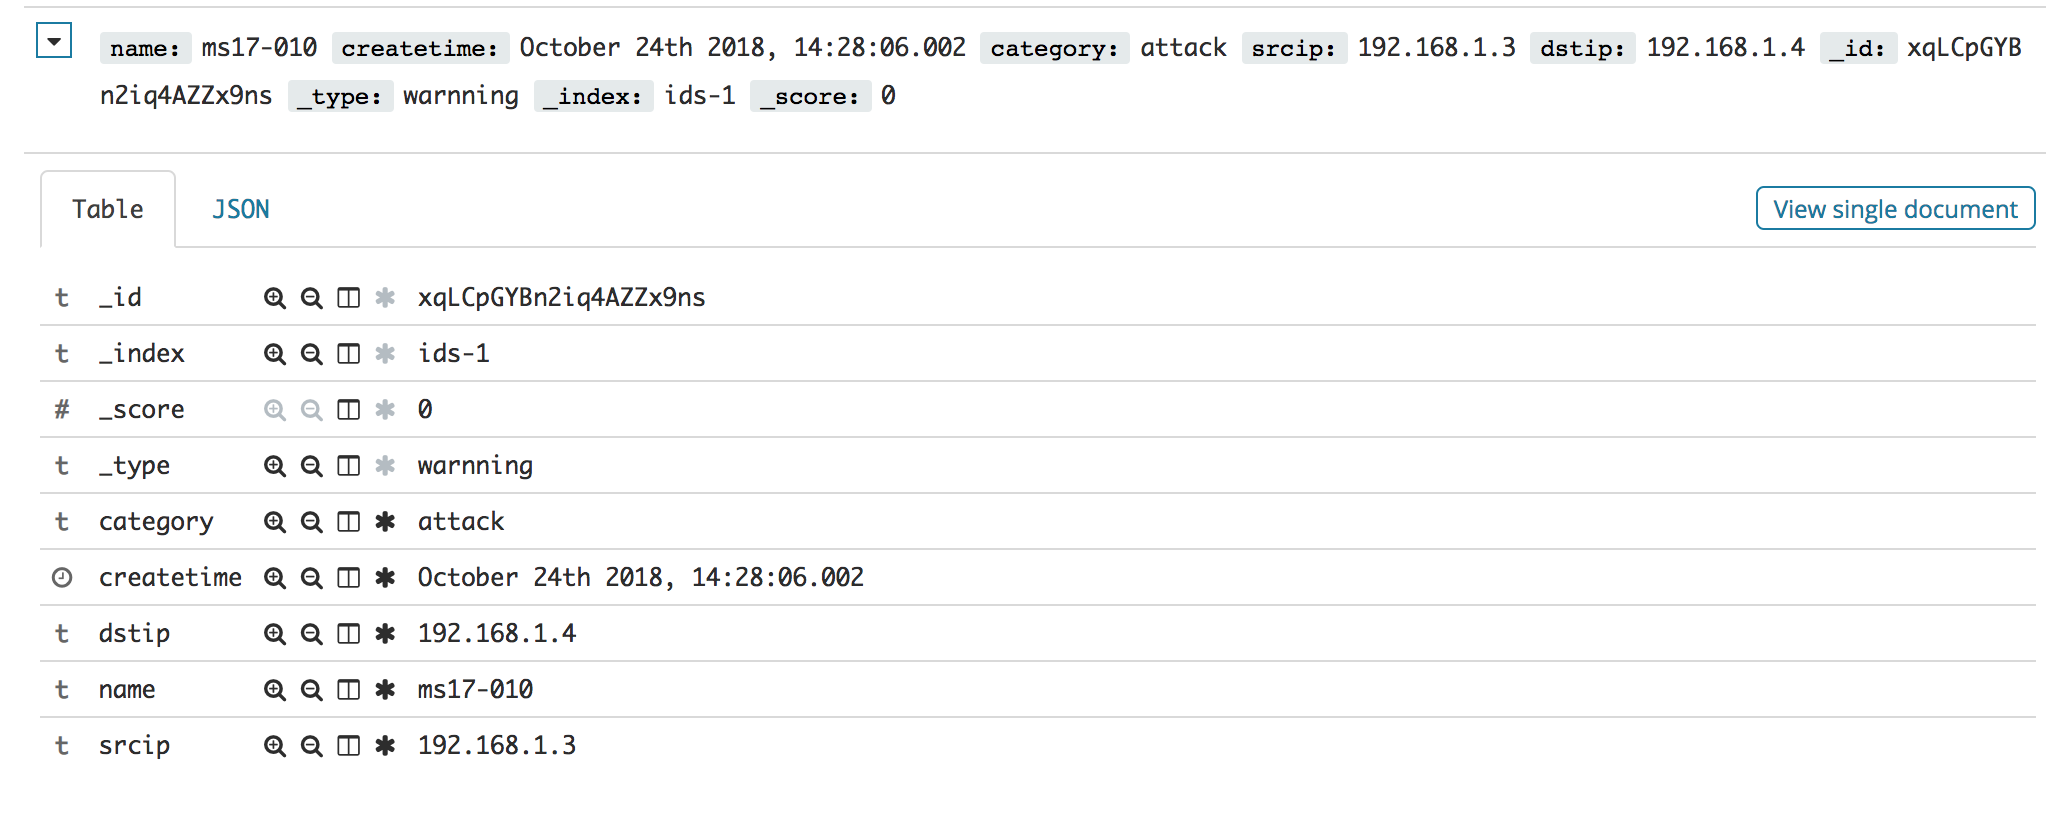
数据如下:
{

	"name": "ms17-010",

	"createtime": 1540362486002,

	"category": "attack",

	"srcip": "192.168.1.3",

	"dstip": "192.168.1.4"

}
效果如图:
4、Elasticsearch的配置文件简介
这里介绍的是elasticsearch.yml
# ======================== Elasticsearch Configuration =========================

#

# NOTE: Elasticsearch comes with reasonable defaults for most settings.

#       Before you set out to tweak and tune the configuration, make sure you

#       understand what are you trying to accomplish and the consequences.

#

# The primary way of configuring a node is via this file. This template lists

# the most important settings you may want to configure for a production cluster.

#

# Please consult the documentation for further information on configuration options:

# https://www.elastic.co/guide/en/elasticsearch/reference/index.html

#

# ---------------------------------- Cluster -----------------------------------

#

# Use a descriptive name for your cluster:

#

#cluster.name: my-application   #集群名

#

# ------------------------------------ Node ------------------------------------

#

# Use a descriptive name for the node:

#

#node.name: node-1  #节点名

#

# Add custom attributes to the node:

#

#node.attr.rack: r1

#

# ----------------------------------- Paths ------------------------------------

#

# Path to directory where to store the data (separate multiple locations by comma):

#

#path.data: /path/to/data   #数据文件路径

#

# Path to log files:

#

#path.logs: /path/to/logs    #日志文件路径

#

# ----------------------------------- Memory -----------------------------------

#

# Lock the memory on startup:

#

#bootstrap.memory_lock: true

#

# Make sure that the heap size is set to about half the memory available

# on the system and that the owner of the process is allowed to use this

# limit.

#

# Elasticsearch performs poorly when the system is swapping the memory.

#

# ---------------------------------- Network -----------------------------------

#

# Set the bind address to a specific IP (IPv4 or IPv6):

#

#network.host: 192.168.0.1  #绑定的IP地址

#

# Set a custom port for HTTP:

#

#http.port: 9200    #服务端口

#

# For more information, consult the network module documentation.

#

# --------------------------------- Discovery ----------------------------------

#

# Pass an initial list of hosts to perform discovery when new node is started:

# The default list of hosts is ["127.0.0.1", "[::1]"]   #  允许访问的地址列表

#

#discovery.zen.ping.unicast.hosts: ["host1", "host2"]

#

# Prevent the "split brain" by configuring the majority of nodes (total number of master-eligible nodes / 2 + 1):

#

#discovery.zen.minimum_master_nodes:

#

# For more information, consult the zen discovery module documentation.

#

# ---------------------------------- Gateway -----------------------------------

#

# Block initial recovery after a full cluster restart until N nodes are started:

#

#gateway.recover_after_nodes: 3

#

# For more information, consult the gateway module documentation.

#

# ---------------------------------- Various -----------------------------------

#

# Require explicit names when deleting indices:

#

#action.destructive_requires_name: true

#  以下是为了避免X-PACK插件与head冲突导致elasticsearch-head无法正常连接elasticsearch而配置的。

http.cors.enabled: true

http.cors.allow-origin: "*"

http.cors.allow-headers: Authorization,X-Requested-With,Content-Length,Content-Type
5、Elasticsearch批量插入数据
python 有 Elasticsearch 库,可以使用python Elasticsearch库中的helpers中的bulk来解决批量导入的问题,对于数据量大的时候的插入效率会好的多。但缺点也有,批量插入不会获取每一条插入具体成功与否的信息。Python伪代码如下:
from elasticsearch import Elasticsearch

from elasticsearch.helpers import bulk

es = Elasticsearch()

_list = []

_object_json = {

    #...

}

for x in x:

    _list.append(_object_json)

    if len(_list) >= 5000:

        bulk(es, _list)

if len(_list) > 0:

    bulk(es, _list)
ELK系列三:Elasticsearch的简单使用和配置文件简介的更多相关文章
- ELK系列(1) - Elasticsearch + Logstash + Kibana + Log4j2快速入门与搭建用例
前言 最近公司分了个ELK相关的任务给我,在一边学习一边工作之余,总结下这些天来的学习历程和踩坑记录. 首先介绍下使用ELK的项目背景:在项目的数据库里有个表用来存储消息队列的消费日志,这些日志用于开 ...
- ElasticSearch实战系列三: ElasticSearch的JAVA API使用教程
前言 在上一篇中介绍了ElasticSearch实战系列二: ElasticSearch的DSL语句使用教程---图文详解,本篇文章就来讲解下 ElasticSearch 6.x官方Java API的 ...
- 用Qt写软件系列三:一个简单的系统工具(上)
导言 继上篇<用Qt写软件系列二:QIECookieViewer>之后,有一段时间没有更新博客了.这次要写的是一个简单的系统工具,需求来自一个内部项目.功能其实很简单,就是查看当前当前系统 ...
- 用Qt写软件系列三:一个简单的系统工具之界面美化
前言 在上一篇中,我们基本上完成了主要功能的实现,剩下的一些导出.进程子模块信息等功能,留到后面再来慢慢实现.这一篇来讲述如何对主界面进行个性化的定制.Qt库提供的只是最基本的组件功能,使用这些组件开 ...
- ELK系列(4) - Elasticsearch cannot write xcontent for unknown value of type class java.math.BigDecimal
问题与分析 在使用Elasticsearch进行index数据时,发现报错如下: java.lang.IllegalArgumentException: cannot write xcontent f ...
- ELK系列(3) - Elasticsearch修改jvm参数
方法 Elasticsearch默认会配置1G的JVM堆的初始值和最大值,该jvm参数被配置在/config/jvm.options里: -Xms1g -Xmx1g 如果只是个人开发小项目,可以把参数 ...
- elk 系列:Elasticsearch 7.2 集群部署+TLS 加密+认证登陆
背景 2019年5月21日,Elastic官方发布消息: Elastic Stack 新版本6.8.0 和7.1.0的核心安全功能现免费提供. 这意味着用户现在能够对网络流量进行加密.创建和管理用户. ...
- ElasticSearch实战系列四: ElasticSearch理论知识介绍
前言 在前几篇关于ElasticSearch的文章中,简单的讲了下有关ElasticSearch的一些使用,这篇文章讲一下有关 ElasticSearch的一些理论知识以及自己的一些见解. 虽然本人是 ...
- ElasticSearch实战系列五: ElasticSearch的聚合查询基础使用教程之度量(Metric)聚合
Title:ElasticSearch实战系列四: ElasticSearch的聚合查询基础使用教程之度量(Metric)聚合 前言 在上上一篇中介绍了ElasticSearch实战系列三: Elas ...
随机推荐
- input框取消光标颜色手机端不生效
<style> input{ color:transparent; } </style> <input value="我要隐藏光标"> //文字 ...
- 8 云计算系列之Horizon的安装与虚拟机创建流程
preface 在上一章节中,我们可以在无web管理界面上创建并启动虚拟机,虽然可以这么做,但是敲命令太繁琐,所以此时我们可以安装openstack web管理界面,通过web界面的图形化操作open ...
- VC获取物理网卡的MAC地址
获取网卡的MAC地址的方法很多,如:Netbios,SNMP,GetAdaptersInfo等.经过测试发现 Netbios 方法在网线拔出的情况下获取不到MAC,而 SNMP 方法有时会获取多个重复 ...
- Android 应用授权访问GooleDrive
Refer:https://developers.google.com/drive/auth/android Go to the Google Cloud Console. Select a pr ...
- Git项目协同开发学习笔记2:项目库开发协作相关命令
之前介绍了如何用git构建项目库及其后续操作的问题,但主要还是个人的操作问题,不太涉及到项目协作方面的问题,所以来说下这块.传送门在这里(后面的可以不用看了). 1.同步 首先就式同步问题:在项目协作 ...
- linux下.so、.ko、.a的区别
各类文件的区别与作用: 1.对于.so文件 .so文件是用户层的动态链接库,用于用户层的动态链接使用,内核态的代码同样不能直接访问. 2.对于.ko文件 .ko文件是内核态的动态链接库,用于内核态的动 ...
- IOS 应用官方接口地址
地址: http://www.apple.com/itunes/affiliates/resources/documentation/itunes-store-web-service-search-a ...
- Xcode文件被锁定:The file ".xcodeproj" could not be unlocked
同事从svn上面checkout项目到本地,通过xcode打开的时候提示的这个问题. The file "xcodeproj" could not be unlocked. Cou ...
- js中对象的深度复制
// 对象的深度复制 cloneObj(oldObj) var cloneObj = function (obj) { var newObj = {}; if (obj instanceof Arra ...
- cocos2dx 3.0 scrollview 在android下面背景變綠色了
在windows上面跑的是OK的, 在android下面跑的時候就變成這樣子了: