
centos7下通过LVS的DR模式实现负载均衡访问
一、两台服务器作为real server ,一台作为director
director:172.28.18.69 vip:172.28.18.70
real server1:172.28.18.71
real server2:172.28.18.78
二、两台real server上安装nginx
配置nginx yum源
[root@localhost ~]# vim /etc/yum.repos.d/nginx.repo

[nginx]

name=nginx repo

baseurl=http://nginx.org/packages/centos/7/$basearch/

gpgcheck=

enabled=
安装
[root@localhost ~]# yum install -y nginx
查看
[root@localhost ~]# whereis nginx

nginx: /usr/sbin/nginx /usr/lib64/nginx /etc/nginx /usr/share/nginx /usr/share/man/man8/nginx..gz

[root@localhost ~]#
配置文件
查看默认根目录页面地址
[root@localhost ~]# vim /etc/nginx/conf.d/default.conf

server {

    listen       ;

    server_name  localhost;

    #charset koi8-r;

    #access_log  /var/log/nginx/host.access.log  main;

    location / {

        root   /usr/share/nginx/html;

        index  index.html index.htm;

    }
编辑/usr/share/nginx/html/index.html
加上本机IP地址,在测试负载均衡的时候,才知道分发到了哪台real server上
[root@localhost ~]# vim /usr/share/nginx/html/index.html

<!DOCTYPE html>

<html>

<head>

<title>Welcome to nginx!</title>

<style>

    body {

        width: 35em;

        margin:  auto;

        font-family: Tahoma, Verdana, Arial, sans-serif;

    }

</style>

</head>

<body>

<h1>Welcome to nginx!-</h1>

<p>If you see this page, the nginx web server is successfully installed and

working. Further configuration is required.</p>

<p>For online documentation and support please refer to

<a href="http://nginx.org/">nginx.org</a>.<br/>

Commercial support is available at

<a href="http://nginx.com/">nginx.com</a>.</p>

<p><em>Thank you for using nginx.</em></p>

</body>

</html>
保存、退出
启动nginx
[root@localhost conf.d]# nginx -c /etc/nginx/nginx.conf
在浏览器查看
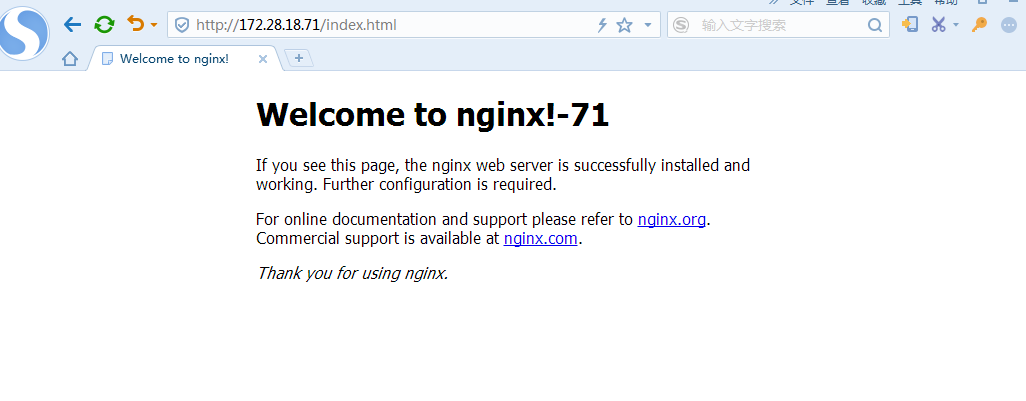
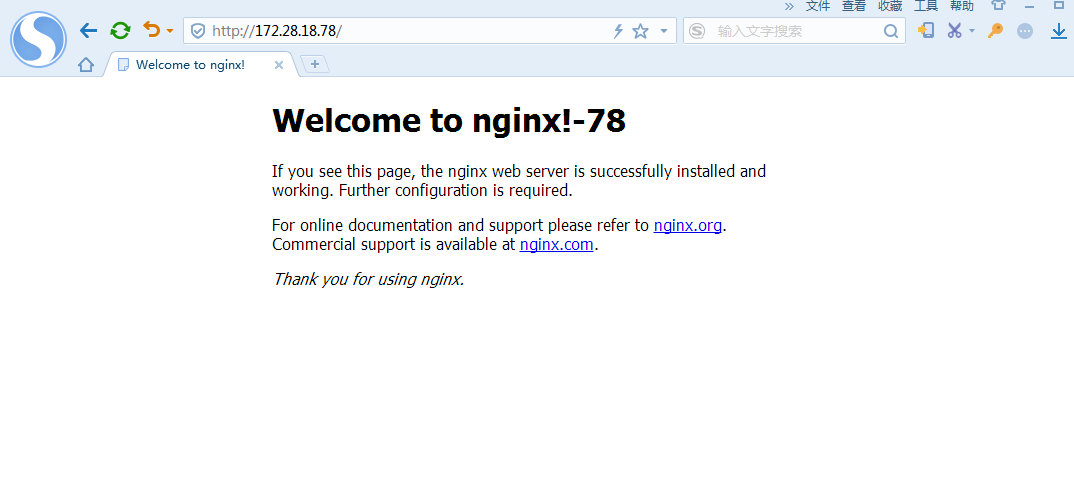
可以显示IP了,同样172.28.18.78的服务器也安装和配置nginx
三、在172.28.18.69上安装ipvsadm
[root@localhost mysql-5.7.]# yum install -y ipvsadm

已加载插件:fastestmirror

Loading mirror speeds from cached hostfile

 * base: mirrors.tuna.tsinghua.edu.cn

 * extras: mirrors.huaweicloud.com

 * updates: mirrors.tuna.tsinghua.edu.cn

base                                                                                | 3.6 kB  ::

extras                                                                              | 3.4 kB  ::

updates                                                                             | 3.4 kB  ::

正在解决依赖关系

--> 正在检查事务

---> 软件包 ipvsadm.x86_64.0.1.-.el7 将被 安装

--> 解决依赖关系完成

依赖关系解决

===========================================================================================================

 Package                  架构                    版本                         源                     大小

===========================================================================================================

正在安装:

 ipvsadm                  x86_64                  1.27-.el7                   base                    k

事务概要

===========================================================================================================

安装   软件包

总下载量: k

安装大小: k

Downloading packages:

ipvsadm-1.27-.el7.x86_64.rpm                                                       |   kB  ::

Running transaction check

Running transaction test

Transaction test succeeded

Running transaction

警告:RPM 数据库已被非 yum 程序修改。

** 发现  个已存在的 RPM 数据库问题, 'yum check' 输出如下:

:postfix-2.10.-.el7.x86_64 有缺少的需求 libmysqlclient.so.()(64bit)

:postfix-2.10.-.el7.x86_64 有缺少的需求 libmysqlclient.so.(libmysqlclient_18)(64bit)

  正在安装    : ipvsadm-1.27-.el7.x86_64                                                              /

  验证中      : ipvsadm-1.27-.el7.x86_64                                                              /

已安装:

  ipvsadm.x86_64 :1.27-.el7

完毕!
四、配置虚拟服务器
[root@director ~]# ipvsadm -A -t 172.28.18.70: -s rr
增加一个虚拟服务器 172.28.18.69, -A:增加一个虚拟服务器 -t:tcp协议 -s:分发算法 rr 轮询
五、增加后端实际服务器
[root@director ~]# ipvsadm -a -t 172.28.18.70: -r 172.28.18.71: -g -w 1

[root@director ~]# ipvsadm -a -t 172.28.18.70: -r 172.28.18.78: -g -w 1
-a :增加后端服务器 -t:对应的虚拟服务器IP -r :对应的后端服务器IP -g: DR模式 -w:权重
六、查看配置规则
[root@director home]# ipvsadm -Ln
IP Virtual Server version 1.2.1 (size=4096)
Prot LocalAddress:Port Scheduler Flags
-> RemoteAddress:Port Forward Weight ActiveConn InActConn
TCP 172.28.18.70:80 rr
-> 172.28.18.71:80 Route 1 0 0
-> 172.28.18.78:80 Route 1 0 0
七、设置director分发器的虚拟IP到设备em1:0
[root@director home]# ip addr add 172.28.18.70 dev em1:

[root@director home]# ip a

: lo: <LOOPBACK,UP,LOWER_UP> mtu  qdisc noqueue state UNKNOWN group default qlen

    link/loopback ::::: brd :::::

    inet 127.0.0.1/ scope host lo

       valid_lft forever preferred_lft forever

    inet6 ::/ scope host

       valid_lft forever preferred_lft forever

: em1: <BROADCAST,MULTICAST,UP,LOWER_UP> mtu  qdisc mq state UP group default qlen

    link/ether :fe:b5:dc:2c: brd ff:ff:ff:ff:ff:ff

    inet 172.28.18.69/ brd 172.28.18.79 scope global noprefixroute em1

       valid_lft forever preferred_lft forever

    inet 172.28.18.70/ scope global em1

       valid_lft forever preferred_lft forever

    inet6 fe80::b3e8:e3b2::a2ed/ scope link noprefixroute

       valid_lft forever preferred_lft forever

: em2: <NO-CARRIER,BROADCAST,MULTICAST,UP> mtu  qdisc mq state DOWN group default qlen

    link/ether :fe:b5:dc:2c: brd ff:ff:ff:ff:ff:ff

: em3: <NO-CARRIER,BROADCAST,MULTICAST,UP> mtu  qdisc mq state DOWN group default qlen

    link/ether :fe:b5:dc:2c:7b brd ff:ff:ff:ff:ff:ff

: em4: <NO-CARRIER,BROADCAST,MULTICAST,UP> mtu  qdisc mq state DOWN group default qlen

    link/ether :fe:b5:dc:2c:7d brd ff:ff:ff:ff:ff:ff
ip -a 查看,172.28.18.70已经绑定到em1:0上了
此时,在其他机器上测试curl 172.28.18.70,还是不通,是因为在后端服务器上还需要设置虚拟IP绑定到回环接口上
八、绑定虚拟IP到后端服务器的回环接口上
[root@server- html]# ip addr add 172.28.18.70 dev lo:
九、在其他服务器上测试172.28.18.70
[root@zabbix_server ~]# curl 172.28.18.70
<!DOCTYPE html>
<html>
<head>
<title>Welcome to nginx!</title>
<style>
body {
width: 35em;
margin: 0 auto;
font-family: Tahoma, Verdana, Arial, sans-serif;
}
</style>
</head>
<body>
<h1>Welcome to nginx!-71</h1>
<p>If you see this page, the nginx web server is successfully installed and
working. Further configuration is required.</p>
<p>For online documentation and support please refer to
<a href="http://nginx.org/">nginx.org</a>.<br/>
Commercial support is available at
<a href="http://nginx.com/">nginx.com</a>.</p>
<p><em>Thank you for using nginx.</em></p>
</body>
</html>
分发到71上
[root@zabbix_server ~]# curl 172.28.18.70
<!DOCTYPE html>
<html>
<head>
<title>Welcome to nginx!</title>
<style>
body {
width: 35em;
margin: 0 auto;
font-family: Tahoma, Verdana, Arial, sans-serif;
}
</style>
</head>
<body>
<h1>Welcome to nginx!-78</h1>
<p>If you see this page, the nginx web server is successfully installed and
working. Further configuration is required.</p>
<p>For online documentation and support please refer to
<a href="http://nginx.org/">nginx.org</a>.<br/>
Commercial support is available at
<a href="http://nginx.com/">nginx.com</a>.</p>
<p><em>Thank you for using nginx.</em></p>
</body>
</html>
再次请求,分发到78上。至此lvsDR模式负载均衡配置完成。
centos7下通过LVS的DR模式实现负载均衡访问的更多相关文章
- 三台CentOS 5 Linux LVS 的DR 模式http负载均衡安装步骤
Linux负载均衡软件LVS(概念篇) 一. LVS简介 LVS是Linux Virtual Server的简称,也就是Linux虚拟服务器, 是一个由章文嵩博士发起的自由软件项目,它的官方站点是ww ...
- LVS基于DR模式搭建负载均衡群集
LVS -DR模式集群架构原理图
- LVS基于NAT模式搭建负载均衡群集
LVS的基本架构图 负载均衡群集中,包括三个层次的组件: 1.第一层,负载调度器(BL) 前段至少有一个负载调度器(Load Balancer 或称为Director)负责响应并分发来自客户端的访问请 ...
- 借助LVS+Keepalived通过DR模式实现负载均衡
1.测试环境4台server,全部初始化一下,该关的关了 # vim /etc/hosts 192.168.1.101 lvs-master DIP 192.168.1.102 lvs-slave D ...
- 在centos7下搭建nginx环境,并配置负载均衡,最终能达到通过域名直接访问的目的
1.关于nginx:个人理解的nginx它的主要用途就是负载均衡,当然可能还有其他一些功能可能我们不长用到,我们通过nginx可以干什么呢?为什么要引入它呢?原因是当有高并发访问服务器时,服务器可能会 ...
- LVS的DR模式负载均衡
参考项目:http://www.cnblogs.com/along21/p/7833261.html#auto_id_3 LVS的DR模式实现负载均衡 1.环境 lvs-server :192.168 ...
- LVS:DR模式(Direct Routing)部署实验
本文介绍怎样在kvm的虚拟环境下,部署实验LVS的DR模式.包含网络结构图,怎样配置.以及使用tcpdump分析ip包. 网络结构图 kvm ...
- LVS的DR模式
DR模式: 请求由LVS接受,由真实提供服务的服务器(RealServer, RS)直接返回给用户,返回的时候不经过LVS. DR模式下需要LVS和绑定同一个VIP(RS通过将VIP绑定在loopba ...
- Lvs Keepalive DR模式高可用配置
Lvs Keepalive DR模式配置 一.环境 #DIP# eth0:192.168.233.145#VIP# eth0:0 192.168.233.250/32 #RIP1:192.168.23 ...
随机推荐
- cors 预请求
1.CORS的其他限制 默认允许的方法只有:GET.HEAD.POST默认允许的Content-Type:text/plain.multipart/form-data.applicaton/x-www ...
- Python 基础语法_Python脚本文件结构
目录 目录 前言 软件环境 Python Script文件结构 导入模块的流程 Python的包package 最后 前言 Python基础语法这一章,主要记录了Python的文件结构.逻辑运算符.算 ...
- 三十六:数据库之SQLAlchemy外建之一对一关系
relationship()的uselist参数默认为True,即一对多,如果要一对一,则需让uselist=False 准备工作 from sqlalchemy import create_engi ...
- Linux 查找当前目录下 包含特定字符串 的所有文件
使用 Linux 经常会遇到这种情况:只知道文件中包含某些特定的字符串,但是不知道具体的文件名.需要根据“特定的字符串”反向查找文件. 示例(路径文件如下): ./miracle/luna/a.txt ...
- 【VS开发】文件夹和文件选择EditBrowe控件使用
让EditBrowse控件既能浏览文件,又能浏览文件夹... 下图是在http://www.codeproject.com/Articles/35722/MFC-Feature-Pack-CMFCEd ...
- 微信小程序 ----- this.getOpenerEventChannel is not a function
小程序 添加新的功能, 页面跳转后,通过事件的发布订阅,实现 from => to 或者 to=> from 数据传递 1. 跳转到指定页面. 通过 wx.navigateTo() .请参 ...
- python 并发编程 阻塞IO模型
阻塞IO(blocking IO) 在linux中,默认情况下所有的socket都是blocking,一个典型的读操作流程大概是这样: 当用户进程调用了recvfrom这个系统调用,kernel内核就 ...
- 红帽学习笔记[RHCSA] 第十课[计划任务Cron与At、逻辑卷管理]
计划任务[At & Cron Jobs] at # at 命令只能计划一次性任务但是比较方便. # 先输入时间 [root@localhost Desktop]# at 10:02 # 输入要 ...
- HDU 1024 Max Sum Plus Plus (动态规划、最大m子段和)
Max Sum Plus Plus Time Limit: 2000/1000 MS (Java/Others) Memory Limit: 65536/32768 K (Java/Others ...
- Git 的这个神技,学会爽歪歪~
现在大多数公司都有 GIT 来管理代码版本控制了,既然用到 GIT,相信大家都接触过 Github.Gitlab.Gitee 这些远程仓库,或者是公司内部自行搭建的 GIT 仓库. 当用到 SSH 方 ...