IdentityServer4认证服务器集成Identity&配置持久化数据库
文章简介
asp.net core的空Web项目集成相关dll和页面文件配置IdnetityServer4认证服务器
Ids4集成Identity
Ids4配置持久化到数据库
写在最前面,此文章不详细讲述IdentityServer4的各个组成部分以及Oauth2相关知识,需要了解详细相关知识的,可以移步我的其他几篇博客(初探IdentityServer4),腾讯视频有Dave老师录制的详细教程(http://v.qq.com/vplus/4cfb00af75c16eb8d198c58fb86eb4dc?page=video)。
asp.net core的空Web项目集成相关dll和页面文件配置IdnetityServer4认证服务器
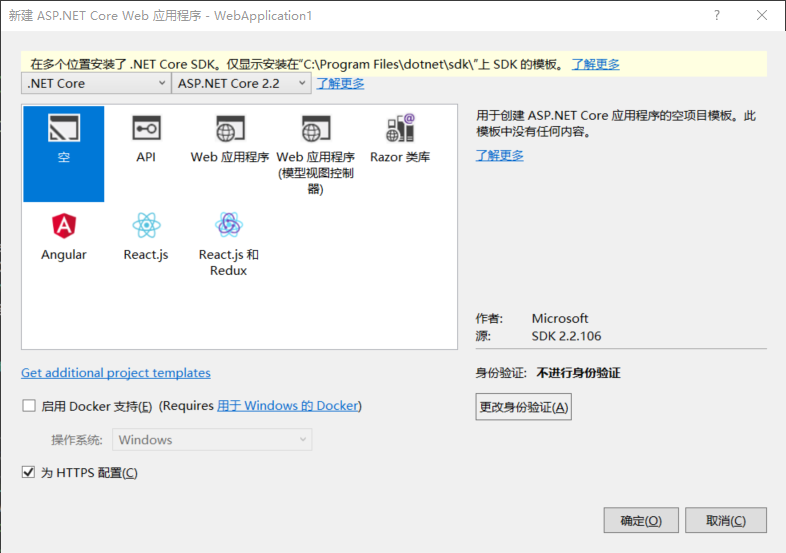
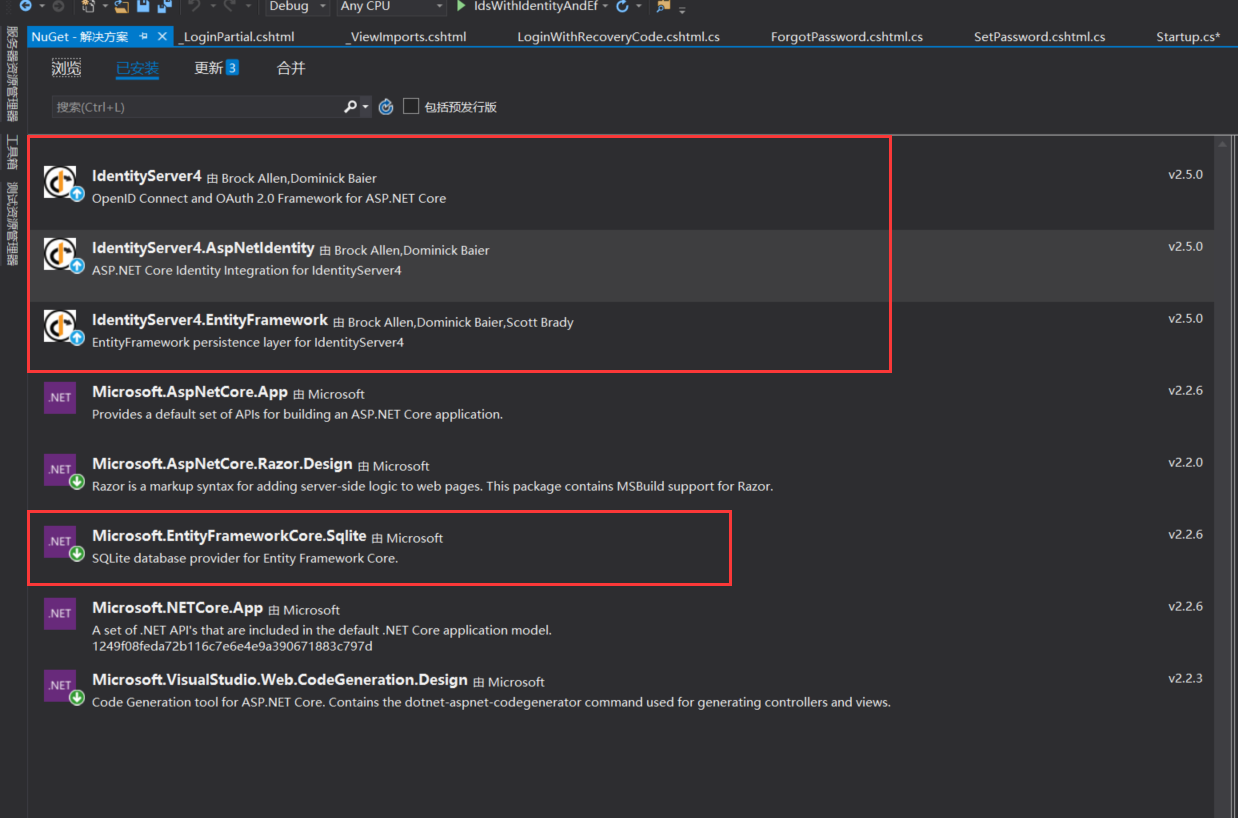
- 首先创建一个net core版本为2.2的空项目,如下图所示。引入IdntityServer4和Identity的相关Nuget包 IdentityServer4,IdentityServer4.AspNetIdentity,IdentityServer4.EntityFramework,Microsoft.EntityFrameworkCore.Sqlite(数据库我们用Sqlite)。入下图所示
- 添加静态文件(wwwroot)和IdentityServer4的登录UI以及控制器相关类(官方文档的Quickstart),添加一个IdentityResource,ApiResource,和Client配置的Config类;因为Quickstart中用到的User类是继承自IdnetityUser的ApplicationUser,所以我们添加一个ApplicationUser类;项目路径是这样的:

- 接下来我们配置startup文件,这样,基于内存配置的(Config文件)我们的IdentityServer4认证服务器就搭好了
public class Startup
{
public IConfiguration Configuration { get; }
public IHostingEnvironment Environment { get; }
public Startup(IConfiguration configuration, IHostingEnvironment environment)
{
Configuration = configuration;
Environment = environment;
}
public void ConfigureServices(IServiceCollection services)
{
services.AddMvcCore()
.AddAuthorization()
.AddJsonFormatters(); services.AddMvc().SetCompatibilityVersion(Microsoft.AspNetCore.Mvc.CompatibilityVersion.Version_2_1); services.Configure<IISOptions>(iis =>
{
iis.AuthenticationDisplayName = "Windows";
iis.AutomaticAuthentication = false;
}); var builder = services.AddIdentityServer(options =>
{
options.Events.RaiseErrorEvents = true;
options.Events.RaiseInformationEvents = true;
options.Events.RaiseFailureEvents = true;
options.Events.RaiseSuccessEvents = true;
})
.AddInMemoryIdentityResources(Config.GetIdentityResources())
.AddInMemoryApiResources(Config.GetApis())
.AddInMemoryClients(Config.GetClients())
.AddTestUsers(Config.GetUsers()); if (Environment.IsDevelopment())
{
builder.AddDeveloperSigningCredential();
}
else
{
throw new Exception("need to configure key material");
}
}
public void Configure(IApplicationBuilder app, IHostingEnvironment env)
{
if (Environment.IsDevelopment())
{
app.UseDeveloperExceptionPage();
app.UseDatabaseErrorPage();
}
else
{
app.UseExceptionHandler("/Home/Error");
}
app.UseStaticFiles();
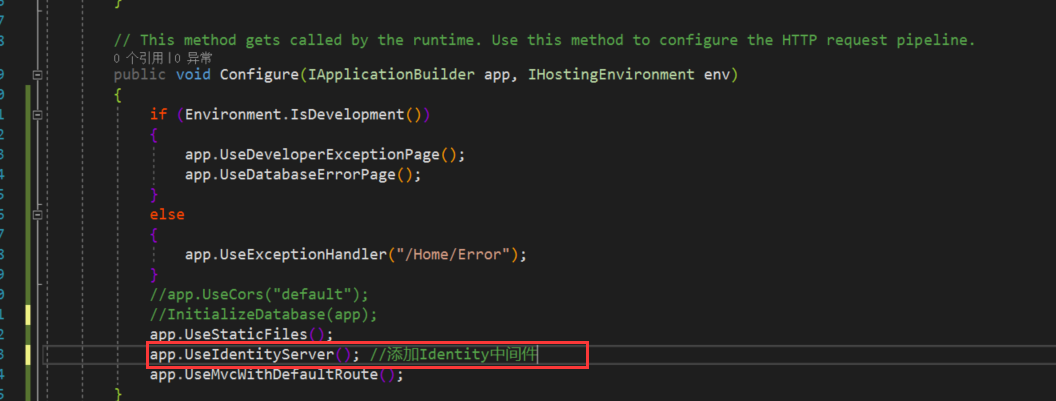
app.UseMvcWithDefaultRoute();
} }
}
Ids4集成Identity
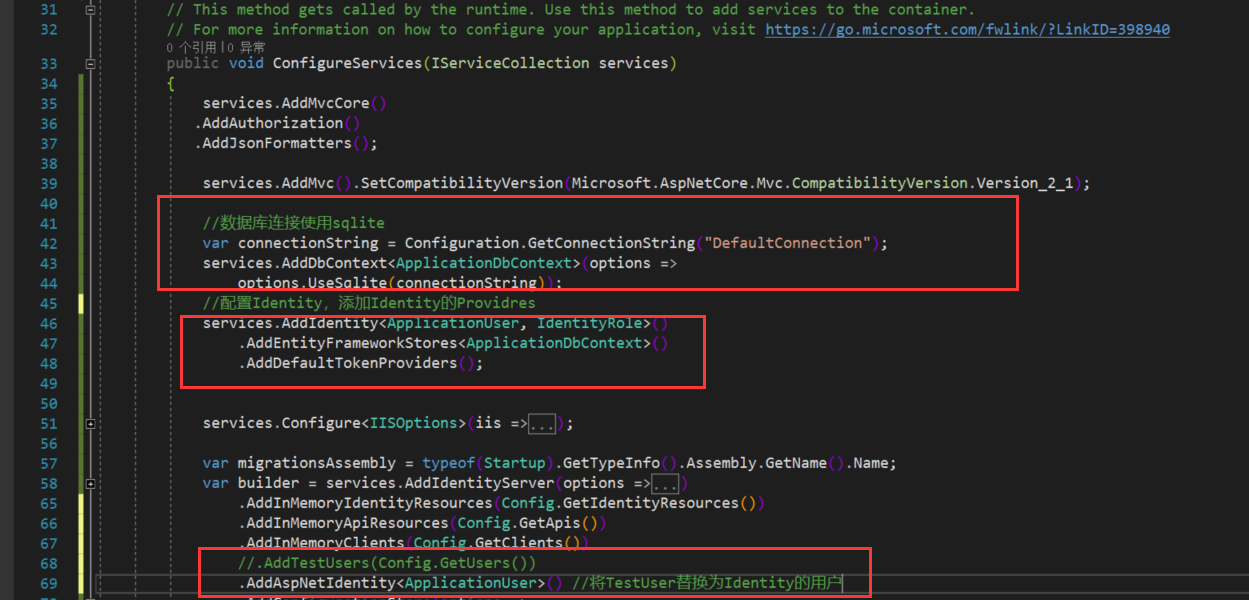
- 首先,添加一个数据库上下文,这里我们使用sqlite数据库,在项目根路径下添加一个叫做identity.db的文件,再在配置文件中,添加数据库链接字符串
     public class ApplicationDbContext : IdentityDbContext<ApplicationUser>

     {

         public ApplicationDbContext(DbContextOptions<ApplicationDbContext> options) : base(options) { }

         protected override void OnModelCreating(ModelBuilder builder)

         {

             base.OnModelCreating(builder);

         }

     }
{
"ConnectionStrings": {
"DefaultConnection": "Data Source=identity.db;"
}
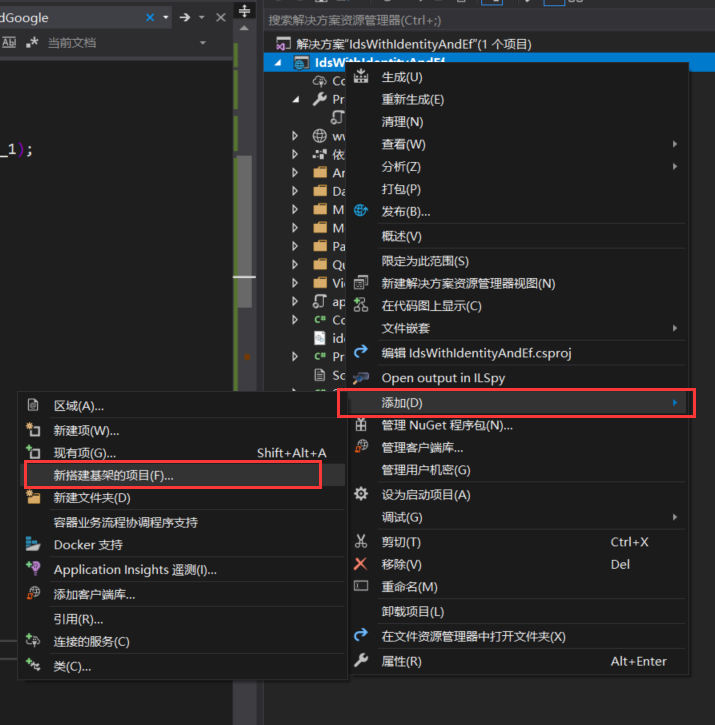
} - 添加Identity的项目基架,选择上一步添加的数据库链接上下文
- 修改startup,配置Idnetity相关信息
最后,添加Identity的数据库迁移文件,更新数据库
 Add-Migration CreateIdentitySchema

 Update-Database
迁移命令
Ids4配置持久化到数据库
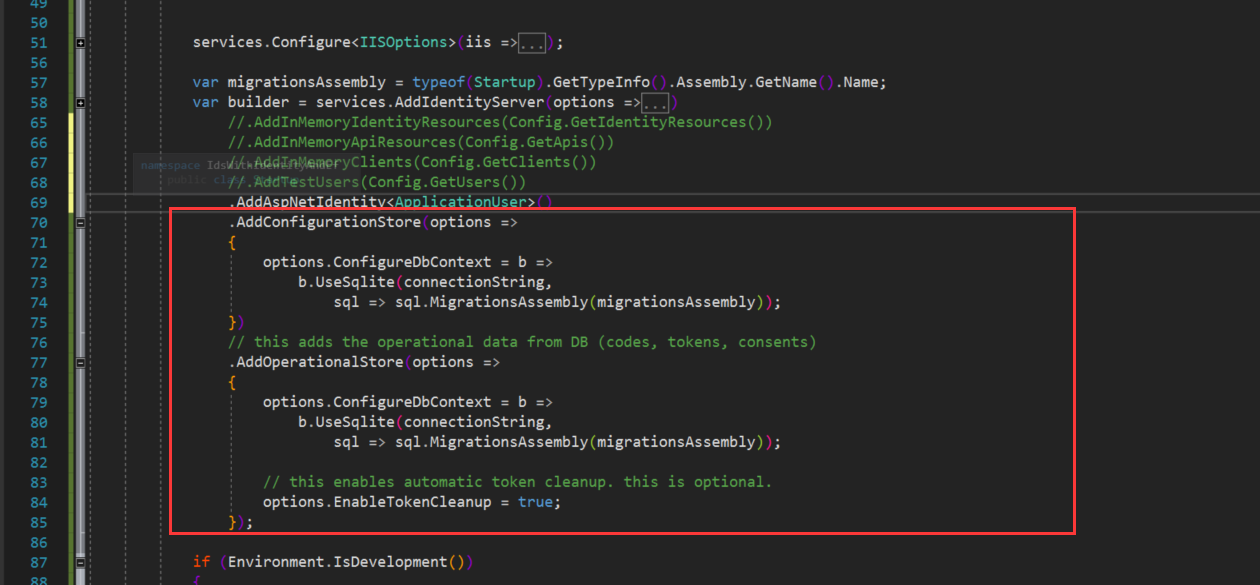
- 到现在为止,我们已经把Identity集成到IdentityServer4认证服务器中去了,但是我们的保护资源配置(Config.cs),还是在内存中静态的存在,接下来,我们把它持久化到数据库中。首先,修改ConfigureServices方法,将从Config.cs中获取Client和Resource的方法注释掉,替换成下图所示,其中ConfigurationStore包含了Cient,ApiResource,IdentityResource等信息,OperationalStore包含了用户登录时候生成的token信息
- 将Config中的配置信息写入到数据库中去
         private void InitializeDatabase(IApplicationBuilder app)

         {

             using (var serviceScope = app.ApplicationServices.GetService<IServiceScopeFactory>().CreateScope())

             {

                 serviceScope.ServiceProvider.GetRequiredService<PersistedGrantDbContext>().Database.Migrate();

                 var context = serviceScope.ServiceProvider.GetRequiredService<ConfigurationDbContext>();

                 context.Database.Migrate();

                 if (!context.Clients.Any())

                 {

                     foreach (var client in Config.GetClients())

                     {

                         context.Clients.Add(client.ToEntity());

                     }

                     context.SaveChanges();

                 }

                 if (!context.IdentityResources.Any())

                 {

                     foreach (var resource in Config.GetIdentityResources())

                     {

                         context.IdentityResources.Add(resource.ToEntity());

                     }

                     context.SaveChanges();

                 }

                 if (!context.ApiResources.Any())

                 {

                     foreach (var resource in Config.GetApis())

                     {

                         context.ApiResources.Add(resource.ToEntity());

                     }

                     context.SaveChanges();

                 }

             }
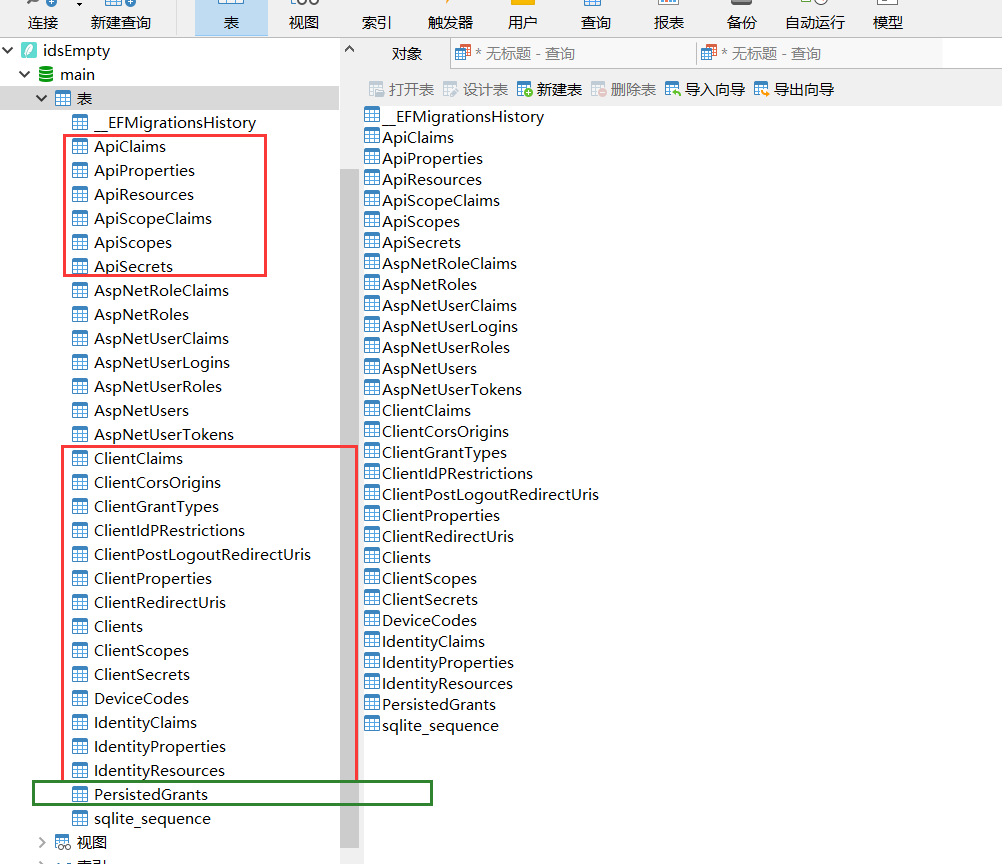
} - 分别为两个数据库上下文执行数据库迁移命令,此时,数据库中将多出这样几张表,红色的框是ConfigurationDbContext生成的,绿的框是PersistedGrantDbContext生成的。最后别忘了把初始化配置种子数据的方法(InitializeDatabase)放到Configure执行下
         private void InitializeDatabase(IApplicationBuilder app)

         {

             using (var serviceScope = app.ApplicationServices.GetService<IServiceScopeFactory>().CreateScope())

             {

                 serviceScope.ServiceProvider.GetRequiredService<PersistedGrantDbContext>().Database.Migrate();

                 var context = serviceScope.ServiceProvider.GetRequiredService<ConfigurationDbContext>();

                 context.Database.Migrate();

                 if (!context.Clients.Any())

                 {

                     foreach (var client in Config.GetClients())

                     {

                         context.Clients.Add(client.ToEntity());

                     }

                     context.SaveChanges();

                 }

                 if (!context.IdentityResources.Any())

                 {

                     foreach (var resource in Config.GetIdentityResources())

                     {

                         context.IdentityResources.Add(resource.ToEntity());

                     }

                     context.SaveChanges();

                 }

                 if (!context.ApiResources.Any())

                 {

                     foreach (var resource in Config.GetApis())

                     {

                         context.ApiResources.Add(resource.ToEntity());

                     }

                     context.SaveChanges();

                 }

             }

         }
配置持久化的迁移文件
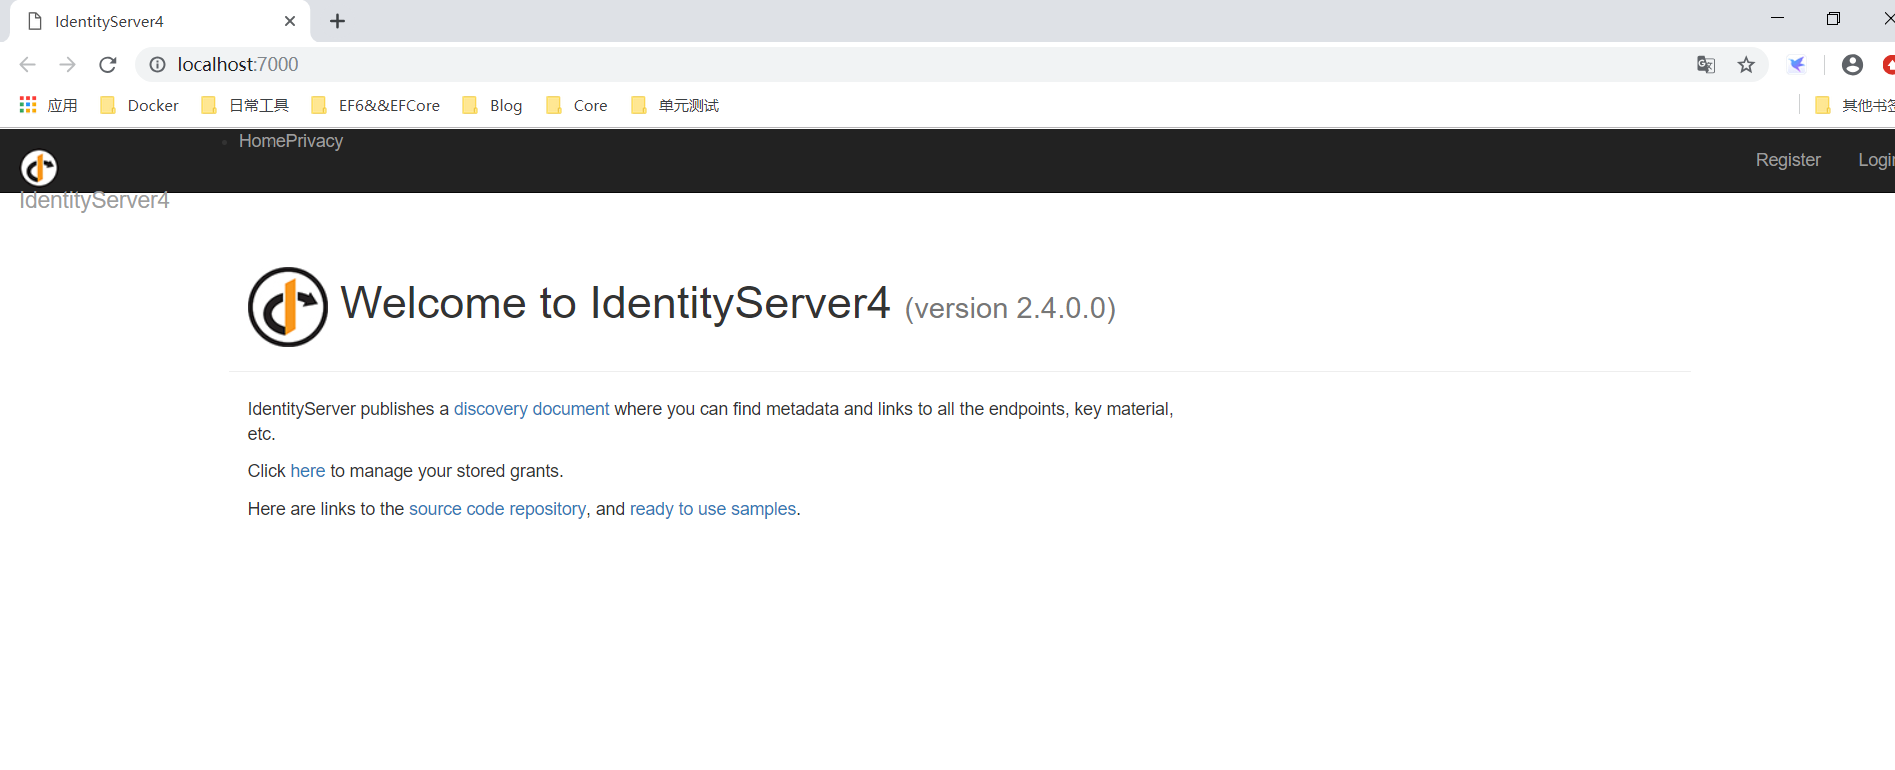
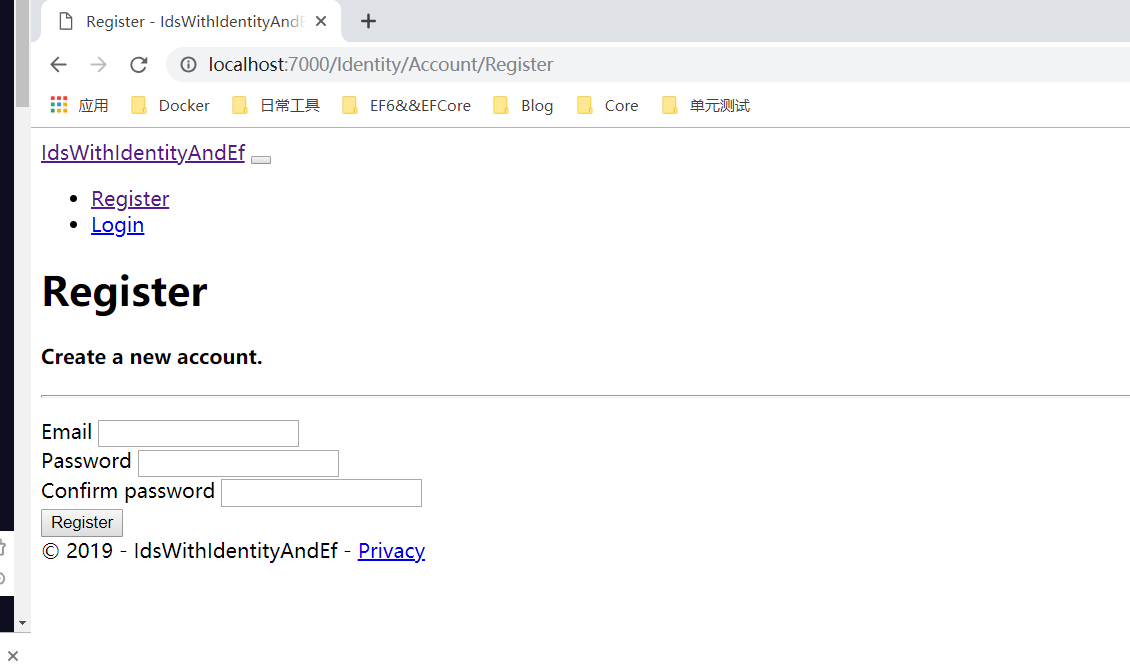
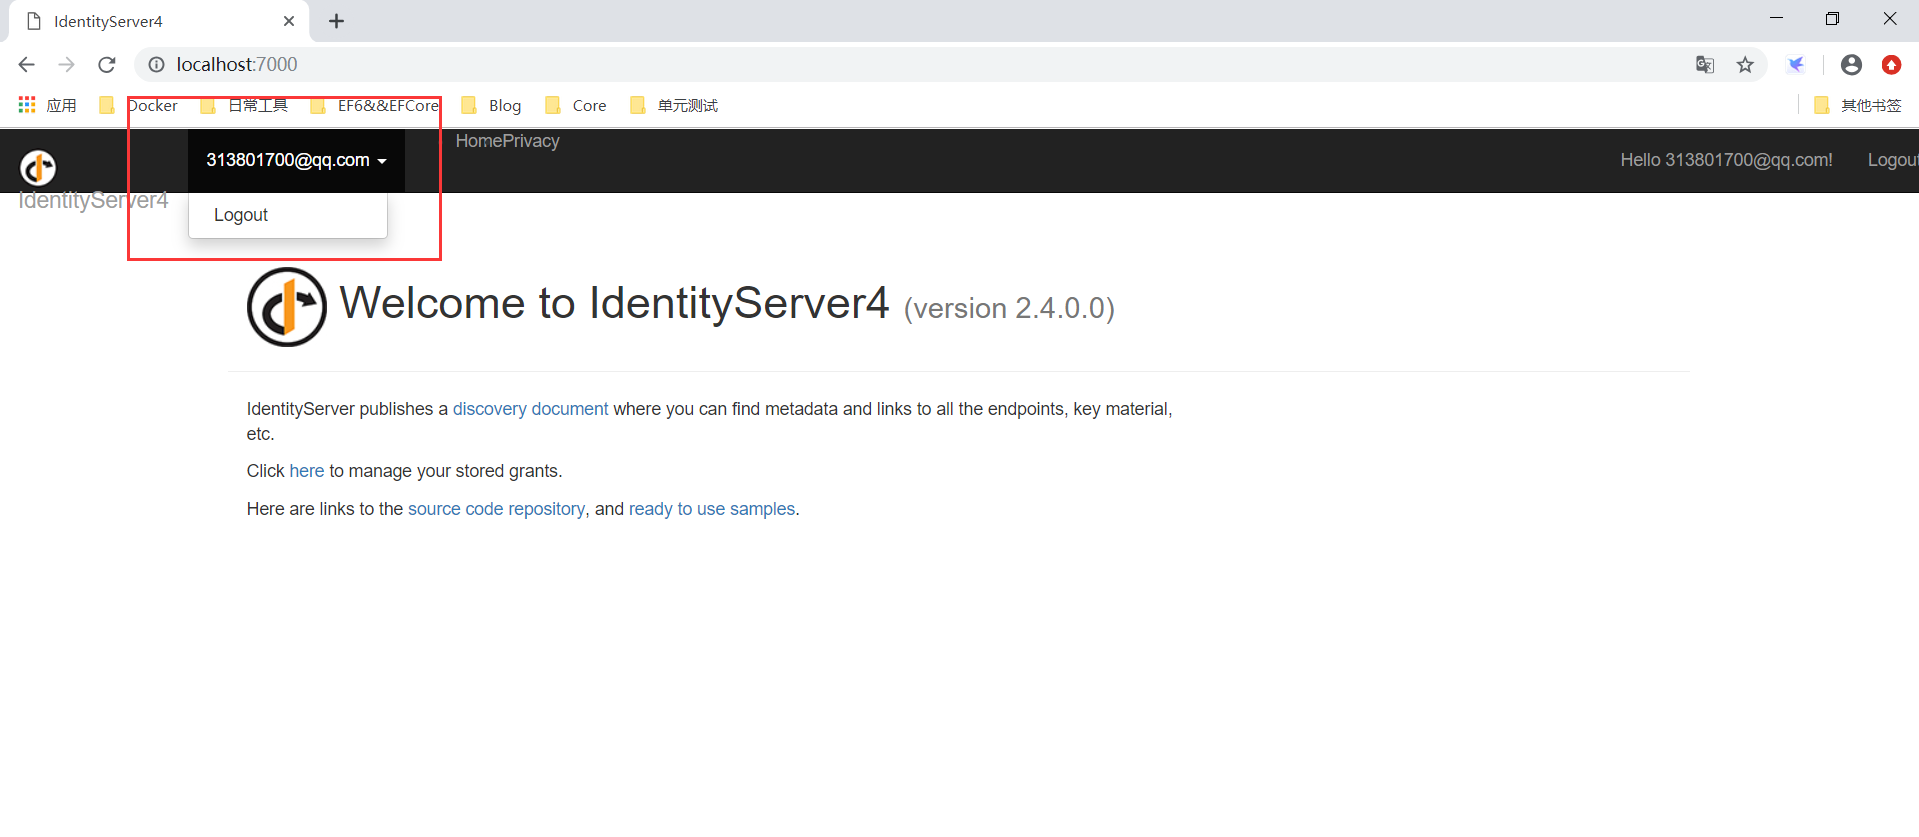
- 最后,运行起来看下效果:我们注册一个用户,登录下
- 示例Demo=》https://github.com/madeinchinalmc/IdentityServer4Sample.git
IdentityServer4认证服务器集成Identity&配置持久化数据库的更多相关文章
- 阿里云CentOs服务器 安装与配置mysql数据库
阿里云CentOs服务器 安装与配置mysql数据库 以上为Linux安装mysql数据库 Linux 安装mysql 数据库 一下为mysql 安装教程 Using username "r ...
- mybatis-spring集成:配置多数据库源中遇到的问题
转自:http://www.cfanz.cn/index.php?c=article&a=read&id=71583 mybatis配置多数据源本身很简单,和基本配置差别不大 但是如果 ...
- asp.net core网关Ocelot的简单介绍& Ocelot集成Identity认证
文章简介 Ocelot网关简介 Ocelot集成Idnetity认证处理 Ocelot网关简介 Ocelot是一个基于netcore实现的API网关,本质是一组按特定顺序排列的中间件.Ocelot内 ...
- .net core 3.0 搭建 IdentityServer4 验证服务器
叙述 最近在搞 IdentityServer4 API接口认证部分,由于之前没有接触过 IdentityServer4 于是在网上一顿搜搜搜,由于自己技术水平也有限,看了好几篇文章才搞懂,想通过博客 ...
- CAS 4.0.0RC 配置通过数据库认证用户登录
配置通过数据库认证用户登录 打开webapp\WEB-INF目录下的deployerConfigContext.xml,替换 <bean id="primaryAuthenticati ...
- SharePoint服务器将连接配置数据库的连接字符串保存在什么地方?
经常有人问我这个问题,SharePoint服务器将连接配置数据库的连接字符串保存在什么地方?虽然其他SharePoint服务器场设置都是保存到了配置数据库里面,但连接配置数据库本身的连接字符串,肯定是 ...
- windows server2008服务器下XAMPP集成环境配置apache的SSL证书:
1.在腾讯与申请的免费SSL证书.按其要求配置,并提交申请,进行审核,审核通过,获得一年使用的SSL免费证书. 2.按下面的要求,进行SSL证书安装配置.本人在配置XAMPP下的apache时,无需复 ...
- 在ASP.NET MVC5 及 Visual Studio 2013 中为Identity账户系统配置数据库链接及Code-First数据库迁移
在ASP.NET MVC5 及 Visual Studio 2013 中为Identity账户系统配置数据库链接及Code-First数据库迁移 最近发布的ASP.NET MVC 5 及Visual ...
- 【翻译】IdentityServer4:基于资源的配置
这篇文章基于https://leastprivilege.com/2016/12/01/new-in-identityserver4-resource-based-configuration/进行翻译 ...
随机推荐
- CPU、内存、磁盘三者的关系
参考:https://blog.csdn.net/weini1111/article/details/70849332 cpu是大脑,计算数据用的. 内存是草稿纸,开着电脑一直都在用里边的数据,如果断 ...
- mysql常用内置函数-查询语句中不能使用strtotime()函数!
来自:http://yushine.iteye.com/blog/775407 FROM_UNIXTIME把 unix时间戳转换为标准时间 unix_timestamp把标准时间转换为 unix时间戳 ...
- 在RedHat 7.2中安装boost库
在RedHat 7.2中安装boost库 环境,其它版本类似 Redhat7.2 64bit boost 1.64.0 步骤 去 boost官网 下载想要版本的.tar.gz,如下图 解压tar -v ...
- 用 Flask 来写个轻博客 (9) — M(V)C_Jinja 语法基础快速概览
#目录 前文列表 扩展阅读 Jinja 变量名 注释 控制语句 if 语句 循环 过滤器 无参数调用 带参数调用 宏 定义宏 调用宏 结果 兼容 JavaScript 前文列表 用 Flask 来写个 ...
- Autofac框架详解 转载https://www.cnblogs.com/lenmom/p/9081658.html
一.组件 创建出来的对象需要从组件中来获取,组件的创建有如下4种(延续第一篇的Demo,仅仅变动所贴出的代码)方式: 1.类型创建RegisterType AutoFac能够通过反射检查一个类型,选择 ...
- 模板引擎的简单原理template
var templateStr = "我的名字叫<%=name%>我是一只小狗,今年<%=age%>岁."; var data = { name:'旺财 ...
- [已解决]报错:have mixed types. Specify dtype option on import or set low_memory=False
报错代码: import pandas as pd pd1 = pd.read_csv('D:/python34/program/wx_chat_single/qq_single.csv') 报错内容 ...
- 23-python基础-python3-浅拷贝与深拷贝(1)
1.可变和不可变数据类型. 列表是‘可变的’数据类型,它的值可以添加.删除或改变. 字符串是‘不可变的’,它不能被更改. (1)字符串 尝试对字符串中的一个字符重新赋值,将导致TypeError错误. ...
- NFS挂载error:reason given by server: Permission denied
首先你得看看你的NFS服务有没有启动 然后你看看你要mount的文件夹有没有在NFS主机共享 然后再看权限对没对
- Shell 变量的分类